manuals.online logo
Brands
  1. Home
  2. •
  3. Brands
  4. •
  5. Radio Shack
  6. •
  7. Switch
  8. •
  9. Radio Shack 10A02 User manual

Radio Shack 10A02 User manual

©2002 RadioShack Corporation.
All Rights Reserved.
RadioShack and RadioShack.com are trademarks
used by RadioShack Corporation.
OWNER’S MANUAL —
Please read before using this equipment.
www.radioshack.comSM
15-1968 A
CONNECTING THE REMOTE CONTROL SWITCH
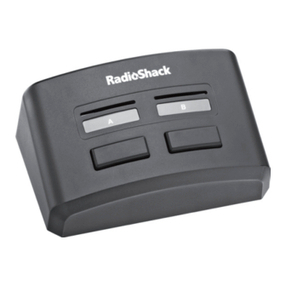
The remote control switch
has two 75-ohm input
terminals and one 75-ohm
output terminal.
Use 75-ohm coaxial cable
for the connections. Your
local RadioShack store
sells theproper cables and
connection accessories.
1. Connect the output
terminals of the two
75-ohm VHF/UHF/
Cable sources to the
switch's AINand BIN
terminals.
2. Then, connect the
switch's TO TV output
terminal to your TV
monitor's input
terminal.
AIN
TO TV
BIN
12VDC 100mA
Power Jack
I
f you have a VCR
H
ook up your VCR between the switch and your TV so you
c
an record programming from Source A and Source B.
If you do not have a VCR
Hook up the switch directly to your TV, or hook up a component
with an RF Tuner between your switch and your TV.
•CableTV
•2ndVCR
• TV Antenna
• Satellite
• Video Game System
• Other RF Source
R
FSignal
S
ource A RF Signal
Source B •CableTV
• TV Antenna
• Satellite
• Video Game System
• Other RF Source
VCR
OtherComponentwith
RF Tuner
RF Signal
Source A RF Signal
Source B
A-B Switch A-B Switch
OR
Remote Controlled A/B Switch
!IMPORTANT !
If an icon appears at the end of a paragraph, go to the box on that page with the corresponding icon for
pertinent information.
!— Important Ô—Note
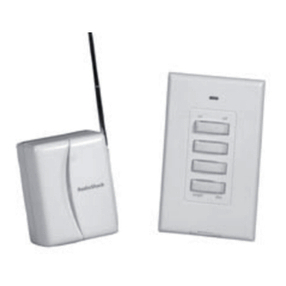
Thank you for purchasing a
RadioShack Remote Control A/B
Switch.Your switchlets youconnect
two 75-ohm VHF/UHF/Cable
sources to your television with only
one 75-ohm jack without mixing the
signals. You can connect sources
such as broadcast TV, cable TV, a
VCR, or a video game system, and
switch between the sources without
leaving your seat. The high-isolation
design prevents interference
between the two sources, and the
electronic switching provides
reliable operation because there are
no mechanical parts to wear out.
The hand-held transmitter's
miniature design takes up very little
surface space.
15-1968
10A02
PrintedinChina
A
RadioShack Corporation
Fort Worth, Texas 76102
POWERING YOUR SWITCH
Connect the supplied AC adapter to the
power jack on the back of the switch. Then,
plug the other end of the adapter into a
standard AC outlet. The power turns on.
After you complete all connections, place the
remote control A/B switch in a location that
exposes the switch's INFRARED REMOTE
window, on top of the TV, for example.
USING YOUR SWITCH
To operate the
remote control A/B
switch, simply point
the transmitter at the
INFRARED
REMOTE window on
the front of the
remote control switch
and press Aor Bto
switch between the
two 75-ohm sources.
Or, press A-B on the
top of the switch.
SPECIFICATIONS
Input ......................................................................................................................75 Ohms, F-Connector ×2
Output ...................................................................................................................75 Ohms, F-Connector ×1
Isolation ....................................................................................................................5 – 216 MHz 80 dB Min;
216 – 550 MHz 65 dB Min;
550 – 900 MHz 50 dB Min
Insertion Loss ............................................................................................................................1.5 dB (Max.)
Remote Control Range .................................................23 Ft (7 m) (At 0°Angle) 16 Ft (5m) (At ±15°Angle)
Power Source ..............Class 2, Regulated 120V AC, 60 Hz; 12V DC, 100 mA, Positive (+) Tip AC Adapter
Use of any other power source may cause damage.
Specifications are typical; individual units might vary. Specifications are subject to change and improvement
without notice.
AB
Transmitter
INFRARED REMOTE
Window
A-B
Limited Ninety-Day Warranty
This product is warranted by RadioShack against manufacturing defects in material and workmanship under normal use for ninety (90)
days from the date of purchase from RadioShack company-owned stores and authorized RadioShack franchisees and dealers. EXCEPT
AS PROVIDED HEREIN, RadioShack MAKES NO EXPRESS WARRANTIES AND ANY IMPLIED WARRANTIES, INCLUDING THOSE
OF MERCHANTABILITY AND FITNESS FOR A PARTICULAR PURPOSE, ARE LIMITED IN DURATION TO THE DURATION OF THE
WRITTEN LIMITED WARRANTIES CONTAINED HEREIN. EXCEPT AS PROVIDED HEREIN, RadioShack SHALL HAVE NO LIABILITY
OR RESPONSIBILITY TO CUSTOMER OR ANY OTHER PERSON OR ENTITY WITH RESPECT TO ANY LIABILITY, LOSS OR DAM-
AGE CAUSED DIRECTLY OR INDIRECTLY BY USE OR PERFORMANCE OF THE PRODUCT OR ARISING OUT OF ANY BREACH OF
THIS WARRANTY, INCLUDING, BUT NOT LIMITED TO, ANY DAMAGES RESULTING FROM INCONVENIENCE, LOSS OF TIME,
DATA, PROPERTY, REVENUE, OR PROFIT OR ANY INDIRECT, SPECIAL, INCIDENTAL, OR CONSEQUENTIAL DAMAGES, EVEN IF
RadioShack HAS BEEN ADVISED OF THE POSSIBILITY OF SUCH DAMAGES.
Some states do not allow limitations on how long an implied warranty lasts or the exclusion or limitation of incidental or consequential dam-
ages, so the above limitations or exclusions may not apply to you.
In the event of a product defect during the warranty period, take the product and the RadioShack sales receipt as proof of purchase date to
any RadioShack store. RadioShack will, at its option, unless otherwise provided by law: (a) correct the defect by product repair without
charge for parts and labor; (b) replace the product with one of the same or similar design; or (c) refund the purchase price. All replaced
parts and products, and products on which a refund is made, become the property of RadioShack. New or reconditioned parts and prod-
ucts may be used in the performance of warranty service. Repaired or replaced parts and products are warranted for the remainder of the
original warranty period. You will be charged for repair or replacement of the product made after the expiration of the warranty period.
This warranty does not cover: (a) damage or failure caused by or attributable to acts of God, abuse, accident, misuse, improper or abnor-
mal usage, failure to follow instructions, improper installation or maintenance, alteration, lightning or other incidence of excess voltage or
current; (b) any repairs other thanthose provided by a RadioShack Authorized Service Facility;(c) consumables such as fuses or batteries;
(d) cosmetic damage; (e) transportation, shipping or insurance costs; or (f) costs of product removal, installation, set-up service adjustment
or reinstallation.
This warranty gives you specific legal rights, and you may also have other rights which vary from state to state.
RadioShack Customer Relations, 200 Taylor Street, 6th Floor, Fort Worth, TX 76102
12/99
INSTALLING BATTERIES
The transmitter requires two AA batteries
(not supplied). Batteries are available at your
local RadioShack store or online at
www.radioshack.com.
ÔBATTERY NOTES Ô
• Dispose of old batteries promptly and
properly.
• Do not burn or bury batteries.
• Use only fresh batteries of the required size
and recommended type.
• Do not mix old and new batteries, different
types of batteries (standard, alkaline, or
rechargeable), or rechargeable batteries of
different capacities.
• If you do not plan to use the switch for a week
or more, remove the batteries. Batteries can
leak chemicals that can destroy electronic
parts.
When the switch stops operating properly,
replace the batteries.
OPEN
2. Place the batteries in the
compartment according tothe
polarity symbols (+ and –)
marked inside. Ô
3. Replace the battery
compartment cover.
1. Slidethebatterycompartmentcover
on the back of the transmitter in the
direction of the arrow to remove it.

This manual suits for next models

1

Other Radio Shack Switch manuals

Radio Shack AFX-500 User manual

Radio Shack

Radio Shack AFX-500 User manual

Radio Shack 15-1985 User manual

Radio Shack

Radio Shack 15-1985 User manual

Radio Shack 26-191 User manual

Radio Shack

Radio Shack 26-191 User manual

Radio Shack 1500474 User manual

Radio Shack

Radio Shack 1500474 User manual

Radio Shack Switch User manual

Radio Shack

Radio Shack Switch User manual

Radio Shack 26-199 User manual

Radio Shack

Radio Shack 26-199 User manual

Radio Shack 15-1988 User manual

Radio Shack

Radio Shack 15-1988 User manual

Radio Shack AFX-400 User manual

Radio Shack

Radio Shack AFX-400 User manual

Radio Shack 61-3005 User manual

Radio Shack

Radio Shack 61-3005 User manual

Radio Shack 15-312 User manual

Radio Shack

Radio Shack 15-312 User manual

Radio Shack 26-137 User manual

Radio Shack

Radio Shack 26-137 User manual

Radio Shack Amplified Video Selector User manual

Radio Shack

Radio Shack Amplified Video Selector User manual

Radio Shack 16-985 User manual

Radio Shack

Radio Shack 16-985 User manual

Radio Shack 49-537 User manual

Radio Shack

Radio Shack 49-537 User manual

Radio Shack AFX-300 User manual

Radio Shack

Radio Shack AFX-300 User manual

Radio Shack 15-1586 - Digital Optical Selector User manual

Radio Shack

Radio Shack 15-1586 - Digital Optical Selector User manual

Radio Shack 15-1976 User manual

Radio Shack

Radio Shack 15-1976 User manual

Radio Shack 15-316 User manual

Radio Shack

Radio Shack 15-316 User manual

Radio Shack 26-192 User manual

Radio Shack

Radio Shack 26-192 User manual

Radio Shack 61-3010 User manual

Radio Shack

Radio Shack 61-3010 User manual

Radio Shack 1500469 User manual

Radio Shack

Radio Shack 1500469 User manual

Radio Shack 15-1977 User manual

Radio Shack

Radio Shack 15-1977 User manual

Radio Shack 26-139 User manual

Radio Shack

Radio Shack 26-139 User manual

Popular Switch manuals by other brands

FUTABA ESW-2J instruction manual

FUTABA

FUTABA ESW-2J instruction manual

Contemporary Control Systems ARCNET AI-USB Series installation guide

Contemporary Control Systems

Contemporary Control Systems ARCNET AI-USB Series installation guide

Lantronix SISPM1040-384-LRT-C install guide

Lantronix

Lantronix SISPM1040-384-LRT-C install guide

ANTAIRA LMP-2004G-SFP Series Hardware manual

ANTAIRA

ANTAIRA LMP-2004G-SFP Series Hardware manual

CyberResearch GFC IPM user manual

CyberResearch

CyberResearch GFC IPM user manual

Extreme Networks BlackDiamond 8806 Hardware installation guide

Extreme Networks

Extreme Networks BlackDiamond 8806 Hardware installation guide

Kathrein EXR 1542 manual

Kathrein

Kathrein EXR 1542 manual

TRENDnet TEG-S5 Quick installation guide

TRENDnet

TRENDnet TEG-S5 Quick installation guide

ICP DAS USA NS-205 quick start guide

ICP DAS USA

ICP DAS USA NS-205 quick start guide

TRENDnet TPE-T80H Quick installation guide

TRENDnet

TRENDnet TPE-T80H Quick installation guide

Vesta PSM-DIN2-ZW Series quick start guide

Vesta

Vesta PSM-DIN2-ZW Series quick start guide

Topgreener TDOS5 installation instructions

Topgreener

Topgreener TDOS5 installation instructions

Synergy Global Technology Combo DB-15 ip 2-console KVM user manual

Synergy Global Technology

Synergy Global Technology Combo DB-15 ip 2-console KVM user manual

Linksys SRW248G4 Product data

Linksys

Linksys SRW248G4 Product data

SMC Networks TigerStack II SMC8848M installation guide

SMC Networks

SMC Networks TigerStack II SMC8848M installation guide

Extron electronics IN1804 Series Setup guide

Extron electronics

Extron electronics IN1804 Series Setup guide

DIVERSITECH ASURITY BG-301+ installation instructions

DIVERSITECH

DIVERSITECH ASURITY BG-301+ installation instructions

Axia xSwitch Installation & user guide

Axia

Axia xSwitch Installation & user guide

manuals.online logo
manuals.online logoBrands
  • About & Mission
  • Contact us
  • Privacy Policy
  • Terms and Conditions

Copyright 2025 Manuals.Online. All Rights Reserved.