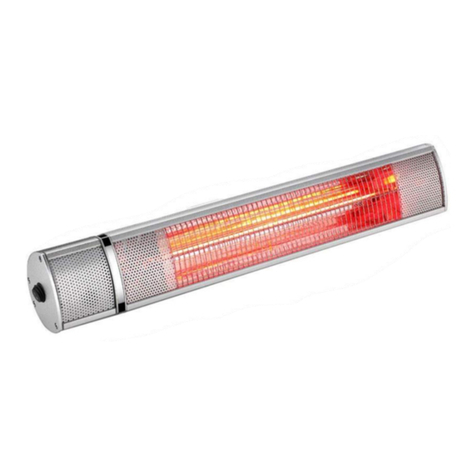
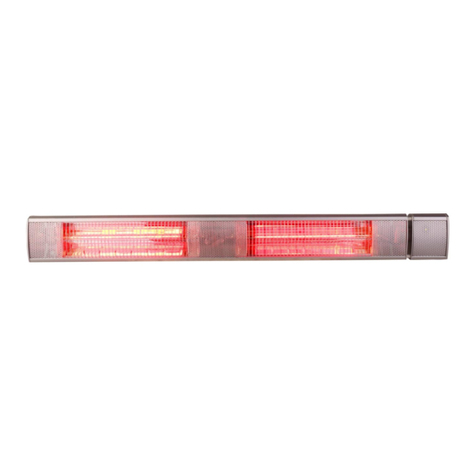
RADtec TW-15R User manual

Instruction Manual
Wall Mounted Infrared Heater
Model: TW-15R
- Thank you for purchasing your new heater.
- These operating instructions will help you use it properly and safely.
- We recommend that you spend some time reading this instruction manual in order for you to
fully understand all of the operational features it offers.
- Read all the safety instructions carefully before use and keep this instruction manual for future
reference.

Safety warnings
READ ALL INSTRUCTIONS BEFORE ATTEMPTING TO OPERATE THIS UNIT. KEEP THE ASSEMBLY
INSTRUCTIONS FOR FUTURE REFERENCE.
-Read all instructions before using this unit.
-Do not leave this unit unattended when in use.
-This heater will get hot when in use. Do not touch hot surfaces.
-Caution: Some parts of this product can become very hot and cause burns. Particular attention has to be given when
children and vulnerable people are present.
-Do not move the unit when in use. Wait until the heater is completely cool before moving and check that it has been
unplugged from the power supply.
-Position the unit at least 39in away from highly combustible materials such as furniture, trees, leaves, dry grass and
bushes.
-The heater must be a minimum of 70in from the ground and 19in from the ceiling of a building or overhanging items.
-The heater must not face with the heating element pointing upwards towards a ceiling. The heater element must be
facing the area it is intended to heat.
-Warning: In order to avoid overheating do not cover the heater.
-Keep children and pets at a safe distance from the unit.
-This appliance cannot be used by children or persons with reduced physical, sensory or mental capabilities or lack of
experience and knowledge if they have been given supervision or instruction concerning use of the appliance in a safe
way and understand the hazards involved.
-Children should not play with the appliance. Cleaning and user maintenance should not be made by children without
supervision.
-Do not operate the heater if there are any signs of damage or malfunction.
-Do not attempt to repair or adjust any electrical or mechanical functions on this unit. The unit does not contain any user
serviceable parts. Only a qualified electrician should perform servicing or repairs. Attempting to repair the unit yourself
will void your warranty.
-If the power cable is damaged, it must be replaced by the manufacturer, its service agent or similarly qualified persons
in order to avoid a hazard.
-Do not handle the element with bare hands.
-Do not replace or attempt to replace the element in this product.
-This product is suitable for indoor and outdoor use. Do not use this heater in the immediate surroundings of a bath,
shower or swimming pool.
-This product must not be left outdoors exposed to the elements for long periods of time.
-Do not touch the plug with wet or damp hands.
-Do not run the power cable under carpeting. Do not cover the power cable with rugs, runner, or similar coverings.
Arrange the power cable away from foot traffic and where it will not be tripped over.
-Do not wind the power cable around the unit.
-Do not insert or allow foreign objects to enter any ventilation or opening on the heater, as this may result in electric
shock, fire, or damage to the heater.
-Do not use in areas where petrol, paint, explosive and/or flammable liquids are used or stored. Keep unit away from
heated surfaces and open flames.
-Where possible, avoid the use of an extension cable as this may overheat and cause a fire. However, if you have to
use an extension cable, ensure it is suitable for the purpose, has been tested for outdoor use and preferably has an
RCD device fitted or attached.
-Always ensure the heater is plugged into a suitable socket, one that is tested for outdoor use.
-To disconnect heater, turn controls to OFF, then remove plug from socket. Do not unplug by pulling on the power cable.
-Always unplug the unit and ensure the unit is completely cold before moving, cleaning or storing.
-Any alternative use, not recommended by the manufacturer, may result in fire, electric shock, or injury to persons.
-The use of attachments on the heater is not recommended.

-Do not use this heater with a programmer, timer, separate remote control system or any other device that switches the
heater on automatically, since a fire risk exists if the heater is covered or positioned incorrectly.
-Warning: This heater is not equipped with a device to control the room temperature. Do not use this heater in small
rooms when occupied by persons not capable of leaving a room on their own, unless constant supervision is provided.
-Always use on a dry, suitably strong, stable, flat and level surface.
-Check exterior walls for areas of damage before installing the heater.
-check exterior walls for communication and electrical cables and pipelines. Should any service lines be present in the
immediate vicinity, do not install your heater and find an alternative location to install this product.
-Do not position directly above or below an electrical socket.
-Do not remove any of the warning stickers or signs from the product.
Installation
1. Before installation, these matters need attention
1.Products should be put down gently
2.Acidic and alkali environment installation is not recommended.
3.The product must be grounded
4. Must check voltage listed on product to ensure it conforms with local supplied voltage.
5. Ensure the power rating should have sufficient current carrying capacity.
2. Ensure the production's installation site
For the safe use of the product, the product installation position should guarantee the bottom
minimum height of 1.8M~70.9in from the ground, ceiling, roof, or other coverings minimum distance
is .5M~19.7in, minimum distance with both sides wall is .5M~19.7in (as shown in figure 1)
*** 1.8M~70.9in / .5M~19.7in ***

3.Installation Steps
I. According to where the product installation location is, use a power
drill to make four 8 mm round holes.
II. Insert the six plastic wall anchors into the six holes.
III. Fix the bracket using six ST4*35 screws and make sure the
installation points are fixed securely.
IV. Before fixing the heater, make sure the rocker power switch on the
right side and then fixed the bracket to the heater using four M6*14
screws and butterfly nuts.

Operating Instructions
- Use power switch on right side of product to control power on/off
Remote control
1. On / Off
Switches on or off the heater or stands it by.
2. First gear
After turn on the heater, you can choose low heating.
3. Second gear
After turn on the heater, you can choose moderate heating.
4. Third gear
After turn on the heater, you can choose high heating.
Maintenance and Cleaning
Attention! Careful and regular maintenance of Infrared Heater is required to attain a long and efficient
operation of your appliance.
1- Check the cleanliness of the Reflector and IR-Filament at least once a month. If necessary, apply
cleaning and maintenance instructions.
2- The number of checks may be increased considering the amount of the dust in the environment.
3- Check the deformation of the Reflector, Wire and Frame visually while cleaning the appliance.
In case of any deformation, consult a qualified technician.
4- Check the power cable and plug visually while cleaning the appliance. In case of any deformation,
consult a qualified technician.
5- It is recommended to change the reflector every 2 years for more efficient operation.

Cleaning
Attention! Regular and careful cleaning helps your heater operate for longer years and more
efficiently.
1- Unplug your power cable for your safety before cleaning your appliance.
2- Take out the front grid wire through the inlets on the frame using a slotted screwdriver.
3- Make sure that the power is off for your safety. Power cable plug must be unplugged.
4- The reflector and filament must be cleaned with a soft cloth. The cloth may be damp but never
too wet and the cleaner should not include any chemical.
5- Refrain from using cleaning material likely to damage the reflector (cleanser etc.).
6- Insert the wire grid using a slotted screwdriver.
Limited Warranty
RADtec provides a 30-Day ReturnWindow (seerefund andreturn policy page) andthefollowing limited warranty. This limited warranty
extends only to the original purchaser.
Please note that anywarranty services or questions must beaccompanied byorder numberfrom the transaction through which the warranted
product was purchased and the ID number located on the unit. The order number and ID#serve as your warranty numbers and must be
retained. RADtec will offernowarranty service without these numbers. RADtec warrants this product and its parts against defects inmaterials
or workmanshipfor(2) years' parts and labor (residentialuse) and(1) year parts and labor (commercial use) from the original ship date.
During this period, RADtec will repair or replace defective parts with new orreconditioned parts at RADtec's option, without charge toyou.
Shipping fees incurred from returns for under-warranty service in the first 30-days will be paid by RADtec. Allshipping fees bothtoand
from RADtec following this 30-day period must be paid by the customer. All returns, both during and following the 30-day period, must be
affected via the Procedures for Obtaining Warranty Service described below. All original parts (parts installed by RADtec at the original
build) replaced by RADtec or its authorized service center, become the property of RADtec. Any after-market additions or modifications
will not be warranted. The heater owner isresponsible forthe payment, at current rates, for any service orrepair outside the scope of this
limited warranty.
RADtec makes no other warranty, either express of implied, including but not limited to implied warranties or merchantability, fitness for a particular purpose,
or conformity to any representation or description, with respect to this heater other than as set forth below. RADtec makes no warranty or representation, either
express or implied, with respect to any other manufacturer’s product or documentation, its quality, performance, merchantability, fitness for a particular purpose, or
conformity to any representation or description.
Table of contents
Other RADtec Heater manuals
Popular Heater manuals by other brands

Anslut
Anslut 013433 operating instructions

GoodHome
GoodHome Kelso DQ1920 Assembly manual

Black & Decker
Black & Decker BDTH600 Use and care book

Somogyi Elektronic
Somogyi Elektronic Home FK 410 WIFI instruction manual

Vortice
Vortice VORT VDH 60 HP MONO Instruction booklet

Ducasa
Ducasa AVANT-A 350 Instructions for operation