manuals.online logo
Brands
  1. Home
  2. •
  3. Brands
  4. •
  5. RamonSoler
  6. •
  7. Bathroom Fixture
  8. •
  9. RamonSoler RCRK 99Z300708 User manual

RamonSoler RCRK 99Z300708 User manual

RCR
RCRK
2
3
INTRODUCCIÓN/INTRODUCTION
INTRODUCTION/EINFÜHRUNG
(ES) Antes de instalar su nuevo rociador es esencial que limpie la instalación para eliminar impurezas que
queden en el sistema y que puede causar daños en el rociador. Recomendamos la instalación de filtros en las
tuberías de alimentación.
Todas las piezas deben ser retiradas de su embalaje e inspeccionadas antes de la instalación por si hubieran
sufrido cualquier daño en el transporte.
Si no se siguen las instrucciones de instalación y conexionado el producto quedará fuera de garantía.
ES
EN
FR
DE
(EN) Before installing your new sprinkler, it is essential to clean the installation to eliminate any impurities
left in the system that could damage it.
We recommend installing filters in the supply pipes.
All the parts must be removed from their packaging and inspected before installing, in case any of them
have been damaged during transport.
If the installation and connection instructions are not followed, the product warranty will be void.
(FR) Avant d’installer votre nouveau système d’extinction automatique , il est indispensable de nettoyer
l’installation afin d’éliminer tout corps étranger qui pourrait se trouver à l’intérieur du système et l’endommager.
Nous vous recommandons d’installer des filtres dans les tuyauteries d’alimentation.
Retirez l’emballage de chaque pièce. Avant de procéder à l’installation, vérifiez si des dommages ont pu être
occasionnés par un transport incorrect.
En cas de non-respect des présentes instructions d’installation et de branchement, la garantie du produit sera
sans effet.
(DE) Vor der Installation des Brausekopfes ist es notwendig, die Anlage zu reinigen, um Verunreinigungen zu
entfernen, die im System verbleiben und die Brause beschädigen könnten.
Wir empfehlen die Anbringung von Filtern an den Zuleitungen.
Sämtliche Teile aus der Verpackung entfernen und vor der Installation auf etwaige Transportschäden prüfen.
Bei Nichtbefolgung der Anweisungen für die Installation und den Anschluss verfällt die Garantie für das
Produkt.
4
DIBUJO TÉCNICO/TECHNICAL DRAWING
DESSIN TECHNIQUE/TECHNISCHE ZEICHNUNG
1. (B) Metalic plug 2.
(x2) (x2) (x2)
3. Washers
(x2)
(x2)
4. Filter
5. Limiter 12l/min
400
R100
200100
~290
50
5
30
170
260
2
40
130°
500
25
220
200
100
5
ES
EN
FR
DE
MONTAJE/MOUNTING
MONTAGE/MONTAGE
Min. 1 Bar
Max. 5 Bar
Correct 2-3 Bar
Max. 70 ºC
Correct 38 º/40 ºC
Flow 3 Bar
RCRK 11 l/min
11,5 l/min (Waterfall)
RCR 12 l/min
11 l/min (Waterfall)
ESPECIFICACIONES/SPECIFICATIONS
SPÉCIFICATION/SPEZIFIKATION
(ES) Prestando atención a los centros de las
conexiones G1/2”, marcar la posición de los
taladros.
(EN) Paying attention to the centres of the
G1/2” connections, mark the positions of the
drill holes.
(FR) En prêtant attention aux centres des
connexions G1/2”, marquer la position des
trous à percer.
(DE) Beim Markieren der Bohrlöcher auf die
jeweilige Mitte der Anschlüsse G1/2” achten.
(ES) Taladrar los agujeros previamente
marcados, utiliza la broca especifica en función
al tipo de pared y al taco que se vaya a utilizar
(incluido taco metálico Ø10mm y M6)
Introducir los tacos en los agujeros (B)
(EN) Drill the holes that have been marked,
using the specific drill bit for the type of wall
and the raw plug that will be used (Ø10mm
and M6 metal raw plug included)
Put the fixings into the holes (B)
(FR) Percer les trous ayant été marqués à l’aide
d’une mèche adaptée au type de mur et aux
chevilles à utiliser (chevilles métalliques Ø10
mm avec vis M6 incluses).
Introduire les chevilles dans les trous (B)
(DE) Die zuvor markierten Löcher mit dem je
nach Art der Wand entsprechenden Bohrer und
dem zu verwendenden Dübel bohren (metallener
Dübel Ø10mm und M6 im Lieferumfang
enthalten). Die Dübel in die Löcher einsetzen (B)
Fig.1 Fig.2
6
ES
EN
FR
DE
MONTAJE/MOUNTING
MONTAGE/MONTAGE
Fig.3
(ES) Roscar los racors (C) a las conexiones
G1/2”.
Para una correcta instalación, la parte hexagonal
del racor debe quedar a ras de la pared.
No olvidar colocar el limitador (5) y el
filtro (4) suministrados entre el racor
y la conexión G1/2”
(EN) Screw the fittings (C) into the G1/2”
connections.
For correct installation, the hexagonal part of the
fitting must sit flush against the wall.
Do not forget to fit the limiter (5) and
the filter (4) provided between the
fitting and the connection G1/2”
(FR) Visser les raccords (C) aux connexions
G1/2”.
Pour réaliser une bonne installation, la partie
hexagonale du raccord doit rester au ras du mur.
Ne pas oublier de placer le limiteur (5)
et le filtre (4) fournis.
(DE) Die Fittings (C) in die Anschlüsse G1/2”
drehen. Für eine korrekte Installation muss das
sechseckige Teil des Fittings bündig mit der Wand
platziert sein.
Dabei nichtvergessen,denimLieferumfang
enthaltenen Durchflussbegrenzer (5) sowie
den Filter (4) einzusetzen.
7
Fig.4
(ES) Fije la placa a la pared sin apretar los
tornillos al máximo (A). Ayúdese de los tornillos
prisioneros (B) para el posicionamiento
correcto del rociador, cuando este en la posición
correcta apriete los tornillos (A) al máximo.
Antes de conectar los tubos de alimentación
(D) al racor (C), medir correctamente y cortar
el sobrante de la conexión si fuera necesario.
(EN) Fix the plate to the wall without screwing
the screws in all the way (A). Use the grub
screws (B) to help correctly position the
sprinkler. When it is in the correct position,
fully tighten the screws (A).
Before connecting the supply pipes (D) to
the fitting (C), correctly measure and cut the
excess off of the connection if necessary.
(FR) Fixer la plaque au mur sans serrer les vis
au maximum (A). S’aider des vis prisonnières
(B) pour positionner correctement la pomme
haute ; une fois qu’elle se trouve dans la position
correcte, serrer les vis (A) au maximum.
Avant de connecter les tubes d’alimentation
(D) au raccord (C), mesurer correctement et
couper l’excédent de la connexion s’il y a lieu.
(DE) Die Platte an der Wand befestigen, ohne
die Schrauben vollständig anzuziehen (A).
Mithilfe der Gewindestifte (B) die richtige
Positionierung des Brausekopfes bestimmen.
Sobald dieser sich an der richtigen Position
befindet, die Schrauben (A) vollständig
anziehen.
Bevor die Zulaufschläuche (D) mit dem Fitting
(C) verbunden werden, genau vermessen
und den Überstand des Anschlusses
gegebenenfalls abschneiden.
MONTAJE/MOUNTING
MONTAGE/MONTAGE
PKIS0027

This manual suits for next models

3

Other RamonSoler Bathroom Fixture manuals

RamonSoler RCEXT User manual

RamonSoler

RamonSoler RCEXT User manual

RamonSoler RELED570 User manual

RamonSoler

RamonSoler RELED570 User manual

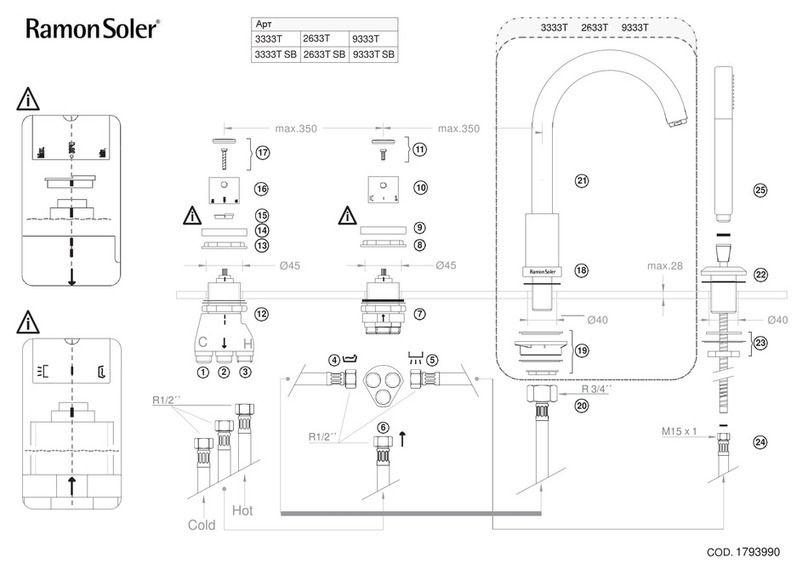
RamonSoler 3333T User manual

RamonSoler

RamonSoler 3333T User manual

RamonSoler 745103 User manual

RamonSoler

RamonSoler 745103 User manual

RamonSoler T20003 RP200 User manual

RamonSoler

RamonSoler T20003 RP200 User manual

RamonSoler 8120B User manual

RamonSoler

RamonSoler 8120B User manual

RamonSoler RELNK500 99Z300715 User manual
RamonSoler

RamonSoler RELNK500 99Z300715 User manual

RamonSoler Soltronic 8102 User manual

RamonSoler

RamonSoler Soltronic 8102 User manual

RamonSoler T100 D User manual

RamonSoler

RamonSoler T100 D User manual

Popular Bathroom Fixture manuals by other brands

baliv WT-5892 manual

baliv

baliv WT-5892 manual

Grohe Allure 19316 manual

Grohe

Grohe Allure 19316 manual

Moen Aromatherapy IN208C2 Installation & Usage Guide

Moen

Moen Aromatherapy IN208C2 Installation & Usage Guide

Villeroy & Boch Squaro Super Flat installation instructions

Villeroy & Boch

Villeroy & Boch Squaro Super Flat installation instructions

Dreamline PRISM PLUS installation instructions

Dreamline

Dreamline PRISM PLUS installation instructions

Kohler K-108 Homeowner's guide

Kohler

Kohler K-108 Homeowner's guide

Glacier bay 67091W-6A01 Installation and care guide

Glacier bay

Glacier bay 67091W-6A01 Installation and care guide

Atlantic DORIS Installation and operating manual

Atlantic

Atlantic DORIS Installation and operating manual

Spectrum Brands Pfister R89-220 Series Maintenance & Care Guide

Spectrum Brands

Spectrum Brands Pfister R89-220 Series Maintenance & Care Guide

Uberhaus 14925004 Operator's manual

Uberhaus

Uberhaus 14925004 Operator's manual

Kohler K-8002 Installation and care guide

Kohler

Kohler K-8002 Installation and care guide

Hans Grohe Croma Classic 100 28539 Series Assembly

Hans Grohe

Hans Grohe Croma Classic 100 28539 Series Assembly

Pulse Shower Spas 1089-BN owner's manual

Pulse Shower Spas

Pulse Shower Spas 1089-BN owner's manual

DURAVIT Ketho Mounting instructions

DURAVIT

DURAVIT Ketho Mounting instructions

Gessi OVALE 11959 manual

Gessi

Gessi OVALE 11959 manual

MERLYN NEXA VWBSVL300 installation guide

MERLYN

MERLYN NEXA VWBSVL300 installation guide

Signature Hardware LEXIA 953782 manual

Signature Hardware

Signature Hardware LEXIA 953782 manual

Triton Omnicare manual

Triton

Triton Omnicare manual

manuals.online logo
manuals.online logoBrands
  • About & Mission
  • Contact us
  • Privacy Policy
  • Terms and Conditions

Copyright 2025 Manuals.Online. All Rights Reserved.