For technical support, contact us at 1-800-565-5321 1505-PH Installation Guide |REV. B1 | Page 7
PHASE 2 – INSTALLATION
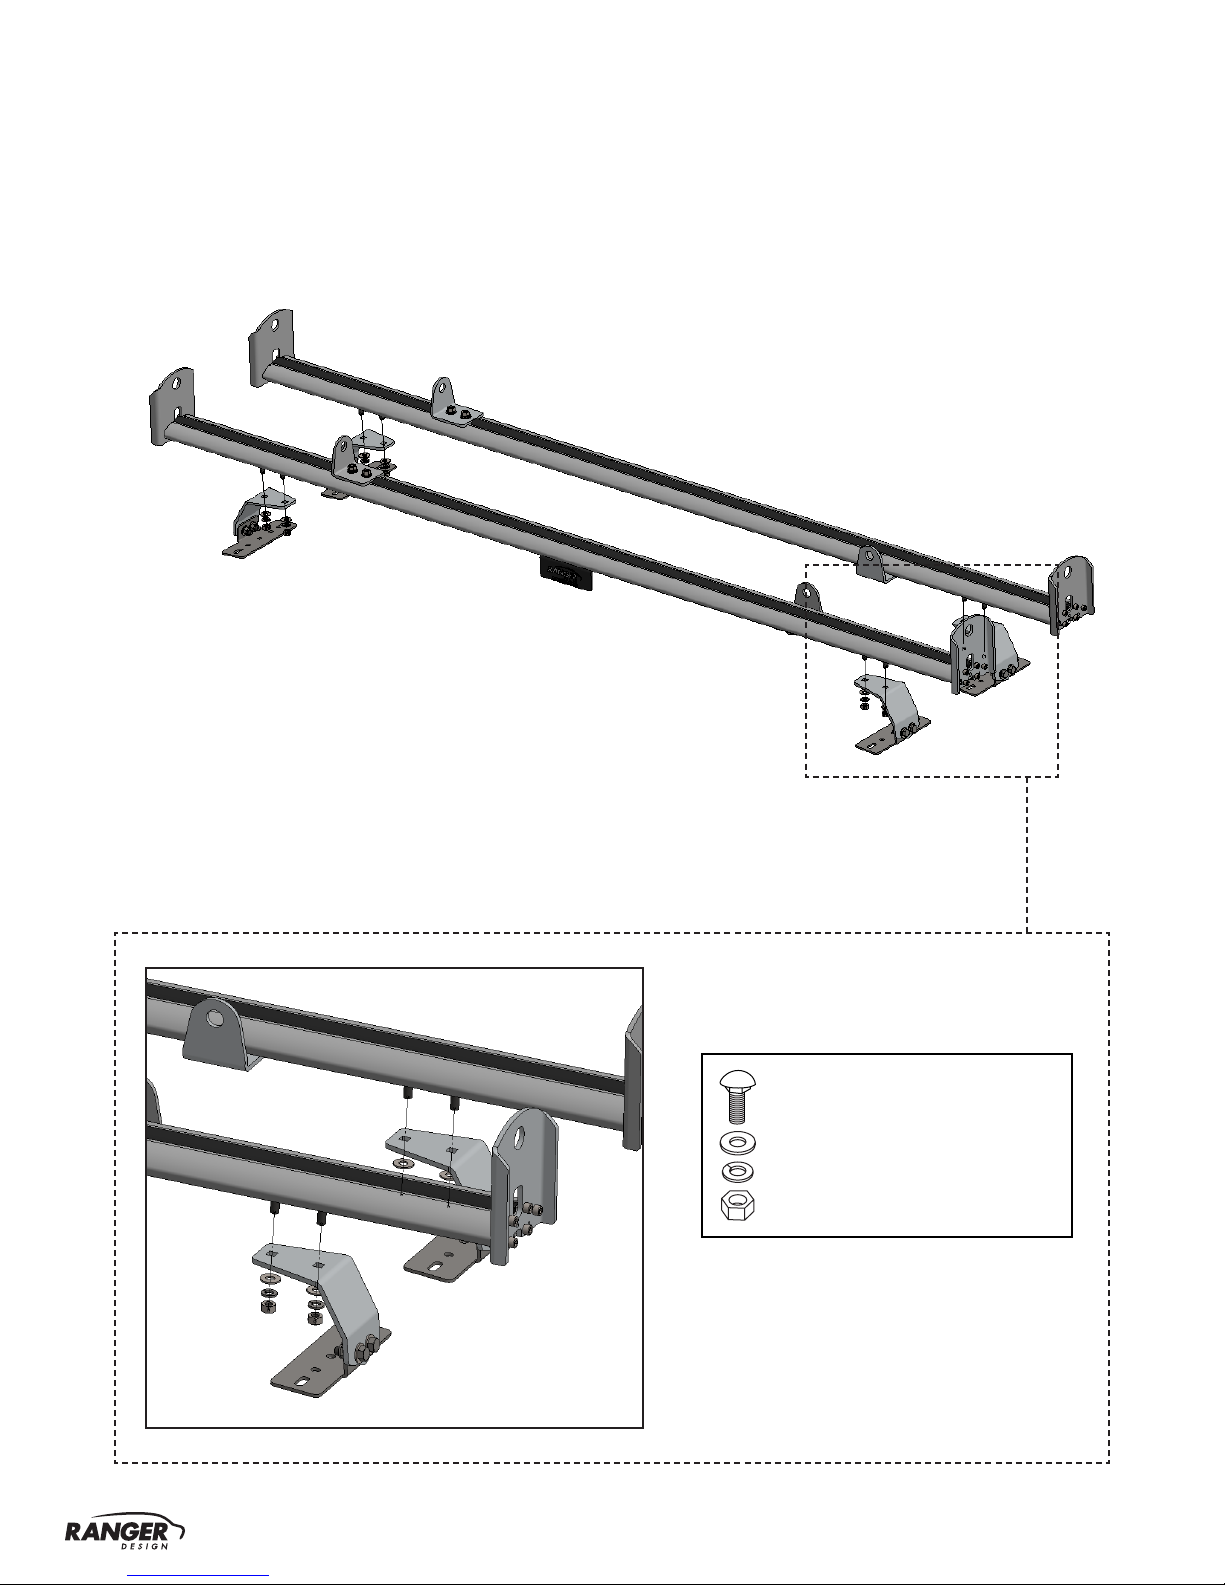
2.1 ROOF CLAMPS INSTALLATION
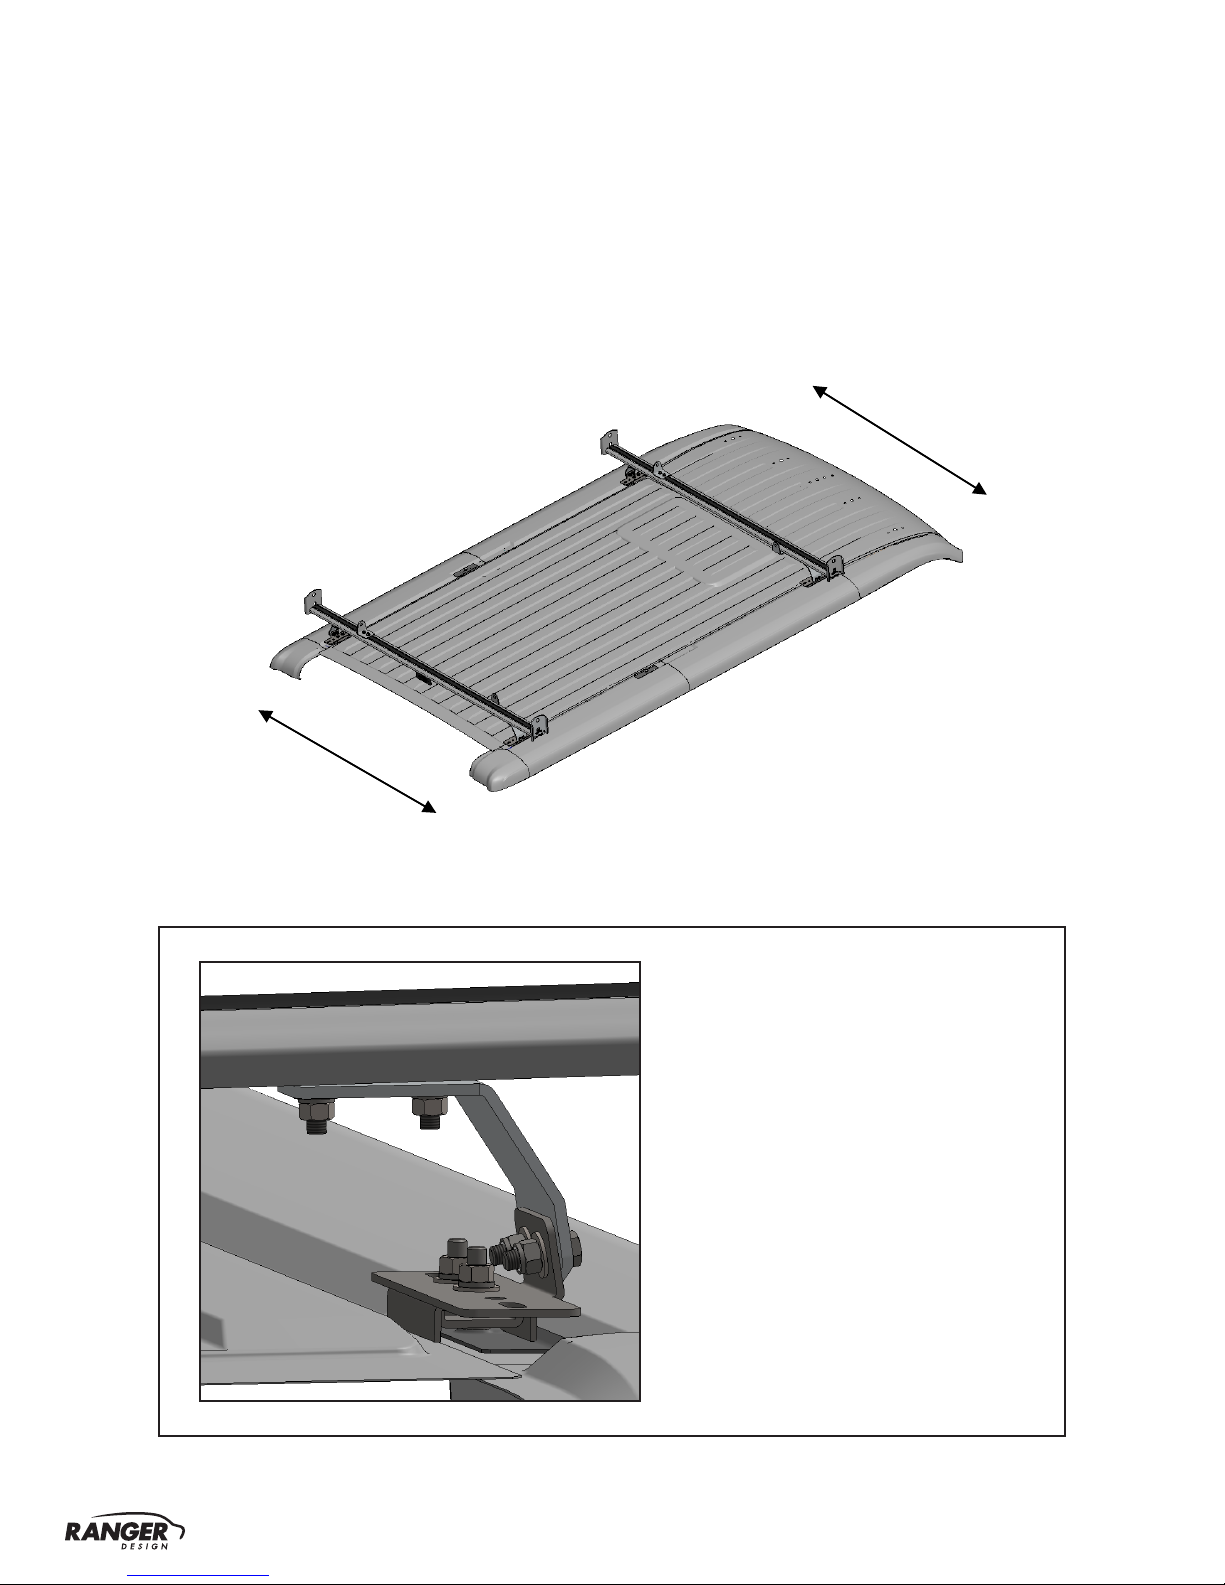
2.1.1 Attach the roof clamps and top roof clamp onto the roof.
NOTE: Picture show 130" wheelbase promaster roof, for all size of promaster vehicle use the mounting
points that are appropriate for your length of cargo.
Attach the roof clamps to the roof.
PUSH
Add the top roof clamps on the roof clamps.
NOTE: The top roof clamp should lay at
on the roof clamp and not slant.
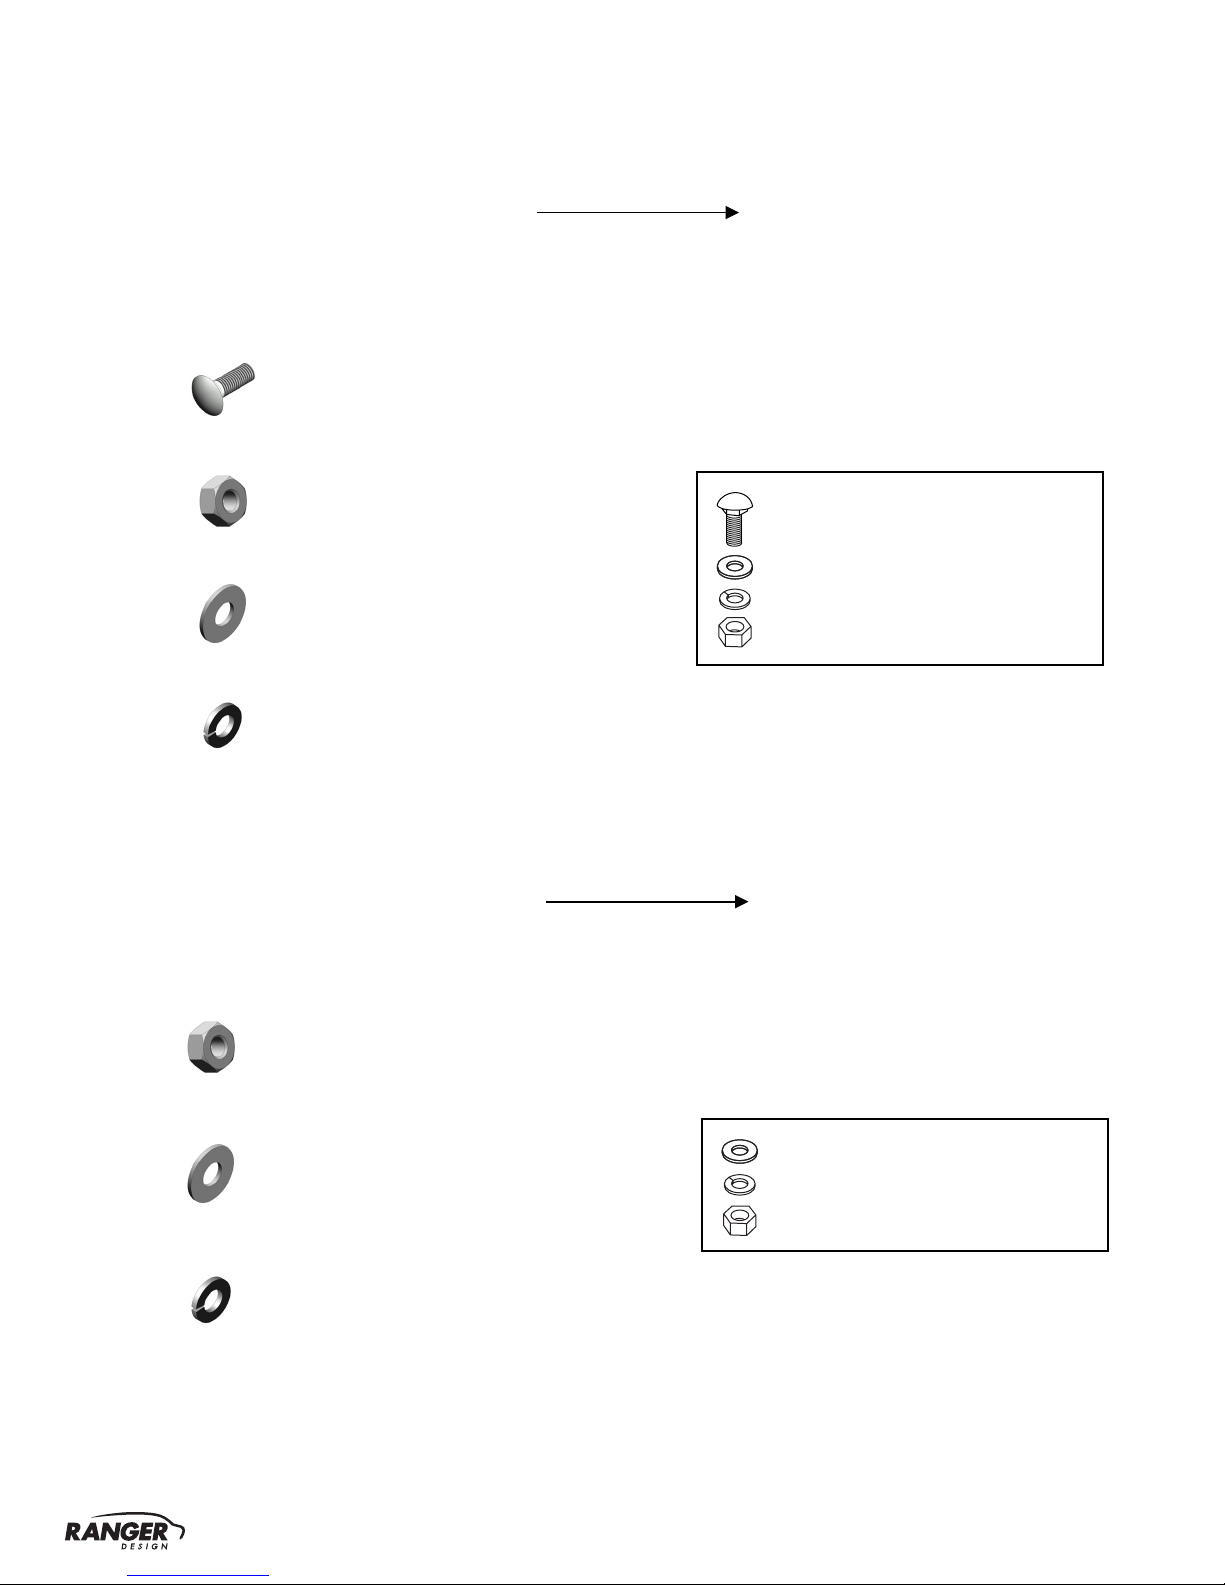
4×
4×