For technical support, contact us at 1-800-565-5321 3010-RP Installation Guide |REV. D1 | Page 2
QUICK START GUIDE
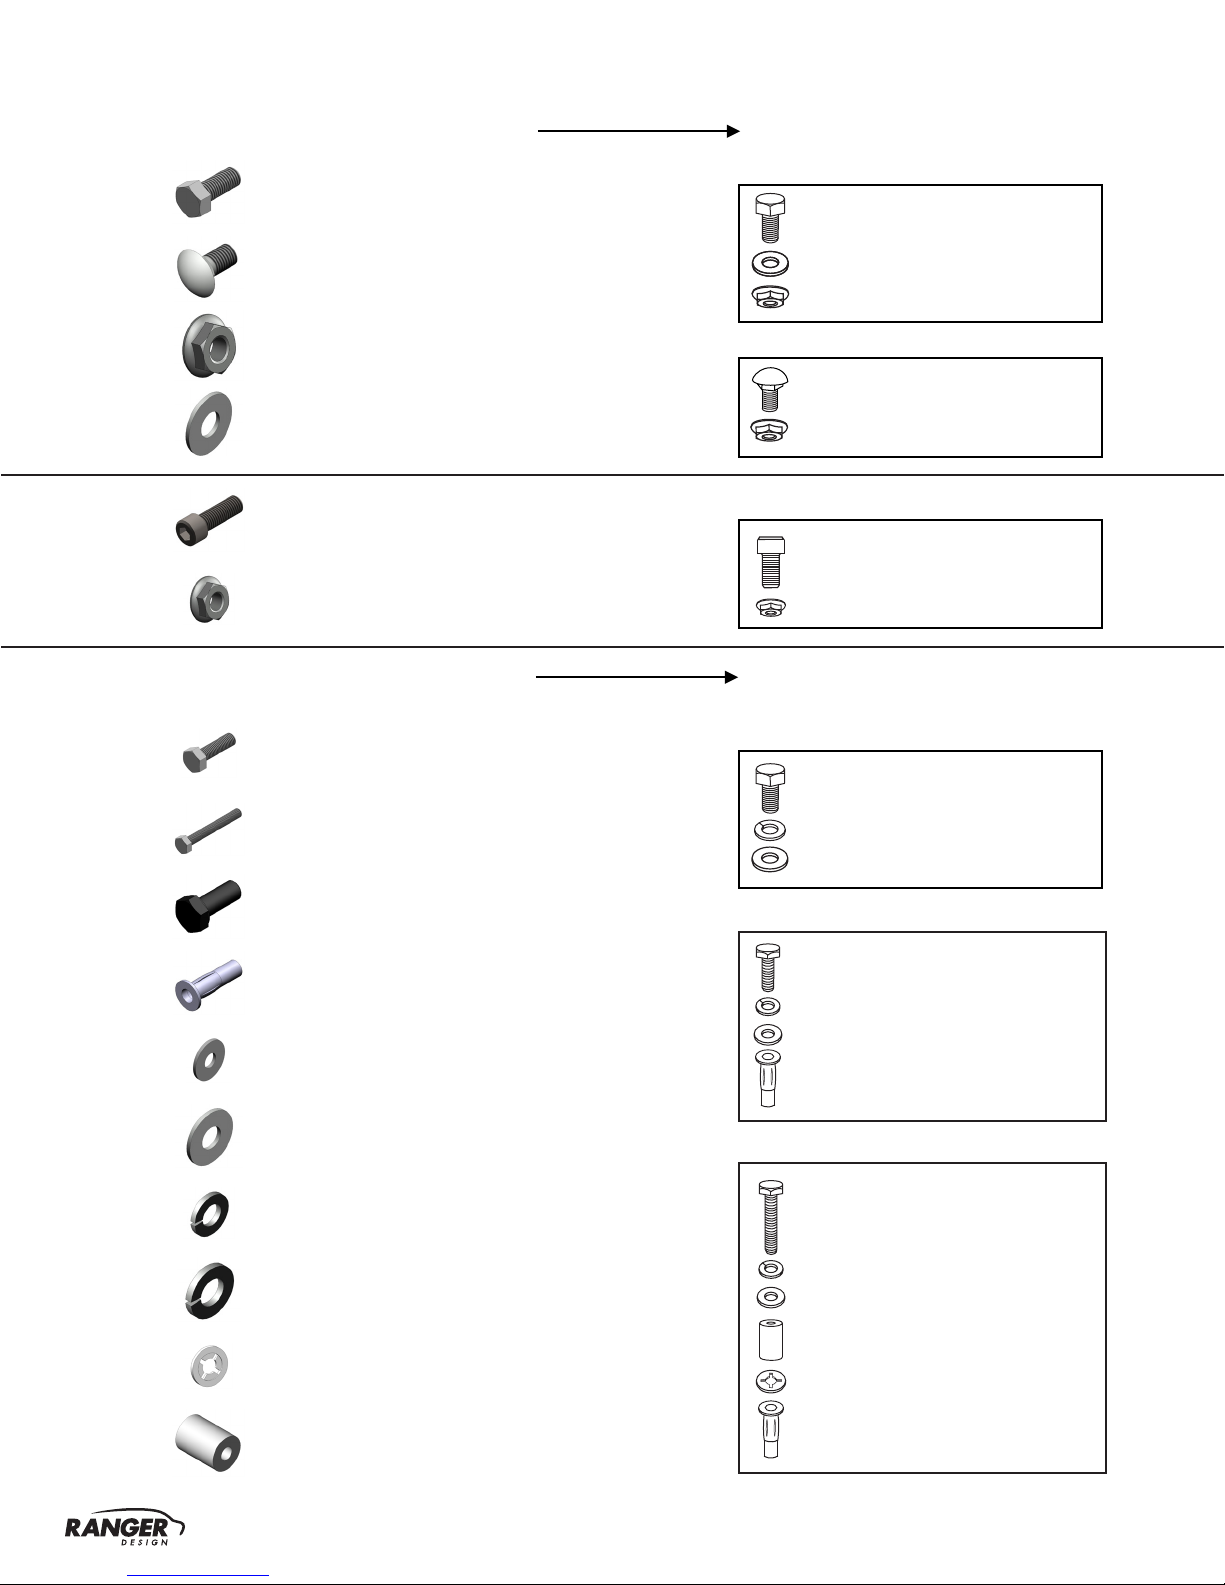
REQUIRED ITEMS
2
PERSONS
qCordless Driver
qCordless Impact
qCordless Drill
qMarker
qPlusnut Tool
qPhillips Head Drive Bit
qTape Measure
q3/16" Driver Bit
q7/16" Socket
q1/2" Socket
q13mm Socket
q9/16" Wrench
q3/8" Drill Bit
q1" Hole Saw
q1-1/2" Hole Saw
q1.1 Setup....................................................................................................................................................
q1.1.1 Unpack components; compare with the bill of materials................................................................
q1.1.2 Verify all parts are present...............................................................................................................
q1.1.3 Identify the assembly and installation fastener bags......................................................................
q1.2 Partition assembly................................................................................................................................
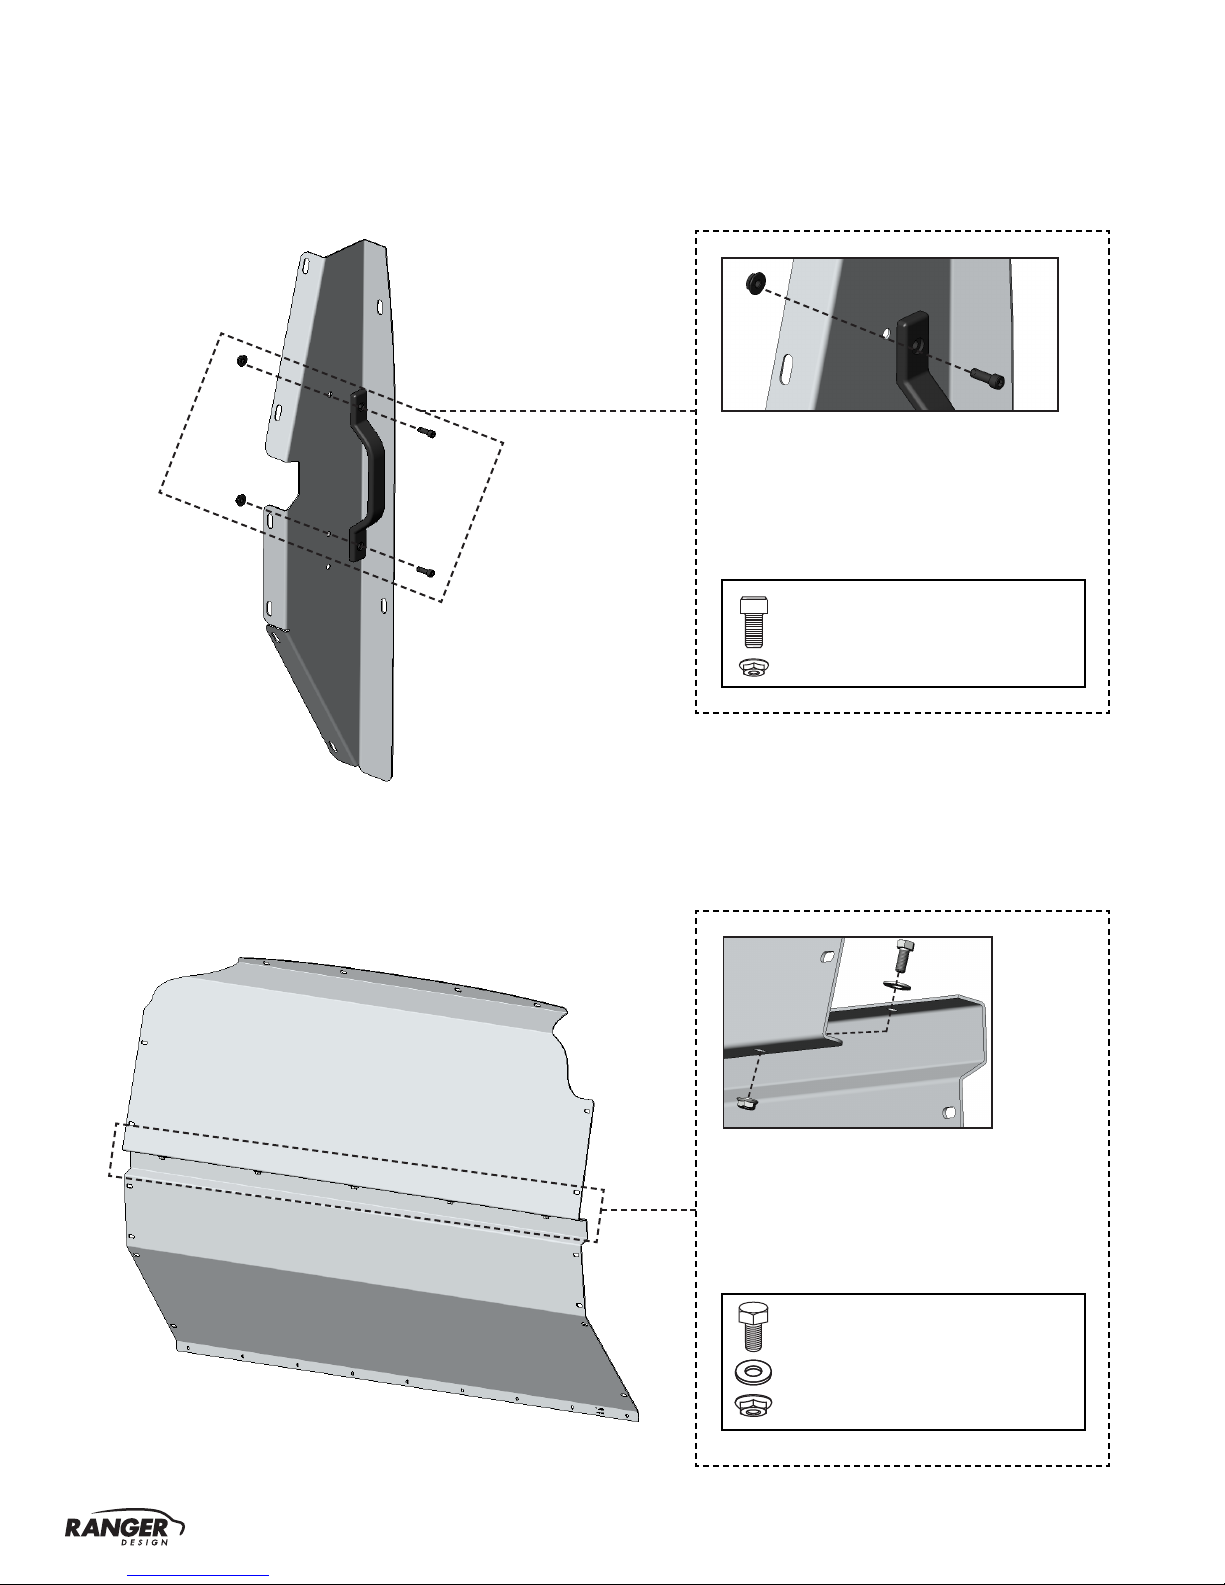
q1.2.1 Remove all the PVC from all the parts, then attach the grab handle to the passenger side wing..
q1.2.2 Attach the upper partition and middle partition together................................................................
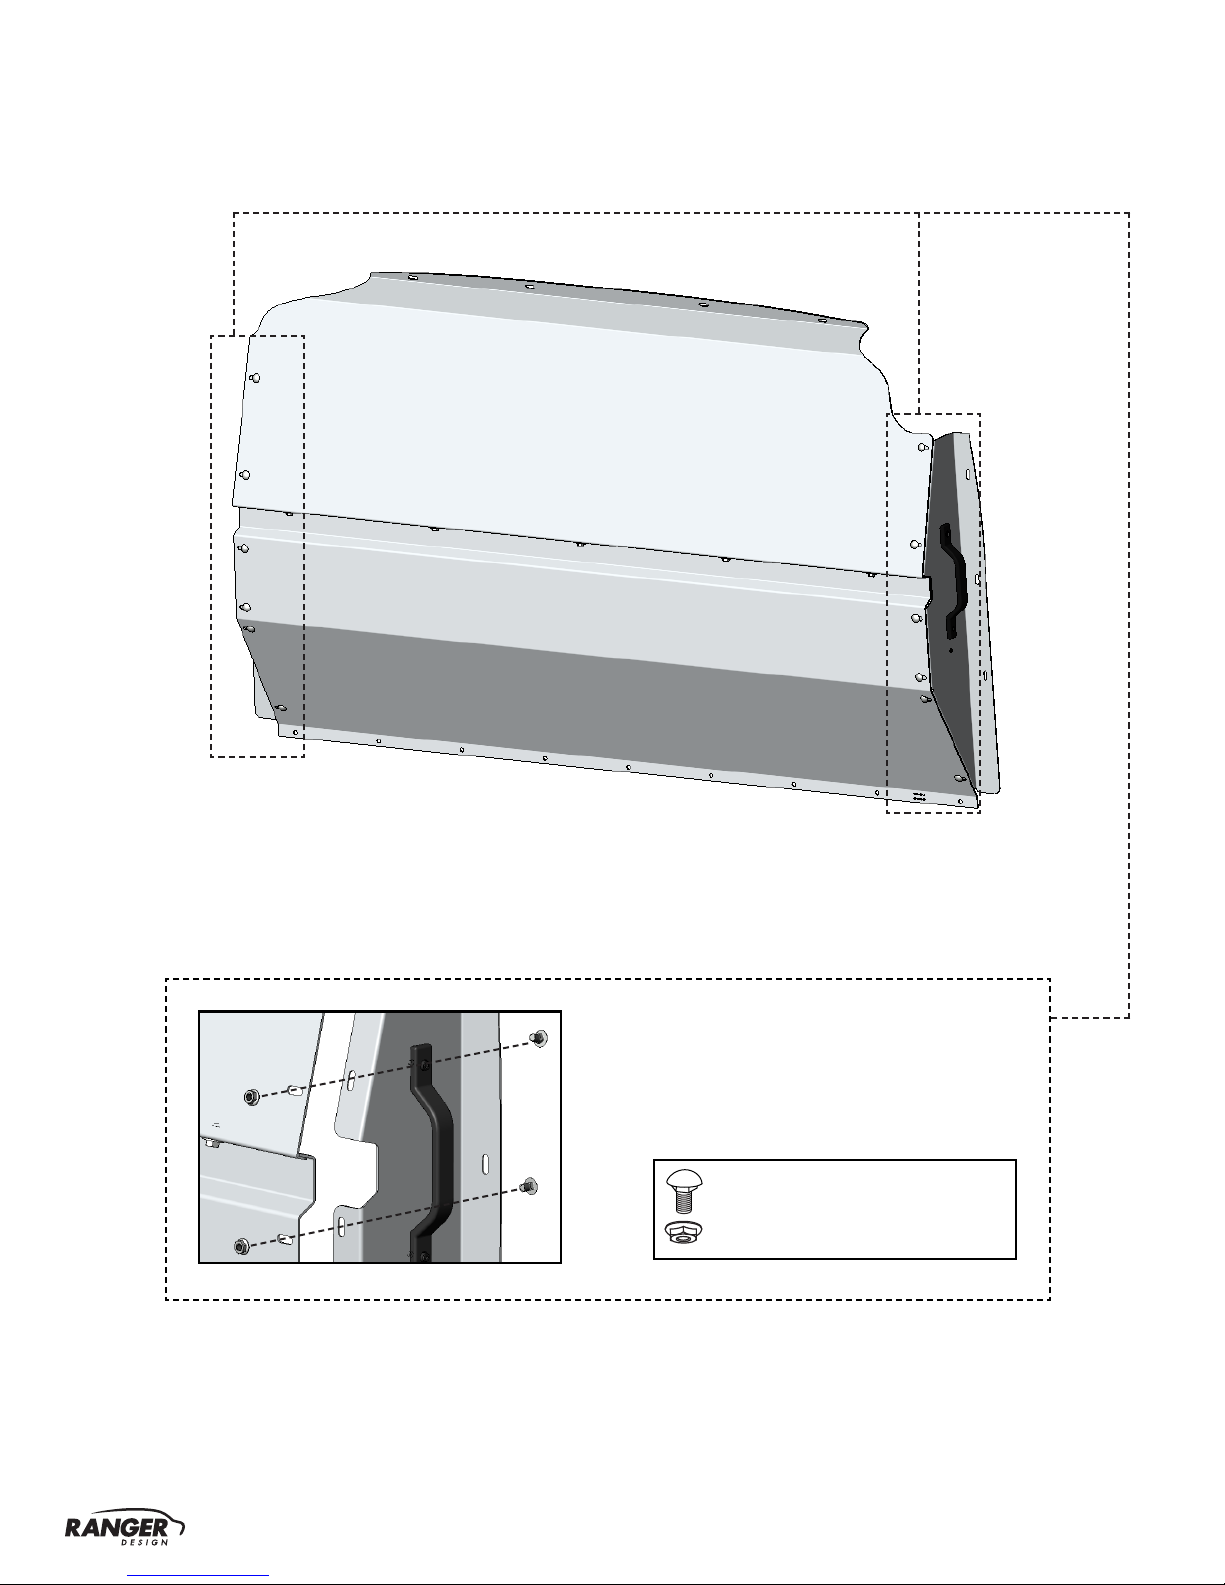
q1.2.3 Attach both wings to the upper and middle partitions....................................................................
q1.2.4 Attach the bottom partition to the middle partition then attach the plastic oor cavity to
the bottom partition.........................................................................................................................
3
3
3
4
5
5
5
6
7
Phase 1 - Assembly
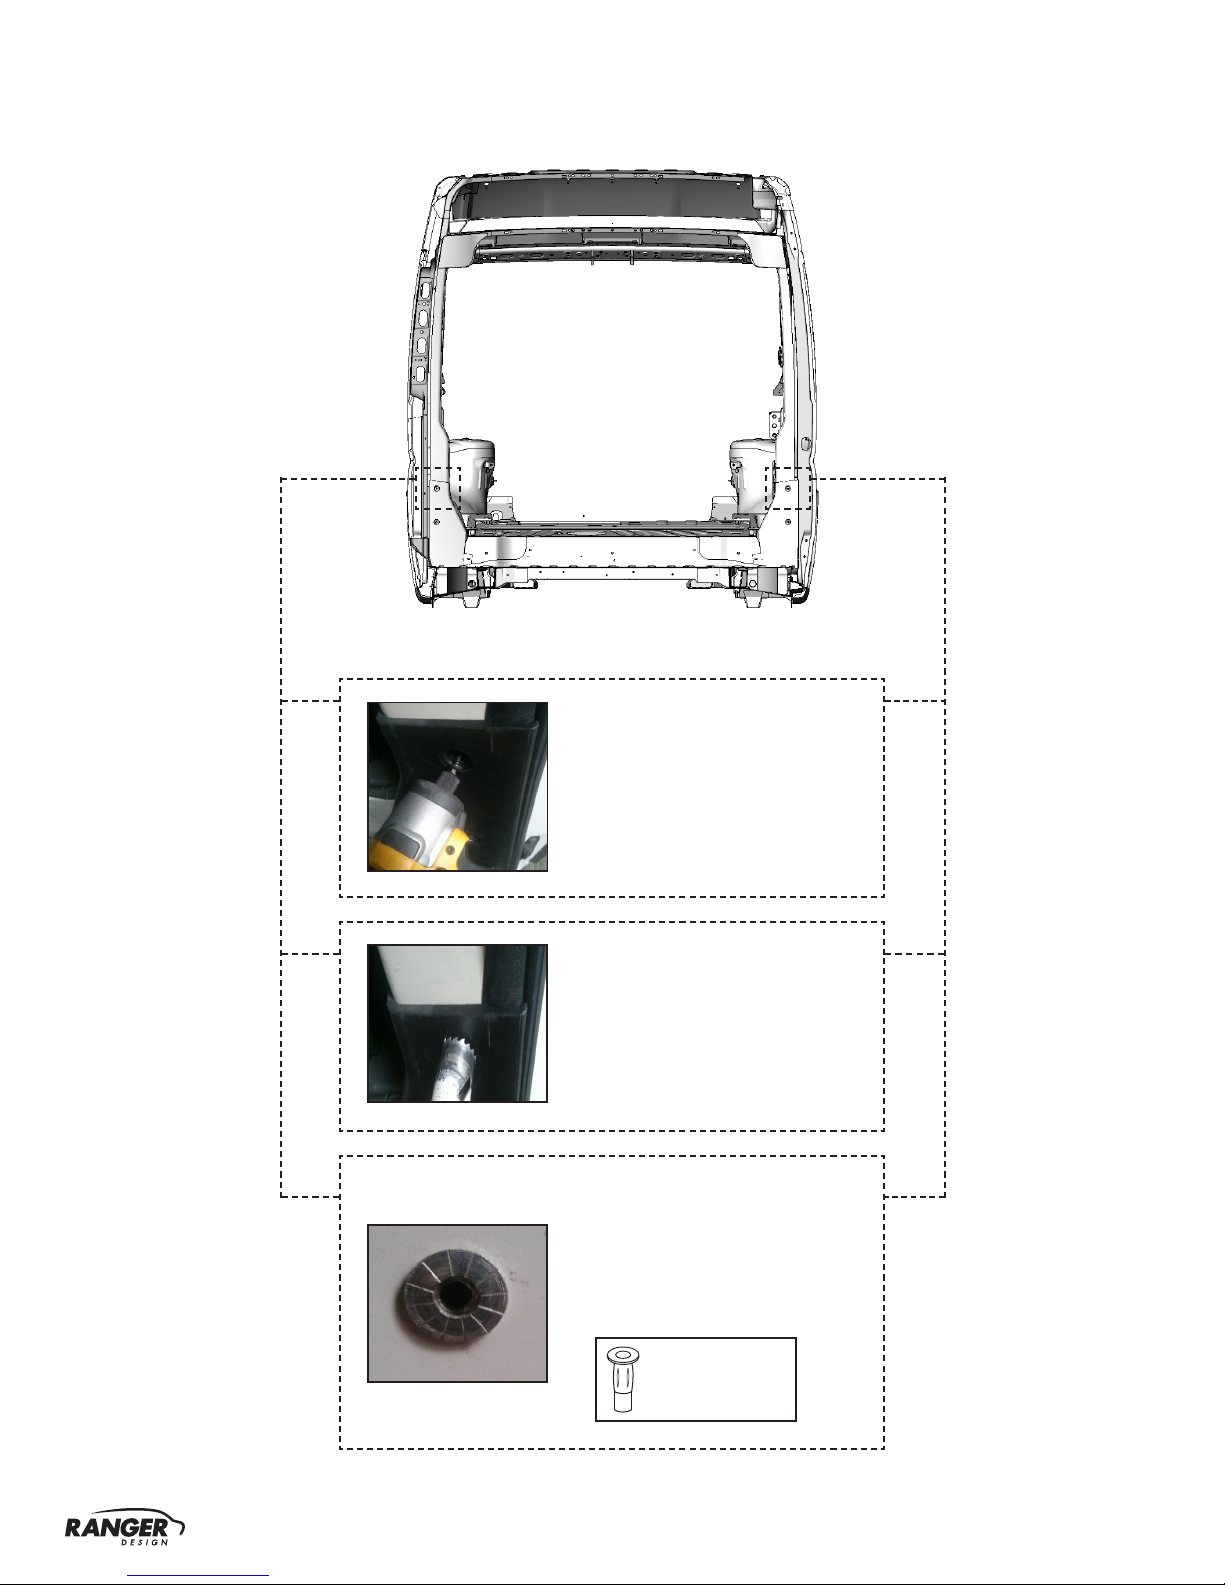
q2.1 Tips on how to attach a plusnut...........................................................................................................
q2.1.1 Attach the plusnut using the plusnut gun........................................................................................
q2.1.2 Attach the plusnut using the Ranger plusnut tool...........................................................................
q2.2 Vehicle preparation...............................................................................................................................
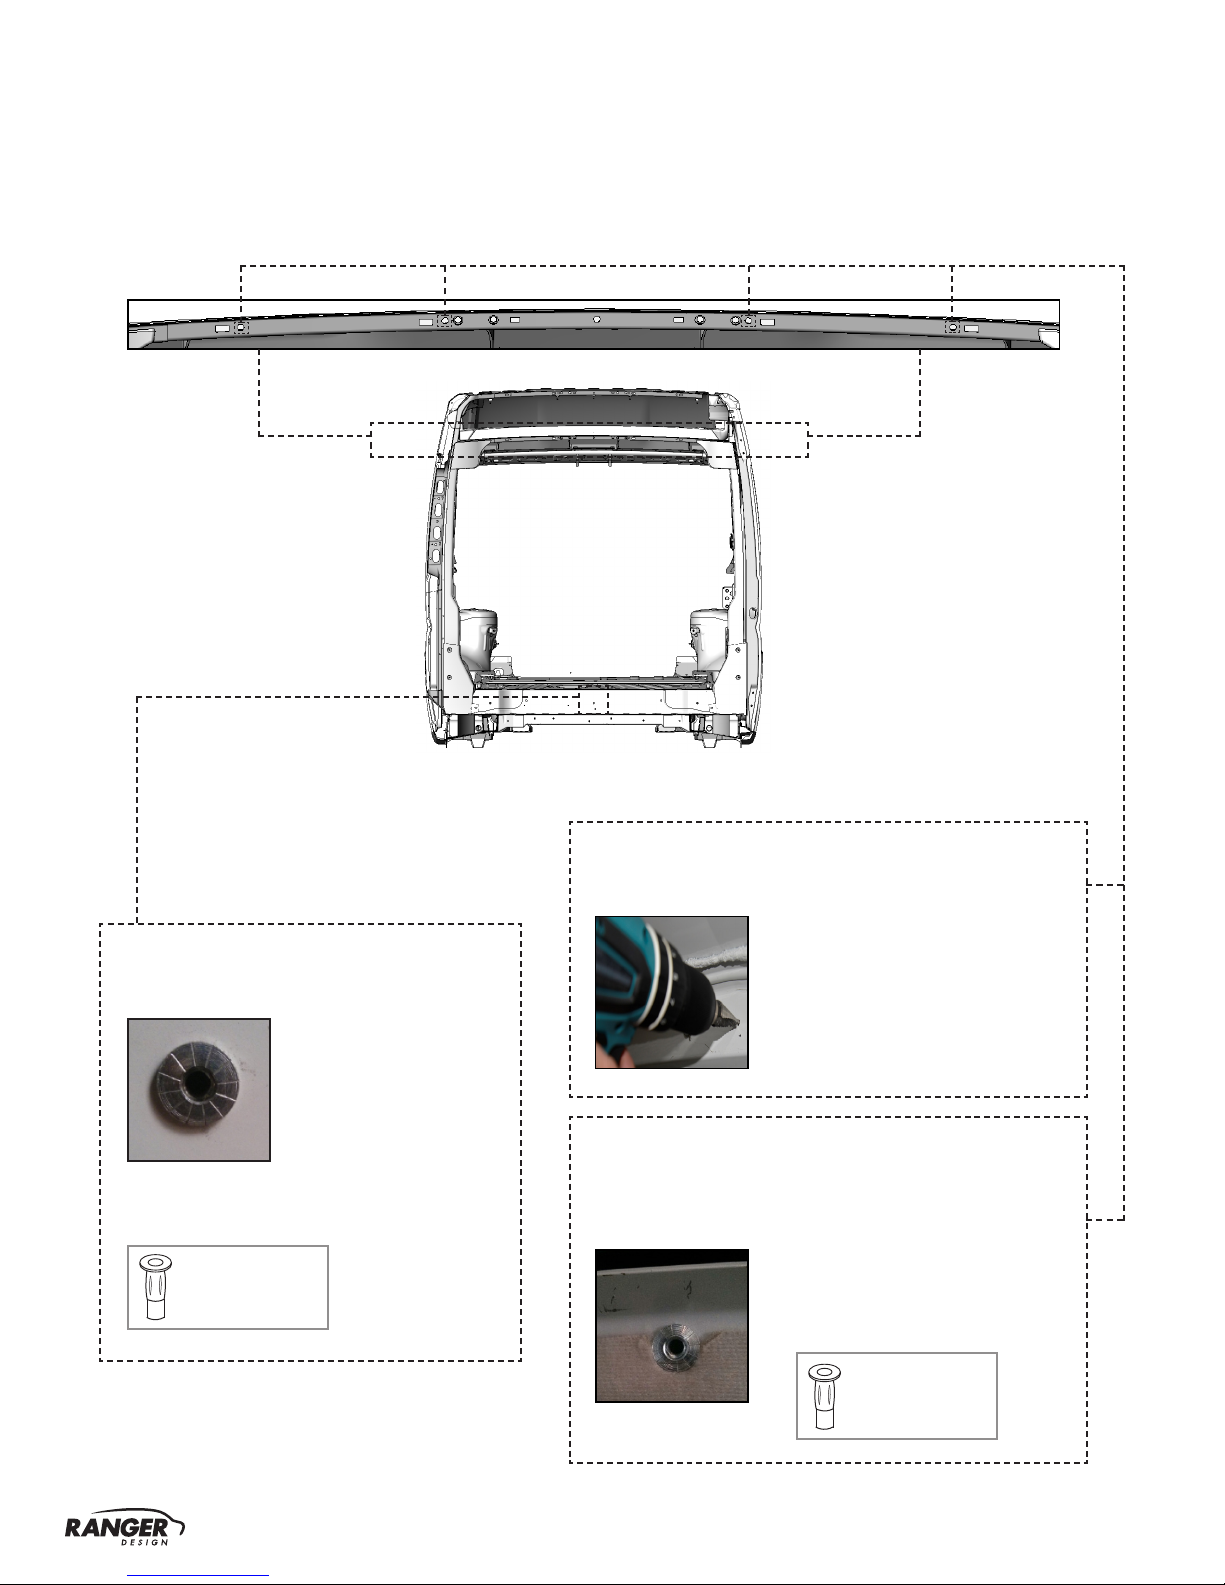
q2.2.1 Ceiling and center oor preparation................................................................................................
q2.2.2 Removing screw and attaching plusnut on the van........................................................................
q2.2.3 Driver and passenger sides preparation. .......................................................................................
q2.3 Contoured partition installation............................................................................................................
q2.3.1 Wings and lower partition installation.............................................................................................
q2.3.2 Top partition installation..................................................................................................................
q2.3.3 Plastic oor cavity installation.........................................................................................................
q2.3.4 Apply the warning label on the top partition...................................................................................
8
8
8
9
9
10
11
12
12
13
14
15
Phase 2 - Installation