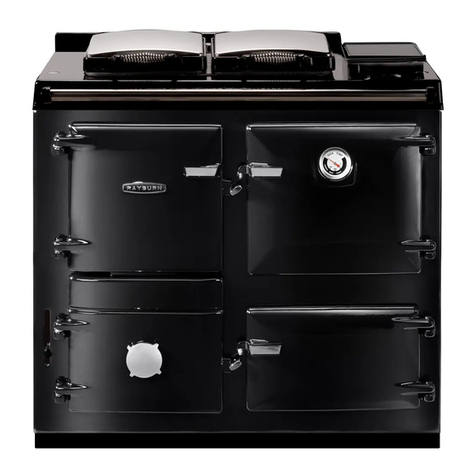
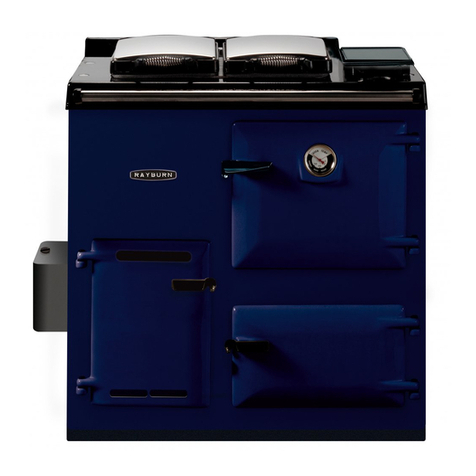
Rayburn Heatranger 345W User manual

Consumer Protection Act 1987
As responsible manufacturers, we take care to make sure that our
products are designed and constructed to meet the required safety
standards when properly installed and used.
IMPORTANT NOTICE: PLEASE READ THE ACCOMPANYING
WARRANTY: Any alteration that is not approved by Aga, could
invalidate the approval of the appliance, operation of the warranty
and could also affect your statutory rights. Use only authorised
replacement parts.
All local regulations including those referring to national and
European standards need to be complied with when installing
the appliance.
Control of Substances - Health and Safety
Important
This appliance may contain some of the materials that are indicated.
It is the Users/Installers responsibility to ensure that the necessary
personal protective clothing is worn when handling, where
applicable, the pertinent parts that contain any of the listed materials
that could be interpreted as being injurious to health and safety, see
below for information.
Firebricks, Fuel beds, Fuels - when handling use disposable
gloves.
Fire Cement - when handling use disposable gloves.
Glues and Sealants - exercise caution - if these are still in liquid
form use face mask and disposable gloves.
Glass Yarn, Mineral Wool, Insulation Pads, Ceramic Fibre,
Kerosene Oil - may be harmful if inhaled, may be irritating to skin,
eyes, nose and throat. When handling avoid inhaling and contact
with skin or eyes. Use disposable gloves, face-masks and eye
protection. After handling wash hands and other exposed parts.
When disposing of the product, reduce dust with water spray,
ensure that parts are securely wrapped.
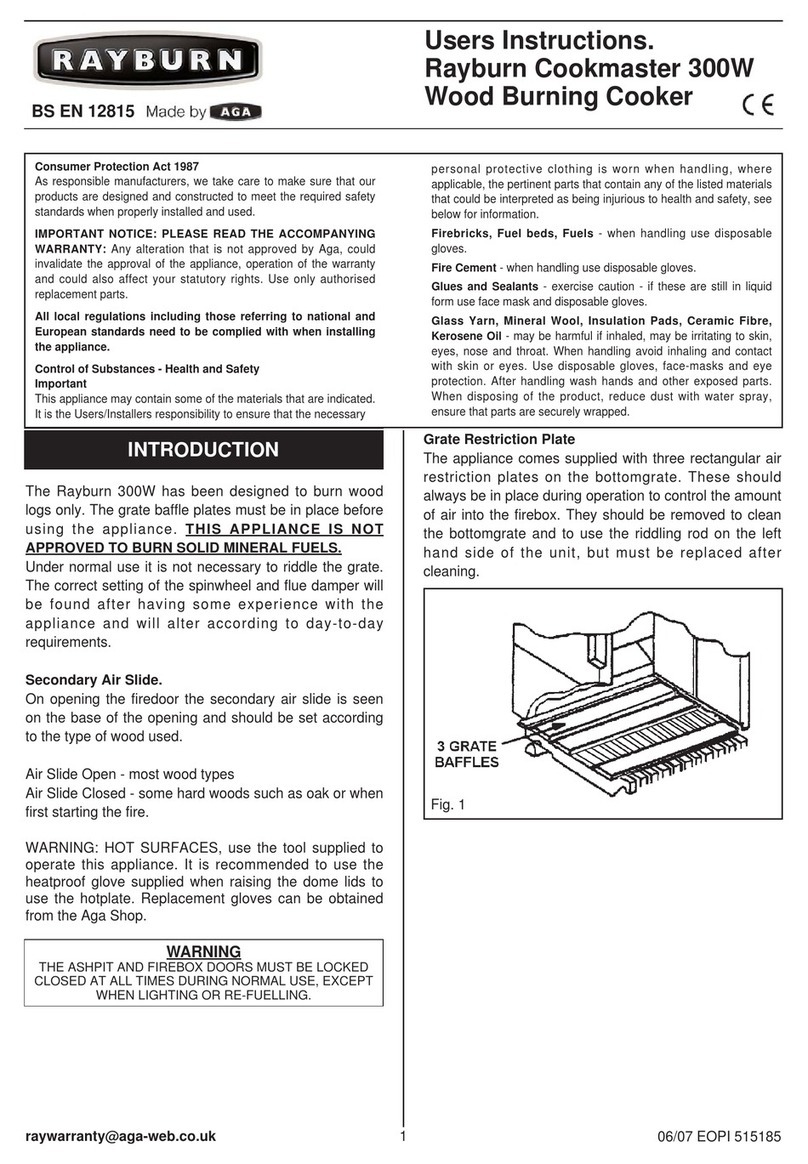
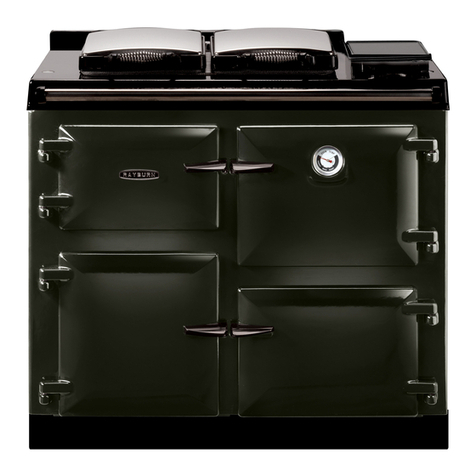
The Rayburn 345W has been designed to burn a variety
of wood logs and thereby provide heating facilities for
cooking, domestic hot water and central heating.
The thermostatically controlled hot water boiler can be
operated independently of the cooker and will provide hot
water for central heating and domestic use (normal
setting for winter usage), whilst manually operated
spinwheel control on the front of the ashpit door will
provide heat for cooking and domestic hot water (normal
setting for summer usage).
The cooker/boiler flueway damper knob on the centre
front of the cooker below the top plate requires to be set
in conjunction with the flue chamber damper to obtain the
appropriate service required from the appliance.
FIREBRICK POSITIONS
The Rayburn 345W is delivered complete including a set
of boiler removable firebricks where positional location
determines the amount of hot water supplied in winter
and summer seasons.
The oven side and firebox front firebricks are
permanently fixed with fire cement and should remain in
their positions at all times.
The two boiler face side bricks and boiler face rear brick
are so located for summer use when hot water, for
domestic use only, will be provided.
For winter use or central heating facilities the boiler face
rear brick is removed and the two boiler face side bricks
are transferred to locate on/over the oven side bricks.
Secondary Air Slide.
On opening the firedoor the secondary air slide is seen
on the base of the opening and should be set according
to the heating requirement. (See Fig. 6).
Air Slide Open - heating
Air Slide Closed - cooking
WARNING: HOT SURFACES, use the tool supplied to
operate this appliance. It is recommended to use the
heatproof glove supplied when raising the dome lids to
use the hotplate. Replacement gloves can be obtained
from the Aga Shop.
Users Instructions.
Rayburn Heatranger 345W
Wood Burning Cooker
INTRODUCTION
PREPARING COOKER FOR USE
110/07 EOPI 515158
WARNING
THE ASHPIT AND FIREBOX DOORS MUST BE LOCKED
CLOSED AT ALL TIMES DURING NORMAL USE, EXCEPT
WHEN LIGHTING OR RE-FUELLING.
Fig. 1

Fuel should be stored under cover and ventilated, and
kept dry. Wet kitchen refuse should not be burned.
The appliance has been tested using wood logs only.
It is not suitable to burn solid mineral fuels.
Prevention: Chimney fires do not occur in clean, intact,
properly installed chimneys. Have a professional
chimney sweep clean and inspect your appliance at least
once a year. More frequent cleaning may be required,
based on the type of fuel burned and the frequency of
use. In general, an older appliance or one that is used
frequently, will require more than one clean per year.
Detection: The first indication of a chimney fire is usually
the noise - a roaring sound grows louder as the fire’s
intensity increases. Clouds of black smoke and sparks
will be seen exiting the top of the chimney; in severe
fires, flames can extend several feet about the chimney.
Action: In case of a chimney fire follow these steps but
do not put yourself or others in peril:
1. Call the fire brigade immediately.
2. Get everyone out of the property.
3. Close down the air supply to the appliance i.e. the
primary air spinner and the flue damper. Limiting the
fires air supply will reduce its intensity. If there is a
damper in the chimney connector, plug or close the
opening.
4. If a fire extinguisher is available, open the appliance
door just enough to insert the nozzle of a 10lb, dry
chemical fire extinguisher rated for Class ABC fires.
Discharge the entire content of the fire extinguisher
into the appliance and shut the door.
5. If possible, wet down the roof and other outside
combustibles to prevent fires ignited by shooting
sparks and flames.
6. Closely monitor all combustible surfaces near the
chimney. During severe chimney fires, these surfaces
can become hot enough to ignite.
After a chimney fire, have the chimney inspected by a
professional chimney sweep or cooker installer.
OVEN DOOR OPERATION - SEE FIG. 2
To open the doors. Twist the handle slightly to lift up the
door catch from the locking spindle and pull the door
open.
To close the doors. Gently push the door shut until the
door catch makes contact with the locking spindle.
FIREDOOR/ASHPIT DOOR OPERATION
The fire door and ashpit door are kept closed by a turn
screw. A tool is supplied to operate these when hot and
they can be adjusted to ensure both these doors close
tightly. IT IS IMPORTANT TO ENSURE PROPER
CLOSURE OF THESE DOORS TO PREVENT
OVERFIRING.
DOOR OPERATION
DESN 512979
DESN 514177
2
Fig. 2
Fig. 3
RECOMMENDED FUELS
CHIMNEY FIRES

The cooker will satisfactorily burn wood logs, blocks or
peat briquettes, but logs should be perfectly dry in order
to obtain the best cooker performance and minimise the
deposits of creosote. Wet logs may also provide
overnight banking problems and the following hints are
recommended:-
a) Burn dry soft wood in the day time and dry hard
wood overnight if possible.
b) Avoid using ‘green’ wood on overnight banking as
creosote deposits will be increased.
c) Using hard wood in the day time will give prolonged
burning but heating response is slower.
d) Wet kitchen refuse should not be burned.
e) Before refuelling, open the flue chamber damper to its
full extent and fill the firebox up to the bottom of the
firedoor opening.
f) To obtain the optimum burning rate both grate baffles
must be located on the top face of the reciprocating
bars at the rear of the firebox. (See Fig. 4). Grate
riddling is not required.
All Fuels using Wood and Paper
a) Check the flue pipe is free of blockage.
b) Open firebox door.
c) Open ashpit door.
d) De-ash and remove ashpan, empty and replace (Fig.
9).
f) Open flue chamber damper to maximum (Fig. 7).
e) Flue dilution lever fully to ‘left’ (flue chamber door
closed, Fig. 7).
f) Lay a liberal supply of wood and paper on top of the
bottomgrate together with a small quantity of fuel and
light.
g) Close and lock the ashpit door with the spinwheel
control open.
h) Close and lock the firedoor.
i) With fire established, open firebox door and fill firebox
with fuel. Check secondary air slide setting (Fig. 6).
Open - heating, closed - cooking.
Close and lock firebox door. Push flue chamber
damper back to position which has been found to give
desired burning rate.
All fuels Using a Gas Poker
a) Check flue pipe is free of blockage.
b) Open firebox door.
c) Open ashpit door.
d) De-ash (Fig. 8) and remove clinker door (Fig. 10).
Insert flat bayonet type gas poker on top of
bottomgrate bars.
e) Remove ashpan and empty (Fig. 9).
f) Open flue chamber damper to maximum (Fig. 7).
g) Flue dilution lever fully to ‘left’ (flue chamber door
closed, Fig. 7).
h) Lay a 75-100mm 3”-4”) shallow depth of fuel onto the
bottomgrate and light gas poker.
i) Close the ashpit and firebox doors as far as possible-
spinwheel control open.
j) When the fuel is well alight, extinguish and remove
the gas poker, replace the clinker door and ashpan,
close and lock the ashpit door with the spinwheel
control open. close the firedoor.
k) With the fire established open the firebox door and fill
firebox with fuel. Check secondary air slide setting
(Fig. 6). Open - heating, closed - cooking.
Close and lock the firebox door.Push the flue
chamber damper back to position which has been
found to give best results. Set spinwheel control to
give desired burning rate.
Heating Only
a) The fire is controlled by using the spinwheel on the
ashpit door to govern the air supply.
b) The adjustable flue chamber damper is for reducing
the chimney draught, and the more it can be closed,
the easier the cooker is to control. The line markings
on the flue chamber enable you to repeat the best
settings to suit your chimney, from No.1 in a closed
position to No.6 fully open.
c) Control over the direction of the flue gases is
FUELLING WITH WOOD OR PEAT
FAMILIARISE YOURSELF WITH THE
COOKER
LIGHTING THE FIRE
3
COOKER CONTROL
Fig. 4
Fig. 5

obtained by the setting of the cooker/boiler damper.
Set the cooker/boiler damper knob on the front of the
cooker to ‘C’ and the boiler thermostat knob on the
rear left hand corner of the top plate, to its minimum
setting.
d) Thermostat set at No.1 as domestic hot water is
obtained when cooking.
NOTE: INTERMEDIATE SELECTIVE SETTINGS OF
THE COOKER/BOILER DAMPER KNOB AWAY FROM
‘C’ WILL PROGRESSIVELY RESTRICT THE AMOUNT
OF HEAT TO THE TOP OF THE OVEN AND
INCREASE THE AMOUNT OF HEAT INTO THE
BOILER UNTIL THE KNOB IS POINTING TO SYMBOL
‘H’ FOR MAXIMUM WATER HEATING. IN THIS
POSITION, THE MINIMUM PROPORTION OF HEAT IS
DIRECTED TO OVEN HEATING. ALTHOUGH THE
OVEN WILL STILL GET HOT.
IF THE OVEN IS TOO HOT SET THE CONTROL TO H.
THIS WILL REDUCE THE OVEN TEMPERATURE BY
DIRECTING THE HEAT TO WATER.
Cooking Only
Set the spinwheel open. The precise amount will be
shown by experience with the appliance, 2-3 turns will do
to start.
After setting the cooker/boiler damper knob to ‘C’, set the
flue chamber damper fully open after refuelling and reset
to position which has been found by practical experience
to give the best results. Do not try to obtain a fast
increase in temperature by opening flue chamber to its
fullest extent. This results in most of the heat being
wasted up the chimney.
Avoid excessive fire temperatures - they are
unnecessary and may do serious harm to the cooker.
The first symptoms of an overheated cooker is the
formation of clinker (melted ash) which will damage the
fire bricks.
Damaged firebricks should be replaced as soon as
possible but may be temporarily repaired with fire
cement.
Keep the ashpit door securely closed with the front
plate catch.
Fig.6
Fig.7
Fig.8
Fig.9
Fig.10
4

Set the cooker/boiler damper knob ‘H’.
Close spinwheel.
To regulate burning, set the boiler thermostat knob to ‘8’
(high) or minimum rate ‘1’ (low).
Adjust as required to suit desired water heating.
Overnight banking and daytime slow burning should be
obtained with the boiler thermostat knob set at ‘1’ to give
extended burning. This maybe higher and will be dictated
by personal choice.
Some woods are more difficult to burn therefore it may
be necessary to open the spinwheel in addition to the
thermostat to obtain the desired results. The spinwheel
must be closed as appropriate. Do not leave the cooker
for extended periods with the spinwheel open as the
cooker may overheat and cause damage.
In some circumstances, it may be possible to overheat
the appliance and the water inside will boil. This will be
evident by the sound of a knocking noise coming from
the appliance and pipes around the house. If this occurs,
close off all air controls and manually start the central
heating pump if fitted. Opening the oven doors and
hotplate covers will help to release heat from the
appliance. Be aware that steam and boiling water will be
expended from any open vent from the heating system
probably in the roof space at the expansion tank.
In the unlikely event that the appliance is not operating in
freezing conditions, the water must be drained from the
boiler to prevent frost damage.
Wood
The appliance is designed for continuous slumbering
overnight for up to a maximum of 10 hours depending on
the type of dry wood being used. Last thing at night,
close the flue chamber damper. De-ash the fire, empty
the ashpan and fully refuel. It may be necessary to open
the flue chamber door.
Ensure that the firebox and ashpit door are securely
closed, close the spinwheel tight and the flue chamber
damper is set to No. 1.
Set the boiler thermostat knob to its minimum setting and
front damper knob to ‘c’.
Turn the flue dilution lever (See Fig. 7) from left to right
hand so that the flue chamber door opens at the bottom
and minimise burning rates.
NOTE: THE PRECISE AMOUNT OF OPENING
DEPENDS ON THE CHIMNEY DRAUGHT AND THE
TYPE/CONDITION OF WOOD TO BE BURNT. THIS
MAY TAKE 2 OR 3 DAYS TO ASCERTAIN.
1. If the fuel in the firebox is exhausted prematurely, the
overnight chimney draught must be reduced by
increasing the opening setting of the flue chamber
door, using the flue dilution lever.
2. If the fuel does not burn but ‘dies out’, the draught
should be increased by reducing the opening setting
of the flue chamber door, using the flue dilution lever.
Following overnight banking, the flue chamber door must
be closed, the spinwheel and flue chamber damper
opened and the fire refuelled.
Immediately the new fuel has caught alight, riddle the fire
and close the flue chamber damper to halfway.
NOTE: BUILD-UP OF CREOSOTE DEPOSITS IN THE
FLUE AND CHIMNEY CAN IN TIME, LEAD TO A
CHIMNEY FIRE.
THESE DEPOSITS CAN BE PREVENTED BY THE
REGULAR USE OF A PROPRIETARY BRAND OF
CHEMICAL CREOSOTE REMOVER, WHICH
REDUCES THE ADHESION STRENGTH OF THE
CREOSOTE DEPOSITS.
IMPORTANT: CHEMICAL CLEANERS MUST NOT BE
CONSIDERED AS AN ALTERNATIVE TO CHIMNEY
SWEEPING, ONLY AS SUPPLEMENTARY.
Against Thermostat knob settings with Cooker/Boiler
Damper at ‘H’ and Spinwheel closed.
Thermostat Setting No. Water Temperature
(APPROXIMATE)
1 46°C (115°F)
3 54.5°C (130°F)
5 65.5°C (150°F)
8 80°C (176°F)
a) Using the cooker boiler to provide heat for domestic
hot water and radiators in the winter, a boiler thermostat
setting at No. 8 is recommended.
b) Using the cooker boiler for the provision of domestic
hot water only, in the summer, a boiler thermostat setting
of No. 5 is recommended.
NOTE: TO CONSERVE FUEL, ENSURE THE HOT
WATER CYLINDER AND PIPES ARE LAGGED WITH
INSULATION.
A correctly fuelled fire will last about 1.5 hours burning
wood when maintaining the maximum rated output of the
boiler with intermittent cooking periods included.
A deep bed of newly charged fuel on a low fire will
take time before heat reaches the ovens, hotplate
and boiler.
ONCE RE-FUELLING HAS BEEN COMPLETED,
CLOSE THE FIREBOX DOOR IMMEDIATELY AND
OPEN ONLY FOR RE-FUELLING CHARGES.
BOILER CENTRAL HEATING
THERMOSTAT SETTING
TYPICAL WATER TEMPERATURES
REFUELLING
5
OVERNIGHT BANKING
Other manuals for Heatranger 345W
1
Table of contents
Other Rayburn Kitchen Appliance manuals

Rayburn
Rayburn 660 User manual

Rayburn
Rayburn 300W User manual

Rayburn
Rayburn 370 SFW User manual

Rayburn
Rayburn Heatranger 880 Installation instructions

Rayburn
Rayburn Two-Oven Operating manual

Rayburn
Rayburn XT User manual

Rayburn
Rayburn supreme User manual

Rayburn
Rayburn Heatranger 355SFW User manual

Rayburn
Rayburn Heatranger 216SFW User manual

Rayburn
Rayburn Cookmaster 300K User manual