RaySafe x2 User manual

USER MANUAL
RaySafe X2

Please consult the built-in help in your base unit
to ensure that you read a version corresponding to your specific instrument setup.
© 2015.06 Unfors RaySafe 5001083-5.1
All rights are reserved. Reproduction or transmission in whole or in part, in any form or by any means,
electronic, mechanical or otherwise, is prohibited without the prior written consent of the copyright owner.

CONTENTS
GENERAL
About the X2 system
Navigate the base unit
View measurement
Access archived measurements
Change parameter view
Analyze waveforms
Connect the base unit to a computer
Connect to computer using Bluetooth
Upgrade the base unit software
Charge the battery
Use the flexi stand
Setting: Screen brightness
Setting: Speaker volume
Setting: Time and date
Final disposal of the system
Regulatory information
R/F SENSOR
Measure with R/F Sensor
R/F: Measurement definitions
R/F: Sensor specifications
Setting: Units
Setting: Stop delay
Setting: Ignore prepulses
MAM SENSOR
Measure with MAM Sensor
Mo/Rh kV with MAM sensor
W/Al scanning with MAM sensor
MAM: Measurement definitions
MAM: Sensor specifications
Setting: kVp mode
Setting: Units
Setting: Stop delay
Setting: Ignore prepulses
CT SENSOR
Measure with CT Sensor
Measure kVp on CT
CT: Measurement definitions
CT: Sensor specifications
Setting: Units
Setting: Stop delay
LIGHT SENSOR
Measure with Light Sensor
Light: Measurement definitions
Light: Sensor specifications
Setting: Units
SURVEY SENSOR
Measure with Survey Sensor
Zero adjust
Survey: Measurement definitions
Survey: Sensor specifications
Setting: Trig mode
Setting: Units
Setting: Stop delay
MAS
Measure mAs
mAs: Measurement definitions
Setting: Stop delay
Setting: Ignore prepulses
RaySafe X2 User Manual
3

ABOUT THE X2 SYSTEM
The RaySafe X2 consists of a base unit, sensors and the X2 View computer software.
The sensors options are:
R/F, for radiography and fluoroscopy measurements, with or without a phantom between the sensor and the
X-ray source.
MAM, for all kinds of mammography measurements.
CT, an ionization chamber for measurements on CT dose applications.
Light, for illuminance measurements and luminance measurements on monitors and light boxes.
Survey, a sensitive sensor for measuring leakage and scattered radiation, as well as other applications with
low dose rate.
mAs, an integrated tube current meter.
X2 View is a PC software for use with the X2 instruments. In X2 View, you can view measurements and waveforms
on a larger display, store measurements, transfer data to Excel or other software and get software updates for the
base unit.
When you want to measure, all you need to do is:
1. Turn on the base unit
2. Connect a sensor
3. Position the sensor
4. Expose
For more detailed information, see the help chapter for each sensor.
RaySafe X2 User Manual
4

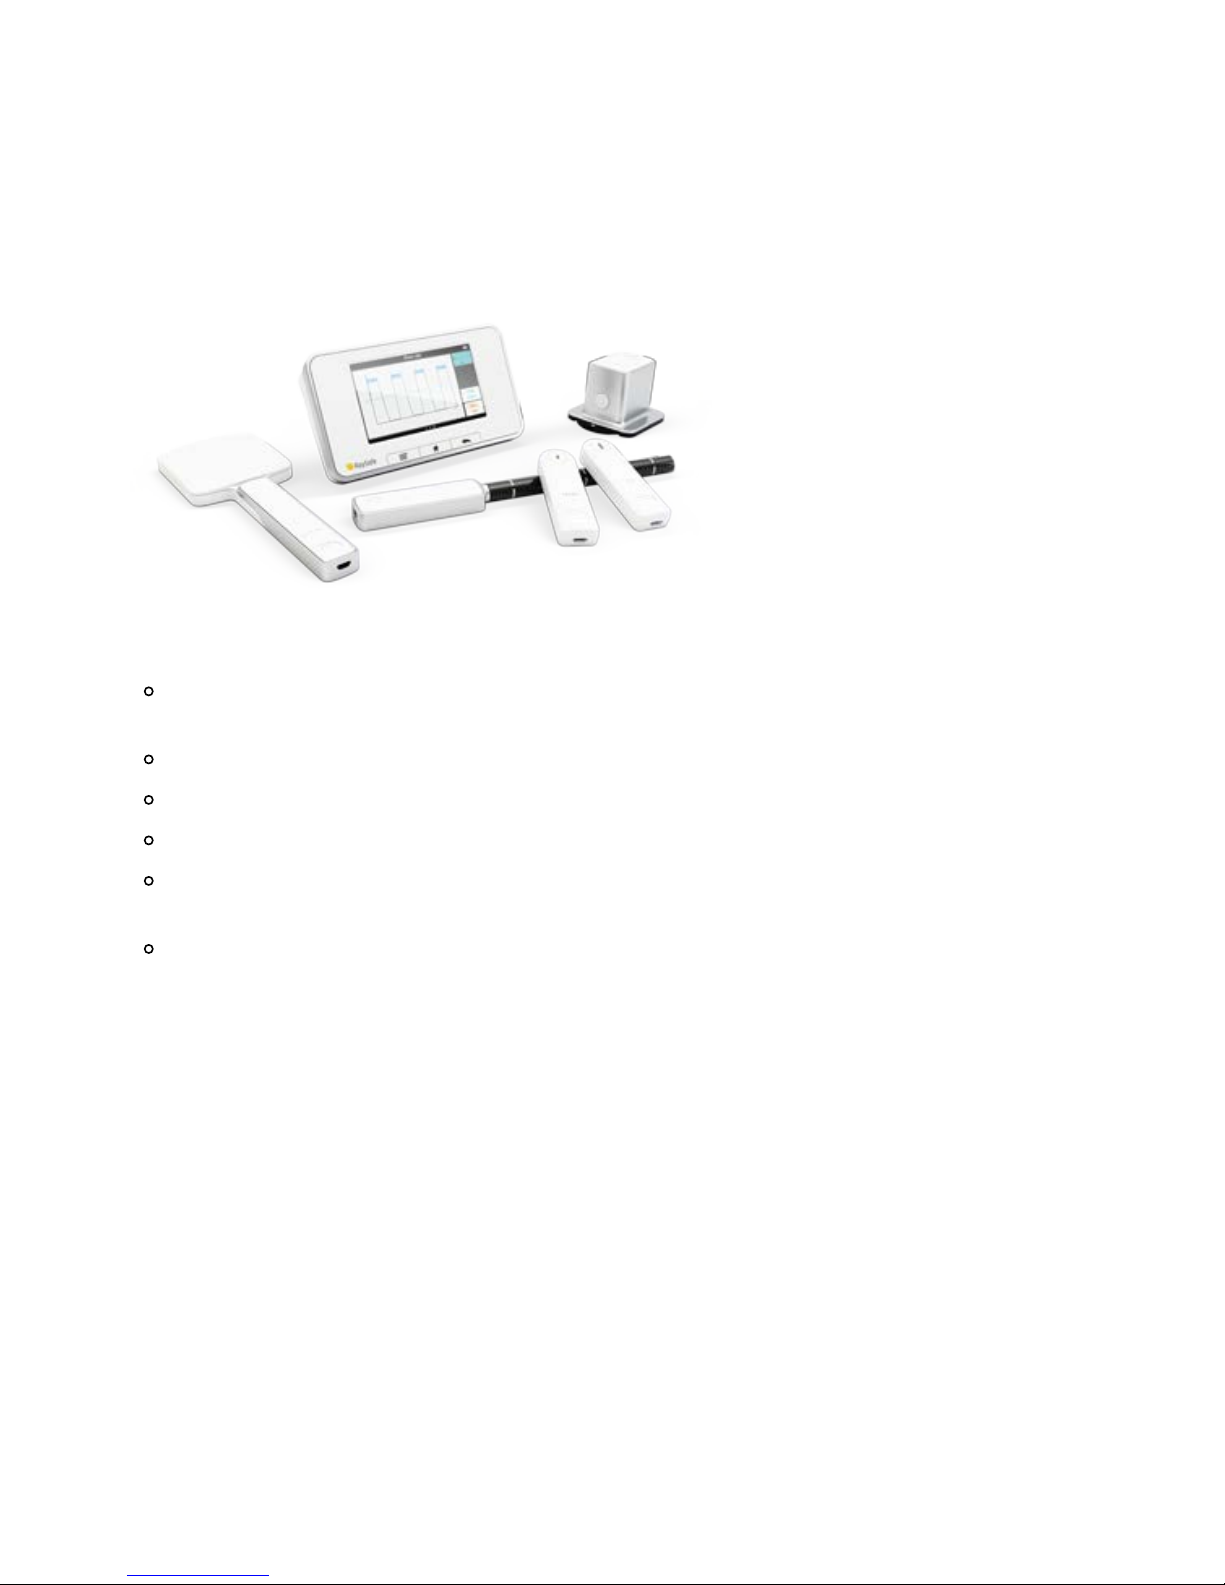
NAVIGATE THE BASE UNIT
The base unit has a touch screen and three buttons.
Swipe up and down on the home screen to access your previously recorded measurements. Swipe right from the
home screen to go to the setup screen, from which you can make settings and view information about the system,
for example the calibration date for a connected sensor. Tap on a parameter to get larger digits, one parameter at
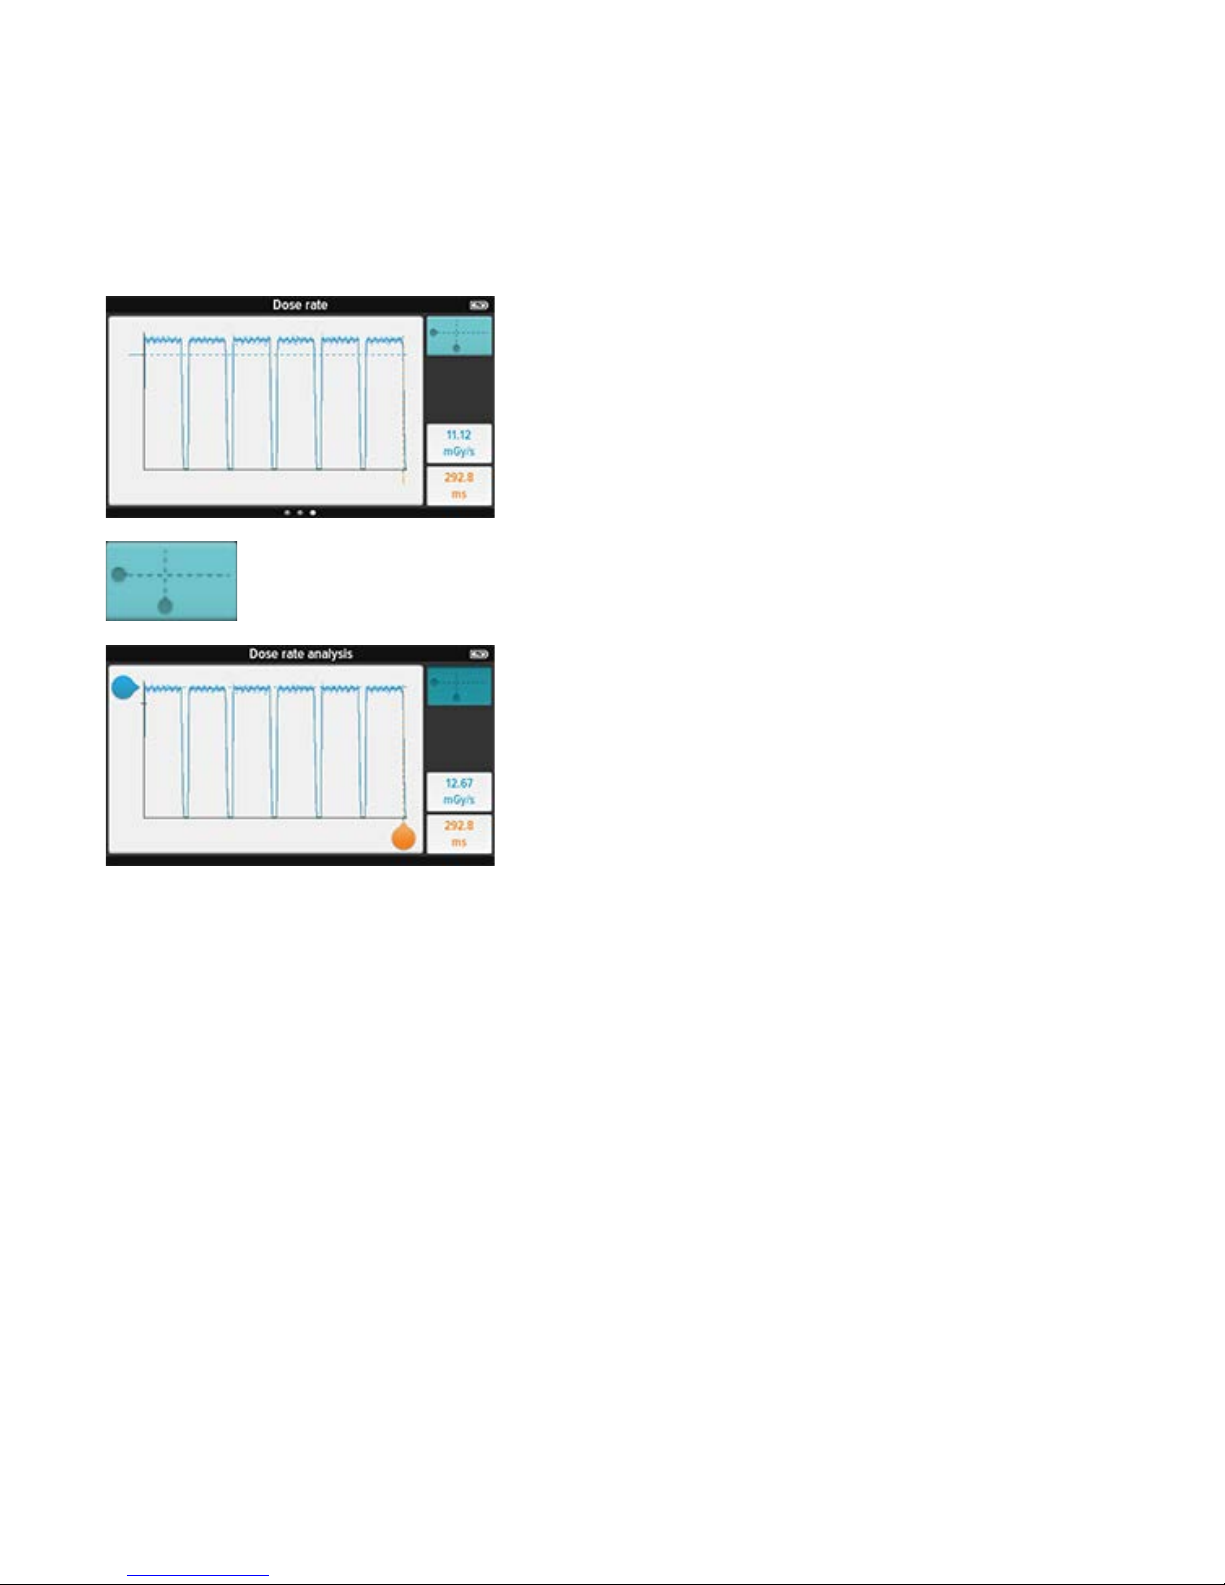
a time. You can also measure in this mode. From the single parameter screen, you can swipe right to view the
measurement specifications, and left to see waveforms, if available.
The three buttons below the screen are:
Menu, brings up a menu on the screen
Home, takes you to the home screen
Back, takes you back to the previous screen
On the back side of the base unit are:
Reset switch, for forced reboot of the base unit
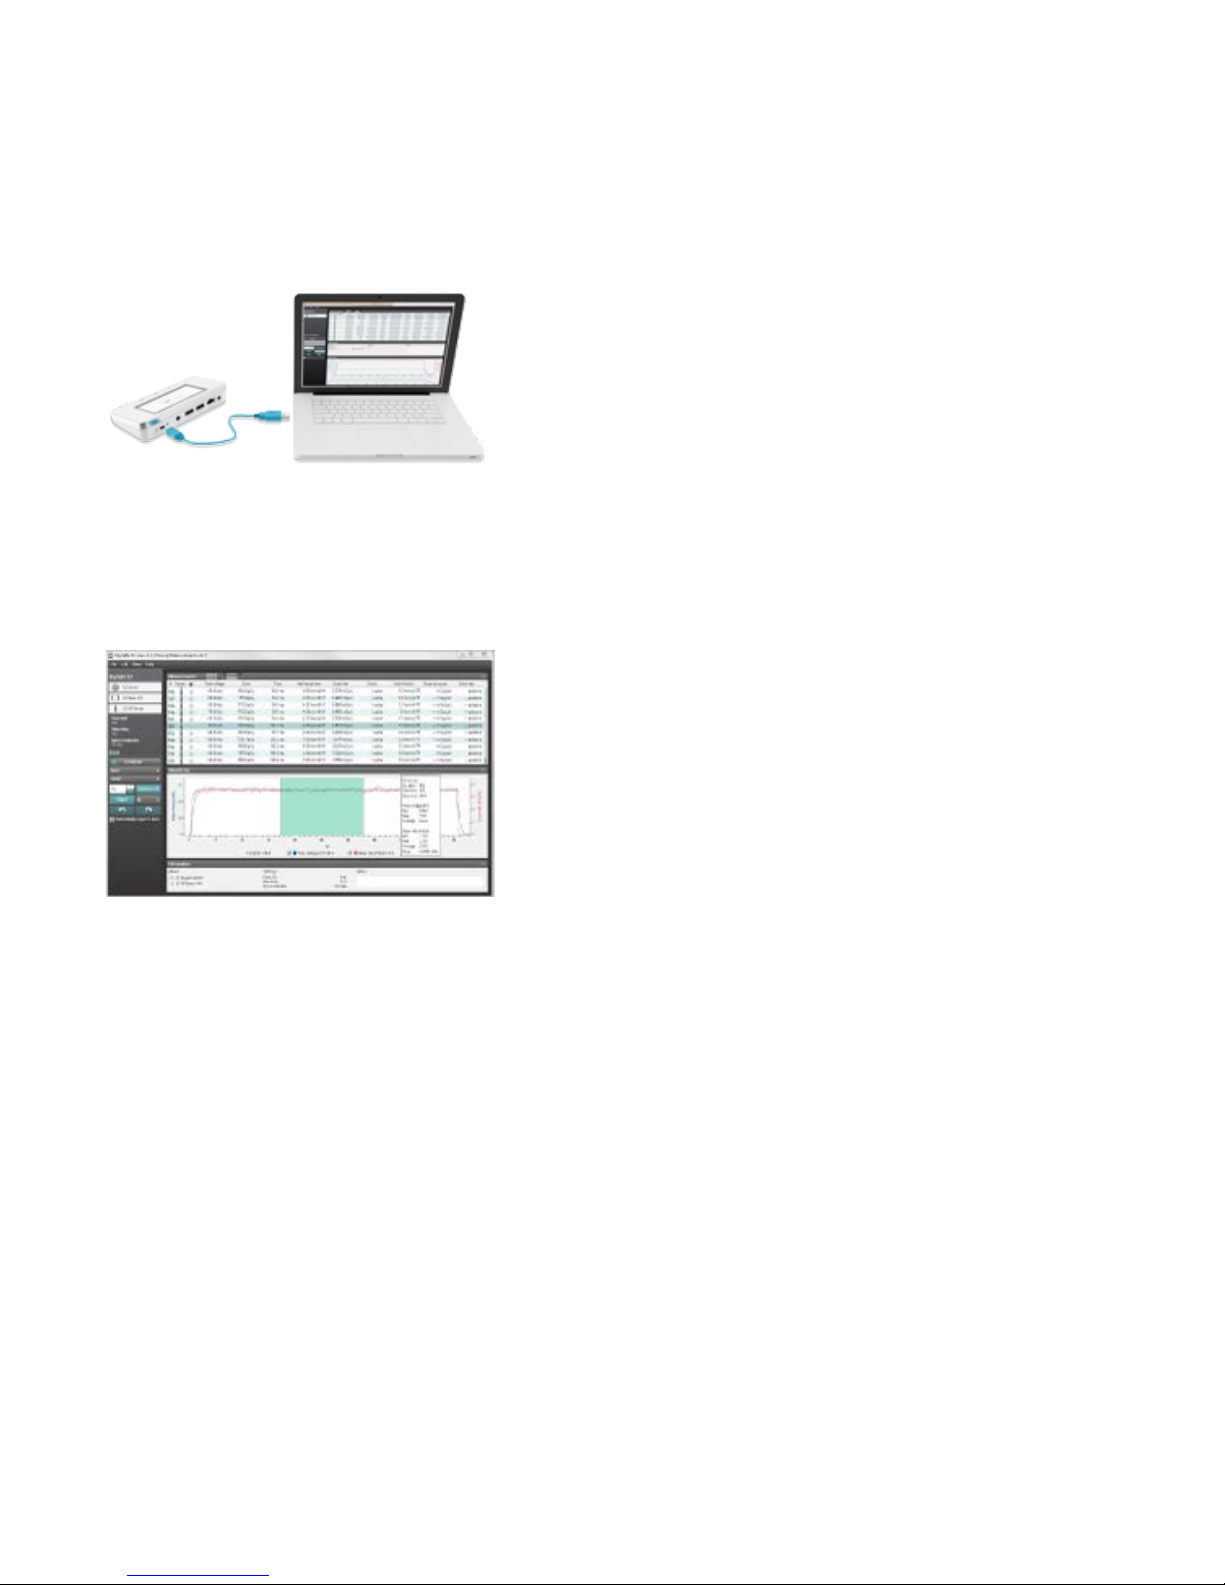
Charger/PC connector, for charging or using with a PC with X2 View
mAs connector, for tube current measurements
Two sensor connectors
Ethernet connector, for future use
On/Off switch. Press the button shortly to enter sleep mode. After a while in sleep mode, the base unit will
turn off automatically. Press the button for 2 seconds to turn off the base unit immediately.
RaySafe X2 User Manual
5

VIEW MEASUREMENT
Swipe up or down to scroll between measurements. Tap on a parameter to get larger digits. Swipe right to access
the parameter information with measurement specifications. Swipe left to view a waveform, if available for the
current parameter.
Press the menu button and select Notes to access more information about the measurement and to be able to add
a note.
RaySafe X2 User Manual
6

ACCESS ARCHIVED MEASUREMENTS
Measurements from previous sessions are automatically archived in the base unit. The memory allows about 10000
measurements. When the memory is full, the oldest measurements are automatically deleted.
The measurements are sorted by date and time.
VIA BASE UNIT
To access archived measurements, press the menu button and select Measurement archive. Select a session to
see the individual measurements for that session. Swipe up or down to scroll between measurements.
VIA X2 VIEW
To access archived measurements via X2 View, connect the base unit to a computer running X2 View and select
Import from base unit under the File menu.
RaySafe X2 User Manual
7

CHANGE PARAMETER VIEW
To change the number of parameters showed on the home screen, press the menu button and select Change view.
There are two views to toggle between:
All measured parameters, or
Four key parameters of your own choice. Press and hold on a box to select which parameter to show.
RaySafe X2 User Manual
8

ANALYZE WAVEFORMS
View a single parameter by tapping on that parameter on the home screen. Swipe left to go to the waveform
screen.
The dark line represents an average of the measured values. If
there are more values than possible to show on the screen, the
light blue pixles represent the range of these values.
The dashed lines indicate the measured parameter values, in this
case average dose rate and time.
Tap on the button in the upper right corner to analyze the waveform.
Slide the handles to view, for example, the peak dose rate of a
pulse.
Pinch with two fingers to zoom in the waveform area.
Tap the button again to exit the analyze mode.
RaySafe X2 User Manual
9

CONNECT THE BASE UNIT TO A COMPUTER
Connect the base unit to a computer running X2 View using a USB cable (recommended length: max 2 m). X2 View
can be installed from the X2 View CD, that came with the system.
If you measure, the results will automatically show up in X2 View.
You can also select Import from Base Unit in the File menu to import measurements stored in the base unit.
From X2 View, you can export measurements to Excel and other software. For more information, see the X2 View
help, reached from the Help menu in X2 View.
RaySafe X2 User Manual
10

CONNECT TO COMPUTER USING BLUETOOTH
Connect the Bluetooth adapter to a SENSOR port on the base unit. A gray Bluetooth status symbol appears in the
upper right corner of the screen.
X2 View will automatically search for base units. The first time you connect, you will have to select your base unit
from the Bluetooth menu in X2 View. The Bluetooth status symbol will turn white when connected.
When restarting X2 View, the base unit will automatically get connected.
RaySafe X2 User Manual
11

UPGRADE THE BASE UNIT SOFTWARE
Connect the base unit to a computer running X2 View and make sure that the computer is connected to internet. If
there are any updates available, the X2 Online field will show a notification symbol. Click on that symbol and follow
the instructions to upgrade the software.
RaySafe X2 User Manual
12

CHARGE THE BATTERY
To charge the base unit, connect it to a wall socket with the included power supply. The charging time is
approximately 4 hours.
The battery lasts for about one day of extensive usage, which means that it is recommendable to start your working
day with a fully charged unit.
The X2 system automatically enters power saving mode when idle for some minutes. If the system does not wake
up by radiation or the buttons on the front, press the power button.
TIP! The base unit will maintain the energy level when connected to a computer.
RaySafe X2 User Manual
13

USE THE FLEXI STAND
The flexi stand can be used in many different setups. Below are some examples.
RaySafe X2 User Manual
14

RaySafe X2 User Manual
15

SETTING: SCREEN BRIGHTNESS
Adjust the screen brightness by sliding the bar.
Reduce the brightness to prolong the base unit battery time.
RaySafe X2 User Manual
16

SETTING: SPEAKER VOLUME
0 % turns the speaker off and 100 % is max volume.
RaySafe X2 User Manual
17

SETTING: TIME AND DATE
Set time and date according to your local time. Measurements are automatically stored in the base unit, sorted by
time.
RaySafe X2 User Manual
18

FINAL DISPOSAL OF THE SYSTEM
Final disposal is when the user disposes of the product in such a way that it can no longer be used for its intended
purpose(s).
In the European Union (the WEEE directive), this label indicates that this product should not be disposed of with
household waste.
This product should be disposed of at an appropriate facility to enable recovery and recycling.
Unfors RaySafe supports users in:
Recovering reusable parts.
Recycling of useful materials by competent disposal companies.
Safe and effective disposal of product.
For advice and information, contact your Unfors RaySafe Service Organization first, or otherwise the manufacturer.
RaySafe X2 User Manual
19

REGULATORY INFORMATION
N28111
Unfors RaySafe K.K.
RaySafe X2 User Manual
20
Other manuals for x2
1
Table of contents
Other RaySafe Medical Equipment manuals