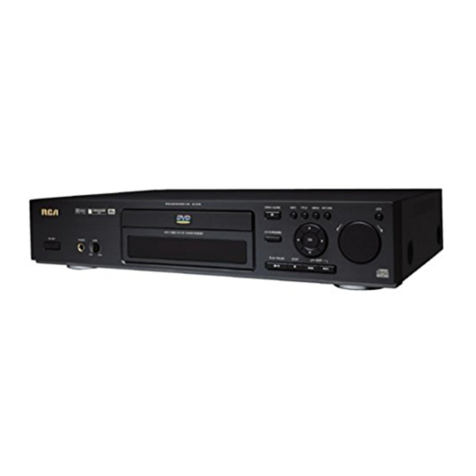
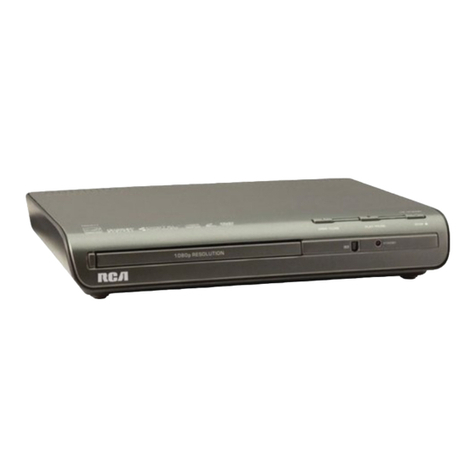
RCA HDV5000 User manual

RCA HD DVD Player — HDV5000
Before you Connect to the Internet
If you connect the player to the Internet via an always-on broadband connection, you can directly access spe-
cial HD DVD sites. For example, if an HD DVD site includes content such as movie trailers, you can watch
the content on the player via the Internet. You will also be able to download software updates for the player
when available.
You do not need to connect to a PC, you can connect directly from your HD DVD player.
Requirements
An always-on broadband internet connection is required to connect your HD DVD player to the Internet.
A 10 Base-T or 100 Base-TX LAN port is required for connection to this player. If your internet service does
not allow for such a connection, you will not be able to connect the player. If a cable LAN connection is not
available in your home, use an optional wireless LAN ethernet adapter to access a wireless LAN access point.
A DSL modem is required to use DSL service and a cable modem is required to use cable modem service. De-
pending on the access method of and subscriber agreement with your Internet Service Provider, you may not
be able to use the internet connection feature contained in this player or you may be limited to the number of
devices you can connect at the same time. (If your ISP limits subscription to one device, this player may not be
allowed to connect when a PC is already connected.)
Before using this feature, please read and understand the important information below.
• This always-on broadband internet connection requirement may change without advance notice.
All operations are not guaranteed.
• Thomson is not responsible for any malfunction of the player and/or the internet connection feature due
to communication errors/malfunctions with your broadband internet connection, or other connected
equipment.
• Thomson is not responsible for any trouble in your internet connection.
• The features of HD DVD discs made available through the Internet Connection feature are not created
or provided by Thomson, and Thomson is not responsible for their functionality or continued availability.
Some disc related material available by the Internet Connection may not be compatible with this player. If
you have questions about such content, please contact the producer of the disc.
• Some internet content may require a higher bandwidth connection.
• You do not need to connect to a PC to use the Internet.
• An HD DVD disc compatible with this feature (commercially available) is required. Not all HD DVD
discs are compatible.
• Even if the player is properly connected and configured, some internet content may not operate properly
because of internet congestion, the quality or bandwidth of your internet service, problems at the provider
of the content or compatibility issues.
• The communication features of this player comply with the Institute of Electrical and Electronic
Engineers (IEEE) 802.3.
• Some internet connection operations may not be possible due to certain restrictions set by the Internet
service provider (ISP) supplying your broadband Internet connection.
• Any fees charged by an ISP including, without limitation, connection charges are your responsibility.
• The use of a Router may not be allowed or its usage may be limited depending on the policies and restric-
tions of your ISP. For details, contact your ISP directly.
2
Connecting to the Internet
with an RJ 45 connector (not supplied )
Category 5/CATS or better

3
Internet Settings
DHCP setting
1. Press the SETUP button on the remote. The Setup menu appears.
2. Use the arrow buttons to highlight the Ethernet option, then press OK.
3. Use the arrow buttons to highlight the DHCP option, then press OK.
4. Set the DHCP option to On, then press OK.
5. Set the DNS option to On, then press OK.
6. Select Confirm, then press OK. Confirming starts.
7. If the setup is successful, an IP address appears. Press the OK button.
If the setup is not successful:
1. Set the DHCP option to Off then press OK.
2. Input the addresses into IP address, Subnet Mask and Gateway using the
number buttons.
Refer to the table on the next page.
3. Set the DNS option to Off then press OK.
4. Input the address into DNS Server.
5. Press OK. Confirming starts.
DHCP
DHCP
IP Address
Subnet Mask
Gateway
DNS
DNS Server
OK
On
Cancel
0. 0. 0. 0
0. 0. 0. 0
0. 0. 0. 0
0. 0. 0. 0
Confirm
Off
On Off
DHCP
DHCP
IP Address
Subnet Mask
Gateway
DNS
DNS Server
OK
On
Cancel
0. 0. 0. 0
0. 0. 0. 0
0. 0. 0. 0
0. 0. 0. 0
Confirm
Off
On Off
Skipped when
“DHCP” is set
to “On”.
Skipped when
“DHCP” is set
to “On”.
Proxy Setting
Proxy
Server
Port
User
Password
OK Cancel
a
************
On Off
a
0
Proxy setting
Use this setting only if your provider requires a proxy setting.
1. On the Ethernet menu, press the arrow buttons to select Proxy setting, then press OK.
2. Set the Proxy option to ON and press OK.
3. Use the arrow buttons to input information into the Server, Port, User and Password fields.
4. Select OK and press the OK button.
User Name and Password
1. On the Ethernet menu, use the arrow buttons to select the User Information option, then
press OK.
2. Select User and press OK.
3. Use the up/down arrow buttons to input letters/numbers. Use the right/left arrow buttons
to move to a new position. Press OK.
4. Select Password and press OK. Input your password using the arrow buttons as described
above. Press OK.
5. When your password is entered, Select OK and press the OK button.
User information
User
Password
OK Cancel
************
A

4
Clock Adjustment Setting
1. On the Ethernet menu, press the up/down buttons to select the NTP Server option, then press OK.
2. Select On or Off by pressing the up/down arrow buttons.
Refer to the table below.
3. Select OK then press the OK button.
Notes
Please contact the router manufacturer when the router DHCP feature is not operating properly.
The firmware in this player is updateable.
DHCP On* Network information will be automatically set.
Off Network information will be manually set.
IP Address This sets a different address within the same subnet of the
PC on your network.
e.g.: If the IP address of the PC is 192.168.1.10, set
192.168.1.15 (or some other unused address).
Subnet Mask This sets the subnet mask of the network environment that
will be connected.
e.g.: 255.255.255.0
Gateway This sets the gateway used by the player (e.g.; 192.168.11).
DNS This sets the DNS server to be used by the player.
e.g.; 192.168.1.1
Proxy Setting Off* This is set when your provider does not require proxy setting.
On Enter the proxy server address when your provider requires proxy setting. (Up to 63
single-byte alphanumeric characters or symbols)
Mac Address (Unable to
set)
Displays the MAC address of the player. It cannot be changed.
User
Information
User Set a user name and a password to prevent improper access. Select a password that
is unique and not known to or easily guessed by others. (Example of passwords to
avoid: your name or your family’s name, telephone number, birth date, street number
of address, and car license plate numbers, as well as repetition of the same number or
symbol.)
When the password is entered, the characters are displayed as “ ”. If you forget the
password, enter a new password.
Password
NTP Server On* The player automatically accesses an internet server to adjust its clock via the network
time protocol.
Off The player does not access an internet server to adjust its clock.
*indicates default setting
Information on Internet Settings

5
Starting the Software Update
After your HD DVD player is connected to the Internet, you can use this option to confirm the current version of software and to
download software updates and to confirm. Before you can use this function, the player needs to be connected to the Internet via an
always-on broadband connection. For details on connecting, go to the previous pages.
Note: Before you download a software update, an End User License Agreement will appear on-screen. You must agree with the terms and
conditions in order to download the update.
If there is no update available, a message appears and the process is canceled. Please check the support section of the RCA website for information
1. Press the SETUP button on the remote (the Setup menu appears).
2. Highlight General and press OK.
3. Highlight Maintenance and press OK.
4. Then highlight Update and press OK. Follow the instructions displayed on your screen.
5. Press the SETUP button to start the update procedure.
When the software update is finished, the disc is ejected and the unit turns off.
about software updates (including information on how to obtain updates on disc rather than using the Internet Connection feature of the player).
If you do not have the player connected to the Internet, go to the RCA customer support section of the website for details on how to
obtain updates on a disc, or if you don’t have Internet access, call RCA customer support.
Caution!
Do not unplug, turn off or use any other feature of the player during the download. The writing of the software
being downloaded will be halted and the player may no longer work properly. If the player stops working,
contact RCA Customer Support.
Other manuals for HDV5000
2
Table of contents
Other RCA DVD Player manuals

RCA
RCA DRC277A User manual

RCA
RCA DRC246N User manual

RCA
RCA DRC300i Quick start guide

RCA
RCA DRC300iH User manual

RCA
RCA DRC69705 - Dual Screen Portable DVD Player User manual

RCA
RCA SelectVision SJT 400 User manual

RCA
RCA DRC300N User manual

RCA
RCA RC6000P User manual

RCA
RCA DRC288SU User manual

RCA
RCA DRC608N User manual

RCA
RCA DRC8335 - DVD Recorder & VCR Combo User manual

RCA
RCA DRC288SU Instruction Manual

RCA
RCA DRC620N User manual

RCA
RCA DRC277A User manual

RCA
RCA DRC279RE User manual

RCA
RCA RC5215P User manual

RCA
RCA Scenium DRS700N User manual

RCA
RCA DRC015 User manual

RCA
RCA DRC288SU Manual

RCA
RCA DRC279BK Instruction Manual