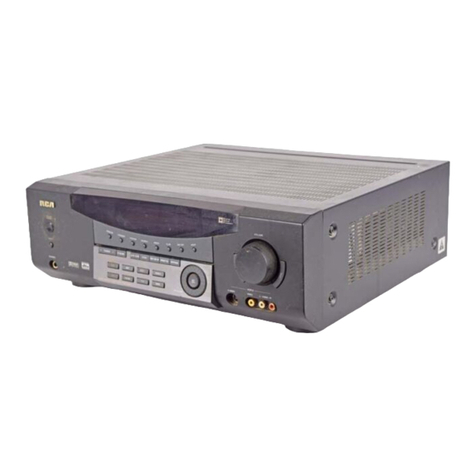
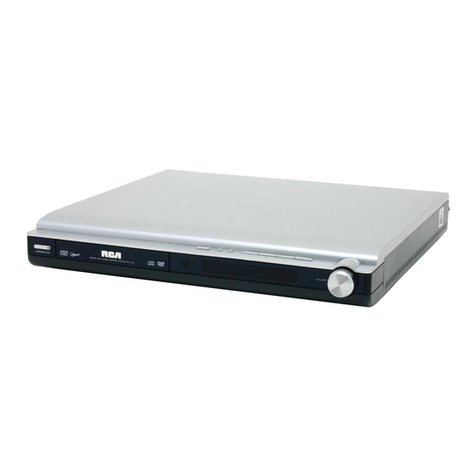
RCA RT2300 User manual

RCA
RT2300
RT2300R
RT2400
RT2400R

RT2300(R)/RT2400(R) rev 2 9/2/99 3:29 PM Page 4
This device generates and uses radio frequency (RF)energy, and if not installed and used properly, this
equipment may cause interference to radio and television reception.
This equipment has been type tested and found to comply with the specifications in Subpart Jof Part 15of
FCCRules. These rules are designed to provide reasonable protection against radio and television
interference in a residential installation. However, there is no guarantee that interference will not occur in
particular installations.
If this equipment does cause interference to radio or television reception (which you can determine by
turning the equipment off and on), try to correct the interference by one or more of the following measures:
• Reorient the receiving antenna (that is, the antenna for the radio or television
that is "receiving" the interference).
• Move the unit away from the equipment that is receiving interference.
• Plug the unit into adifferent wall outlet so that the unit and the equipment
receiving interference are on different branch circuits.
If these measures do not eliminate the interference, please consult your dealer or an experienced
radio/television technician for additional suggestions.
Also, the Federal Communications Commission has prepared a helpful booklet, "How ToIdentify and Resolve
Radio TV Interference Problems." This booklet isavailable from the U.S.Government Printing Office,
Washington, DC20402. Pleasespecify stock number 004-000-00345-4 when ordering copies.
ForYour Safety
The AC power plug ispolarized (one blade iswider than the other) and only fits into AC power outlets one
way. If the plug won't go into the outlet completely, turn the plug over and try to insert it the other way. If it
still won't fit, contact a qualified electrician to change the outlet, or use adifferent one. De net attempt to
bypass this safety feature.
CAUTION: TO PREVENT ELECTRIC SHOCK, MATCH WIDE BLADE OF PLUG TO WIDE SLOT,
FULLY INSERT.
ForYour Records
Inthe event that service should be required, you may need both the model number and the serial number. In
the space below, record the date and place of purchase, and the serial number:
Model No. RT23001RT2300RIRT24001RT2400R
Remote Control No. CRK76AD1
Date of Purchase
Placeof Purchase
Serial No.
Service Information
This product should be serviced only by those specially trained in appropriate servicing techniques. For
instructions on how to obtain service, refer to the warranty included in this Guide
1
WARNING : TO PREVENT FIRE
OR ELECTRICAL SHOCK HAZARD,
DO NOT EXPOSE THIS PRODUCT
TO RAIN OR MOISTURE.
AA
SEE MARKING ON BOTTOM/BACK OF PRODUCT
°',°,...............................................................................................................................................................................°"

RT2300(R)/RT2400(R) rev 2 9/2/99 3:29 PM Page 5
FCCInformation ................ 1
Getting Started ................. 3
Unpack the Receiver .................. 3
Inserting batteries into remote control ...... 3
Set up and Maintenance of the Receiver
....................................
Connecting to Audio.Visual
Components ......................... 4
Connecting the Antennas .............. 6
Connecting the speakers .............. 6
Subwoofers .............................. 6
Positioning your speakers ............. 7
Connecting for power ................. 8
Using Headphones .................... 8
Demo Mode .......................... 8
Restore to Factory Settings ............ 8
How to Operate your Receiver ..... 9
Receiver Controls ..................... 9
Your Remote Control ................. 10
The Built-in Radio .................... 11
Seek Tuning ............................. 11
Storing and Recalling Stations in Memory ...11
Using the Receiver to Play DVD ........ 12
Using the Receiver to Play CD ......... 12
Using the Receiver to Play Video Cassette
................................... 12
Using the Remote to Control additional
components ........................ 12
Advanced Sound Control ........ 13
Dolby Pro Logic and Dolby 3 Ster eo .... 13
Dolby Digital ........................ 13
Setting up the Speakers .............. 13
The Test Tone / Setup button .............. 13
Input IQ ............................ 14
Night Mode ......................... 14
Auto Detect ......................... 14
Demo Mode ......................... 14
Program Format Display .............. 14
Care and Maintenance .......... 15
Troubleshooting Tips ................. 15
Receiver/Tuner Operation ................. 15
Remote Control Operation ................ 15
General ................................ 15
Cleaning the Exterior ................ 15
Equipment Specifications ............. 15
Remote Codes ................. 16
Cable Codes ............................ 16
VCR Codes .............................. 16
TV Codes ............................... 17
Satellite Receivers ....................... 18
Audio (RCA/Dimensia only) ............... 18
Laserdisc Players ......................... 18
Index ........................ 19
USWarranty .................. 20
Canadian Warranty ............. 21
"o°o ............................................................................................................................................................................. o°°" 2
RT2300(R)/RT2400(R) rev 2 9/2/99 3:29 PM Page 6
Unpack the Receiver
Check that you received the following items with
the receiver:
• one receiver unit;
• one RCA Universal Remote Control
(CRK76AD1);
• one external FM Dipole antenna;
• one external AM loop antenna;
• one instruction book;
• one owner registration/survey card;
• and one safety leaflet.
• one pair of AA batteries;
• one audio cable (two wires) with red and
white RCAconnectors;
• one video cable (single wire) with yellow
RCAconnectors;
Inserting batteries into
remote control
Insert two AA(R6) batteries with the + and- on the
battery compartment. To usethe remote control, point
it directly at your receiver.
Set up and Maintenance of
the Receiver
• Providespacesfor sufficient ventilation as
indicated:
10cm
,_10 cm
IIIIIIIII IIIIIIIII IIIIIIIII IIIIIIIII IIIIIIIII
0
Do not connect to the AC power cords until
all of the connections are completed.
Do not useyour set immediately after transfer
from acold place to awarm place: risk of
condensation.
Do not expose your set to water projections and
excessively high temperatures.
After having disconnected your set, clean the case
with a soft cloth, or with a slightly humid chamois
leather. Never use strong solvents.

RT2300(R)/RT2400(R) rev 2 9/2/99 3:29 PM Page 7
Connecting to Audio.Visual
Components
This receiver allows you to connect to a large variety
of audio or video components.
Before you Connect
•Protectcomponentsfrom power surges.
•Connect all components before plugging any
power cordsinto the wall outlet.
• Always turn off the receiver and/or components
before you connect or disconnect any cables.
• Contact Consumer relations if you have questions
concerning the connections or components.
Note: If you purchase the receiver with the speaker
set ( i.e. RT2300, RT2400),please make sure the color-
coded pins match the color of the terminals in which
they are inserted. The connection cable plugs and
jacks are color-codes follows:
Speaker Terminals To ease speaker connections
the speaker cords and the terminals are color-coded
into: Red/Black (Main Speakers), Blue/Black (Center
Speakers) and Grey/Black (Rear Speakers). When
connecting the speakers, make sure the color of
speaker wires and terminals are matched.
RCA Phono Type T_erminals Red for the right (R)
channel. White for the left (L)channel. Yellow for the
video. Black for the subwoofer.
• Make sureall antennasand cablesare properly
grounded.
Protect your Components from
Overheating
• Do not block ventilation holes in any component.
Arrange the components sothat air can circulate
freely.
• Do not stack components directly on top of each
other.
• Allow adequate ventilation when placing your
components in a stand.
• Place an amplifier near the top shelf of the stand
so heating air rising from it will not flow around other
components. If you have asatellite receiver, you
should place it on the top shelf.
(continued on next page ->)
Positioning the Cables
Cables should be positioned correctly to avoid audio
hum or interference. A few suggestions below:
• Insert all cable plugs firmly into their jacks.
• Place audio/video cables to the sides of the
receiver's back panel instead of straight down the
middle after you connect the components.
• Try not to coil any power cables and keep them
away from the audio/video cables asmuch as possible.
%°°, ............................................................................................................................................................................. °'°" 4

RT2300(R)/RT2400(R) rev 2 9/2/99 3:29 PM Page 8
Tips:
1.If your CDplayer isequipped with digital opticaljacks, using
optical cableispreferred. What you need isjust one more optical
digital connecting cord(not supplied). Plug it in the digital input
jack of the receiver and you can enjoy better sound quality
brought to you by the optical cable.When optical cable isused,no
more analog cableisneeded.
2.If you haveavideo camera,video game machine, or an extra
VCRs,connect it to VCR2jack at the front of the receiver.
3.If you havea SATreceiver or DVD player,you can make useof an
optical digital connecting cord(not supplied) or coaxial digital
connecting cord (not supplied) to enjoy Dolby Digital sound
quality. One optical /coaxial cableisneeded for each SATreceiver /
DVDplayer.When optical cable isused,no more analog cable is
needed.
Note: The optical cablejack isfor either DVDor CD.If you have
plugged in the optical cable for DVD,usethe analog cable for CD,
or unplug the optical cablefrom DVDand plug it in CDwhen use.
4. If your video component hasaS-Videojack included, you can
make useof it to enjoy enhanced video quality byconnecting it to
the relevant S-Videojack at the rearside of the receiver.1video
cable isneeded for eachcomponent. When S-Videocableisused,
no more analog video cableisneeded.
Note: Before plugging in the optical cable or S-Videocable, make
sureto match the shapeof the plug andjack, or you won't beable
to plug in completely.
with Optical Cable
CD Player
I _ I
DVD
I I
with
Optical
To
AUDIO
OUT
with Coaxial Cable
To S-VIDEO OUT
To AUDIO OUT
AUDIO ,,
MONITOR _
OUT
[................................
To
VIDEO IN
To
VIDEO
OUT To
AUDIO
OUT
EO --o,
)
I
To VIDEO OUT
TOVIDEO IN (VCR)
To AUDIO OUT
To AUDIO IN (VCR)
To
S-VIDEO IN
DSS ]
ITo
S-VIDEO VIDEO
OUT OUT
VCR
oLNEOUT"1
To LINE IN
Tape Deck I (Tape Deck)
I"
°%°° ............................................................................................................................................................................... °,°"
_5

RT2300(R)/RT2400(R) rev 2 9/2/99 3:30 PM Page 9
©©
@o@1
o
o o
Antenna and Speaker
Wire Connection
Push Speaker terminal tab
down to insert wire.
Release tab to lock wire in
the terminal.
NOTE: Make sure the insulation
is completely removed from the
ends of the Antenna and
speaker wires at all connection
points,
SUB WOOFER MAiN SPEAKERS CENTER
SPEAKER
SURROUND SOUND SPEAKERS
iii<
iii<
iii<
iii<
ii!_i
%°°o ............................................................................................................................................................................. °°°'° 6

RT2300(R)/RT2400(R) rev 2 9/2/99 3:30 PM Page i0
Positioning your Speakers
Your system isequipped with Dolby Digital, which
enables you to reproduce sound effects asthey were
intended. However, the speakers must be properly
positioned and balanced.
In order to enjoy Dolby-enhanced sound quality, five
speakers are preferred: One center speaker, left and
right main speakers, rear left and right speakers, and
an optional subwoofer. However, if your front
speakers are small speakers, then a subwoofer is
essential or you won't be able to enjoy enhanced
basseffects. Below are a few suggestions for the set
up:
1.The two main speakers should be set between six
and ten feet apart. Putting them any closer or farther
apart may result in distorted sound.
2.Try to align center speaker and two main speakers,
or set the center speaker slightly behind the left and
right main speakers, otherwise the surround effect
may be distorted.
3.Aim the rear speakers directly at the two main
speakers, matching height to height. If the room is
sparsely decorated, slightly tilt the speakers down to
increase sound quality. If the room isdensely
decorated, face the speakers towards the rear wall at
the ceiling.
different speakers, and noise will be generated to
that particular speaker. You can change the levels of
different speakers by rotating the Multi Jog.
(For more information refer to section "The TestTone
/Setup button" in "Advanced Sound Control" on
page 13.)
7
_!il.iill
i!ii!iii_
i<!
J
Actually there are many more possible options.
Experiment repeatedly to find a right balance for
you.
You can balance the speakers by pressing the Test
Tone ISetup button on the receiver. After pressing
the button the display will toggle between levelsof
Dolby Digital
BB I DOLBY I Manufactured
DIGI T A L under license from
Dolby Laboratories.
"Dolby", "Pro Logic" and the double-D symbol
are trademarks of Dolby Laboratories.
Copyright 1992-1997 Dolby Laboratories, Inc.
All Rights Reserved.
%°°, .............................................................................................................................................................................. °°'°

RT2300(R)/RT2400(R) rev 2 9/2/99 3:30 PM Page ii
Connecting for power _
Make sure you connect all your other electronic components and the ,_
speakers before plugging your receiver into the outlet.
Plug the power cord in the wall outlet, matching the wide blade of the plug
with the wide slot in the outlet. Be sure to insert the plug completely.
Using Headphones
Tolisten privately through your audio system, usethe PHONESjack on the
receiver. However, make sure you turn down the volume before you put on
the headphones. Increase the volume to the desired level after headphones
are in place.
Derno Mode
Right after you plugged in the power, a demo message will appear in dis-
play. (For more information please refer to section "Demo Mode" in
"Advanced Sound Control" on page 14.)
Restore to Factory Settings
You can always restore all settings back to original state. When the receiver isin Standby
mode, press in turn
CONCERT _ OFF _ NIGHT _ ARENA _ CHURCH _THEATER
then you can restore everything like preset radio station frequencies, speaker settings,etc,
back to the first time you use it.
8

RT2300(R)/RT2400(R) rev 2 9/2/99 3:30 PM Page 12
f
DIGITAL I
L
°°°oo............................................................................................................................................................................... °°°°°
_g

RT2300(R)/RT2400(R) rev 2 9/2/99 3:30 PM Page 13
Your Remote Control
Please be sure you have inserted the batteries into the remote. (See
"Inserting batteries into remote control" on page 3.) You can test it
by pressing any button. If it works, the red LEDwill light. (_ DVD VCR2 AM,FM SAT.CABLE
&&°&&

RT2300(R)/RT2400(R) rev 2 9/2/99 3:30 PM Page 14

RT2300(R)/RT2400(R)rev2 9/2/99 3:30PMPage15
Using the Receiver to Play
DVD
After you haveconnectedyour DVDplayerand
receiver,you canpartly control the DVDplaythrough
your receiver:
1. Connect the DVD player with the receiver and
other components. (For more details please refer to
page 4.)
2. Turn on the receiver.
3. Select DVD.
4. Turn on DVD player and play DVD through your
DVD player.
5. Pressand rotate Multi Jog to select input signal -
Optical or Coaxial. (For more information refer to
item 6 "Multi Jog" on page 9.)
6. Set Night Mode if needed. (For more information
refer to section "Night Mode" on page 14.)
7. Change Volume.
Using the Receiver to Play CD
After you haveconnectedyour CDplayerand
receiver,you canpartly control the CDplaythrough
your receiver:
1. Connect the CD player with the receiver. (For more
details please refer to page 4.)
2. Turn on the receiver.
3. Select CD.
4. Turn on CDPlayer and play CDthrough your CD
player.
5. Pressand rotate Multi-Jog to select input signal -
Optical or Analog. (For more information refer to
item 6 "Multi Jog" on page 9.)
6. Change Volume.
7. Set Preset EQ if needed. (For more information
refer to item 11 "Preset EQ" on page 9.)
8. Set Surround Mode if needed. (For more
information refer to section "The Test Tone /Setup
button" on page 13.)
Using the Receiver to Play
Video Cassette
After you have connected your VCRand receiver, you
can partly control the VCR playback through your
receiver:
1. Connect the VCRwith the receiver. (For more
details please refer to page 4.)
2. Turn on the receiver.
3. Select VCR1.
4. Turn on VCRand start play video cassette on VCR.
5. Pressand rotate Multi-Jog to select input signal -
Analog only. (For more information refer to item 6
"Multi Jog" on page 9.)
6. Change Volume.
7. Set Preset EQif needed. (For more information
refer to item 11 "Preset EQ" on page 9.)
8. Set Surround Mode if needed. (For more
information refer to section "The TestTone /Setup
button" on page 13.)
Using the Remote to Control
additional components
You can set your remote to control components other
than the receiver itself (like CD, TV,DVD, TAPE,etc.).
What you need isto program your remote to control
them in advance:
1. Turn on the component to be programmed.
2. Look up the brand and corresponding code
number in the code list on page 16.
3. While keeping the component button (like VCR1,
VCR2,TV, DVD) on the remote pressed, enter the
code from the code list.
4. Releasethe component button, then pressPOWER
to see if the component responds to the remote
commands. If it doesn't work, try pressing the
component button, then POWER again.
5. Repeat steps 3 through 4 using the next code listed
for the brand of your component until the
component responds to the remote commands.
This remote may not operate all models of the brands shown.
Ifa battery isremoved from the battery compartment of the
remote control, all control key functions will return to
original, and you need to re-enter all previous programmed
codesagain.
The buttons on the remote operate may not work on all other
brands of components Experiment with the remote and your
components to see which buttons work If only a few
functions operate check to see if another code set will work
with more buttons
"°°, ............................................................................................................................................................................. oo°"
12

RT2300(R)/RT2400(R) rev 2 9/2/99 3:30 PM Page 16
This receiverisequipped with several built-in sound
enhancement systemto give you the sound quality you
haveonce dreamed of- but now comestrue:
Dolby Pro Logic and Dolby 3
Stereo
Thissurround systemreproduces theater-like surround
sound from Dolby-encoded software. The Pro Logic mode
usesthe built-in circuit to steerthe Left, Center, Right and
Surround channel audio signals.The 3 Stereo mode will
redirect the Surround signal to the front left and right
speakerswhen only the front and center speakersare
used.
Usethis mode to suityour speakersystem configuration
(suchassizeand number of speakers)andtype of
program (suchasVCR).
Dolby Digital
The Dolby Digital mode letsyou enjoy full digital
surround from software processedin the Dolby Digital
format. Dolby Digital provides better sound quality and
more powerful presencethan conventional Dolby
Surround.
When the soundtrack of a Dolby Digital movie was made,
all the sound effects are mixed down to sixseparate
channels of digital audio, and these sixchannels of
independent digital audio are pressedto a single stream
of digital data on your DVD.When you play it byyour
DVDplayer,the receiver decodesthis stream of digital
data backto sixaudio channels for playback.
Dolby Digital isoptimal for DVDand SAT.
Also, to makethe surround sound more effective and suit
the acoustic conditions in your listening room, you need
to delay the signal from someof the speakers.Such
channel delay compensatesfor center or surround
speakersthat arecloser to listening position than the
front speakers.Larger the difference in distance, larger
the delay time. Forexample, inDolby Digital environ-
ment, ifthe distancefrom your listening point to the cen-
ter/ surround speaker isequal to that to the front speaker,
set0 ms.
The TestTone/Setup button
You can make useof the TestTone /Setup button in
receiverto tell your receiver about your speakers,like
how large they are (speaker selection ) and in what
way you want to balance the speakers(channel delay ).
After you haveconnected to the speakers,you can
change the setup of the speakersby holding the TestTone
/Setup button for two seconds,then the display will show
_ which enables you to set the sizeof front speaker.
Pressingthe button momentarily while display still shows
_L_, the display will show in turn: center, surround,
subwoofer, and delay time. You can now setthe sizeor
delay time of the speakersbyrotating the Multi Jog.
Setting up the speakers
This receiversupports a wide range of speakers and
subwoofers. Foroptimal surround sound enjoyment, you
need to register the speaker selection settings of your
audio system.Ifyou buy this receiver with accompanied
speaker package (i.e. RT2300,RT2400)then this step has
been done for you. (Note: the sub-woofer can be pro-
grammed OFFonly when the main speakersare setto
"LRG".)
Note: Center Channel delay isapplicable in Dolby Digital
mode only, while Surround Channel Delayisapplicable in
Dolby ProLogic and Dolby Digital only.
You can alsoadjust the relative loudnessof the
individual speakersby TestTone /Setup button. InDolby
modes, pressTestTone/Setup button momentarily. A
short noise will be produced in the speakersone by one.
Thespeaker having the noise at that moment will be
shown in the display. You can listen to that speaker and
rotate the Multi-Jog to adjust the level.
"°°°° ............................................................................................................................................................................... °°°°
13

RT2300(R)/RT2400(R) rev 2 9/2/99 3:30 PM Page 17
InputIQ
One of the smartest feature of the receiver isthe ability to
pre-select the best surround mode for you once you
turn on the unit by pressing the Function Button
(like DVD,SAT,CD)directly. The default surround mode
for different components are astable below. If you
decide to change the surround mode, you can pressthe
Surround Button to change the mode you want.
Auto Detect
When a Dolby Digital component isinserted (like DVD)
the receiver will automatically detect the signal and shift
to Dolby Digital surround mode, andthe display will show
A._O_.
DVD STEREO*/ Dolby Digital* PROLOGIC
SAT PROLOGIC** /Dolby Digital** PRO LOGIC
VCR1 N/A PROLOGIC
VCR2 N/A PROLOGIC
TV N/A PROLOGIC
CD STEREO STEREO
TAPE N/A STEREO
TUNER N/A STEREO
If, at the time you press DVD button, a Dolby Digital DVD is playing, then the default surround mode will be Dolby Digital,
otherwise (like using DVD to play CD) then it will be Stereo.
** The default surround mode of SAT depends on the signal of individual programs.
Night Mode Program Format Display
Byusing Dynamic Range Compressiontechnology, you
can enjoy enhanced sound quality by Dolby Digital at
night without interrupting your roommates or your
neighbors. When you are watching a Dolby Digital
enabled component (DVD,SAT),you canactivate Night
Mode by pressing NIGHTbutton at the front of receiver,
and this mode will compressthe difference in volume
between normal voicesand sounds like explosion.There
are two modes(SOFT,SOFTER)for you to choosein terms
of the extend of compression.
Demo Mode
Once you plugged in the power, ademo messagewill be
displayed. Thedemo messagewill alsobe
displayed if you pressa function button (like CD) but
then leavethe unit without pressingany button for 30
seconds.Torestore to normal, pressthe Multi-Jog,
Standby /Power button or any function button.
When adigital source isplaying, the receiverwill
automatically switch to the proper surround mode and
indicateson the speaker iconson the right-hand sideof
display. (Seediagram.)
It isimportant to note, however, that not all Dolby
Digital sourcesare encoded
with the full complement of
five channels plus LFE*.
Speakericon showshow many
and which speakeryou have
enabled (See"Setting up the
speakers" on page 13.)and the
letter inside the speaker icon
showswhich channel ispresent
in the source information. Forexample, the diagram
shown meansyou have all the five speakersand sub-
woofer enabled and the digital sourcesyou played have
five channels plus LFEcomplemented.
* LFEstands for Low Frequency Effect. The indication "LFE" appears
if the digital source contains LFEinformation. In this case, the bass
signal will be delivered to the subwoofer, offering more dynamic
deep bass sound effects. If the letter is flashing, the signal iseither
too weak or just gone.
%'°. ............................................................................................................................................................................. °°°'°
14

RT2300(R)/RT2400(R) rev 2 9/2/99 3:30 PM Page 18
Troubleshooting Tips
Receiver/TunerOperation
STEREOindicator isoff.
• Adjust the antenna.
• The signal istoo weak. Connect an external
antenna.
• The signal is Mono. Severe hum or noise.
Remote Control Operation
The remote control does not operate the unit.
• Another function isselected on the remote.
Pressthe correct function button.
• No batteries installed. (Included with your
system) Install the batteries before attempt
attempting to operate the remote. Be sure to
match the + and - ends of each battery to the
symbols shown in the remote battery
compartment.
• The batteries are exhausted. Replace all
batteries.
• The remote is not pointed at the remote
control sensor on the main unit or there is
an obstacle between the remote and the
main unit.
• The remote control istoo far from the
main unit.
• Move closer.
General
No audio.
• Make sure the MUTE indicator on the front
panel isoff.
• Make sure the speakers are turned on.
• Check the connections.
• Check the power cord connection.
No audio from one channel.
• Adjust the balance control.
• Check the speaker wire connection
or connecting cable. Noise when the TV is
turned on.
• The TV istoo close to the audio system.
Specific instruments sound displaced.
• Check the connection between the receiver
and the speakers. The sound does not match the
video.
• Pressthe function button for the video source.
• Wrong digital signal input - pressthe Multi Jog
and rotate to choose the signal
Cleaning the Exterior
• Disconnect the system from AC power before
cleaning the exterior of the system with a
soft dust cloth, or with a slightly humid chamois
leather. Never use strong solvents.
EQUIPMENTSPECIFICATIONS:
AMPLIFIER SECTION:
All 5channels. Each 50W (for RT2300 and RT2300R)or
100W (for RT2400 and RT2400R) at 6 ohm.
0.9% THD @1kHz
Muting Attenuation: 65dB
Frequency Response: 40Hz to 20kHz +/-3dB
Signal to Noise Ratio: 65dB (Bypassmode)
VIDEO SECTION:
Input ( Sensitivity/Impedance ):lVp-p/75ohm
Output (Level/Impedance): lVp-p/75 ohm
Frequency Response: 10Hz to 6MHz at +/- 3dB
Signal to noise ratio: 40dB
Crosstalk @3.58MHz: 40dB
AM TUNER SECTION:
Frequency Response: 80Hz -2kHz +/-6dB
Usable Sensitivity: 800uV/m @SIN 20dB
Signal to Noise: 38dB
Image Ratio: 27dB @1000kHz
IF ReJection: 35dB
FM TUNER SECTION:
FrequencyResponse: 40Hz -15kHz +/-3dB
Quieting: 24dBu
Signal to Noise: 60dB(stereo)/ 65dB(mono)
Image Ratio: 40dB
iF ReJection: 50dB

RT2300(R)/RT2400(R) rev 2 9/2/99 3:30 PM Page 19
5002,5003,5004,5005,5006,5009,5053 2131
5008, 5009 2026
5008, 5009, 5010, 5011 2027
5008 2002, 2026
2003, 2004, 2005, 2007, 2008, 2111, 2112, 2113
5008 2021
5011 2013
5011 2009,2010
5012, 5013 2014
5014, 5015 2011
5016 2013
5017 2012,2025
5011 2014
5009 2013, 2014, 2015, 2016, 2017,
5018, 5019, 5049 2018,2019
2021,2022,2114
5003 2020,2110
5020, 5021, 5022, 5035, 5045 2062
5003 2027,2061
5002 2013, 2014, 2015, 2016, 2017,
5011 2018, 2019, 2027
5003, 5005, 5007, 5018, 5023, 2009
5024, 5046, 5053 2061
5025 2013,2014,2023,2061
5026 2000,2002,2009,2013,2016,
5002, 5027, 5028 2018,2021,2022,2024,2115
5002, 5027, 5028 2013
2015, 2017, 2019, 2025, 2026,
5002, 5016, 5029 2027,2028,2110
5048, 5052 2110
5026 2009,2010
5011, 5012, 5013, 5019, 5025, 2000
5030, 5031, 5032 2002,2026
5033, 5034 2014,2029
5026 2014
5047, 5049, 5052 2002, 2012, 2014, 2015, 2021, 2024, 2025, 2026,
5009, 5049 2029,2030,2032,2033,2034,2035,2036,2037,
5022, 5035 2038,2039,2040,2041,2042,2044,2045,2047,
5017 2065,2105, 2113,2116, 2117,2130
2011, 2023, 2048, 2049, 2050, 2051, 2052, 2118
5003 2021,2119
5026 2002, 2026
5014, 5034 2026
5006, 5036, 5037, 5038 2000,2001,2013,2021,2022,2053,2115,2120
5014, 5018 2009,2014, 2018,2054, 2121
5003 2026
5014 2026
5052 2009
5007, 5018, 5053 2061
5014, 5018 2011
5018 2002,2055, 2056,2057, 2107,
2111, 2120, 2122
5040 2023
5014 2021
5004, 5023, 5041 2021
5026 2009, 2010, 2011, 2013, 2014,
5018 2021,2022, 2055,2056, 2058,
5027 2059,2060,2107,2118
5008, 5009, 5011 2055,2056,2111
5002 2009, 2010, 2011, 2018, 2058,
5053 2111,2123
5008, 5009, 5010, 5011 2009,2010,2011,2016,2018,
5044 2058, 2111, 2123
5015, 5025, 5027, 5040 2061
2014,2021
5026, 5050, 5051 2002,2026
2061
2014
2021,2022,2062,2063,2104,
2108, 2124
2013
2009, 2010, 2011, 2016, 2018,
2021, 2058, 2062, 2064
2014
2021
2021
%°°°............................................................................................................................................................................. °°°°°
16

RT2300(R)/RT2400(R) rev 2 9/2/99 3:30 PM Page 20
2002, 2011, 2013, 2014, 2021, 2023, 2026, 2021, 2026, 2061
2104, 2131 2009, 2010, 2011, 2018, 2058, 2111
2029, 2065, 2113 2004, 2098, 2104, 2119, 2128
2013
2053
2055, 2056, 2107
2029, 2055, 2056, 2065, 2066, 2067, 2069,
2070, 2071, 2072, 2073, 2074, 2106, 2113,
2123 1172
2075,2131 1001,1173
2021, 2131 1174
2002,2013,2026 1016
2002, 2013, 2016, 2026, 2053, 2061 1002
2009, 2010, 2011, 2016, 2018, 2058, 2064, 1046
2076, 2078, 2079, 2111, 2123 1038
2014 1003,1038
2013 1004,1005,1006,1007,1175,1176
2021 1038
2014, 2131 1004
2096 1001,1083,1162
2035 1038
2021, 2022, 2109, 2125, 2126, 2127 1004
2016, 2055, 2056, 2107, 2120 1004,1006, 1008,1174
2018 1175
2021, 2022,2062, 2063 1002
2021, 2062, 2096, 2124 1009
2014 1004,1006,1008,1016,1038,1105,1171,
2010, 2055, 2080, 2081, 2123 1174,1177
2016, 2017, 2019, 2110 1176
2000, 2001 1004,1006
2061 1004,1006
2104 1012,1013,1014,1038,1176
2011 1038
2011 1038,1171
2021,2022,2125 1000,1004,1006,1015,1105,1162,1171
2000, 2001, 2003, 2013, 2021, 2055, 2056, 1038
2082, 2083, 2084, 2085, 2086, 2087, 2088, 1004, 1005,1006, 1016, 1017, 1018, 1127,
2089, 2090, 2091, 2107, 2115, 2120, 2125 1171
2002, 2011, 2013, 2014, 2021, 2022, 2023, 1004,1006, 1171
2026, 2029, 2049, 2050, 2096, 2131 1000
2014 1004,1151
2014 1178
2128 1002,1176
2104 1003,1004,1006,1019,1022
2005, 2013, 2015, 2033, 2053, 2112 1004,1006, 1012,1014, 1023,1024,
2104, 2131 1025,1026, 1027,1028, 1029,1030,
2010, 2092, 2111, 2123 1031,1032, 1033,1034, 1035,1036, 1037,
2011, 2013, 2023 1038, 1039, 1041, 1042, 1043, 1044, 1046,
2012, 2015, 2025, 2032, 2035, 2038, 2065, 1047,1123, 1124,1162, 1171,1176, 1177,
2093,2116 1179,1191
2011, 2014, 2021, 2023, 2048, 2049, 2050, 1004, 1006
2051,2055,2056,2107,2118 1048,1049,1050,1051,1162,1180
2002, 2017, 2029, 2094, 2095, 2096, 2131 1046
2004, 2056, 2061, 2098 1038,1046
2013 1038
2002,2131 1000,1003,1004,1006,1022,1052,1054,
2021, 2061, 2128 1055,1087, 1164,1165, 1166,1167, 1168,
2002, 2004, 2098, 2099, 2119, 2128 1181
2021, 2107 1004,1151
2002, 2021, 2022, 2026, 2062, 2063, 2065, 1004, 1005, 1006, 1012, 1019, 1056, 1057,
2124 1058,1155,1156,1171,1172
2002,2026 1038,1046,1171
2002, 2011 1004,1006
2014 1038
2058, 2111 1004,1006, 1012,1013, 1059,1060, 1061,
2002, 2026, 2058, 2085, 2111 1135,1136, 1137,1138, 1139,1140, 1141,
2021, 2109 1142,1143, 1144,1145, 1146,1148, 1150,
2002, 2014, 2021, 2026, 2100, 2129 1179
2013, 2024, 2047 1038
2015, 2049, 2051, 2055, 2065, 2093, 2116 1062
2013, 2014 1174
2013 1062
2009, 2010, 2015, 2016 1002
2010 1000,1004,1005,1006,1008,1022,1052,
2009, 2010, 2015, 2016, 2113 1054, 1058, 1063, 1064, 1072, 1087, 1105,
2013 1128,1171,1172,1181
2002, 2013, 2014, 2015, 2021, 2023, 2026, 1004,1006
2029, 2055, 2056, 2061, 2096, 2101, 2102, 1012, 1013, 1054, 1060, 1065, 1066, 1067,
2103,2107,2116,2131 1089,1157,1158,1159,1182
%°°°°°.............................................................................................................................................................................. °°°°°
17

RT2300(R)/RT2400(R) rev 2 9/2/99 3:30 PM Page 21
1002,1004,1006
1175
1004,1006,1019
1068,1069,1174,1183
1038, 1070,1171, 1176,1177
1062
1083
1004, 1006
1000,1006,1049,1062,1071,1072,1073,
1162,1181
1004, 1006,1008, 1019,1062, 1068,1069,
1074, 1075,1076, 1077,1088, 1089,1130,
1131,1132,1133,1134,1183,1184
1083
1062
1004,1006,1062,1078
1006,1059
1176
1001,1006,1082,1083,1162
1004,1005,1006,1019,1022,1051,1079,
1080,1082
1054,1151,1171,1172,1181
1052
1004,1005,1006,1019,1022,1051,1079,
1080, 1081,1082, 1082,1083, 1125
1083
1003,1173
1004,1005,1006,1105,1176,1178
1038, 1178
1084
1006, 1071,1072, 1185
1003, 1004,1005, 1006,1089
1006, 1016
1016
1038
1185
1095,1173
1035, 1191
1003,1054,1062,1170
1003,1004,1005,1006,1008,1012,1019,
1062,1068,1069,1074,1075,1077,1183,
1184
1003,1004,1008,1012,1019,1062,1068,
1069, 1074,1075, 1076,1086, 1087,1088,
1089
1004,1171
1004, 1006, 1090, 1091, 1092, 1179, 1185
1004,1005,1006,1016,1171
1105
1054
1000, 1181
1004,1006,1012,1093,1175
1151
1004
1003,1054,1070,1094
1000,1004,1006,1012,1038,1049,1095,
1162,1171,1172
1000,1003,1004,1005,1006,1007,1019,
1096,1098,1099,1100,1101,1102,1103,
1129, 1179,1181, 1187,1188, 1190
1176
1151
1004,1006,1171,1172,1175
1004,1005,1006,1012,1015,1019,1104,
1105, 1106,1171, 1172
1171
1191
1004, 1048,1049, 1050,1080, 1107,1108,
1162,1169,1180,1189
1006
1004,1006,1012,1024,1035,1038,1046
1000,1004,1006,1013,1019,1046,1048,
1049,1050,1051,1066,1071,1072,1109,
1110,1162,1180,1181,1189
1004, 1006,1012, 1029,1095, 1111,1112,
1113,1122,1171,1173
1004
1001,1083,1115
1008
1176
1002
1004, 1006, 1008, 1038, 1046
1189
1004,1038
1038
1174
1002
1004,1006,1008,1019,1062,1068,1069,
1074,1075,1076,1077,1088,1116,1161,
1183,1184
1033,1038, 1189
1173
1003,1178
1054
1004,1006, 1054
1004,1005,1006,1008,1012,1013,1016,
1038,1046, 1076,1082, 1083,1105,1170,
1171
1117
1004,1006
1049,1071,1072,1089,1105,1109,1117,
1118,1160,1162
1171
1052,1087
1066,1182
1004,1005,1006
1174
1000,1001,1004,1005,1006,1019,1024,
1033,1046,1052,1062,1069,1074,1075,
1076,1083, 1087,1088, 1095,1119,1120,
1184
1004,1005,1006,1019
1004, 1083, 1151, 1152, 1153, 1154
5056, 5057
5058, 5059
5000, 5001
5060, 5061, 5062
ER
5075
5076
5000, 5001
5000, 5001
5063
5072
5064
5065
5066
5067
5068
5073
5069
only)
4OO3
4004
4005
4007
4006
2001
2001
%°°, ............................................................................................................................................................................. °°°'°
18

RT2300(R)/RT2400(R) rev 2 9/2/99 3:30 PM Page 22
A CD button 9, 10
SAT button 9
Accessories included 3 DVD button 9, 10
AdJustment buttons 10 SAT.CABLE button 10
AM antenna (see Antenna) 6 TAPE button 9, 10
AM.FM button (see Function buttons) 9, 10 TV button 9, 10
Antenna VCR 1 button 9, 10
AM antenna 6 VCR 2 button 9, 10
FM antenna 6
ARENA button (see DSPmode) 9, 10
Audio codes 18 I__
11J
Auto Detect 14
B
Basic controls of the remote 10
Batteries 3
Brightness of display 9
GUIDE.RDM.PTY button 10
l{
Headphones (see Phones) 8
I
CINPUT.SEEK button 10
Care and maintenance 15 Input IQ 14
CD button (see Function buttons) 9, 10
Center Channel Delay 13
Cleaning the exterior 15
Channel buttons (CH+,CH-) 10
CHURCHbutton (see DSPmode) 9, 10
CONCERTbutton (see DSPmode) 9, 10
Connecting the Antennas 6
Connecting components
CD 4
SAT 4
DVD 4
Monitor 4
TV4
Tape Deck 4
VCR 4
Connecting the speakers 6
Connecting the subwoofer 6
LEVELbutton 9, 10
Low Frequency Effect (LFE) 14
N
MENU button 10
Multi Jog 9
MUTE button 10
N
Number buttons 10
Night Mode 14
B O
Demo Mode 8, 14
DIGITAL button 10
Digital camera 9
Digital Input select (see Multi Jog) 9
Digital Sound Processor (DSP)Mode 9, 10
DIM selection 9
Display 9
Dolby 3 Stereo 10, 13
Dolby Digital 10, 13
Dolby Pro Logic 10, 13
DSPmode 9, 10
SAT button (see Function
buttons) 9
DVD button (see Function
buttons) 9, 10
E
Equipment specifications 15
F
Family game machines 9
FCCInformation 1
FM antenna (see Antenna) 6
FORWARD button (see Operation buttons) 10
Function buttons
AM.FM button 9, 10
ON/OFF button 10
Operation buttons 10
FORWARD button 10
PAUSEbutton 10
PLAYbutton 10
RECORDbutton 10
REVERSEbutton 10
STOP button 10
Operate your DVD using the Receiver 12
Output level of speakers (see Sound Control)
9
P
R SCAN button 9
PAUSEbutton (see Operation buttons) 10
Phones 9
PLAY button (see Operation buttons) 10
POWER/STANDBY button 7, 8
Preset EQ 9
Preset stations
playing 11
setting 11
PROGRAM button 9
Program Format Display 14
Programming the remote 12
R
RECORDbutton (see Operation buttons) 10
Remote Control
programming 12
Remote control buttons 10
REVERSEbutton (see Operation buttons) 10
$
SVideo Input 9
SAT.CABLEbutton (see Function buttons) 10
Second VCR 9
Seek Tuning 11
Sound Control 9
Speaker terminals, matching 6
Speakers, connecting 6
Speakers, positioning 7
Specifications,equipment 15
Stations
preset 9
recalling 11
storing in memory 11
storing in memory 9, 10
STOPbutton (see Operation buttons) 10
Storing stations in memory 10
Subwoofer, connecting 6
SURROUND button 9, 10
Surround channel delay 13
Surround sound control 10
T
TAPE button (see Function buttons) 7, 8
TESTTONE/SETUP button 13
THEATERbutton (see DSPmode) 9, 10
Troubleshooting tips 15
Tuning Buttons 9
Tuning the receiver 11
TV button (see Function buttons) 9, 10
V
VCR1button (see Function buttons) 7, 8
VCR2button (see Function buttons) 7, 8
VCR2jack 9
ventilation 3
VOL buttons (see Volume buttons) 10
Volume buttons 10
Volume knob (see Sound Control) 9
%°°° ............................................................................................................................................................................... °o°°°
19
Other manuals for RT2300
2
This manual suits for next models
3
Table of contents
Other RCA Receiver manuals

RCA
RCA AR-88.LF User manual

RCA
RCA RW2110 User manual

RCA
RCA RT2360 User manual

RCA
RCA RT-2400 User manual

RCA
RCA RP-6150 User manual

RCA
RCA RT2300 User manual

RCA
RCA RT2500R User manual

RCA
RCA RT2500 - Dolby Digital Home Theater System Assembly instructions

RCA
RCA Digital Satellite Receiver User manual

RCA
RCA DSS1 User manual