RCA C29400 User manual

USER’S
GUIDE
C29400
M29400
C O L O R T V
It is important to read this manual before
operating this unit for the first time.


WARNING
RISK OF ELECTRIC SHOCK
DO NOT OPEN
TO REDUCE THE RISK OF ELECTRIC SHOCK, DO
NOT REMOVE COVER (OR BACK). NO USER
SERVICEABLE PARTS INSIDE. REFER SERVICING
TO QUALIFIED SERVICE PERSONNEL.
This symbol indicates
“dangerous voltage” inside
the product that presents a
risk of electric shock or
personal injury.
This symbol indicates
important instructions
accompanying the
product.
Important Information
i
WARNING
To reduce the risk of fire or
shock hazard, do not expose
this TV to rain or moisture.
Refer to the identification/rating label located on the back panel of your
product for its proper operating voltage.
FCC Regulations state that unauthorized changes or modifications to this
equipment may void the user’s authority to operate it.
If fixed (non-moving) images are left on the screen for long periods, they
may be permanently imprinted on the screen. Such images include network
logos, phone numbers, and video games. This damage is not covered by
your warranty. Extended viewing of channels displaying these images
should be avoided.
Cable TV Installer: This reminder is provided to call your attention to
Article 820-40 of the National Electrical Code which provides guidelines for
proper grounding and, in particular, specifies that the cable ground shall be
connected to the grounding system of the building as close to the point of
cable entry as practical.

Table of Contents
1
Important Information Warning _____________________________________________________________________ i
Quick Guide to Your TV Startup ____________________________________________________________________ 2-3
Hook up, Plug in TV, Put Batteries in the Remote,
Turn on the TV, Place Channels into Memory, Set the Time
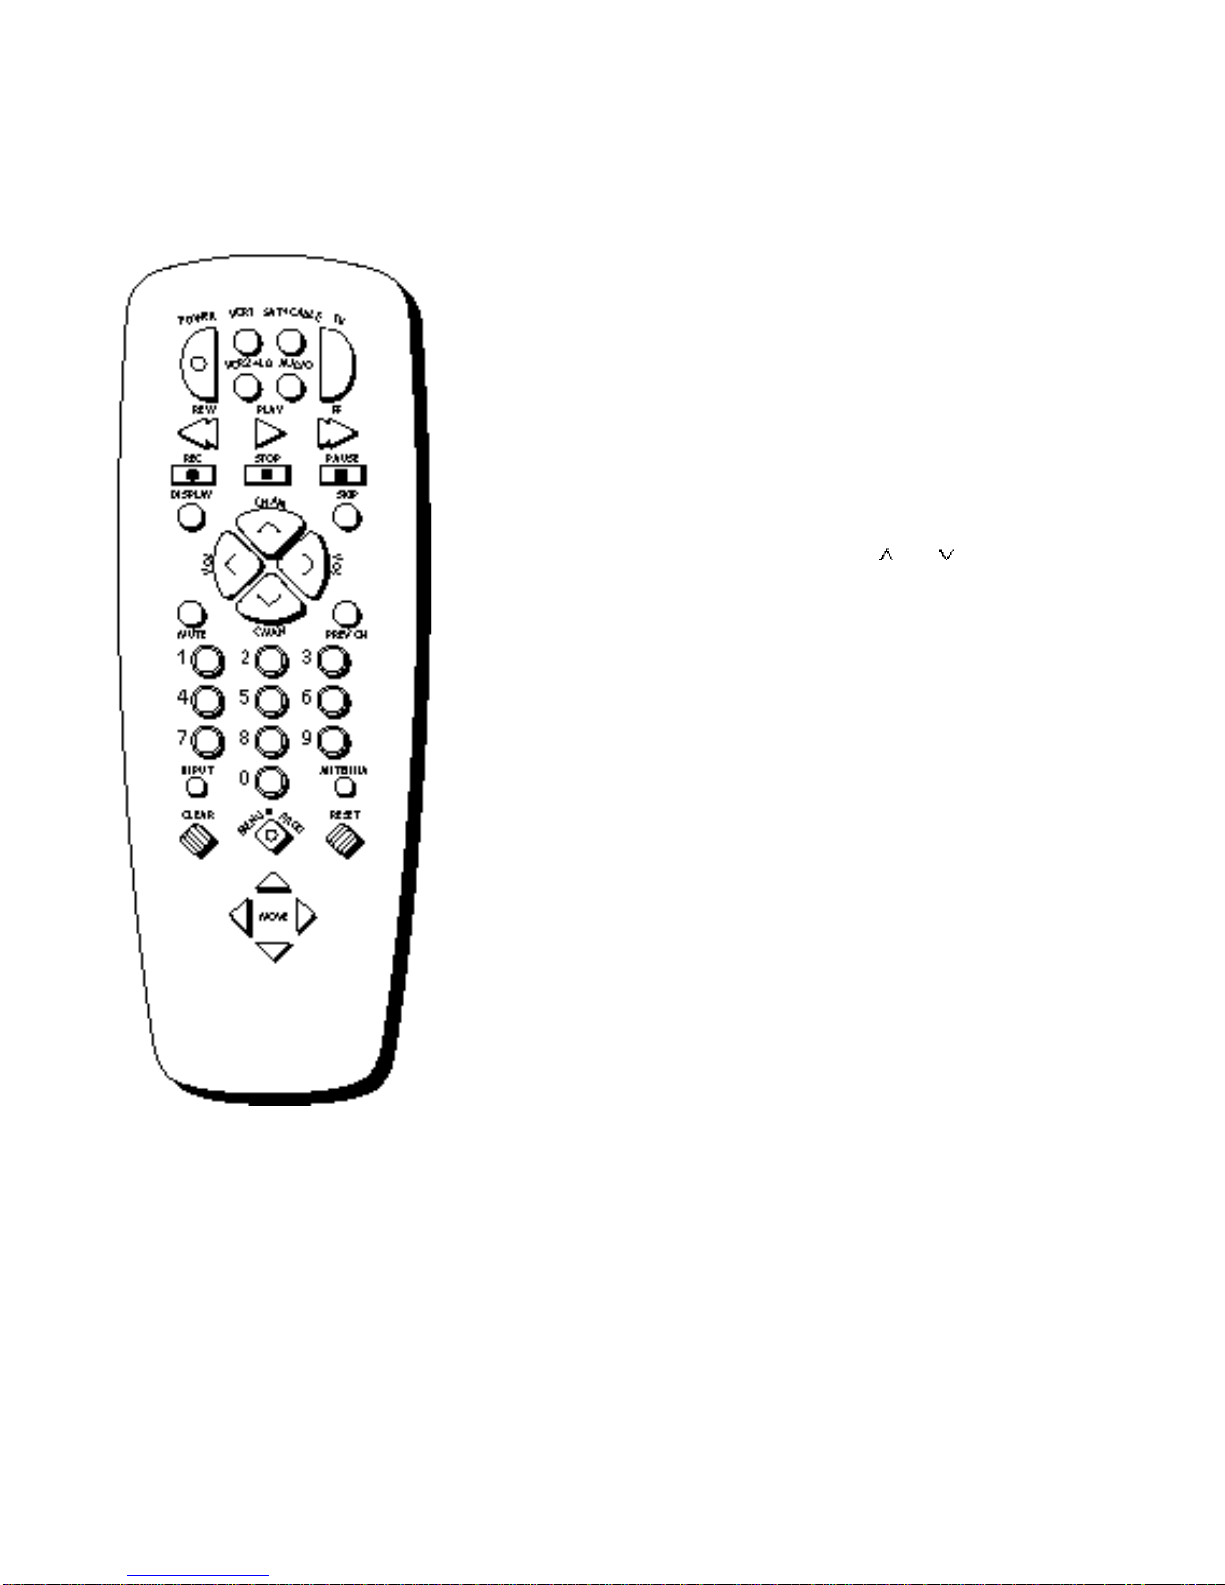
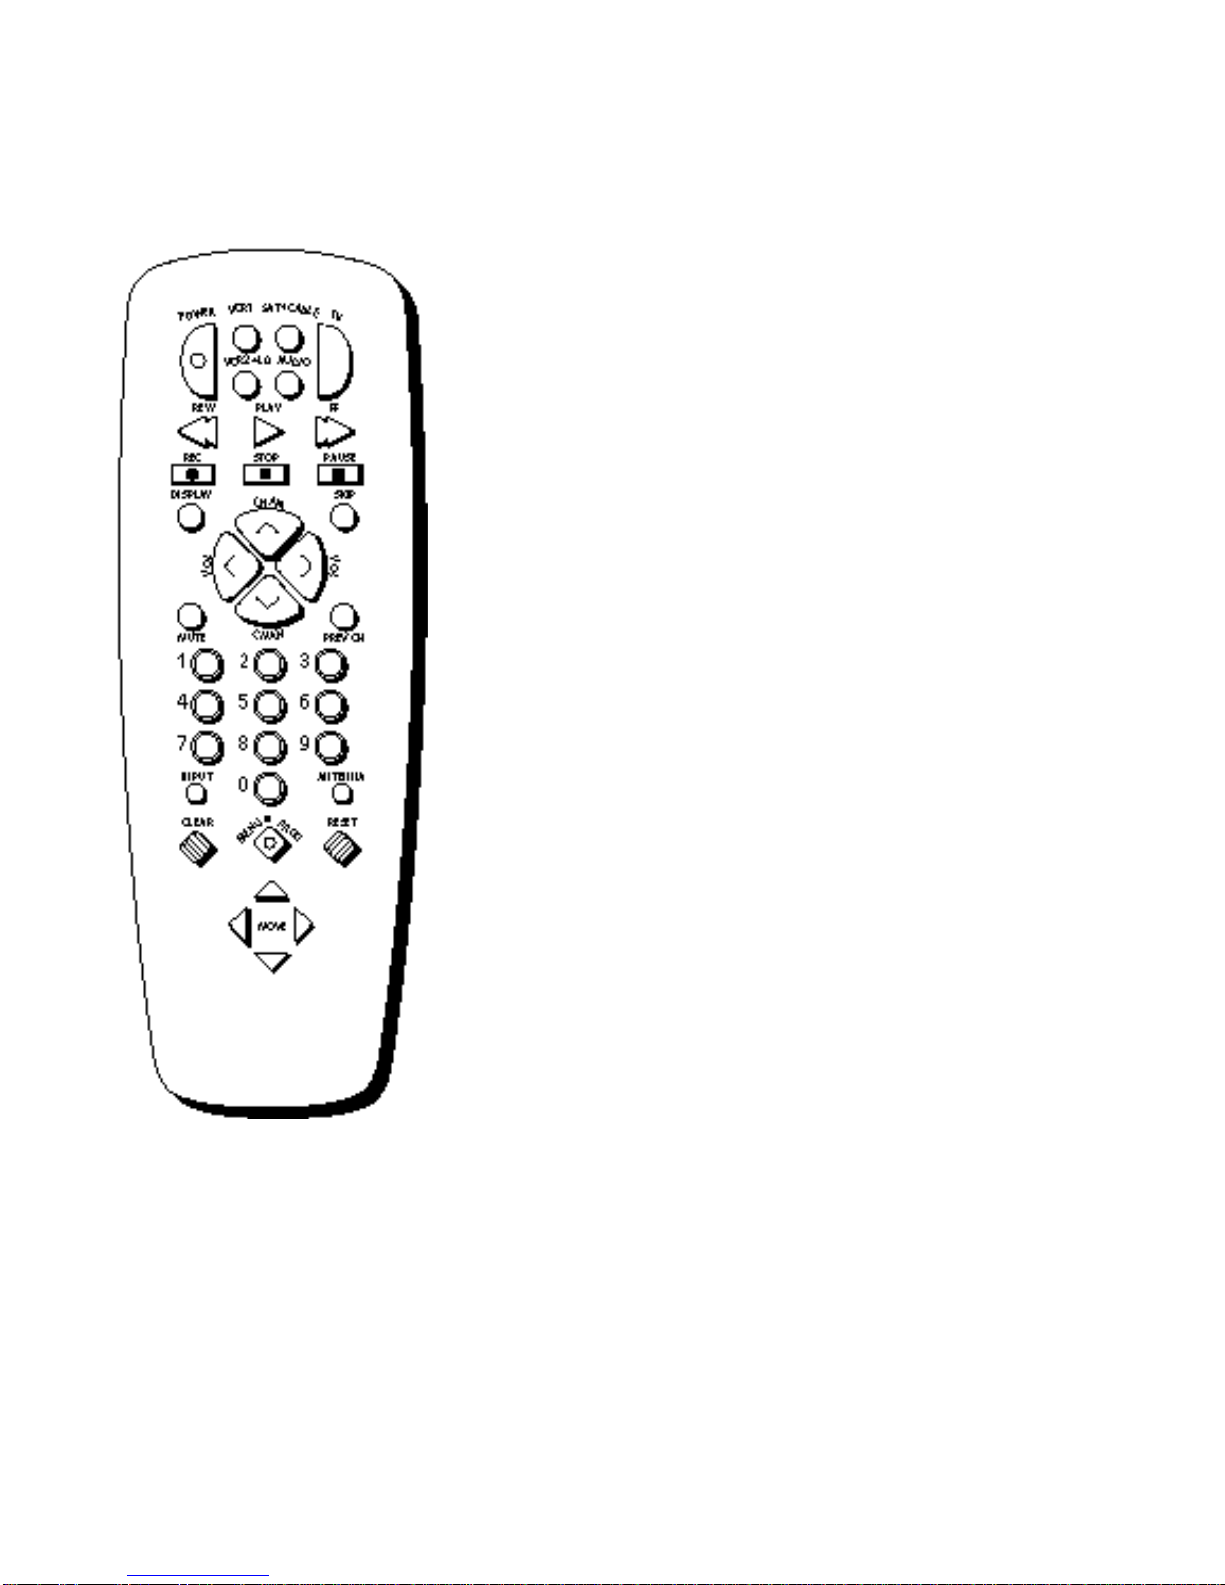
Basic Tour of the Remote ____________________________________________ 4
Basic Button Layout and Functions
Menu Basics ______________________________________________________________ 5
Colors, Menu Buttons, Moving through the Menus
Using Your TV and Remote With Remote Buttons ______________________________________________ 6-7
With VCRs ____________________________________________________________ 8-10
With a Satellite Receiver ___________________________________________ 11
With a Cable Box _________________________________________________ 12-13
With a Laserdisc Player ____________________________________________ 14
With Audio Equipment ____________________________________________ 15
Adjusting Your TV Overall Picture _________________________________________________________ 16
Picture Settings ________________________________________________________ 17
Color, Tint, Brightness, Sharpness, Autocolor, Picture Reset
Sound Settings ____________________________________________________ 18-19
Stereo, Expanded Stereo, SAP, Tone, Speakers
Using Advanced Features Placing Channels in Memory/Autoprogram ____________ 20
Adding and Deleting Channels in Memory ________________21
Naming the Channels ______________________________________________ 22
Setting the Sleep Timer _____________________________________________ 23
Setting the Alarm Clock ___________________________________________ 24
Selecting a Language _______________________________________________ 25
Watching Closed Captioning ____________________________________ 26
Setting Your TV for Antenna or Cable _______________________ 27
References Front Panel Buttons __________________________________________________ 30
Displays on the Screen _____________________________________________ 31
Trouble Checks ____________________________________________________ 32-33

Quick Guide to Your TV
Startup
2
For Model M29400:
Plug the cord into the outlet,
matching the wide and the small
end of the plug with the outlet.
2. Plug in the TV
1. Hook up your TV
Details are in the Connections
Guide.
Hook up any antennas, cables or
other equipment to your TV before
you follow the steps below.
The steps below will get your TV connected and ready for watching.
For more details, see the page numbers listed.
3. Put Batteries in the Remote A. Pull off the cover of the battery
compartment.
B. Place the batteries, matching
the +and –end of each battery
in the compartment.
C. Replace the cover.
For Model C29400:
A. Plug cord into adapter as shown at
the left.
B. Plug the adapter into the outlet,
matching the prongs with the outlet.
CAUTION: Choose the location for your TV carefully. Take precautions that the stand or other furniture on
which the TV is placed is properly located (see Important Safeguards sheet) and of adequate size and
strength to prevent the TV from accidentally being tipped over, pushed off, or pulled off. This could cause
damage to the TV and/or personal injury.

Quick Guide to Your TV
Startup
3
A. Press MENU•PROG until the
Alarm menu is selected. This
menu is green.
B. The Clock is automatically
highlighted the first time you
set it. If it is not, press MOVE H
(down) to highlight it.
C. Press MOVE Fto set the hour.
D. Press MOVE Eto set the
minutes.
A. Press MENU•PROG until the
Setup menu is selected. This
menu is white.
B. Press MOVE Eto start placing
channels in the TV’s memory.
C. Wait until TV has cycled through
all the channels and returns to
original channel.
6. Set the Time
5. Place all available
channels in memory
(Autoprogram)
Details for adding and deleting
channels are on page 21.
Press TV on the remote.
OR
Press POWER on the TV.
4.Turn on the TV
12:21 AM 13
Controls Alarm Adjust Setup
Alarm: Off
Alarm Channel: 07
On Time: Disabled
Off Time: Disabled
Clock: Use –/+ to set time.
13
Controls Alarm Adjust Setup
English Français Español
Autoprogram
Label: 13 Clear
Channel Memory: 13 Stored
Cable/Air: Cable

Quick Guide to Your TV
Basic Tour of the Remote
4
Turns the TV on.
Sets the remote to control the TV.
Operates TV when remote is set to
control the TV.
Operates the TV and advanced
features.
TV Power Button
Volume and Channel Controls
Details are on page 6.
Basic information about your remote is shown below. This will give you a
general idea of how your remote works. For more details, see pages 6–15.
Controls components such as a
VCR, laserdisc player, audio
equipment, satellite receiver and a
cable box.
Changes the menus and features
on the screen.
Component Buttons
Details are on pages 8–15.
Menu Buttons
See next page for details.

Yellow
Quick Guide to Your TV
Menu Basics
5
Colors
Menu Buttons
These buttons are used with the
TV’s menus to adjust the features.
You can use the menu buttons on
the remote or the front of the TV.
Press MENU•PROG repeatedly to
see each of the four menu colors.
Each menu has a different color
background as shown at the left.
Green Light
Blue White
General information about using the on-screen menu system is shown
below. Details on using the remote buttons are on pages 6-7. Many menu items
are explained in detail in Using the Advanced Features starting on page 20.
Moving through the Menus
Controls Alarm Adjust Setup
English Français Español
Autoprogram
Label: 13 Clear
Channel Memory: 13 Stored
Cable/Air: Cable
Controls Alarm Adjust Setup
English Français Español
Autoprogram
Label: 13 Clear
Channel Memory: 13 Stored
Cable/Air: Cable
1. Press MENU•PROG on the
remote or MENU on the front
panel to move from menu to
menu.
2. Press MOVE or on the
remote or CHANNEL up/down
on the front panel to move up
and down through the features
in the menu.
3. Press MOVE Fand Eon the
remote or VOLUME + or –on
the front panel to move left and
right on the menu lines.

Using Your TV and Remote
With Remote Buttons
6
POWER
Turns off the TV.
Turns off compatible VCRs.
Turns on a component after a
component button is pressed.
AUDIO, VCR, VCR2•LD,
SAT•CABLE, TV
Sets the remote to control the
component. VCR2•LD can only be
programmed for one component:
either a VCR or a Laserdisc Player.
See Using the Remote with a VCR,
Cable Box, Laserdisc Player and Audio
equipment on pages 8–15.
TV
Turns on the TV.
Shows the displays on the screen.
Sets the remote to control the TV.
See Using the Remote with a VCR,
Cable Box, Laserdisc Player and Audio
equipment on pages 8–15.
REW (Rewind)
Rewinds a tape or laserdisc.
Searches backward while tape or
laserdisc is playing.
PLAY
Plays tape or laserdisc.
FF (Fast Forward)
Fast forwards a tape or laserdisc.
Searches forward while tape or
laserdisc is playing.
REC (Record)
Starts recording onto tape.
STOP
Stops tape or laserdisc.
PAUSE
Pauses tape or laserdisc.
DISPLAY
Shows displays on the screen.
Clears menus from the screen.
SKIP (Commercial Skip)
Allows you to scan other chan-
nels during commercials.
Each press adds 30 seconds. TV
switches back to original channel
when time runs out. Press
CLEAR to cancel SKIP.
CHAN and
(Channel up and down)
Scans up and down through
channels in the TV’s memory.
Moves through channels
in VCR’s memory.
VOL < and >
(Volume down and up)
Raises and lowers sound.
MUTE
Switches the TV sound on or off.
PREV CH (Previous Channel)
Changes back and forth between
two channels.
Select a channel and then select
another. Press PREV CH to
switch between the two channels.

Using Your TV and Remote
With Remote Buttons
7
Number Buttons (0-9)
Selects any channel number.
Two numbers must be pressed for
each channel. Press 0 and 6 for
channel 6. For three digit chan-
nels, press and hold 1 until 1--
appears on the screen. Then press
the other two numbers.
INPUT
Switches between the TV channels
and
Video 00.
ANTENNA (ANT A•B)
Used as TV/VCR button when
remote is set to control the VCR.
CLEAR
Clears menus and displays from
the screen.
Clears items from VCR timer
programs and VCR’s clock.
MENU•PROG (Program)
Shows menus on the screen and
moves from menu to menu.
Sets VCR clock and programs
timer on VCR.
RESET
Returns the picture adjustments to
the original settings.
MOVE Fand E(left and right)
Moves left and right on a menu
line. See Menu Basics on page 5.
Changes a feature setting.
MOVE G and H(up and down)
Moves up and down menus. See
Menu Basics on page 5.

Using Your TV and Remote
With VCRs: Programming the Remote
Refer to the Connection Book or the VCR’s owners manual to hook up your VCRs.
The remote may need to be programmed for your VCR. This remote may
not operate all models of brands listed below. Use the codes below or on the
sheet packed in with your remote.
2.Program the remote for
your VCRs
1.Test the remote A.Press VCR1 or VCR2 to turn
the VCR on.
B.Press the VCR buttons shown
at the left. If your VCR does
not work, program VCR1 or
VCR2 with a VCR code from
the list below.
A. Point the remote at the VCR
and hold VCR1.
B. Enter the code for your brand
from the code list below.
C. Release VCR1.
D. Press POWER. If nothing
happens, try pressing VCR1
and then POWER.
E. Repeat A–D with another code
if the first one does not work or
if a second VCR is connected.
VCR Codes
Aiwa.................................................15
Akai........................................03,22,23
Audio Dynamics........................14,16
Broksonic.........................................10
Canon...............................................08
Capehart...........................................01
Citizen..............................................09
Craig............................................07,12
Curtis Mathes........................00,08,15
Daewoo............................................13
dbx...............................................14,16
Dimensia..........................................00
Dynatech..........................................15
Emerson...09,10,13,15,20,23,24,34,41
Fisher............................02,12,18,19,43
Funai.................................................15
GE .................................00,07,08,32,37
Goldstar.......................................09,14
Harman Kardon..............................14
Hitachi...............................05,15,35,36
Instant Replay.................................08
JCL....................................................08
JCPenney.......02,05,07,08,14,16,30,35
JVC.....................................02,14,16,30
Kenwood...........................02,14,16,30
Lloyd ................................................15
Magnavox...................................08,29
Marantz...................02,08,14,16,29,30
Marta................................................09
MEI...................................................08
Memorex...........................08,09,12,15
MGA............................................04,27
Minolta........................................05,35
Mitsubishi....................04,05,27,35,40
Montgomery Ward.........................06
MTC.............................................07,15
Multitech...........................07,15,31,32
NEC...................................02,14,16,30
Panasonic.........................................08
Pentax..........................................05,35
Philco...........................................08,29
Philips..........................................08,29
Pioneer...................................05,16,33
ProScan.............................................00
Quartz...............................................02
Quasar..............................................08
RCA....................00,05,07,08,28,35,37
Realistic.........02,06,08,09,12,15,19,43
Samsung.......................07,13,22,32,42
Sansui...............................................16
Sanyo..........................................02,12
Scott.......................................04,13,41
Sears.............02,05,09,12,18,19,35,43
Sharp.....................................06,24,39
Shintom ................................17,26,31
Sony.......................................17,26,38
Sylvania................................08,15,29
Symphonic................................02,15
Tashiko...........................................09
Tatung.............................................30
Teac............................................15,30
Technics..........................................08
Teknika............................08,09,15,21
Toshiba.................................05,13,19
Totevision..................................07,09
Unitech...........................................07
Vector Research........................14,16
Victor ..............................................16
Video Concepts........................14,16
Videosonic......................................07
Wards..................................................
............05,06,07,08,12,13,15,25,31,35
Yamaha............................02,14,16,30
Zenith.........................................11,17

Using Your TV and Remote
With VCRs: Setting the VCR1 Channel
The VCR 1 Channel works with the VCR1 button on the remote. If the
VCR 1 Channel is set, pressing VCR1 selects the channel to see the VCR
picture. The VCR 1 Channel setting depends on which diagram you have
used from the Connection Guide. If you want to turn this feature off, set
the VCR 1 Channel to Disable. Refer to the chart below for your setting.
A.Press TV to set the remote to
control the TV.
B. Press MENU•PROG to select the
Setup menu. This menu is
white.
A.Press MOVE H(down) to
highlight the VCR 1 Channel.
B. Press Eto highlight the channel.
A.Enter channel 00, 03, or 04.
Choose your setting from the
chart below. Press CHANNEL
down until “Disabled” is
displayed to turn the feature off.
1. Select the Setup Menu
2. Highlight VCR1 Channel
3. Enter channel number
13
Controls Alarm Adjust Setup
English Français Español
Autoprogram
Label: 13 Clear
Channel Memory: 13 Stored
Cable/Air: Cable
13
Controls Alarm Adjust Setup
English Français Español
Autoprogram
Label: 13 Clear
Channel Memory: 13 Stored
Cable/Air: Cable
13
Controls Alarm Adjust Setup
English Français Español
Autoprogram
Label: 13 Clear
Channel Memory: 13 Stored
Cable/Air: Cable
Diagram used from the
Connection Guide:
1B, 1C, 2B, 2C, 3B, 3C, 4C, 5C
4B, 5B
Set VCR1 Channel to:
00
3 or 4 (same as 3/4 switch)
VCR 1 Channel: 03
VCR 1 Channel: 00

A. Press VCR1 or VCR2 to set the
remote to control the VCR.
B. Press POWER.
A. Press VCR1 or VCR2 to set the
remote to control the VCR.
B. Tune the VCR to the channel
you want to record using
CHANNEL up and down or
pressing two number buttons.
C. Press RECORD to start
recording.
D. Press TV/VCR on the VCR.
E. Press TV to set the remote to
control the TV.
F. Press CHANNEL up or down to
change channels on the TV.
G. To see the channel you are
recording, tune the TV back to
channel 00.
Using Your TV and Remote
With VCRs: Basic Operation
10
A.Press channel 00 on the TV to
see what the VCR is doing.
B. Press VCR1 or VCR2 to set the
remote to control the VCR.
C. Press POWER to turn on the
VCR if it did not turn on when
you pressed VCR1 or VCR2.
A. Turn on VCR.
B. Insert a tape in the VCR.
C. Press PLAY to start the tape
playing.
D. Press STOP when you are
finished.
E. Press REW to rewind the tape.
Watch a tape in your VCR
If the remote operates your VCR, this page and the next will show you
how to use it for basic functions. See page 7 for more details on buttons used
with your VCR.
Turn on the VCR
Turn off the VCR
Record one TV program
and watch another

11
Using Your TV and Remote
With a Satellite Receiver: Basic Operation
A. Press SAT•CABLE to set the
remote to control the satellite
receiver.
B. Press POWER to turn on the
receiver if it did not turn on
when you pressed SAT•CABLE.
A. Press SAT•CABLE to set the
remote to control the satellite
receiver.
B. Press POWER to turn off the
receiver.
You may also be able to use the TV’s remote with RCA satellite receivers.
Refer to your Satellite Receiver owner’s manual to hook up your Satellite
Receiver. The remote may need to be programmed for other brands of
satellite receivers, but may not operate all models of the brands listed
below. Use the codes below or on the sheet packed in with your remote.
Follow the instructions below for basic operation of your receiver. You
may also want to experiment with other buttons on the remote to see if
they work with your receiver.
Turn off the Satellite
Receiver
Program the remote for your
Satellite Receiver A. Point the remote at the satellite
receiver and hold SAT•CABLE.
B. Enter the code for your brand
from the code list below.
C. Release SAT•CABLE.
D. Press POWER. If nothing
happens, try pressing
SAT•CABLE and then POWER.
Turn on the Satellite
Receiver
Chaparral..........................80,81
Cheyenne...............................81
Drake.................................82,83
DSS..........................................00
GE............................................00
General Instruments...92,93,94
ProScan...................................00
RCA.........................................00
Realistic..................................84
Sierra I,II,III............................81
STS1.........................................85
STS2.........................................86
STS3.........................................87
STS4.........................................88
Toshiba...................................89
Uniden....................................90
Video Cipher II......................91
Satellite Receiver Codes

Using Your TV and Remote
With a Cable Box: Programming and Basic Operation
12
Refer to the Connection Book or contact your cable company to hook up your cable
box. If you have a cable box with its own remote, then you may also be able
to use the TV’s remote with your cable box. This remote may not operate
all models of brands listed below. Use the codes below or on the sheet packed in
with your remote.
Program the remote for your
cable box A.Point the remote at the cable
box and hold SAT•CABLE.
B. Enter the code numbers for
your brand from the list below.
C. Release SAT•CABLE.
D.Press POWER to turn it on.
If nothing happens, try
pressing SAT•CABLE and
then POWER.
E. Repeat A-D with another code
if the first one does not work.
A.Tune TV to channel 02, 03, 04,
05, or 06--the cable box channel.
B. Point remote at the cable box
and press SAT•CABLE.
C. Press POWER to turn it on.
D.Press CHANNEL up or down to
change channels on the cable
box.
A. Press SAT•CABLE.
B. Press POWER to turn it off.
Basic Operation:
Turn on the Cable Box
Turn off the Cable Box
ABC..............................................22,46
Anvision.......................................07,08
Cablestar......................................07,08
Eagle..................................................08
Eastern International.......................02
General Instrument.............................
....................04,05,15,23,24,25,30,36,46
Hamlin...............................12,13,34,48
Hitachi.....................................37,43,46
Jerrold....................................................
..........04,05,15,23,24,25,30,36,45,46,47
MACOM......................................37,43
Magnavox.............................................
..........07,08,19,21,26,28,29,32,33,40,41
NSC...................................................09
Oak..........................................01,16,38
Oak Sigma........................................16
Panasonic................................03,27,39
Philips...................................................
..........07,08,19,21,26,28,29,32,33,40,41
Pioneer....................................18,20,44
Randtek........................................07,08
RCA..............................................00,27
Regal.............................................12,13
Regency........................................02,33
Samsung...........................................44
Scientific Atlanta....................03,22,35
Signature...........................................46
Sprucer..............................................27
Starcom.............................................46
Sylvania.............................................11
Teknika.............................................06
Texscan.........................................10,11
Tocom.................................17,21,49,50
Unika.......................................31,32,41
Viewstar................................................
..........07,08,19,21,26,28,29,32,33,40,41
Warner Amex...................................44
Zenith...........................................14,42
Cable Box Codes

Using Your TV and Remote
With a Cable Box: Setting the Cable Channel
13
The Cable Channel works with SAT•CABLE on the remote. If the Cable
Channel is set, pressing SAT•CABLE selects the channel to see cable
channels. The Cable Channel setting depends on which channel your
cable box must be on to see cable channels. The channels usually used
are 02, 03, 04, 05 or 06. Consult your cable company for more information.
A.Press TV to set the remote to
control the TV.
B. Press MENU•PROG to select the
Setup menu. This menu is
white.
A.Press MOVE H(down) to move
down the menu until Cable
Channel is highlighted.
B. Press Eto underline the
channel.
A.Enter the number for your cable
box, either 02,03,04,05 or 06.
Press CHANNEL down until
“Disabled” is displayed to turn
this feature off.
1. Select the Setup menu
2. Highlight Cable Channel
3. Enter channel number
VCR 1 Channel: 00
Cable Channel: 02
13
Controls Alarm Adjust Setup
English Français Español
Autoprogram
Label: 13 Clear
Channel Memory: 13 Stored
Cable/Air: Cable
VCR 1 Channel: 00
Cable Channel: 02
13
Controls Alarm Adjust Setup
English Français Español
Autoprogram
Label: 13 Clear
Channel Memory: 13 Stored
Cable/Air: Cable
VCR 1 Channel: 00
Cable Channel: 03
13
Controls Alarm Adjust Setup
English Français Español
Autoprogram
Label: 13 Clear
Channel Memory: 13 Stored
Cable/Air: Cable

Using Your TV and Remote
With a Laserdisc Player: Programming and Basic Operation
14
Refer to your Laserdisc Player owner’s manual to hook up your Laserdisc Player.
The remote may need to be programmed for your laserdisc player. This
remote may not operate all models of brands listed below. Use the codes below
or on the sheet packed in with your remote.
A.Tune TV to channel 00, 03, or 04.
B. Point the remote at the laserdisc
player and press VCR2•LD.
C. Press POWER to turn it on.
D.Use the buttons on the remote
that relate to laserdisc player
functions. Not all buttons high-
lighted may work with your
laserdisc player.
E. Press POWER to turn it off.
Program the remote for
your Laserdisc Player A.Point the remote at the laserdisc
player and hold VCR2•LD.
B. Enter the code for your brand
from the code list below.
C. Release VCR2•LD.
D.Press POWER. If nothing
happens, try pressing VCR2•LD
and then POWER.
Basic Operation
Pioneer........................33
ProScan.......................33
RCA.............................33
Laserdisc Player Codes

Using Your TV and Remote
With Audio Equipment: Programming and Basic Operation
15
Basic Operation
Program the remote for
audio equipment
A. Point the remote at the audio
equipment and hold AUDIO.
B. Enter the code from the
code list.
C. Release AUDIO.
D. Press POWER to turn it on. If
nothing happens, try pressing
AUDIO and then POWER.
E. Repeat A–D with another code
if the first one does not work.
A. Point the remote at the audio
equipment and press AUDIO.
B. Press POWER to turn it on.
C. Use the buttons on the
remote that relate to audio
functions. Not all buttons
highlighted may work with
your equipment.
D. Turn the audio equipment off
using the audio component’s
power off button.
RCA/ Dimensia
AM/FM...........................03
CD....................................07
Tape.................................06
Phono..............................05
Aux..................................04
Audio Codes
Refer to the Connection Book or your Audio equipment owner’s manual to hook
up your audio equipment. Your remote controls only RCA audio equipment
such as a radio, CD player, tape player, turntable, or amplifier. The
remote may need to be programmed for your equipment. This remote
may not operate all models of brands listed below. Use the codes below or
on the sheet packed in with your remote.

Adjusting Your TV
Overall Picture
16
Follow the steps below to lighten or darken the overall picture without
changing the color levels.
1. Select the Controls Menu Press MENU•PROG to select
the Controls menu. This menu
is yellow.
Press MOVE H(down) to
highlight Picture.
Press MOVE E(right) to lighten
the picture.
OR
Press MOVE F(left) to darken
the picture.
2. Highlight Picture
3. Use MOVE Eand Fto
adjust the Picture
Controls Alarm Adjust Setup
Sleep Timer: -:--
Closed Captioning: Off
Picture -..... I.....+
Stereo: On
SAP: Off
Controls Alarm Adjust Setup
Sleep Timer: -:--
Closed Captioning: Off
Picture -..... I.....+
Stereo: On
SAP: Off
Picture -....... I...+

Adjusting Your TV
Picture Settings
1. Select the Adjust Menu Press MENU•PROG repeatedly to
select the Adjust menu. This menu
is light blue.
Press MOVE H(down) to
highlight the picture item you
want to adjust.
Press MOVE Eor Fto adjust
each item.
2. Highlight item to change
3. Use MOVE Eor Fto
adjust each item
Follow the steps below to change the picture on the screen to your
personal setting. The chart at the bottom of the page explains your options.
Color
Tint
Bright (Brightness)
Sharp (Sharpness)
Autocolor
Picture Reset
Press MOVE Eto:
Increase color richness
Give red tint to skin color
Add more light to dark parts of
the picture
Show cleaner, clearer images
Turn on to keep Color and Tint in
proper balance each time you
change channels
Reset the picture back to the
factory settings
Press MOVE Fto:
Decrease color to black and white
Give green tint to skin color
Add more dark to light parts of
the picture
Make picture more smooth
Turn off for manual adjustment
of Color and Tint
Reset the picture back to the
factory settings
Picture Reset
17
Controls Alarm Adjust Setup
Color -.....I.....+
Tint G.....I.....R
Bright -.....I.....+
Sharp -.....I.....+
Autocolor: On
Controls Alarm Adjust Setup
Color -.....I.....+
Tint G.....I.....R
Bright -.....I.....+
Sharp -.....I.....+
Autocolor: On
This manual suits for next models
1
Table of contents
Other RCA TV manuals