Tablle of CoHteHts
Chapter 1: Connections _ Setup
Things to Consider Before You Connect ....... 2
Demo Pin ..............................................................2
Put Batteries in the Remote .......................... 2
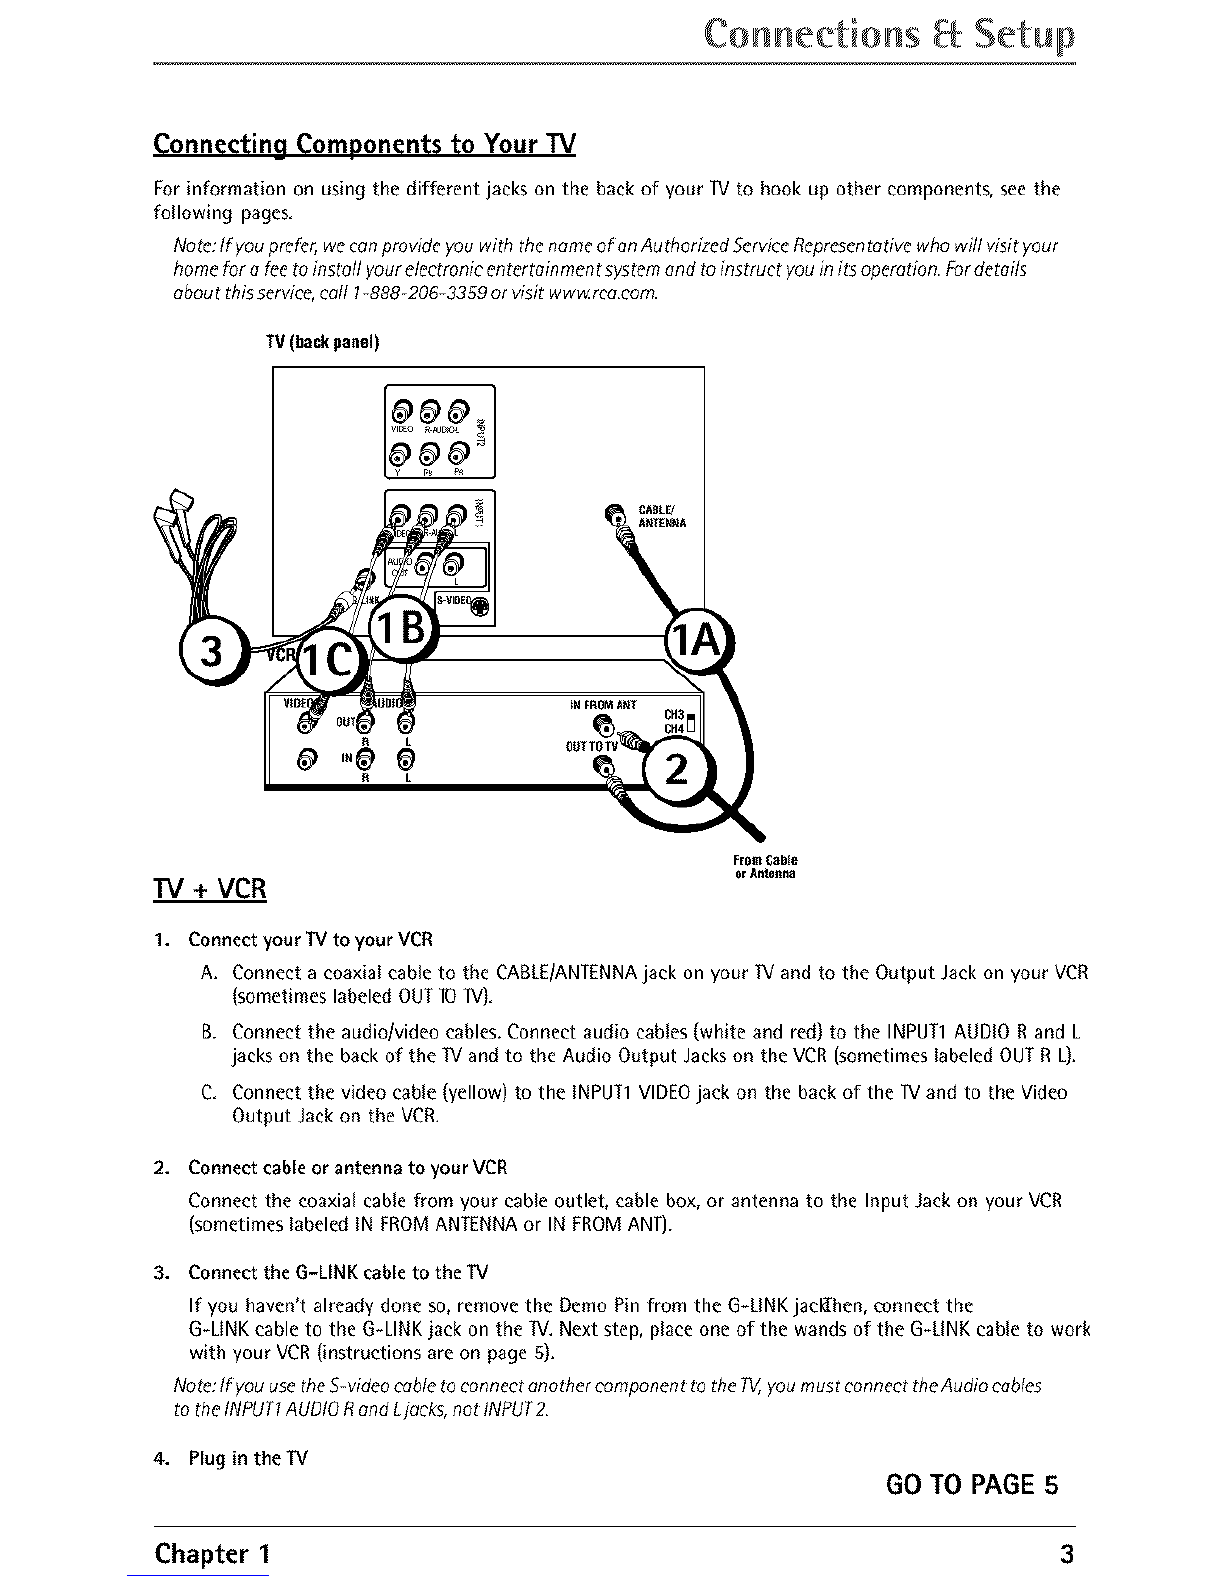
Connecting Components to Your TV ............. 3
_[V+ VCR ...............................................................3
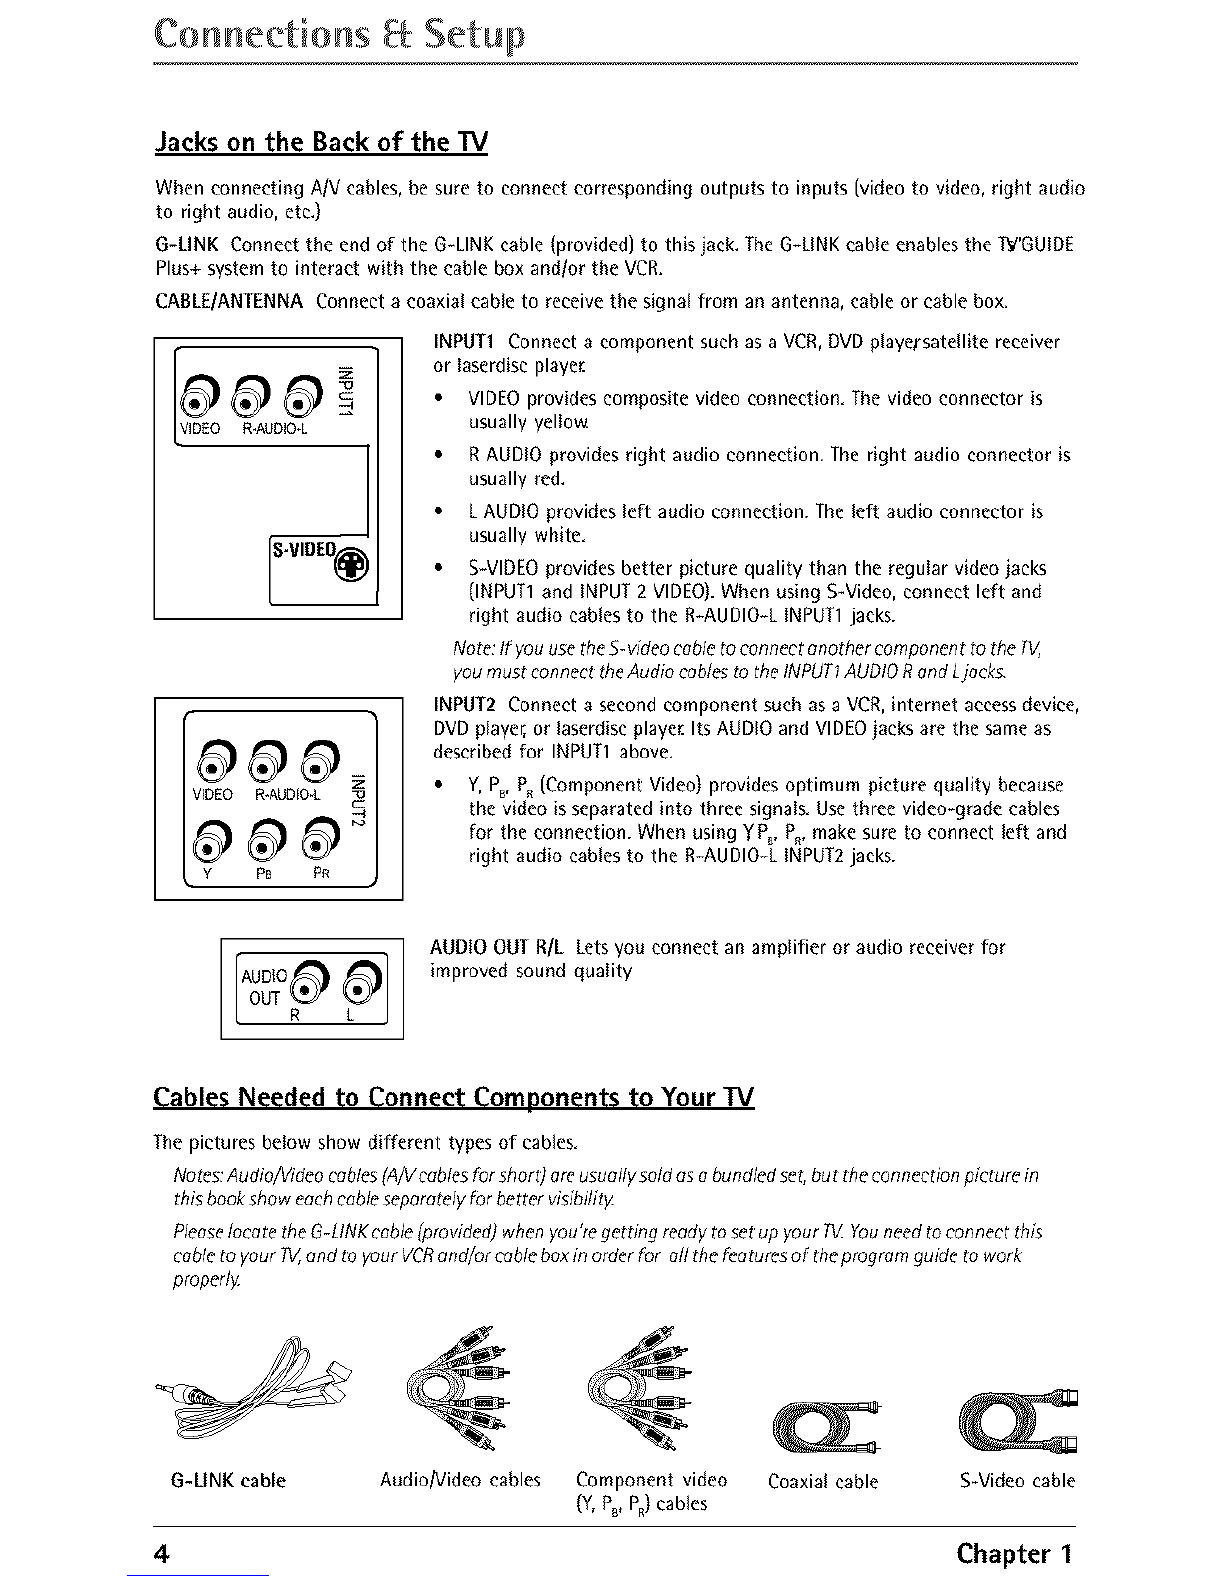
Jacks on the Back of the W...........................4
Cables Needed to Coneect Components to..
Your IV .............................................................4
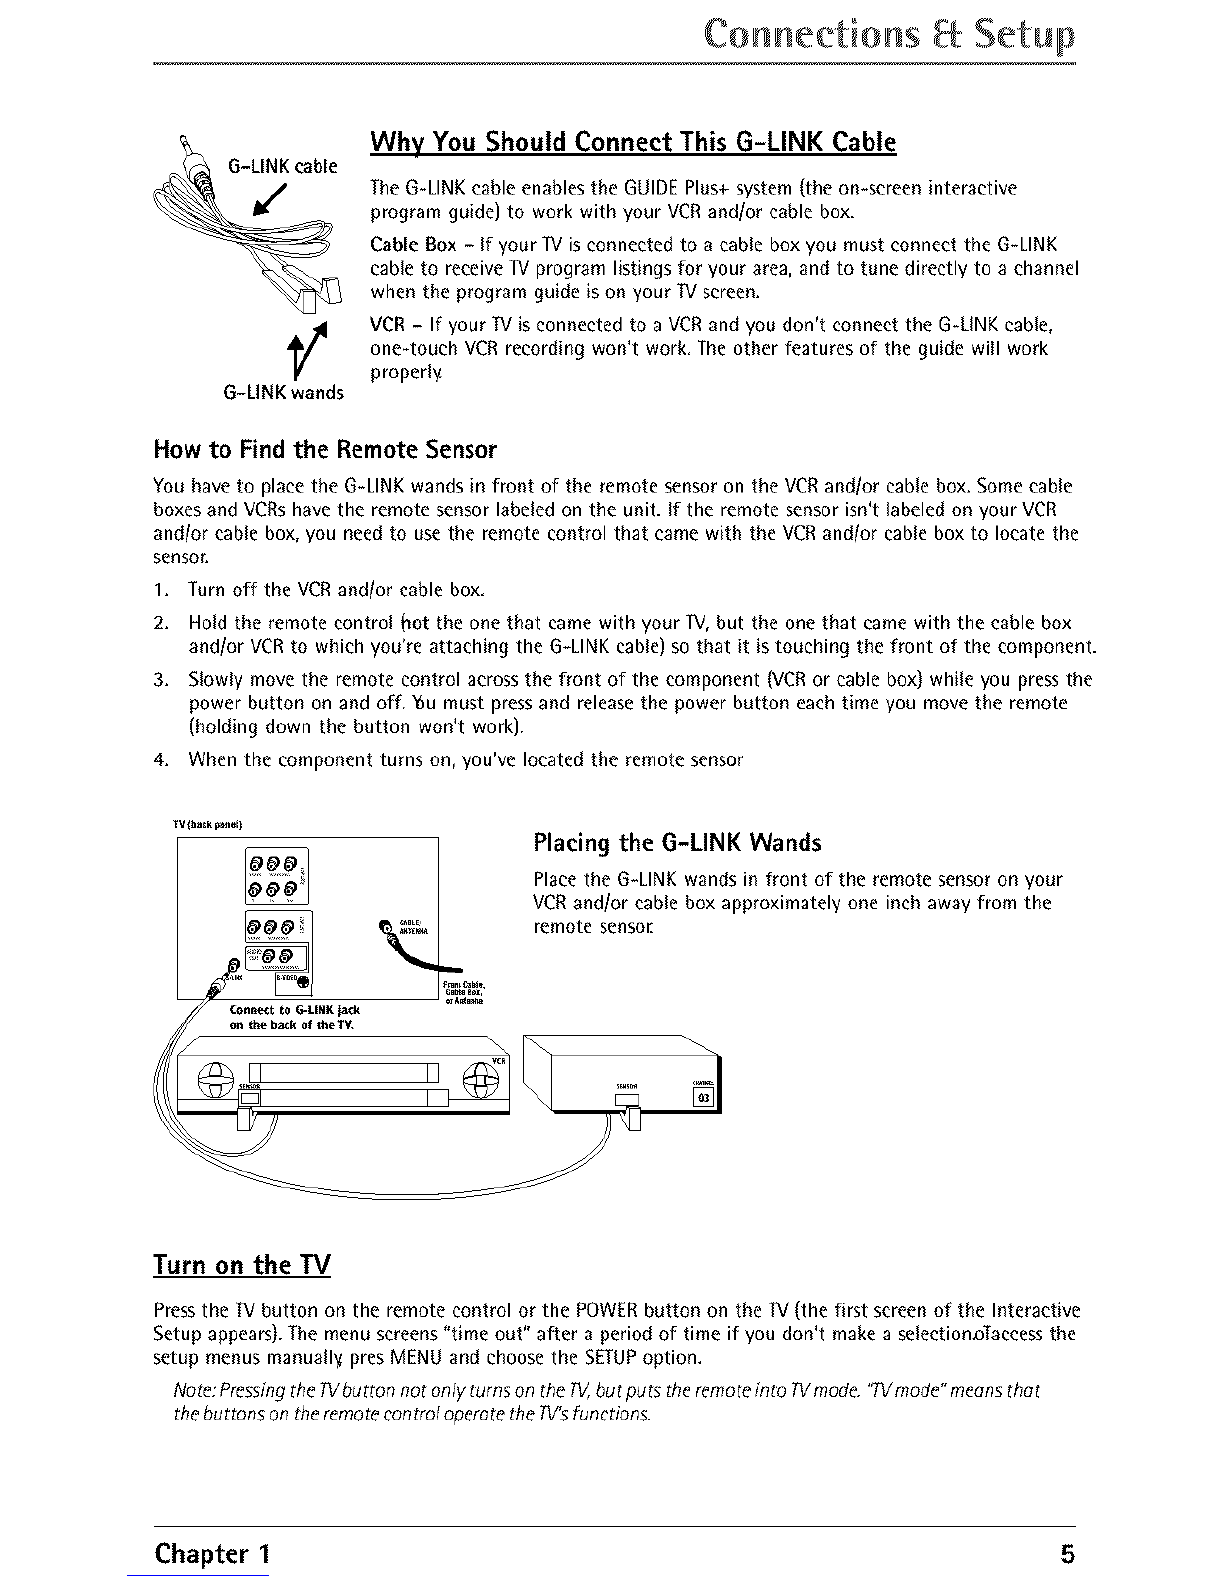
Why You Should Connect This
G-LINK Cable ................................................... 5
How to Find the Remote Sensor ...................5
Placing the G-LINK Wands .............................5
Complete the Interactive Setup ..................... 6
Set the Menu Language ..................................6
Complete Auto Channel Search ....................6
The GUIDE Plus+ System Setup .....................6
What to Expect ............................................... 7
Chapter 2: Using the Remote
Control
The Buttons on the Remote Control ............. 8
Using the WHOolNPUT Button ......................9
Programming the Remote to Operate Other
Components ..................................................... 9
Find Out If You Need to Program
the Remote ..........................................................9
Now to Program the Remote .......................10
How to Use the Remote After You've
Programmed It .............................................. 10
Remote Codes ................................................ 11
Chapter 3: Using the TV's
Featu res
About the GUIDEPlus+ System.................. 12
TheGUIDEPlus+ SystemMenu Ear...........12
( chapter 3 continued)
Grid Guide ..........................................................12
Sort .......................................................................13
News ....................................................................14
Schedule .............................................................14
Messages .............................................................14
Channels .............................................................14
Setup ....................................................................15
Promotions and Advertising .........................15
Parental Controls and V-Chip ..................... 16
How V-Chip Works ..........................................16
V-Chip _[V Rating Limit ...................................17
Blocking Specific Content Themes ............. 18
Viewing Specific Content Themes ..............19
V-Chip Movie Rating Limit ...........................19
V-Chip Unrated Program Block ...................19
Channel Block ...................................................20
Front Panel Block .............................................20
Lock/Unlock Parental Controls ....................20
Chapter 4: Using the TV's
Menu System
How to Use Your TV's Menu System .......... 21
Audio Menu .................................................. 21
Picture Quality Menu .................................. 22
Screen Menu ................................................. 22
Using Closed Captioning .............................. 23
Channel Menu .............................................. 23
Time Menu .................................................... 24
Chapter 5: Other Information
Troubleshooting ............................................ 25
Care and Cleaning ........................................ 27
The Front of Your TV ................................... 27
Limited Warranty ......................................... 27
Accessories .................................................... 28