RCA RP5050 - Digital 128 MB Built Quick start guide

RP5050
It is important to read this instruction book prior to using your new product for the first time.
Nous vous recommandons de lire ce manuel d’instructions avant d’utiliser votre nouveau produit pour la première fois.
Es importante leer este manual antes de usar por vez primera su euipo.
user
manual
Guide de l’utilisateur
Manual de usuario
RP5050 EN 17/10/06 5:51 PM Page 2

EN
FCC Information
FCC Information
This device complies with Part 15 of the FCC
Rules. Operation is subject to the following
two conditions: (1) This device may not
cause harmful interference, and (2) this
device must accept any interference
received, including interference that may
cause undesired operation.
In accordance with FCC requirements,
changes or modifications not expressly
approved by Thomson Inc. could void the
user’s authority to operate this product.
This equipment has been tested and found
to comply with the limits for a Class B
digital device, pursuant to Part 15 of FCC
Rules.These limits are designed to provide
reasonable protection against harmful
interference in a residential installation.
This equipment generates, uses, and can
radiate radio frequency energy and, if not
installed and used in accordance with the
instructions, may cause harmful
interference to radio communications.
However, there is no guarantee that
interference will not occur in a particular
installation. If this equipment does cause
harmful interference to radio or television
reception, which can be determined by
turning the equipment off and on, the user
is encouraged to try to correct the
interference by one or more of the
following measures
• Reorient or relocate the receiving
antenna.
• Increase the separation between the
equipment and receiver.
• Connect the equipment into an outlet
on a circuit different from that to which
the receiver is connected.
• Consult the dealer or an experienced
radio/TV technician for help.
Also, the Federal Communications
Commission has prepared a helpful
booklet, "How To Identify and Resolve
Radio TV Interference Problems." This
booklet is available from the U.S.
Government Printing Office, Washington,
DC 20402. Please specify stock number 004-
000-00345-4 when ordering copies.
Ecology
Help protect the environment - we
recommend that you dispose of used
batteries by putting them into specially
designed receptacles.
Maintenance
Clean the unit with a soft cloth, or a damp
chamois leather. Never use solvents.
WARNING: TO PREVENT FIRE OR ELECTRICAL
SHOCK HAZARD, DO NOT EXPOSE THIS PRODUCT
TO RAIN OR MOISTURE.
SEE MARKING ON BOTTOM / BACK OF PRODUCT
CAUTION
RISKOFELECTRICSHOCK
DONOTOPEN
THE EXCLAMATION
POINT WITHIN THE
TRIANGLE IS A
WARNING SIGN
ALERTING YOU OF
IMPORTANT
INSTRUCTIONS
ACCOMPANYING
THE PRODUCT.
THE LIGHTNING
FLASH AND ARROW-
HEAD WITHIN THE
TRIANGLE IS A
WARNING SIGN
ALERTING YOU OF
"DANGEROUS
VOLTAGE" INSIDE
THE PRODUCT.
CAUTION: TO REDUCE THE
RISK OF ELECTRIC SHOCK,
DO NOT REMOVE COVER
(OR BACK). NO USER-
SERVICEABLE PARTS IN-
SIDE. REFER SERVICING
TO QUALIFIED SERVICE
PERSONNEL.
RCA
RP5050
Equipment tested for
compliance as a
complete unit
This Class B digital apparatus complies with Canadian
ICES-003.
Cet appareil numérique de la class B est conforme à la
norme du NMB-003 du Canada
RP5050 EN 18/10/06 11:16 AM Page 3

EN
Precautions for the Unit
•Do not use the unit immediately after
transportation from a cold place to a
warm place; condensation problem may
be resulted.
•Avoid shock to the unit especially during
recording. Recorded data can be
damaged.
•Do not store the unit near fire, places
with high temperature or places with
direct sunlight.
•Do not operate or store unit in places
with frequent static electricity or
electrical noise (e.g. speaker, TV set).
•Clean the unit with a soft cloth or a
damp chamois leather. Never use
solvents.
•The unit must only be opened by
qualified personnel.
• Do not expose this appliance to rain or
moisture.
Precautions for Batteries
•If you do not use the unit for more than
one month, be sure to remove the
batteries to avoid leakage.
•When installing batteries, be sure that
the polarities are correct. Reversing
polarity may cause personal injury and
damage to the batteries.
•Never mix new batteries with old ones.
Do not mix battery types.
•Discard leaking batteries immediately.
Leaking batteries can cause skin burns or
other personal injury.
•Do not dispose of in fire.
•Do not charge batteries which are not
intended to be recharged.
Power Supply
•2x “AAA” size batteries
For Your Records
In the event that service should be required,
you may need both the model number. In
the space below, record the date and place
of purchase:
Date of Purchase:
Place of Purchase:
Service Information
This product should be serviced only by
those specially trained in appropriate
servicing techniques. For instructions on
how to obtain service, refer to the warranty
included in this Guide.
NOTE:
The RBRC seal on the rechargeable battery
used in this product indicates that we are
participating in a program to collect and
recycle the rechargeable battery. For more
information, go to the RBRC web site at
www.rbrc.org, or call 1-800-8-BATTERY, or
contact a local recycling center.
The descriptions and characteristics given in this document are given as a general indication and
not as a guarantee. In order to provide the highest quality product possible, we reserve the right to
make any improvement or modification without prior notice. The English version serves as the final
reference on all products and operational details should any discrepancies arise in other languages.
ESD Remark:
In case of misfunction due to electrostatic discharge just reset the product (disconnect and
reconnect of the power source may be required) to resume normal operation.
RP5050 EN 18/10/06 11:16 AM Page 4

EN
Contents
FCC Information
Contents . . . . . . . . . . . . . . . . . . . . .1
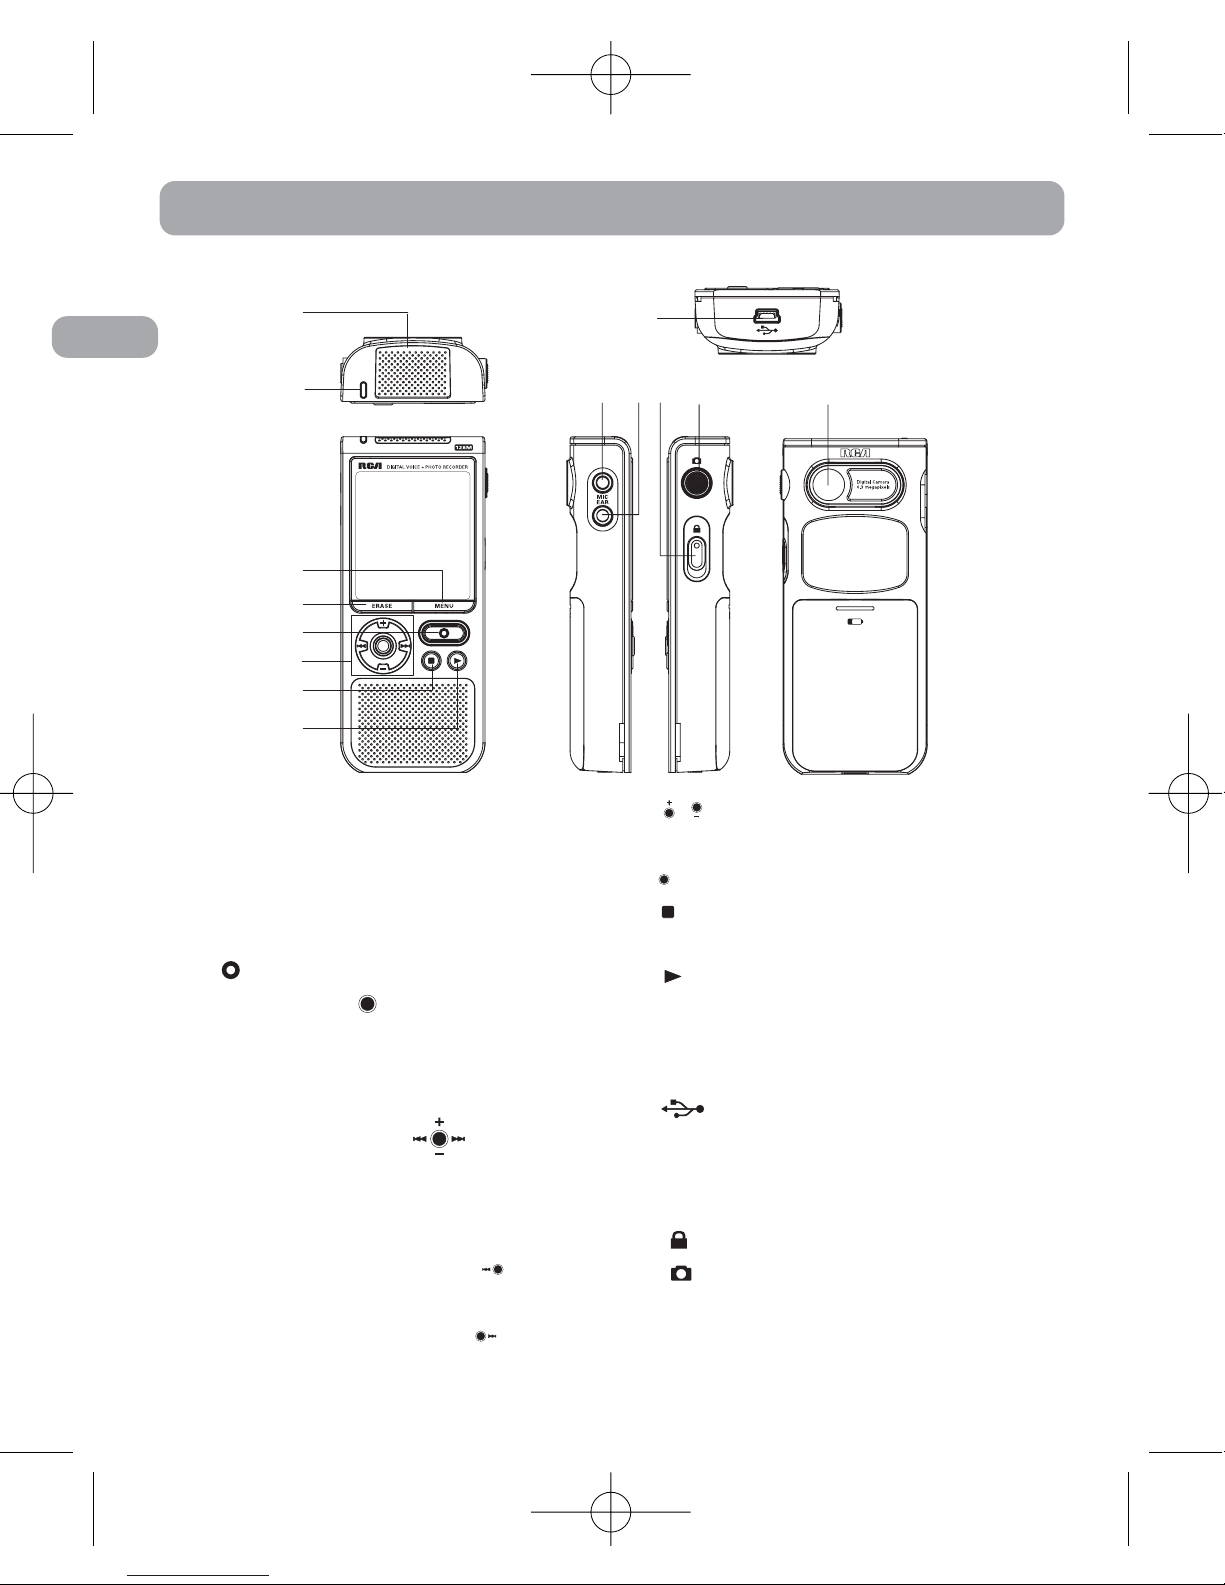
General Controls . . . . . . . . . . . . . . .3
Before You Begin . . . . . . . . . . . . . .4
Unpacking your Player . . . . . . . . . . .4
Power Supply . . . . . . . . . . . . . . . . . . .4
Installing Batteries . . . . . . . . . . . . . . .4
Recharging Batteries . . . . . . . . . . . . .4
Using Headphones and External
Microphone . . . . . . . . . . . . . . . . . . . .4
Switching On and Off the Device . . .4
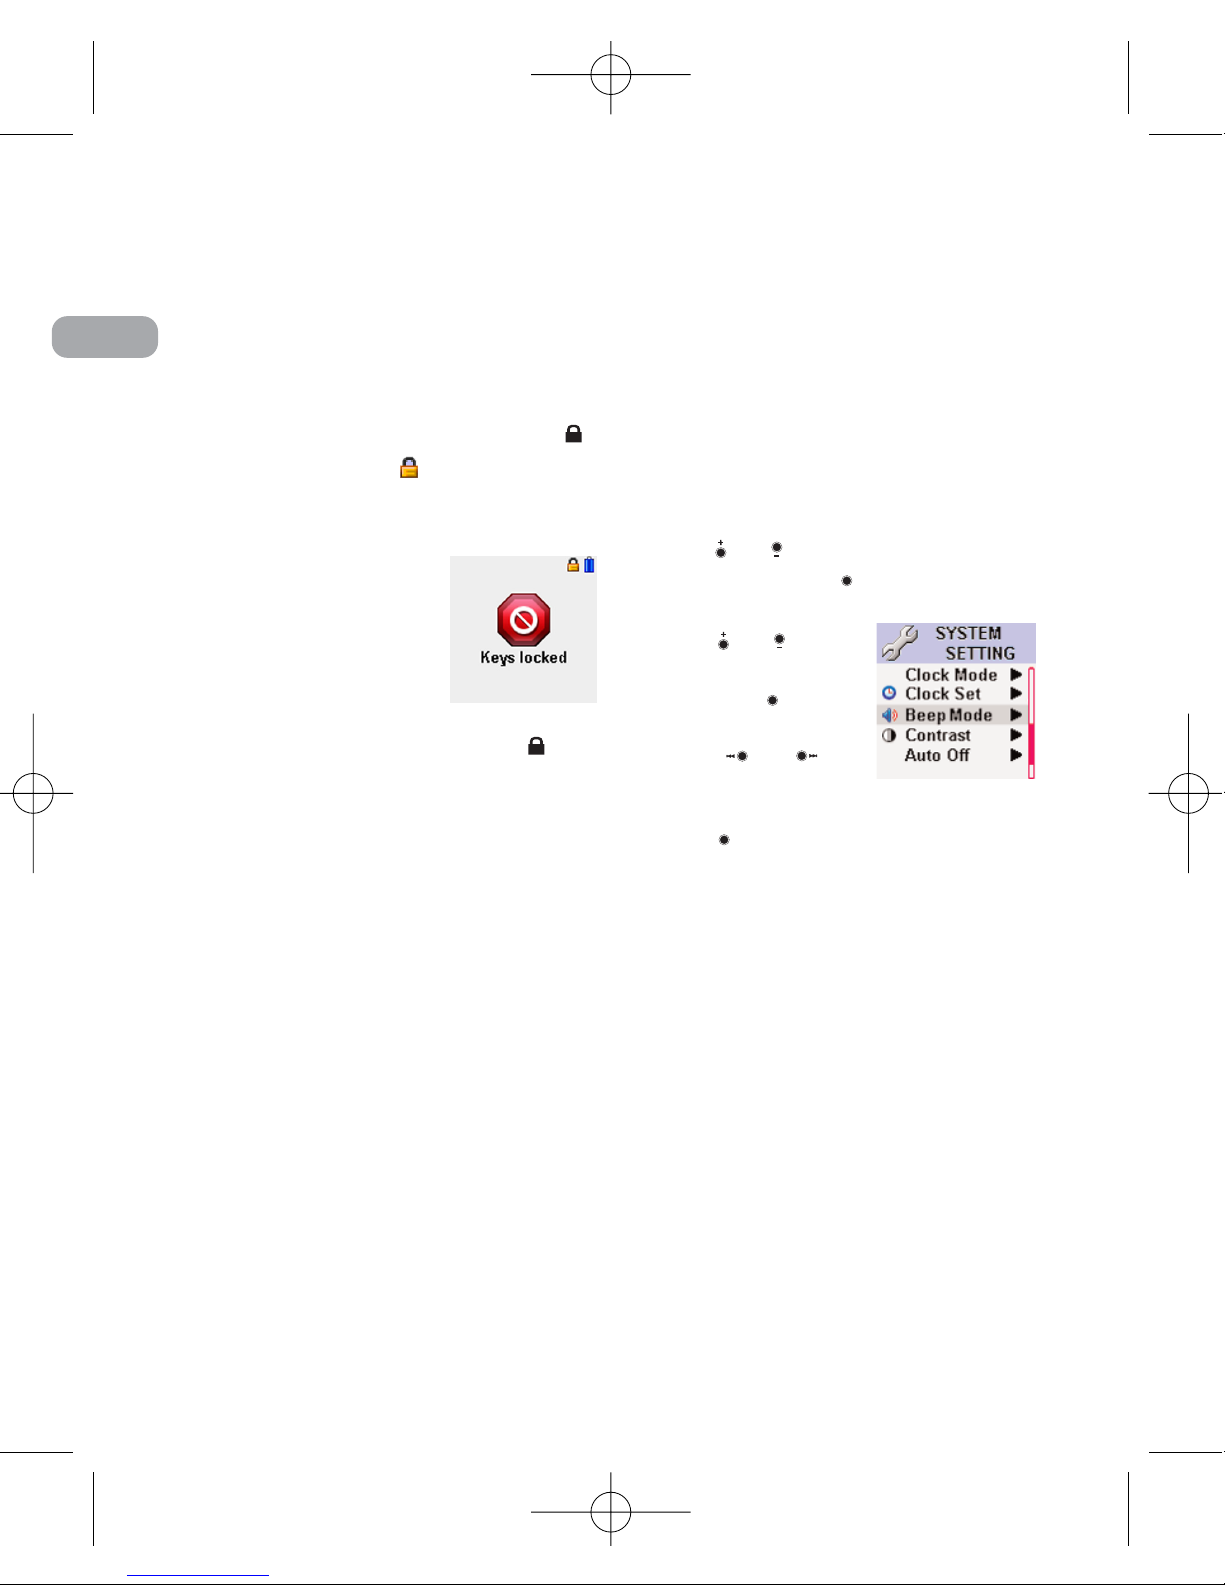
Keys Lock . . . . . . . . . . . . . . . . . . . . . . .5
Beep Mode . . . . . . . . . . . . . . . . . . . . .5
Quick Start . . . . . . . . . . . . . . . . . . .6
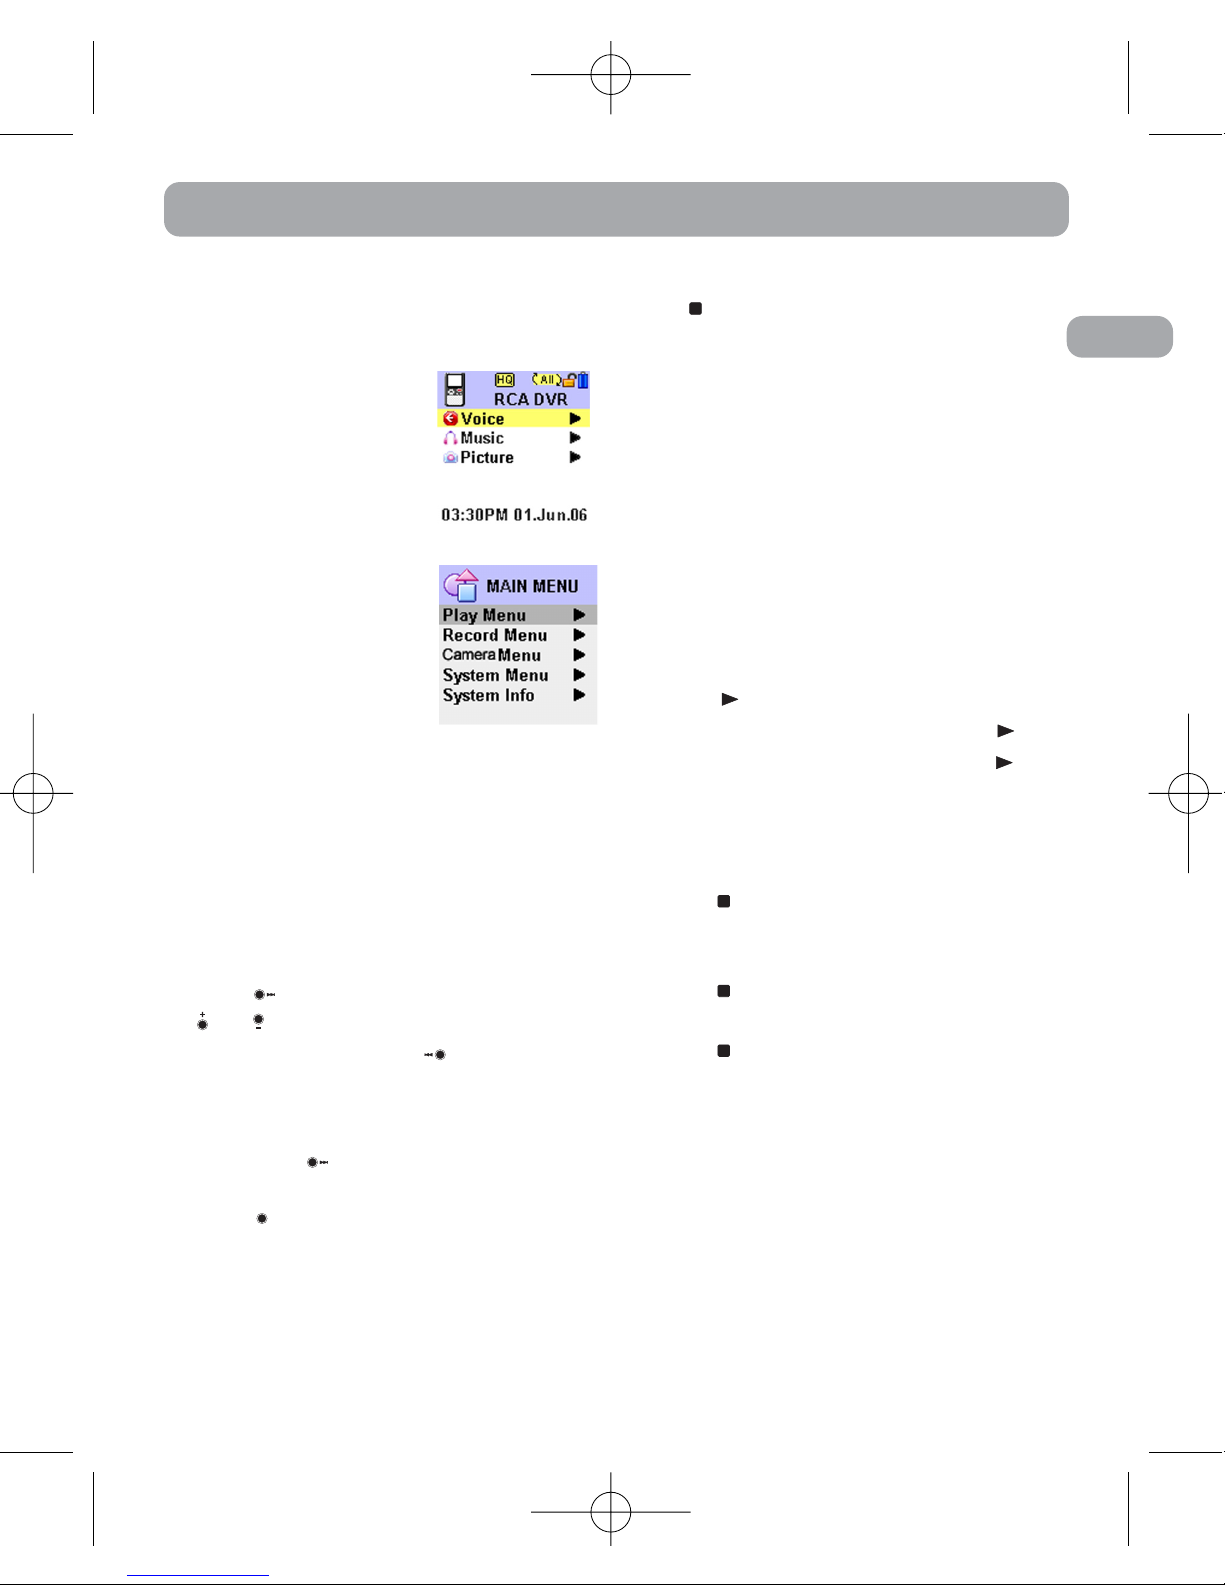
Menu Navigation . . . . . . . . . . . . . . . .6
Basic Operation . . . . . . . . . . . . . . . . .6
Playing/Pausing . . . . . . . . . . . . . . . . .6
Stopping . . . . . . . . . . . . . . . . . . . . . . .6
Skipping Files . . . . . . . . . . . . . . . . . . .7
Scanning Files . . . . . . . . . . . . . . . . . . .7
Volume Control . . . . . . . . . . . . . . . . .7
Recording . . . . . . . . . . . . . . . . . . . . . .7
Connecting the Player to your
Computer . . . . . . . . . . . . . . . . . . . . . .7
Setting the Time . . . . . . . . . . . . . . .7
Year/Date/12/24/Time Setting . . . . . .7
Clock Mode . . . . . . . . . . . . . . . . .7
Clock Set . . . . . . . . . . . . . . . . . . .8
Basic Operation . . . . . . . . . . . . . . . .8
Navigation Mode . . . . . . . . . . . . . . . .8
Selecting Folder and File . . . . . . . . . .8
Playback Features . . . . . . . . . . . . . . . .8
In Music Mode and Voice Mode 8
In Picture View Mode . . . . . . . . .9
Bookmark . . . . . . . . . . . . . . . . . . . .9
Creating a Bookmark . . . . . . . . . . . . .9
Skipping to a Bookmark . . . . . . . . . .9
Deleting Bookmarks . . . . . . . . . . . . .9
Recording Mode . . . . . . . . . . . . . .10
Setting Recording Mode . . . . . . . . .10
Setting Record Quality . . . . . . . . . .10
Navigating Recorded Voice Files . .11
Manual Recording . . . . . . . . . . . . . .11
Setting AVR (Automatic Voice
Recording) . . . . . . . . . . . . . . . . . . . . .12
AVR Setting . . . . . . . . . . . . . . . .12
AVR Level . . . . . . . . . . . . . . . . . .12
Settings . . . . . . . . . . . . . . . . . . . . .13
Clock Mode and Clock Set . . . . . . . .13
Beep Mode . . . . . . . . . . . . . . . . . . . .13
Contrast . . . . . . . . . . . . . . . . . . . . . .13
Auto Off . . . . . . . . . . . . . . . . . . . . . .13
Back Light . . . . . . . . . . . . . . . . . . . . .13
Format . . . . . . . . . . . . . . . . . . . . . . . .13
Default . . . . . . . . . . . . . . . . . . . . . . . .14
Camera Mode . . . . . . . . . . . . . . . .14
Capture Condition . . . . . . . . . . . . . .14
Night Mode . . . . . . . . . . . . . . . .14
EV Effect . . . . . . . . . . . . . . . . . .14
Capture Picture . . . . . . . . . . . . . . . . .14
1
RP5050 EN 18/10/06 11:16 AM Page 5

EN
2
Picture View Mode . . . . . . . . . . . .15
Entering Picture View Mode . . . . .15
Playback Features . . . . . . . . . . . . . . .15
Skipping Pictures . . . . . . . . . . . . . . .15
Zooming Pictures . . . . . . . . . . . . . . .15
Deleting Pictures . . . . . . . . . . . . . . .15
Advanced Playback Features . . . . .15
Speed Control . . . . . . . . . . . . . . . . . .15
Repeat One/All . . . . . . . . . . . . . . . . .16
EQ Sound . . . . . . . . . . . . . . . . . . . . . .16
A-B Repeat . . . . . . . . . . . . . . . . . . . .16
IntroScan . . . . . . . . . . . . . . . . . . . . . .16
Erasing File . . . . . . . . . . . . . . . . . .17
Erasing Selected File . . . . . . . . . . . .17
Advanced Operation . . . . . . . . . . .17
CAUTION . . . . . . . . . . . . . . . . . . . . . .17
Insert . . . . . . . . . . . . . . . . . . . . . . . . .17
Append . . . . . . . . . . . . . . . . . . . . . . .18
Cut . . . . . . . . . . . . . . . . . . . . . . . . . . .18
Format . . . . . . . . . . . . . . . . . . . . . . . .19
Connecting to the Computer . . . .19
Computer System Requirements . .19
Connecting to the Computer . . . . .19
Using your player as a file
storage player . . . . . . . . . . . . . .20
Transfer Files via Windows
Explorer (Drag and Drop) . . . .20
Disconnecting from the Computer 20
Troubleshooting Tips . . . . . . . . . . .22
U.S. Limited Warranty . . . . . . . . . .23
Canadian Limited Warranty . . . . .25
RP5050 EN 18/10/06 11:16 AM Page 6

EN
General Controls
14
1
2
3
4
5
6
7
8
10 11 12 13
9
1. Built-in microphone
2. Recording indicator
3. MENU - Accesses the Function
menu or Main Menu.
4. ERASE - Erases the selected item.
5. - Starts or pauses recording.
6. Center Key
• Press in the center of the Navigation
key to select or enter the menu
options.
Navigation Key
• Move through
menus and options in each
direction.
• In playback mode, press to skip
and search backward.
• In playback mode, press to skip
and search forward.
• / - In playback mode,
increases/decreases volume.
•
- Confirms your selection.
7. - Turns off the player. Stops
playback or recording.
8. - Turns on the player. Starts or
pauses playback. In music and voice
stop mode, press and hold to enter
IntroScan mode.
9. - Connects computer.
10.MIC - Connects external
microphone.
11.EAR - Connects earphones
12. - Turns on/off lock function.
13. - Enters Capture Mode or
captures a picture.
14.Camera lens
3
RP5050 EN 18/10/06 11:16 AM Page 7

Unpacking your Player
• one voice recorder
• one USB dock
• two NiMH rechargeable "AAA"
batteries
• one carrying case
• one clip-on mic
Power Supply
This player can be operated by two
NiMH "AAA" batteries (included).
Installing Batteries (Included)
1. Slide the battery compartment
door to the bottom and lift up the
door to open.
2. Insert the two supplied NiMH
rechargeable “AAA” batteries
with polarities matching
indications.
3. Replace the battery compartment
door.
4. Refer to the battery level indicator
()on display for batteries level.
When the indicator is empty,
follow the steps below to recharge
the batteries.
Recharging Batteries
1. Ensure the two supplied NiMH
rechargeable "AAA" batteries are
installed correctly and the player is
off.
2. Connect the USB dock to the
computer. Then connect your
player to the USB dock.
3. Recharging begins automatically.
It should take about 6 hours to
fully recharge 650mAh NiMH
batteries.
Using Headphones and External
Microphone
• When headphones are connected,
the sound output from speaker
will be cut.
• When external microphone is
connected, no record can be made
from the built-in microphone.
Switching On and Off the Player
• Press to turn on the player to
start playback. The player will
enter Function Menu.
• Press and hold to turn off the
player completely.
EN
Before You Begin
4
Warning:
You may have to replace the
batteries if you are using non-
rechargeable "AAA" batteries other than
those supplied. If power interruption
exceeds 20 seconds, you will have to reset
the date and time.
Note:
This player can only recharge NiMH
battery.
!
RP5050 EN 18/10/06 11:16 AM Page 8

EN
Before You Begin
5
Keys Lock
This feature avoids accidental key
activation during recording or
playback.
• When the player is on, slide the
button upward , will be
displayed on the top right hand
corner of the display.
• When the player is
off and locked, "Keys
locked" will be
displayed when
turning on the
player.
• To unlock the keys, slide the
button downward.
Beep Mode
You can activate this feature so that
beep sound can be heard whenever
you press on any button except
during recording. Default is On.
1. Press and hold MENU to display
Main Menu.
2. Push or to select System
Menu and press to confirm
selection.
3. Press or to
select Beep Mode
and press to
confirm selection.
4. Press or to
set beep sound On
or Off.
5. Press or MENU to save and exit
the current option.
RP5050 EN 18/10/06 11:16 AM Page 9

EN
Quick Start
Menu Navigation
Two menus are available:
•Function Menu:
access to Voice
Playback mode,
Music Playback
mode and Picture
Viewing mode.
•Main Menu: access
to Play Menu,
Record
Menu,Camera
Menu, System
Menu and System
Info.
•To display Function Menu, press
MENU in any mode.
•To display Main Menu, press and
hold MENU in any mode.
To navigate through the menu,
press to go into a menu level, press
or to move along menu items at
the same level. Press to go back
up a menu level.
If the selected item is a music or voice
file, press will start playback.
Press to confirm your selection.
Press to exit the Function Menu or
the Main Menu and go back to
Playback mode.
Basic Operation
Refer to the following for basic
operations. For detailed operations
and advanced features, please refer
to the relevant sections.
Playing/Pausing
•In Music or Voice Playback mode,
press to begin playback.
•In Picture Viewing mode, press
to view picture. Press and hold
to start picture slide show.
Stopping
•Press to stop music or voice
playback in Music or Voice
Playback mode.
•Press to stop picture slide show
in Picture Viewing mode.
•Press to stop recording in
Recording mode.
Function Menu
Main Menu
6
RP5050 EN 18/10/06 11:16 AM Page 10

EN
Quick Start
Skipping Files
•To skip to the next file in Music or
Voice Playback mode, press and
release .
•To skip to the previous file in Music
or Voice Playback mode, press and
release within the beginning 4
seconds of the current file.
Otherwise, press and release
twice.
•To view the previous or next picture
in Picture Viewing mode, press
or .
Scanning Files
•In Music or Voice Playback mode,
press and hold to fast reverse.
•In Music or Voice Playback mode,
press and hold to fast forward.
Volume Control
•Press or to increase or decrease
volume level.
Recording
•In Function Menu, press to start
recording.
•Press to pause recording, press
again to resume recording.
•Press to stop recording.
Connecting the Player to your
Computer
Refer to page 19 for details.
7
Year/Date/12/24/Time Setting
You can still use this player for normal
recording without setting the time.
However, no correct recording date
and time can be referred for your
recorded messages. Default is 24 hour
format.
Clock Mode
1. In System Menu, press or to
select Clock Mode and press to
confirm selection.
2. Press or select 24 hour or 12
hour format and press or MENU
to save and exit current option.
Setting the Time
RP5050 EN 18/10/06 11:16 AM Page 11

EN
Navigation Mode
To enter navigation
mode, press and hold
in Music Mode, Voice
Mode or during voice
playback and Picture
Mode.
To exit navigation
mode, press .
Selecting Folder and File
You can select a specific folder for
navigating. Default is Folder A.
1. In navigation
mode, press or
to select the
previous or the next
folder.
2. Press to enter the
selected folder.
3. Press or to select the previous
or the next file.
Playback Features
In Music Mode and Voice Mode
•Press to begin playback.
•Press to pause playback, press
again to resume playback.
•Press to stop music or voice
playback.
•To skip to the next file, press and
release .
•To skip to the previous file , press
and release within the
beginning 4 seconds of the current
file. Otherwise, press and release
twice.
•To fast reverse, press and hold .
•To fast forward, press and hold .
•Press or to increase or
decrease volume in playback,
pause or stop mode.
Music Mode
Voice Mode
Picture Mode
Clock Set
1. In System Menu, press or to
select Clock Set and press to
confirm selection.
2. Press or to highlight year,
month, day, hour, minute and AM
or PM(12 hour only) .
3. Press or to increase or
decrease the number. When you
finish setting the Year, Month and
Date, press or MENU to save
and exit current option.
8
Basic Operation
RP5050 EN 18/10/06 11:16 AM Page 12

EN
Basic Operation
In Picture Viewing Mode
•In Picture Viewing display mode,
press to view picture. Press and
hold to start picture slide show.
•Press to stop picture slide show
in Picture Viewing mode.
•To view the previous or next picture
in Picture Viewing mode, press
or .
Creating a Bookmark
This feature allows you to create an
interception point in the recorded
voice file for quick reference.
1. During voice
playback, press
CAMERA to set a
bookmark. will
be displayed.
2. You can create 10
bookmarks in each
file. If the total
number of
bookmarks you
create exceeds 10,
“FULL” will be
displayed.
3. You can create up to 20 files which
contains bookmarks.
Skipping to a bookmark
You can skip to a bookmark anytime
during playback.
1. During playback, press to go to
the bookmark (if available).
2. Press or to search different
bookmarks of the file.
Deleting Bookmarks
1. Select the file you want to delete
all the bookmarks.
2. During playback of a file, press and
hold ERASE to delete all the
bookmarks in the file.
3. will not be displayed after
deleting bookmarks.
9
Bookmark
Tip:
Playback will continue when you
access the Function Menu or the Main
Menu by pressing MENU or pressing and
holding MENU.
Note:
Bookmark cannot be added when:
•the battery indicator shows the power
is too low;
•the IntroScan Mode is selected.
•the file is a music file.
Tip:
Bookmark could not be created within 3
seconds after the last bookmark has been
set.
RP5050 EN 18/10/06 11:16 AM Page 13

EN
Recording Mode
Setting Record Mode
You can select between two
recording conditions. Default is
Dictation.
Definition
• Conference - in a more open area
and recording source is far from
the player.
• Dictation - in a more enclosed
area and recording source is close
to the player.
1. In Main Menu Mode, press or
to select Record Menu and press
to confirm your selection.
2. Press or to select Record
Mode and press to confirm your
selection.
3. Press or to toggle between
Dictation and Conference.
4. Press or MENU to save and exit
the current option. Dict or Conf
will be displays to reflect your
selection.
Setting Record Quality
You can select between three
recording qualities. Default is HQ.
Definition
• HQ (High Quality) -
This allows about 498 minutes
recording.
• SP (Standard Play) -
This allows about 990 minutes
recording.
• LP (Long Play) -
This allows about 1990 minutes
recording.
1. In Main Menu Mode, press or
to select Record Menu and press
to confirm your selection.
2. Press or to select Rec.
Quality and press to confirm
your selection.
3. Press or to toggle between
HQ, SP and LP.
4. Press or MENU to save and exit
the current option. HQ, SP or LP
will be displays to reflect your
selection.
10
Tip:
For conferences, to obtain optimum
recording quality, place the recorder with
the microphone freely exposed to the
sound source as close as convenient. A
built-in automatic recording level control
will set the optimum record level during
manual recording. Avoid recording near
unwanted noise sources, such as air
conditioners or fans.
RP5050 EN 18/10/06 11:16 AM Page 14

EN
11
Navigating Recorded Voice Files
In Navigation Mode, you can navigate
your folders and your recorded voice
files. Default is Folder A.
1. Press and hold MENU to enter
Main Menu Mode in stop mode.
2. Press or to select Record
Menu and press to confirm your
selection.
3. Press or to
select Folder and
press to confirm
your selection.
4. Press or to
select Folder A, B,
C or D.
5. Press to enter the selected
folder.
6. Press or to select the
previous or the next recorded voice
file.
Manual Recording
1. Press to start recording. The
recording indicator will be on.
2. Optionally, you can press MENU to
enter Function Menu. Press or
and to select Voice Playback
mode and then press to start
recording. The recording indicator
will be on.
3. Press to pause
recording, press
again to resume
recording. The
recording indicator
will be flashing
when recording is paused.
4. Press to stop recording.
Recording Mode
Note:
•You can record up to 99 files in one
folder. When the maximum limit is
reached or memory is full,
will be displayed and the recording
will be stopped and saved
automatically.
•If the length of the recorded voice file
is less than four seconds, it may not be
saved.
RP5050 EN 18/10/06 11:16 AM Page 15

EN
Setting AVR
You can select between two
recording modes - manual recording
and AVR (Automatic Voice
Recording). Default AVR setting is off
and the AVR Level is 5.
AVR (Automatic Voice Recording)
This feature allows the player to
sense sound and to record only when
you are speaking into the
microphone. When dictation stops
for about 3 seconds, recording will
stop and then start again
automatically when you resume
dictation.
AVR Setting
1. In Main Menu Mode, press or
to select Record Menu and press
to confirm your selection.
2. Press or to select AVR and
press to confirm your selection.
3. Press or to toggle between
On and Off.
4. Press or MENU to save and exit
the current option.
5. Press to enter AVR mode.
"AVR" will be displayed.
6. During AVR on
recording, you can
also adjust the
sensitivity of the
microphone from
level 1 to 8 by
pressing or .
The AVR value displays .
7. Start dictation. Recording starts
automatically.
8. Press to end AVR recording.
9. Repeat step 2-4 and select AVR off
for de-selection.
AVR Level
You can adjust the AVR value before
recording.
1. In Main Menu Mode, press or
to select Record Menu and press
to confirm your selection.
2. Press or to
select AVR Level
and press to
confirm your
selection.
3. Press or to adjust the
sensitivity of the microphone from
level 1 to 8.
4. Press to enter AVR mode
Start dictation. Recording starts
automatically.
Tip:
The first syllable or two may be lost
when you start recording because this
'sound' is used to turn on the AVR
feature. It is a good practice to make
some 'sounds' or say a short word to
activate the AVR before you begin actual
dictation.
Note:
Decrease the AVR value and thus
the sensitivity when the recording
environment is noisy and vice versa.
12
RP5050 EN 18/10/06 11:16 AM Page 16

EN
Settings
13
There are eight options in the System
Menu.
Clock Mode and Clock Set
Refer to page 7 for details.
Beep Mode
Refer to page 4 for details
Contrast
You can adjust the contrast value from
level -2 to 2. Default is 0.
1. In System Menu
mode, press or
to select Contrast
and press to
confirm your
selection.
2. Press or to adjust the
contrast level from -2 to 2.
3. Press or MENU to save and exit
the current option.
Auto Off
You can adjust the time period before
the player turns off automatically.
Default is 3 min.
1. In System Menu mode, press or
to select Auto Off and press to
confirm your selection.
2. Press or to
select among Off, 1
min and 3 min.
3. Press or MENU to
save and exit the
current option.
Back Light
You can adjust the time period before
the backlight turns off automatically.
Default is 10 sec.
1. In System Menu
mode, press or
to select Backlight
and press to
confirm your
selection.
2. Press or to select among On,
5 sec, 10 sec, 20 sec and 30 sec.
3. Press or MENU to save and exit
the current option.
Format
Refer to page 19 for details.
press
or
Tip:
In Camera Mode and Picture Viewing
mode, the player turns off automatically
if no operation is performed regardless of
the Auto Off Timer Setting. This is to
achieve a better battery performance.
RP5050 EN 18/10/06 11:16 AM Page 17

EN
Capture Condition
Night Mode
Activate this mode when you are
capturing picture at night. Default
Night mode is off.
1. In Main Menu
Mode, press or
to select Camera
Menu and press
to confirm your selection.
2. Press or to select Night
Mode and press to confirm your
selection.
3. Press or to select On.
4. Press or MENU to save and exit
the current option.
EV Effect
An increase in EV (exposure value)
increases the amount of light allowed
to reach your camera and vice versa.
You can adjust EV from -2.0 to +2.0.
Increase EV if your picture is too dark
and decrease EV if your picture is too
light. Default EV is 0.
1. In Main Menu Mode, press or
to select Camera Menu and press
to confirm your selection.
2. Press or to select EV. Effect.
and press to confirm your
selection.
3. Press or to adjust the value
from level -2 to 2.
4. Press or MENU to save and exit
the current option.
Capture Picture
1. Press and hold
CAMERA in any
mode (except in
voice recording or
pause mode) to
enter Camera
Mode.
2. Press CAMERA again or press
capture picture.
3. Press MENU to quit CAMERA
mode.
4. The captured picture will be saved
in "My Album" folder.
Default
You can restore all the settings in the
player to the factory default when
needed.
1. In System Menu Mode, press or
to select System Menu and
press to confirm your selection.
2. Press or to select Default and
press to confirm your selection.
3. Press or to toggle between
Yes or No.
4. Press to confirm Yes and exit
current option. Settings is restored
to default settings.
14
Camera Mode
RP5050 EN 18/10/06 11:17 AM Page 18

EN
Picture Viewing Mode
Entering Picture Viewing Mode
1. Press MENU to enter the Function
Menu mode.
2. Press or to select to select
Picture Viewing mode.
3. Press to enter Picture Viewing
Mode.
4. Press MENU to exit Picture Viewing
Mode.
Playback Features
•Press or to view picture. Press
and hold to start picture slide
show.
•Press to stop picture slide show.
Skipping Pictures
•In Picture Viewing Navigation
mode, press or to select the
previous or the next picture.
Zooming Pictures
•When viewing picture, press to
zoom in the picture, then press ,
, or to navigate inside the
picture.
•Press and hold to zoom out into
normal size.
Deleting Pictures
•In Picture Viewing mode, press
or
to select the unwanted
picture in Picture Viewing mode.
•Press and hold ERASE to enter
Erase Mode.
•Press ERASE to delete the current
picture.
Speed Control
You can adjust the playback speed.
1. In Main Menu
Mode, press or
to select Play Menu
and press to
confirm your
selection.
2. Press to confirm selecting Speed
Control.
3. Press or
to
select between
Normal , Fast and Slow.
4. Press or MENU to save and exit
the current option.
15
Note:
Zooming feature is not accessible
during picture slide show.
Advanced Playback Features
RP5050 EN 18/10/06 11:17 AM Page 19

EN
Repeat One/All
You can choose to play a specific file
or all files in a folder. Default is
Off.
1. In Main Menu
Mode, press or
to select Play
Menu and press
to confirm your selection.
2. Press to confirm selecting
Repeat Mode.
3. Press or to toggle between
All, One or Off.
4. Press or MENU to save and exit
the current option.
EQ Sound
You can select among different EQ
Sound settings. Default is Normal.
1. In Main Menu
Mode, press or
to select Play
Menu and press
to confirm your
selection.
2. Press to confirm selecting EQ
Sound.
3. Press or to select among
Normal, Classic, Pop, Jazz, Rock
and Bass.
4. Press or MENU to save and exit
the current option.
A-B Repeat
You can repeat a certain part of a file
with the help of this function.
1. During voice playback, press to
set the start repeat position (A),
will be displayed.
2. Press again to set the end
repeat position (B). Press when
is flashing to confirm your
selection. Repeat from position A
to B will start, displays.
3. To resume normal playback, press
again.
IntroScan
This feature allows playback of the
beginning 10 seconds of each file in a
folder.
1. Select folder (A, B, C or D) and file.
2. In music and voice stop mode, press
and hold to enter IntroScan
mode. displays.
16
Note:
This function only applicable under
music playback mode.
RP5050 EN 18/10/06 11:17 AM Page 20

EN
Erasing File
CAUTION
• The edit function does not operate
when battery power is too low or
the IntroScan Mode is in used.
• After editing a message,
will be displayed. Do not power off
the player until “WAITING”
disappears.
Insert
You can insert new segments into a
file without erasing previously
recorded content. Insert should be
done when voice playback is paused.
1. Select folder (A, B, C or D) and file
for inserting new segment.
2. Press twice to pause playback or
press or to scan to the point
that you want to insert new
segment and then press to
pause playback.
3. Press to enter
Insert mode."Do you
want Insert"
displays.
4. Press again to
start recording new
segment, displays.
5. Press to stop recording.
6. will be flashing until the
memory rearrangement completed.
Then the player will go to stop
mode.
17
Erasing Selected File
You can delete a specific file.
1. Select folder (A, B, C or D) and file.
2. In music and voice stop mode or in
picture navigation mode, press
and hold ERASE to enter Erase
mode. "DELETE" will be flashing.
3. Press ERASE again to delete the
current file and will be
flashing.
Tip:
•To cancel erasing file, press when
"DELETE" is flashing.
•You cannot enter Erase mode if the
battery indicator shows the power is
too low.
Advanced Operation
RP5050 EN 18/10/06 11:17 AM Page 21
This manual suits for next models
2
Table of contents
Other RCA Voice Recorder manuals