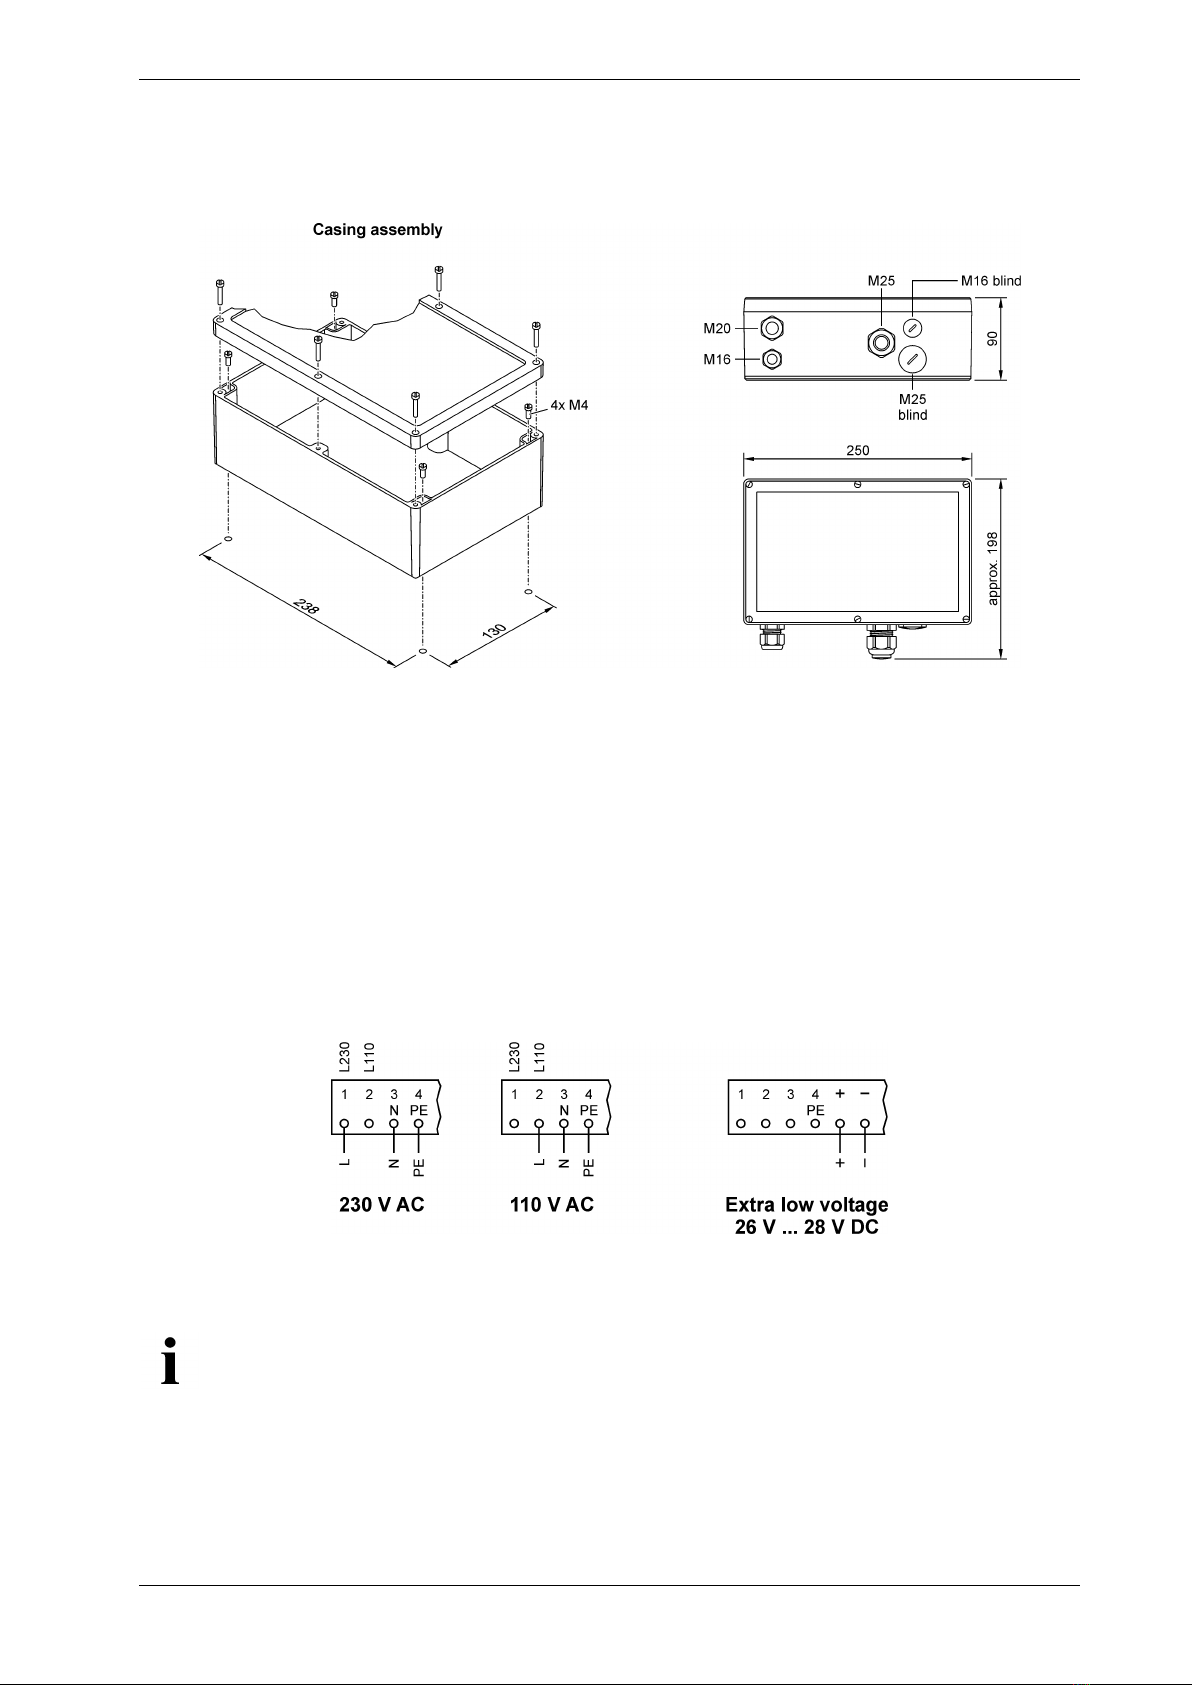
RM-216 CB.10 Easy Line Documentation
RDN 10000088 7 07.07.2016
5 “Step by step” settings
5.1 Function when shipped
The down time cleaning input E1, E2 (terminals 10, 11) is bridged at the factory. Once the supply voltage
is at RM-216 CB, the solenoid valves are controlled consecutively in sequence. The filter control system
automatically detects how many valves are connected.
For connecting an external ∆p switch, see section 6.3 “Cleaning via start / stop input (external ∆p
switch)”.
To activate the down time cleaning, see section 6.2 “Down time cleaning”.
If another function is required or if additional functions are to be activated, the parameter setting of the
RM-216 CB must be changed. For more on this, see section 5.2 “Setting parameters”.
5.2 Setting parameters
To set or check the parameters, proceed as follows:
Use the parameter list in section 5.3 to search for the parameters you want to change or check.
On the RM-216 CB, press buttons and simultaneously, for at least 3 seconds. The
program then changes from operation mode to parameter selection mode. The parameter P01
“Pulse time” is displayed on the text display at its set value.
Press the button to call up all following parameters P02 ... P11 in sequence. The parameters
already displayed can be accessed by repeatedly pressing the button.
To change the value of a displayed parameter, press the ENTER button for at least one
second.
The program then changes from parameter selection mode to parameter setting
mode.
button to increase the parameter value displayed in increments. Press the
button to decrease the parameter value displayed.
Press the ENTER button for at least 3 seconds. The new parameter value is stored. The text
display will briefly display the message “Store”.
The program automatically returns to the
parameter selection mode.
You can now call up other parameters and check or change their
values.
So that the program changes from parameter selection mode to operation mode, press buttons
and simultaneously for at least 3 seconds.
If the program is still in parameter setting mode, follow the instructions given under point .
The symbols shown on the right will be shown in the
lower left-
hand corner of the text display. They
indicate to the operator which mode the equipment is
currently in.
+ -Operation mode
+^-Parameter selection mode
+>-Parameter setting mode
If no buttons are pressed for 4 minutes, the RM-216 CB automatically returns from parameter
selection mode or parameter setting mode to operation mode with the last values stored.