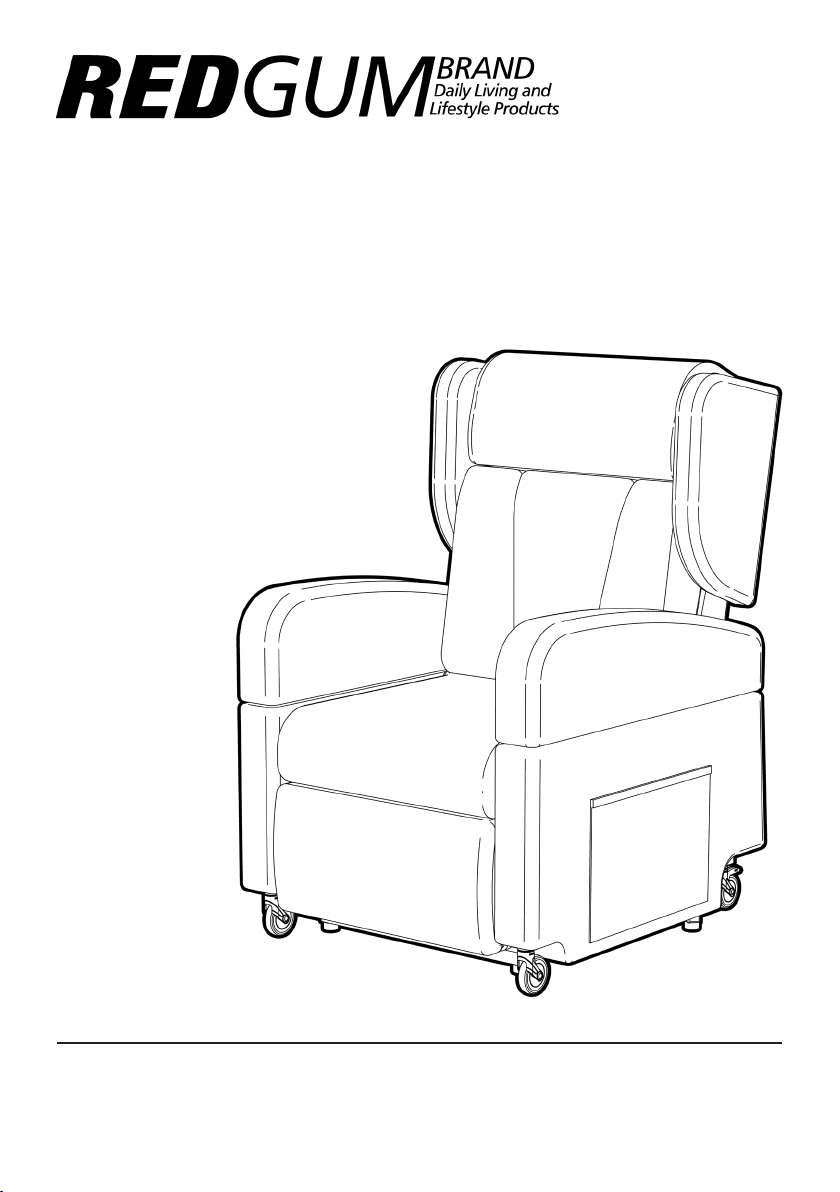
REDGUM Brand LC0901 User manual

redgumbrand.com.au
ULTRACARE
MOBILE HEIGHT ADJUSTABLE LIFT CHAIR
LC0901
USER MANUAL
Please read and keep these instrucons
EDITION 1

redgumbrand.com.au
REDGUM Brand owns the copyright to the ULTRACARE MOBILE ADJUSTABLE HEIGHT LIFT CHAIR
user manual.
Any informaon contained in this user manual shall not be photocopied, reproduced or
translated into any other languages without the prior wrien consent of REDGUM Brand.
REDGUM Brand strives to provide the highest quality products possible.
Products are subject to change without noce.
© Copyright REDGUM Brand 2021
REDGUM Brand is part of FOR-DE Group Pty Ltd

redgumbrand.com.au
CONTENTS
1. INTRODUCTION - INTENDED USE
2. PRODUCT OVERVIEW - FEATURES / SPECIFICATIONS
3. ASSEMBLY - UNPACK and INSPECT SUPPLIED PARTS
4. ASSEMBLY - ATTACH PUSH HANDLE TO BACKREST
5. ASSEMBLY - ATTACH BACKREST TO CHAIR BASE
6. ASSEMBLY - ATTACH ARMREST TO CHAIR BASE
7. ASSEMBLY - ATTACH WINGS TO CHAIR BASE
8. ASSEMBLY - BATTERY CONNECTION
9. ASSEMBLY - MAINS POWER CONNECTION
10. ASSEMBLY - BATTERY CHARGING
11. USAGE GUIDELINES - CHAIR POSITIONING AND CASTORS
12. USAGE GUIDELINES - HANDSET CONTROLS
13. USAGE GUIDELINES - DO’s + DON’Ts
14. PRODUCT CARE - INSPECTIONS / CLEANING
15. WARRANTY
16. REDGUM BRAND PRODUCT RANGE

redgumbrand.com.au
INTRODUCTION
Thank you for purchasing this quality REDGUM Brand product.
If you have any issues or quesons about the
please contact your local distributor or REDGUM Brand direct:
T: +61 8 9248 4180
E: sales@for-de.com.au
A: 1 Business Way, Malaga Western Australia 6090
INTENDED USE
This product has limitaons and should be used in accordance to these guidelines.
Failure to follow these guidelines may result in damage to the product and injury
to the user. It is the responsibility of the user to ensure the suitability of this product
for its intended use. The user should consult their appropriate healthcare
professional if unsure of the correct product usage for their unique circumstances.
Only use your ULTRACARE Mobile Li Chair for the purpose for which it is
intended, which is as a single seang armchair that can li, rest and recline.
Read and follow all instrucons, warnings and notes in this manual and all other
accompanying literature before aempng to operate this product for the rst me.
In addion, your safety depends upon you, as well as your dealer, carer or
healthcare professional in using good judgement.
IMPORTANT NOTE
This equipment MUST be assembled
by a competent person.
It is recommended that a second person
is used to assist with connecng the
backrest onto the chair.
1.

redgumbrand.com.au
PRODUCT OVERVIEW
FEATURES
Adjustable electric armchair
- Seat raise and lt funcon
- Backrest recline funcon
- Legrest elevaon funcon
- Li chair height adjustment funcon
- Mobile li chair with baery pack
- Removable Lithium-ion baery
- Audible and visual warning when baery
requires recharging
- Ø75mm castors with push handle at rear
- Handset controls with large buons
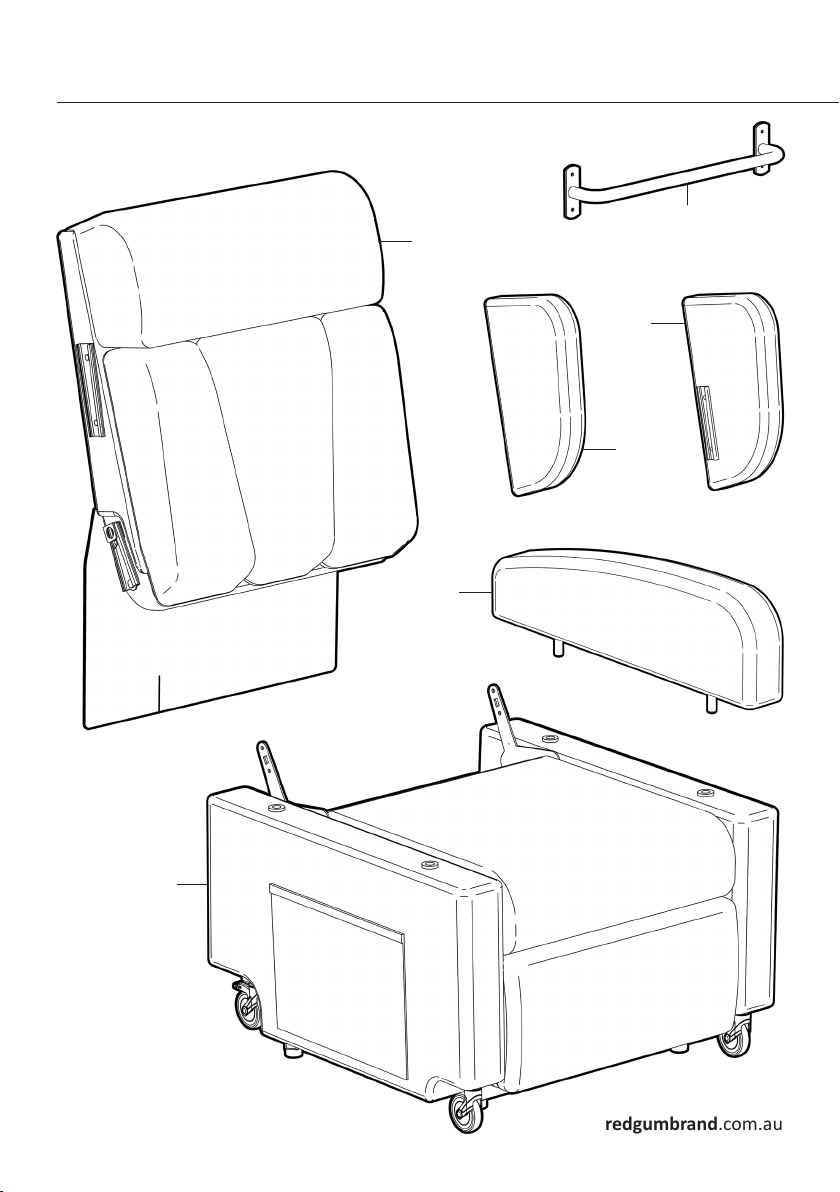
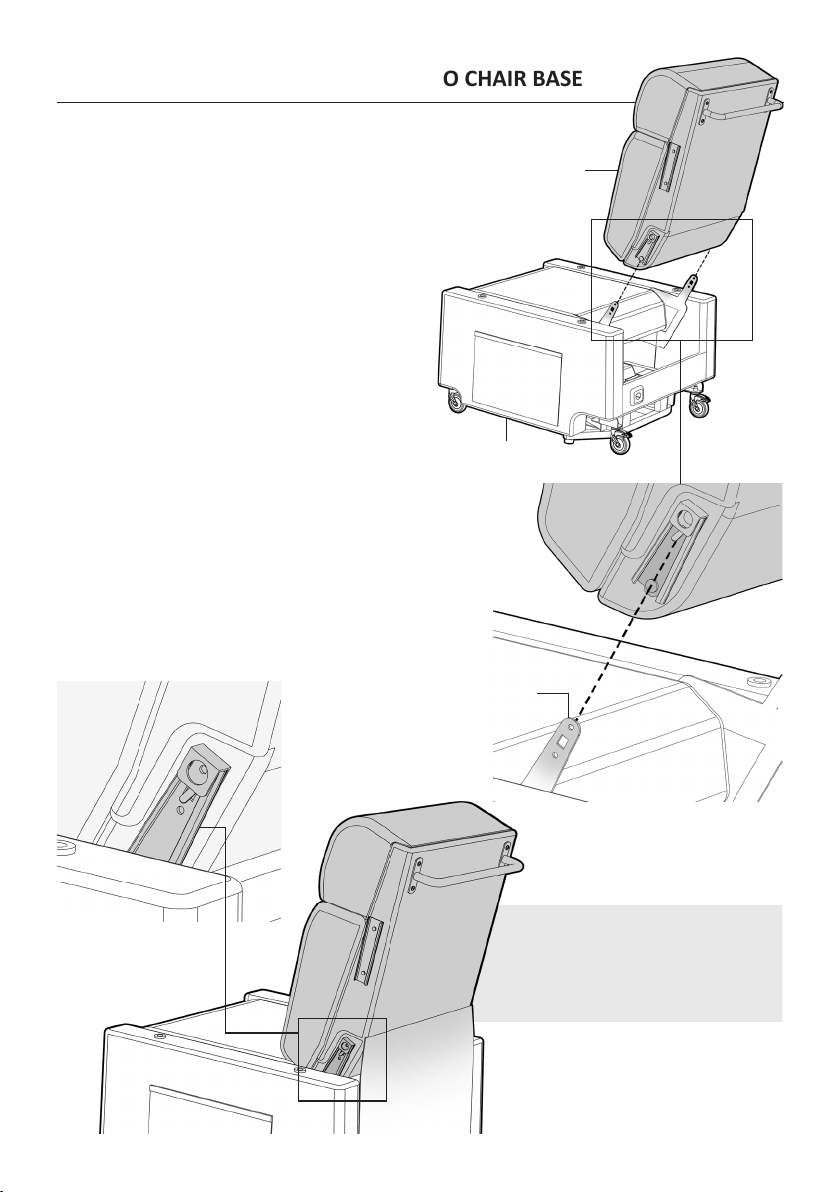
- Removable armrests and wings for side transfers
- Inconnent PU backrest / seat / legrest coverings
- Vinyl side coverings with storage pockets either side
- Added comfort of a pocket spring seat base
- Quality German actuators
SPECIFICATIONS
(All specicaons may vary (+/- 10mm) as each chair is handcraed)
Overall: 760mm (W) x 850mm (D) x 1140mm (H)
Seat: 540mm (W) x 510mm (D) x 530 - 710mm (H)
Armrest: 100mm (W) x 450mm (D) x 180mm (H) (Relevant to seat)
Backrest: (Relevant to seat)
Legrest: (Relevant to seat)
Castors: ø75mm - Swivel front / Braked rear
Distance from wall: 600mm
Maximum User Weight: 160kg
Product Weight: Base: 48.3 kg / Backrest: 7.5kg / Armrest: 2.8kg / Wing: 1.8kg
Combined weight: 65kg
Baery:
Please contact REDGUM Brand if you would like any further informaon.
2.

redgumbrand.com.au
ASSEMBLY- UNPACK and INSPECT SUPPLIED PARTS
Ensure you have been supplied with the following parts:
3.
LEFT
WING
(x1)
PUSH HANDLE
(x1)
BASE
(x1)
BACKREST
(x1)
RIGHT
WING
(x1)
ARMREST
(x2)

redgumbrand.com.au
IMPORTANT NOTE
Check the product for any visible damage. If you see any damage or suspect a fault
DO NOT USE YOUR PRODUCT and contact your supplier for support.
4.
CHECK HANDSET
IN SIDE POCKET
TOOL REQUIRED (not supplied)
- Large phillips head screwdriver
POWER CABLE
(x1)
NOTE: Parts shown on this page are not to scale
BOLT
(x4)
BATTERY
(x1) BATTERY CHARGER
(x1)

redgumbrand.com.au
5.
ASSEMBLY- ATTACH PUSH HANDLE TO BACKREST
Please follow these steps to aach the push handle to backrest:
1. Line up push handle holes
with backrest holes.
2. Using large phillips head screwdriver
x push handle into posion
using 4 Bolts.
Bolt
Push Handle
NOTE:
Check to ensure push handle
has been securely ed
in place prior to use.

redgumbrand.com.au
6.
ASSEMBLY- ATTACH BACKREST TO CHAIR BASE
Please follow these steps
to aach the backrest
to the chair base:
1. Posion the chair base as shown.
2. Align the backrest over the chair base
with the padded front facing toward
front of chair base.
3. Fit the backrest to the chair base by
sliding the mounng brackets located
on either side of the backrest onto the
mount plates located inside the sides
of chair at the rear of the chair base.
4. Push down on the backrest unl you
hear two loud ‘Clicks’ indicang
that BOTH connecon points are
locked in posion.
5. Pull up on the backrest to check that
it is securely locked down in place.
IMPORTANT NOTE:
Pull up on the backrest to check
that it is securely locked down
in place prior to use.
Mount plate
Backrest
Chair Base

redgumbrand.com.au
7.
ASSEMBLY- ATTACH ARMRESTS TO CHAIR BASE
Please follow these steps to aach
the armrests to chair base:
1. Align the armrest locaon pins
to the holes in the chair base.
2. Slide the armrest locaon pins
into the holes on chair.
3. Push armrest all the way
down unl fully located
onto the chair base.
4. Repeat process to locate
other armrest.
IMPORTANT NOTE:
Ensure both armrests are fully
located onto the chair base prior
to use.
Armrest
Locaon
Pins

redgumbrand.com.au
8.
ASSEMBLY- ATTACH WINGS TO BACKREST
Please follow these steps to aach the wings
to the backrest:
1. Align the bracket on the wing with the bracket
on the side of the backrest.
2. Slide the wing down onto the bracket.
3. Push wing all the way down unl fully located
onto side of backrest.
4. Repeat process for other wing.
IMPORTANT NOTE:
Ensure both wings are fully
located onto the backrest
prior to use.
Wings
Bracket

redgumbrand.com.au
9.
Baery
power
level
buon
ASSEMBLY- BATTERY CONNECTION
Please follow these steps to connect the baery.
1. Locate the baery port on the back of the chair.
(Can be found behind backrest cover ap)
2. Align the baery horizontally with the port.
3. Plug the baery in and turn 90° clockwise.
Press the buon on baery to check power level
(4 lights = fully charged / 1 light = recharge)
Baery
Baery port
Baery power level
indicaon lights
4 lights = fully charged
1 light = recharge
Correctly ed baery
(Vercal orientaon)
Plug baery in
and turn 90°
clockwise
IMPORTANT NOTE:
Audible and visual warning when baery
requires recharging

redgumbrand.com.au
IMPORTANT NOTE:
Always keep power cable clear of base frame
to avoid any cable damage.
10.
ASSEMBLY- MAINS POWER CONNECTION
Please follow these steps
to connect the li chair to
mains power.
1. Posion the chair near GPO plug.
It is recommended that you
into mains power. Try to avoid
using extension cords.
2. Insert the plug into the port
on the rear of chair and then
plug the power cable into the GPO.
LED indicator on transformer will show green.
Plug
GPO
Port
Power cable

redgumbrand.com.au
11.
ASSEMBLY- BATTERY CHARGING
Please follow these steps
to charge the baery.
1. Check baery level by pressing buon.
Lights indicate power level:
- 4 lights = full baery
- 1 light = recharge required
2. Plug the power cable plug into
the baery charger as shown.
3. Connect power cable to mains power.
4. Insert baery into charger.
5. Lights on baery will illuminate.
Baery is fully charged when all
4 lights are showing.
We recommend that a 2 baery system
be used where possible. One baery in use
and one baery on charge.
Baery
charger
Baery
Power cable plug
Power level
indicator lights

redgumbrand.com.au
12.
USAGE GUIDELINES - CHAIR POSITIONING AND CASTORS
Prior to using the Li Chair please follow
these steps to posion the chair as required:
- Posion the chair on a at and level oor.
- The li chair should be placed near
a power point if being plugged into
mains power. We recommend that
the chair be plugged directly into the
power source where possible.
- Allow sucient room in front and
behind the chair for reclining backrest and extending legrest:
- 600mm from wall
- 500mm + in front
- If possible maintain at least 1 metre between the li chair and other furniture.
- Avoid placing the chair in the direct sun (Material colour may fade over me with sunlight).
- DO NOT use li chair outdoors (Indoor use only).
600mm
clearance
behind
chair
IMPORTANT NOTE:
DO NOT use
your hands to
lock / unlock castors
(Potenal pinch point)
Please follow these steps to lock and unlock the castors:
1. To lock the castors: using your foot - press down on brake lever
2. To unlock castors: using your foot - push the small tab in towards castor to release brake.

redgumbrand.com.au
13.
USAGE GUIDELINES - HANDSET CONTROLS
The Li Chair comes with a handset that controls the various movement of the chair
Depress the relevant buon to achieve the required movement:
Raise the chair upLower down the chair
Press buon to go from li
to sing to reclined posion. Press buon to go from
reclined to sing to
lied posion.
NOTE:
The hook on the rear of the handset
can be removed if not required.

redgumbrand.com.au
USAGE GUIDELINES - DO’S + DON’TS
Please follow these guidelines to get the
opmal benet from the Li Chair.
Failure to follow these guidelines may result in
damage to the li chair and put the user at risk:
Maximum User Weight is 160kg.
Do not overload li chair!
- Ensure areas behind and in front
of the li chair are clear at all mes.
- Only the occupant or a qualied carer
should operate the li chair.
- Always leave the li chair in the
upright posion when not in use.
- Ensure that only ONE person
uses the li chair at a me.
- Do not allow anyone to sit
on the legrest when raised.
- Store the handset in the
side pocket when not in use.
- Do not expose the li chair to excessive heat, humidity or dust.
- When moving the li chair hold from the base - not backrest or armrests.
If you are unsure about any of these precauons please contact
your local distributor or REDGUM Brand direct for further informaon.
14.
IMPORTANT NOTE:
PINCH POINTS EXIST ON LIFT CHAIRS
Keep clear of the li and recline
mechanisms at all mes !

redgumbrand.com.au
15.
PRODUCT CARE - INSPECTIONS / CLEANING
INSPECTIONS
We suggest that you visually check the Li Chair periodically for signs of damage or wear
prior to use. Pay parcular aenon to the following areas:
- Handset including cable
- Baery , baery charger and power cable
- Actuators (motors)
- Coverings (look for pulls / tears / gaps / stch fraying)
Overall check that no components are loose or worn.
immediately if you suspect damage or any other fault.
If in any doubt, please do not issue or use, but immediately contact your
local distributor or REDGUM Brand direct for advice and service support.
CLEANING
Clean your li chair coverings using
a non-abrasive cleaner or mild detergent
with a so cloth.
Spot clean any spills as soon as possible to reduce
the amount of ingress into fabric seams.
Abrasive cleaners or abrasive cleaning pads
could damage the li chair coverings
and should not be used.
DO NOT expose any of the electrics
to any moisture:
- Actuators
- Handsets
- Cabling.
Keep these components dry
at all mes and away from
any temperature extremes.

redgumbrand.com.au
Please keep this User Manual in
a safe place for future reference.
WARRANTY
Your REDGUM Brand:
ULTRACARE Mobile Li Chair (LC0901)
is covered by the following warranes from the date of purchase:
- FRAME (including mechanisms): 5 years
- BATTERY and CHARGER: 1 year
- OTHER ELECTRICS: 2 years
- FABRICS: 2 years
If the product has any manufacturing faults during this period contact the place of
purchase for assessment. Failures as a result of ACCIDENTAL MISUSE, MODIFICATION
OR WEAR AND TEAR ARE NOT COVERED BY THIS WARRANTY.
Our goods come with guarantees that cannot be excluded under the Australian
Consumer Law. You are entled to a replacement part for a major failure and for
compensaon for any other reasonably foreseeable loss or damage. You are entled
to have the goods repaired or replaced if the goods fail to be of acceptable quality
and failure does not amount to major failure.
If you have any issues or quesons about your li chair
please contact your local distributor or REDGUM Brand direct on:
T: +61 8 9248 4180
E: sales@for-de.com.au
A: 1 Business Way, Malaga
Western Australia 6090
16.

redgumbrand.com.au
DISTRIBUTOR:
Proudly Australian Owned and Operated
Table of contents
Other REDGUM Brand Wheelchair manuals