5
Dieter Frank GmbH
Technical Changes and misprints reserved
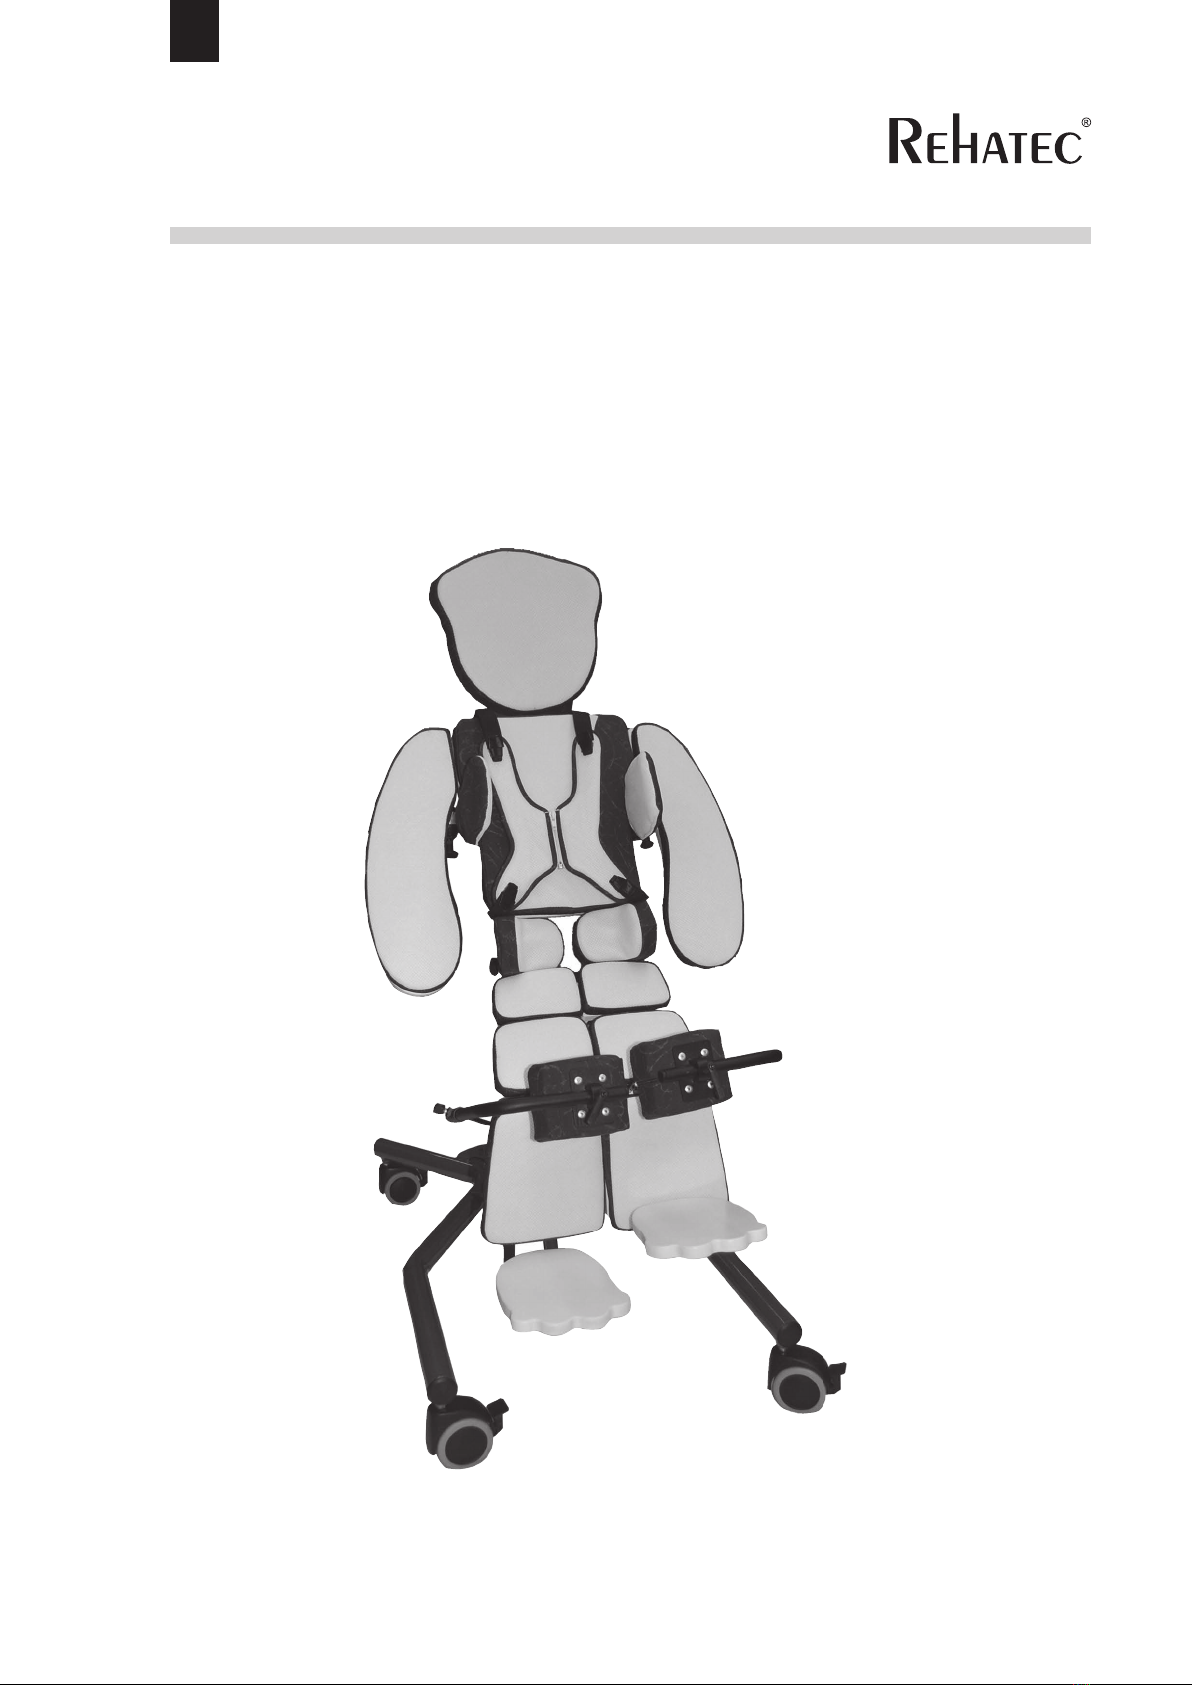
Supine-Bear “Lasse”
2. Legal Terms
Intended use
The Supine-Bear “Lasse” is a standing system which has been designed for children. Maximum user
weight is 50kg for size 1 and 60kg for size 2.
All safety precautions, advices and information in this manual have to be considered by the user/ope-
rator, to insure safe and successful use of the device.
This product is made strictly for professional use by trained and professionally instructed persons. Are-
as of use are: physiotherapy, rehab, physical therapy and medical therapy.
Rehatec Dieter Frank GmbH gives no guarantee concerning suitability of this product for a particular
therapeutic and diagnostic purpose.
The user/operator determines the purposeful use.
This medical product is intended for indoor use at room temperatures from 15°C to 35°C.
Use in wet rooms is not permitted. If disregarded it can cause severe damage and be dangerous for
the user as well as the operator.
Risks
Depending on the medical condition and the therapeutic goal, it is important to clarify with the physi-
cian or therapist, for how long the patient is able to stay in the standing system. The following symp-
toms might occur:
• Problems with circulation
• Pain in leg and/or back area
• Increase of spasticity
• Seizures
Many users have to initially stand in a exed position and only later can be fully extended. Never cor-
rect the position with force or hard pressure.
Responsibility
Alterations, repairs, maintenance work and upgrades of the system may only be carried out by autho-
rized persons.
Rehatec’s warranty applies only when the product is used according to the specied conditions and
for the intended purposes.