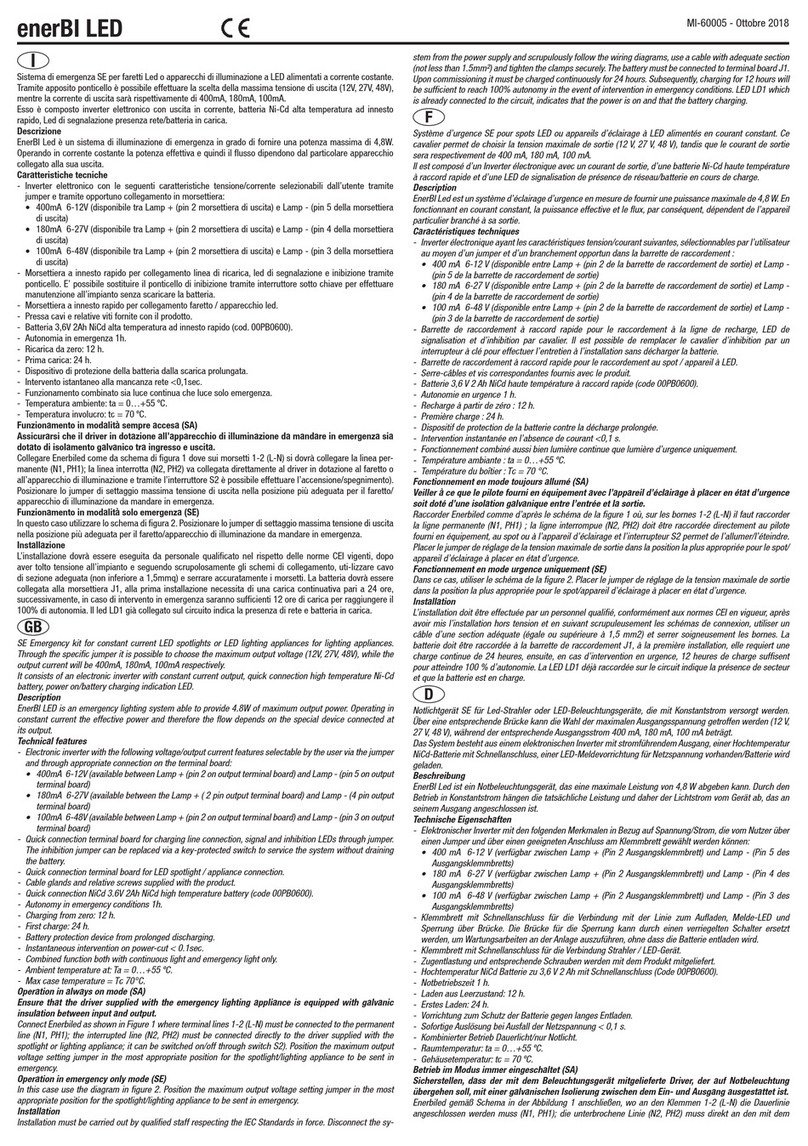
manuals.online logo
Brands
  1. Home
  2. •
  3. Brands
  4. •
  5. RELCO
  6. •
  7. Lighting Equipment
  8. •
  9. RELCO Inverled OB 12-48V SA-SE User manual

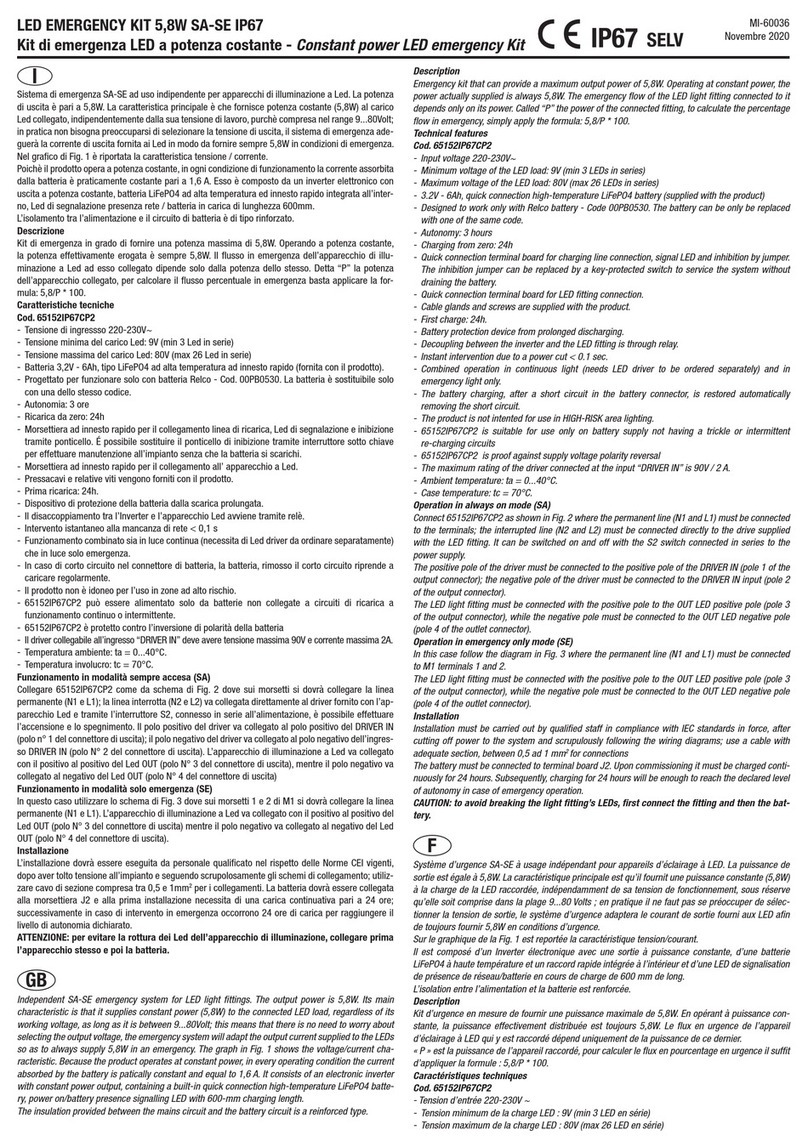
RELCO Inverled OB 12-48V SA-SE User manual

INVERLED OB 12-48V SA-SE - RP0709 82INVL48
Giugno 2015
Istruzioni per l’installazione
Collegare Inverled OB 12-48V SA-SE, utilizzando uno degli schemi riportati, a secondo del
tipo di utilizzo. Utilizzare lo schema di figura 1 per avere il funzionamento di tipo sempre
acceso SA (necessita di un alimentatore per led da ordinare separatamente).
Utilizzare lo schema di figura 2 per avere il funzionamento di tipo solo emergenza SE (non
necessita l’uso di un alimentatore per led).
Inserire il cablaggio “SPIA LED” e l’accumulatore come indicato in Fig. A. Disporre l’ac-
cumulatore lontano da fonti di calore, perché una temperatura troppo elevata può com-
prometterne la durata.
Caratteristiche tecniche
- Dimensioni compatte.
- Tensione di alimentazione: 220-240 V, 50/60 Hz.
- Batteria: 3,6V Ni-Cd a scelta in funzione dell’autonomia
- Temperatura ambiente: 0÷40°C.
- Assorbimento massimo di rete: 18 mA.
- Fattore di potenza: cosl0,8.
- Flusso luminoso costante in emergenza.
- Tensione massima di uscita / corrente di uscita selezionabile tramite ponticello mobile:
48V /100mA, 24V/200mA, 12V/400mA. In fabbrica Inverled OB 12-48V SA-SE esce con
ponticello nella posizione 12V massimi.
- Utilizzabile con faretti in corrente con numero minimo di 2 led e massimo 13 led
- Utilizzabile con faretti led in tensione a 12V, 24V, 48V del tipo non a potenza costante
- Autonomia: 1h / 3h a seconda della batteria scelta (1h con batteria 3,6V 2Ah codice
00PB0600, 3h con batteria 3,6V 4Ah codice 00PB0100)
- Spia LED di attivazione del circuito di ricarica.
- Tempo di ricarica: max 12 ore per batteria 00PB0600, max 24h per batteria 00PB0100
- Morsetti (3-4) per inibizione tramite interruttore
- Conforme alla norma EN60598 - 2 - 22.
- Collegamento lato rete e controllo remoto con cavi da 0,75 a 1,5 mm2.
- Collegamento lato uscita con cavi da 0,75 a 1 mm2.
- Lunghezza standard cavo led: 600 mm.
- Lunghezza standard cavo batteria: 340 mm.
Attenzione
- Assicurarsi che la corrente erogata da Inverled OB 12-48V SA-SE sia inferiore o uguale
alla massima corrente sopportata dal carico LED collegato.
- Prima di collegare INVERLED OB 12-48V SA-SE al carico selezionare tramite l’apposito
ponticello la massima tensione di uscita desiderata, quindi collegare il polo negativo del
carico LED all’uscita contrassegnata dalla stessa tensione scelta.
- Scegliere ad esempio una tensione di uscita massima di 48V e collegare il polo
negativo del carico ad un’uscita diversa (24V oppure 12V) può portare al guasto
permanente dell’Inverled OB 12-48V SA-SE.
- La protezione contro i contatti accidentali, per l’alimentatore, dipende dall’involucro
dell’apparecchio a cui è collegato. Inverled può essere alimentato solo da batterie non
collegate a circuiti di ricarica a funzionamento continuo o intermittente.
Avvertenze
- Leggere attentamente le avvertenze contenute in questo foglio istruzioni, perchè
fornisce delle indicazioni molto importanti che riguardano l’installazione, l’uttilizzo e la
manutenzione.
- Dopo aver tolto l’imballaggio assicurarsi dell’integrità dell’apparecchio. In caso di
dubbio rivolgersi a personale qualificato.
- Prima di collegare l’apparecchio, accertarsi che i dati targa siano corrispondenti a quelli
della rete elettrica di distribuzione.
- Questo apparecchio dovrà essere destinato solo all’uso per il quale è stato espressamente
concepito e collegato secondo le istruzioni fornite. Ogni altro uso è da considerarsi
improprio e quindi pericoloso.
Il costruttore non può essere considerato responsabile per eventuali danni a persone
animali o cose derivati da usi impropri, erronei ed irragionevoli.
- Inverled OB 12-48V SA-SE è costruito unicamente per essere alimentato dalle batterie
previste a catalogo e nel presente foglio istruzioni.
- Non associare Inverled a dispositivi di ricarica esterni.
- Prima di effettuare qualsiasi operazione di pulizia o di manutenzione, disinserire
l’apparecchio dalla rete.
- In caso di guasto, per l’eventuale riparazione rivolgersi ad un centro di assistenza tecnica
autorizzato dal costruttore e richiedere l’utilizzo di ricambi originali. Il mancato rispetto di
quanto sopra può compromettere la sicurezza dell’apparecchio.
Instructions for installation
Connect the Inverled OB 12-48V SA-SE, using one of the diagrams shown, depending on
the type of use. Use the diagram in figure 1 for SA always on type operation (requires an
LED power supply to be ordered separately).
Use the diagram in figure 2 for SE only emergency type operation (does not require an
LED power supply).
Insert the “LED INDICATOR LIGHT” wiring and the battery as shown in Fig. A. Place the
battery far from sources of heat, as excessively high temperatures can compromise its
duration.
Technical features
- Compact dimensions.
- Input voltage: 220-240 V, 50/60 Hz.
- Batteries: choice of 3.6V Ni-Cd, depending on duration
- Ambient temperature: 0÷40°C.
- Max absorption from mains: 18 mA.
- Power factor: cosl0.8.
- Constant lamp brightness during emergency operation.
- Max output voltage/output current, selectable via mobile jumper: 48V/100mA,
24V/200mA, 12V/400mA. Inverled OB 12-48V SA-SE comes out the factory with the
jumper in the 12V maximum position.
- Can be used with spotlights in current with a minimum of 2 and a maximum of 13
LEDs.
- Can be used with spotlights under 12V, 24V, 48V voltage not in constant power
- Duration: 1h/3h depending on the battery chosen (1h with 3,6V 2Ah battery code
00PB0600, 3h with 3,6V 4Ah battery code 00PB0600)
- Charging circuit activation LED indicator light.
- Charging time: max 12 hours for 00PB0600 battery, max 24 hours for 00PB0100 battery
- Terminals (3-4) to inhibit via switch
- Complies with the EN60598 - 2 - 22 standard.
- Mains and remote control connection with 0.75 to 1.5mm2cables.
- Output connection with 0.75 to 1mm2cables.
- LED cable standard length: 600mm.
- Battery cable standard length: 340mm.
Attention
- Make sure that the current produced by Inverled OB 12-48V SA-SE is less than or equal
to the maximum current that can be sustained by the connected LED load.
- Before connecting Inverled OB 12-48V SA-SE to the load, select the maximum output
voltagedesiredviathe specificjumper,thenconnectthenegativepoleofthe LEDloadtothe
output marked with the same voltage chosen.
- For example, chosing a maximum output voltage of 48V and connecting the negative
pole of the load to a different output (24V or 12V) can permanently damage the Inverled
OB 12-48V SA-SE.
- Protection against accidental contact for the power supply depends on the casing of
the unit to which it is connected. Inverled can only be powered by batteries that are not
connected to continuous or intermittent operation charging circuits.
Warnings
- Carefully read the instructions printed on this leaflet because it contains important
information regarding proper installation, use and maintenance.
- After having removed the packaging, make sure the unit is intact. In case of doubts,
contact qualified personnel.
- Before connecting the unit, make sure that the data on the plate correspond to thosen
on the mains.
- This unit must only be used for the purposes for which it is expressly intended and
connectedaccordingtotheinstructionsprovided.Anyotheruseistobeconsideredimproper
and, therefore, dangerous. The manufacturer cannot be held liable for any damages to
persons, animals or things due to improper, wrong or unreasonable use.
- Inverled OB 12-48V SA-SE is made to be powered solely by the batteries shown in the
catalogue and in this instructions leaflet.
- Do not connect Inverled to external chargers.
- Disconnect the unit from the mains before beginning any cleaning or maintenance
operations.
- If the unit fails, contact a technical assistance centre aothorised by the manufacturer for
any repairs and request the use of original spare parts. Failure to respect the above can
compromise unit security.
Instructions pour l’installation
Brancher Inverled OB 12-48V SA-SE en utilisant l’un des schémas indiqués, en fonction
du type d’utilisation. Utiliser le schéma de la figure 1 pour avoir le fonctionnement de
type toujours allumé SA (un alimentateur pour LED est nécessaire, il faut le commander
séparément).
Utiliser le schéma de la figure 2 pour avoir le fonctionnement de type urgence uniquement
SE (un alimentateur pour LED est nécessaire, il faut le commander séparément).
Introduire le câblage “VOYANT LUMINEUX” et l’accumulateur comme indiqué sur la Fig.
A. Placer l’accumulateur loin de toute source de chaleur, car une température trop élevée
peut compromettre sa durée de vie.
Caractéristiques techniques
- Dimensions compactes.
- Tension d’alimentation : 220-240V, 50/60 Hz.
- Batterie : 3,6V Ni-Cd au choix en fonction de l’autonomie
- Température ambiante : 0÷40°C.
- Courant maximum absorbé par le réseau : 18 mA.
- Facteur de puissance : cosl0,8.
- Flux lumineux constant en urgence.
- Tension de sortie maximale / courant de sortie sélectionnable par cavalier mobile:
48V /100mA, 24V/200mA, 12V/400mA. INVERLED OB sort d’usine avec le cavalier dans
la position 12V maximum.
I
GB
F
- Utilisable avec des spots en courant avec un nombre minimum de 2 LED et maximum de
13 LED
- Utilisable avec spots à LED en tension à 12V, 24V, 48V du type pas à puissance
constante.
- Autonomie: 1h/3h selon le choix de la batterie (1h avec la batterie 3,6V 2Ah code
00PB0600, 3h avec la batterie 3,6V 4Ah codce 00PB0100)
- Voyant lumineux d’activation du circuit de recharge.
- Temps de recharge : max 12 heures pour la batterie 00PB0600, max 24h pour la batterie
00PB0100
- Bornes (3-4) pour inhibition par interrupteur
- Conforme à la norme EN60598 - 2 - 22.
- Branchement côté réseau et contrôle à distance avec des câbles de 0,75 à 1,5 mm2.
- Branchement côté sortie avec des câbles de 0,75 à 1 mm2.
- Longueur standard du câble LED : 600 mm.
- Longueur standard du câble batterie : 340 mm.
Attention
- S’assurer que le courant fourni par Inverled OB 12 - 48V est inférieur ou égal au courant
maximum supporté par la charge du LED connecté.
- Avant de brancher Inverled OB 12-48V SA-SE à la charge, il faut sélectionner le cavalier
spécifique à la tension de sortie maximale souhaitée, puis connecter le pôle négatif de la
charge du LED à la sortie portant la même tension que celle sélectionnée.
- Par exemple, sélectionner une tension de sortie maximale de 48V et connecter le pôle
négatif de la charge à une sortie différente (24V ou 12V) cela peut entraîner une panne
permanente de l’Inverled.
- Pour l’alimentateur, la protection contre les contacts accidentels dépend du boîtier
de l’appareil auquel il est connecté. Inverled peut être alimenté exclusivement par des
batteries non-connectées à des circuits de recharge à fonctionnement continu ou inter-
mittent.
Mises en garde
- Lire attentivement les mises en gardes contenues dans cette notice d’instructions, car
celle-ci comprend des indications extrêmement importantes concernant l’installation,
l’utilisation et la maintenance.
- Après avoir déballé l’appareil, contrôler que celui-ci est en bon état. En cas de doute,
consulter un personnel qualifié.
- Avantdebrancherl’appareil,s’assurerquelesdonnéesdelaplaquecorrespondentbienaux
données du réseau de distribution électrique.
- Cet appareil devra être destiné uniquement à l’utilisation pour laquelle il a été
expressément conçu et branché conformément aux instructions fournies. Toute autre
utilisation doit être considérée comme impropre et donc dangereuse. Le fabricant ne peut
être considéré responsable des éventuels dommages causés à des personnes ou à des
choses dérivant d’utilisations impropres, incorrectes et non raisonnables.
- Inverled OB 12-48V SA-SE est conçu uniquement pour être alimenté par des batteries
prévues dans le catalogue et dans cette notice d’instructions.
- Ne pas associer Inverled à des dispositifs extérieurs de recharge.
- Avant d’effectuer toute opération de nettoyage ou de mantenance, débrancher
l’appareil du secteur.
- En cas de panne,pour l’éventuelle réparation, contacter un centre d’assistance technique
agréé par le fabricant et demander l’utilisation de pièces de rechange originales. Le
non-respect des indications susmentionnées peut compromettre la sécurité de
l’appareil.
Installationshinweise
Inverled OB 12-48V SA-SE mithilfe eines der abgedruckten Schaltpläne abhängig von der
Verwendungsart anschließen. Den Plan aus Abbildung 1 verwenden, um die Betriebswei-
se SA Immer An zu erhalten (hierzu wird ein LED-Vorschaltgerät benötigt, das separat
bestellt werden muss).
Den Plan aus Abbildung 2 verwenden, um die Betriebsweise SE Nur Notleuchte zu erhal-
ten (es wird kein LED-Vorschaltgerät benötigt).
Verkabelung “SPIA LED” (LED-Kontrollleuchte) und den Akkumulator wie in Abb. A gezeigt
einsetzen. Akkumulator von Wärmequellen fernhalten, da eine zu hohe temperatur dessen
Lebensdauer verkürzen kann.
Technische Eigenschaften
- Kompakte Abmessungen.
- Versorgungsspannung: 220-240 V, 50/60 Hz.
- Batterie: 3,6 V Ni-Cd nach Wahl, je nach Autonomie
- Raumtemperatur: 0÷40 °C.
- Maximale Netzstromaufnahme: 18 mA.
- Leistungsfaktor: cosl0,8.
- Gleichbleibender Lichtstrom bei Notbeleuchtungsbetrieb.
- Maximale Ausgangsspannung / Ausgangsstrom wählbar mittels Jumper: 48 V /100 mA,
24 V/200 mA, 2V/400 mA. Werkseitig wurde Inverled OB 12-48V SA-SE mit Jumper auf
max. 12 V eingestellt.
- Verwendbar mit stromführenden Spots mit min. 2 und max. 13 LEDs.
- Verwendbar mit LED-Spots mit Spannung 12 V, 24 V, 48 V mit Bereitschaftsleistung.
- Autonomie: 1 Std. / 3 Std. je nach gewählter Batterie (1 Std mit Batterie 3,6 V 2 Ah Art
Nr. 00PB0600, 3 Std. mit Batterie 3,6 V 4 Ah Art.Nr. 00PB0100).
- LED-Betriebsanzeige des Aufladekreises.
- Ladezeit: max. 12 Stunden für Batterie 00PB0600, max. 24 Stunden für Batterie
00PB0100.
- Klemmen (3-4) zur Sperrung mittels Schalter.
- Entspricht Norm EN 60598 - 2 - 22.
D
- Netzseitiger Anschluss und Fernsteuerung mit Kabeln von 0,75 bis 1,5 mm2.
- Ausgangsseitiger Anschluss mit Kabeln von 0,75 bis 1 mm2.
- Standard-Kabellänge LED: 600 mm.
- Standard-Kabellänge Batterie: 340 mm.
Achtung
- Sicherstellen,dassdervon InverledOB12-48V SA-SEabgegebene Stromunteroder gleich
dem max. Strom ist, dem der angeschlossene LED-Lastanschluss standhält.
- VordemLastanschlussvonInverledOB12-48VSA-SEmitdementsprechendenJumperdie
gewünschte maximale Ausgangsspannung auswählen, dann den negativen Pol der
LED-Last mit dem Ausgang verbinden, dessen Kennzeichnung der gewählten
Spannung entspricht.
- Wenn beispielsweise eine maximale Ausgangsspannung von 48 V ausgewählt und der
negative Pol der Last an einen anderenAusgang angeschlossen wird (24V oder 12V), kann
Inverled OB 12-48V SA-SE dauerhaft beschädigt werden.
- Der Schutz des Vorschaltgeräts gegen unbeabsichtigten Kontakt hängt vom Gehäuse des
Geräts ab, an das es angeschlossen ist.Inverled kann nur mit Batterien gespeist werden,
die nicht an Aufladekreise mit kontinuierlichem oder intermittierendem Betrieb
angeschlossen sind.
Warnhinweise
- Die Hinweise dieser Anleitung sorgfältig lesen, weil sie sehr wichtige Informationen
bezüglich der Installation, der Verwendung und der Wartung liefern.
- Nach dem Entfernen der Verpackung den einwandfreien Zustand des Geräts prüfen. Bei
Zweifeln Fachpersonal kontaktieren.
- Vor dem Anschluss des Geräts sicherstellen, dass die Daten des Typenschilds denen des
Stromnetzes entsprechen.
- DiesesGerätdarf nurfürden Zweckverwendet werden,fürdenes ausdrücklichentwickelt
wurde, und muss entsprechend den gemachten Angaben installiert werden. Jede andere
Verwendungistunsachgemäßunddahergefährlich.DerHerstellerkannnichtfüreventuelle
Schäden an Personen, Tieren oder Gegenständen haftbar gemacht werden, die auf eine
unsachgemäße Verwendung zurückzuführen sind.
- Inverled OB 12-48V SA-SE wurde ausschließlich für eine Versorgung mit den im Katalog
und in dieser Anleitung vorgesehenen Batterien entworfen.
- Inverled nicht an externe Ladevorrichtungen anschließen.
- Vor Reinigungs- oder Wartungsarbeiten die Stromversorgung des Gerätes
unterbrechen.
- Bei einem Defekt oder für Reparaturen ein vom Hersteller autorisiertes, technisches
Kundendienstzentrum kontaktieren und dieVerwendung von Originalteilen verlangen.Die
Missachtung dieser Hinweise kann die Sicherheit des Geräts beeinträchtigen.
Instrucciones para la instalación
Conecte Inverled OB 12-48V SA-SE, utilizando uno de los esquemas incluidos, según el
tipo de uso. Utilice el esquema de la figura 1 para el funcionamiento “siempre activo” SA
(requiere un alimentador para indicador de led, que debe solicitarse por separado).
Utilice el esquema de la figura 2 para el funcionamiento “solo emergencia” SE (no requie-
re alimentador para indicador de led).
Monte el cableado “INDICADOR LED” y el acumulador tal como se muestra en la Fig.
A. Coloque el acumulador lejos de fuentes de calor ya que una temperatura demasiado
elevada puede comprometer la duración.
Características técnicas
- Dimensiones compactas.
- Tensión de alimentación: 220-240 V, 50/60 Hz.
- Batería: 3,6 V Ni-Cd a elegir en función de la autonomía
- Temperatura ambiente: 0÷40 °C.
- Consumo máximo de la red: 18 mA.
- Factor de potencia: cosl0,8.
- Flujo luminoso constante en emergencia.
- Tensión máxima de salida/corriente de salida programable mediante puente móvil:
48 V /100 mA, 24 V/200 mA, 12 V/400 mA. De la fábrica Inverled OB 12-48V SA-SE sale
con el puente en la posición de 12 V máximos.
- Puede utilizarse con faros con corriente con 2 led con mínimo y 13 como máximo
- Puede utilizarse con faros de led con tensión de 12V, 24V, 48V del tipo sin potencia
constante.
- Autonomía: 1h/3h según la batería elegida (1h con batería de 3,6V 2Ah, código
00PB0600; 3h con batería de 3,6V 4Ah, código 00PB0100)
- Indicador luminoso LED de activación del circuito de recarga.
- Tiempo de recarga: máx. 12 horas para batería 00PB0600; máx. 24 h para batería
00PB0100
- Bornes (3-4) para inhibición mediante interruptor
- En conformidad con la norma EN60598 - 2 - 22.
- Conexión lado de red y control a distancia con cables de entre 0,75 y 1,5 mm2.
- Conexión lado de salida con cables de entre 0,75 y 1 mm2.
- Longitud estándar del cable del indicador de led: 600 mm.
- Longitud estándar del cable de la batería: 340 mm.
Atención
- Asegúrese de que la corriente suministrada por Inverled OB 12-48V SA-SE sea inferior o
igual a la corriente máxima soportada por la carga del indicador de led conectado.
- Antes de conectar Inverled OB 12-48V SA-SE a la carga, seleccione, mediante el opor-
tuno puente, la tensión máxima de salida deseada; después, conecte el polo negativo de
la carga del indicador LED a la salida marcada con la tensió elegida.
- Elegir, por ejemplo, una tensión de salida máxima de 48 V y conectar el polo negativo
de la carga a una salida diferente (24 V, o bien 12 V), puede desembocar en la avería
E
permanente del INVERLED.
- La protección contra los contactos accidentales, para el alimentador, depende del
revestimiento del aparato al que está conectado. Inverled sólo puede alimentarse con
baterías no conectadas a circuitos de recarga de funcionamiento continuo o intermitente.
Advertencias
- Lea atentamente las advertencias de este documento de instrucciones, ya que ofrecen
indicaciones importantes sobre la instalación, el uso y el mantenimiento.
- Tras haber quitado el embalaje, asegúrese de que el aparato esté en perfecto estado. En
caso de dudas, póngase en contacto con personal cualificado.
- Antes de conectar el aparato, cerciórese de que los datos de la placa se correspondan
a los de la red eléctrica de suministro.
- Este aparato sólo debe destinarse al uso para el que ha sido expresamente ideado y
conectarse según las instrucciones facilitadas. Cualquier otro uso debe considerarse
inapropiado y, por tanto, peligroso. El fabricante no se considera responsable por daños a
personas, animales o cosas derivados de usos inapropiados, erróneos e irracionales.
- Inverled OB 12-48V SA-SE ha sido fabricado únicamente para ser alimentado con las
baterías previstas en el catálogo y en este documento de instrucciones.
- No conecte Inverled a dispositivos de recarga externos.
- Antes de realizar cualquier operación de limpieza o mantenimiento, desenchufe el
aparato de la red.
- En caso de avería del aparato, para su reparación, póngase en contacto con un centro de
asistencia técnica autorizado por el fabricante y solicite el uso de repuestos originales. El
incumplimiento de cuanto acaba de referirse, puede comprometer la seguridad del
aparato.
Installationsvejledning
Forbind Inverled OB 12-48V SA-SE, ved hjælp af et af diagrammerne, i henhold til an-
vendelsestypen. Brug diagrammet i figur 1 til at have funktionen “tændt altid” (SA) (det
kræver en strømforsyning til lysdiode, som skal bestilles separat).
Brug diagrammet i figur 2 til at have funktionen “kun nødstilfælde” (SA) (det kræver ikke
en strømforsyning til lysdiode).
Indsæt ledninger “LED-indikator” og akkumulatoren som vist i fig. A. Arranger batteriet
væk fra varmekilder, fordi en for høj temperatur kan påvirke varigheden.
Tekniske specifikationer
- Kompakte dimensioner.
- Netspænding : 220-240 V, 50/60 Hz.
- Batteri : 3,6V Ni-Cd valgfrit til den selvstændige funktion
- Omgivelsestemperatur : 0÷40°C
- Maksimal netværksoptagelse: 18 mA.
- Strømfaktor: cosl0.8.
- Konstant lysudbytte i nødstilfælde.
- Maksimal udgangsspænding / strømudgang vælges med jumper: 48V /100mA,
24V/200mA, 12V/400mA. Inverled OB 12-48V SA-SE kommer ud fra fabrikken med
jumperen i maksimal position 12V.
- Kan anvendes med strømførende spots med minimum antal lysdioder 2, maksimum
13 LED
- Kan anvendes med spændingsførende spots ved 12V, 24V, 48V med ikke-konstant effekt
- Autonomi: 1t / 3t afhængigt af batterivalg (1 time med batteri 3.6V 2Ah kode 00PB0600,
3t med batteri 3.6V 4Ah kode 00PB0100)
- LED lysaktivering af kredsløbsopladning.
- Opladningstid: maks. 12 timer for batteri 00PB0600, maks. 24 timer for batteri
00PB0100
- Terminaler (3-4) til inhibition ved hjælp af afbryder
- Overholder standard EN60598 - 2-22.
- Gitter-side-forbindelse og fjernbetjening med kabler 0,75 - 1,5 mm2.
- Udgangs-side-forbindelse med kabler 0,75 - 1 mm2.
- Standardlængde lysdiode-kabel: 600 mm.
- Standardlængde batteri-kabel: 340 mm.
Bemærk
- Sørg for, at strømmen der leverer af Inverled OB 12 - 48V er mindre end eller lig med
den maksimale strøm, der understøttes af den tilsluttede lysdiode-belastning.
- Før tilslutning Inverled OB 12-48V SA-SE til belastningen,skal det vælges,ved hjælp af den
relevante jumper, den maksimale spænding for den ønskede udgang, og tilslut derefter
den negative pol i LED-belastningen, der er markeret ved udgangen af den selvsamme,
valgte spænding.
- Hvis for eksempel der vælges en maksimal udgangsspænding på 48V og tilslut den
negative belastningspol til en anden udgang (24V eller 12V) kan dette fører til
permanent svigt af INVERLED.
- Beskyttelsen mod utilsigtet kontakt til strømforsyningen, afhænger af kabinettet på den
enhed, som den er tilsluttet. Inverled kan kun drives af batterier, der ikke er forbundet
til kontinuerligt eller intermitterende opladningskredsløb.
Advarsler
- Læs omhyggeligt anvisningerne i denne vejledning, fordi de giver meget vigtige
oplysninger om installation, brug og vedligeholdelse.
- Efter at have fjernet emballagen, skal apparatets integritet kontrolleres. Hvis der er tvivl,
skal en kvalificeret tekniker kontaktes.
- Før apparatet tilsluttes sørg da for, at oplysningerne på etiketten svarer til dem på
strømforsyningsnettet.
- Dette apparat må kun anvendes til det formål, hvortil det er produceret og skal tilsluttes
i overensstemmelse med de udleverede anvisninger. Enhver anden brug betragtes som
ukorrekt, og er derfor farlig. Producenten kan ikke holdes ansvarlig for eventuelle
skader på personer eller dyr, der er forårsaget af forkert brug eller fejl.
- Inverled OB 12-48V SA-SE er bygget til at kun at få strøm fra de batterier, der indgår i
kataloget og i denne vejledning.
- Inverled OB 12-48V SA-SE må ikke forbindes til nogen ekstern batterioplader.
- Før enhver rengøring eller vedligeholdelse skal apparatet frakobles netværket.
- I tilfælde af fejl, ved eventuel reparation, skal henvendelse ske til et servicecenter, der
er autoriseret af producenten, og der skal anmodes om anvendelse af originale
reservedele. Manglende overholdelse af de leverede anvisninger kan bringe apparatets
sikkerhed i fare.
Instruções para a instalação
Conectar Inverled OB 12-48V SA-SE utilizando um dos esquemas ilustrados, de acordo
com o tipo de uso. Utilizar o esquema da figura 1 para obter o funcionamento de tipo
sempre aceso SA (precisa de um alimentador para led a ser pedido separadamente).
Utilizar o esquema de figura 2 para obter o funcionamento de tipo apenas emergência SE
(não precisa usar um alimentador para led).
Inserir a cablagem “INDICADOR LUMINOSO LED” e o acumulador como indicado na Fig.
A. Colocar o acumulador longe das fontes de calor pois temperaturas elevadas podem
comprometer a sua duração.
Características técnicas
- Dimensões compactas.
- Tensão de alimentação: 220-240 V, 50/60 Hz.
- Bateria : 3,6V Ni-Cd à escolha conforme a autonomia
- Temperatura ambiente: 0÷40°C.
- Absorção máxima de rede: 18 mA.
- Fator de potência: cosl0,8.
- Fluxo luminoso constante em emergência.
- Tensão máxima de saída / corrente de saída selecionável através de ponte móvel:
48V /100mA, 24V/200mA, 12V/400mA. Inverled OB 12-48V SA-SE sai da fábrica com
ponte na posição 12V máximos.
- Utilizável com spots de luz em corrente com no mínimo de 2 leds e no máximo 13
- Utilizável com spots de luz em tensão de 12V, 24V, 48V do tipo sem potência constante
- Autonomia: 1h / 3h de acordo com a bateria escolhida (1h com bateria 3,6V 2Ah código
00PB0600, 3h com bateria 3,6V 4Ah código 00PB0100)
- Indicador luminoso LED de ativação do circuito de recarga.
- Tempo de recarga: máx. 12 horas para bateria 00PB0600, máx. 24h para bateria
00PB0100
- Bornes (3-4) para inibição através de interruptor
- Em conformidade com a norma EN60598 - 2 - 22.
- Conexão no lado da rede e controlo remoto com cabos de 0,75 a 1,5 mm2.
- Conexão no lado da saída com cabos de 0,75 a 1 mm2.
- Comprimento padrão do cabo led: 600 mm.
- Comprimento padrão do cabo da bateria: 340 mm.
Atenção
- Verificar se a corrente fornecida pelo Inverled OB 12-48V SA-SE é inferior ou igual à
corrente máxima suportada pela carga do led ligado.
- Antes de ligar Inverled OB 12-48V SA-SE à carga, selecionar através da respetiva ponte
a tensão máxima de saída desejada e, em seguida, ligar o polo negativo da carga LED
à saída marcada com a mesma tensão escolhida.
- Escolher, por exemplo, uma tensão de saída máxima de 48V e ligar o polo negativo
da carga a uma saída diferente (24V ou 12V) pode provocar dano permanente ao
INVERLED.
- A proteção contra os contactos acidentais para o alimentador depende do invólucro do
aparelho ao qual é conectado. Inverled pode ser alimentado somente por baterias não
conectadas a circuitos de recarga com funcionamento contínuo ou intermitente.
Advertências
- Ler com atenção as advertências contidas neste folheto de instruções porque contém
indicações muito importantes referentes à instalação, utilização e manutenção.
- Após retirar a embalagem, certificar-se da integridade do aparelho. Em caso de
dúvidas, contactar pessoal qualificado.
- Antes de conectar o aparelho, verificar se os dados da placa correspondem aos dados
da rede elétrica de distribuição.
- Este aparelho deve ser destinado somente para o uso para o qual foi expressamente
projetado e deve ser conectado de acordo com as instruções fornecidas. Qualquer
outro tipo de uso deve ser considerado impróprio, portanto, perigoso. O fabricante não
pode ser considerado responsável por danos causados às pessoas, animais ou objetos
decorrentes do uso impróprio, incorreto e irracional.
- Inverled OB 12-48V SA-SE é fabricado unicamente para ser alimentado pelas baterias
previstas no catálogo e no presente folheto de instruções.
- Não associar Inverled aos dispositivos externos de recarga.
- Antes de realizar qualquer operação de limpeza ou manutenção, desconectar o aparelho
da rede.
- Em caso de defeitos, dirigir-se a um centro de assistência técnica autorizado pelo
fabricante e solicitar o uso de peças de troca originais. O desrespeito às indicações
pode comprometer a segurança do aparelho.
D
P
Fig. A
Spinotto - Plug - Jack (broche)
Clavija - Stecker - Stift
Ø34 mm
215 mm
Fusibile 4 A - Fuse 4 A - Fusible 4 A
Fusible 4A - Sicherung - Säkring
Câble plat 2x0,35 Rouge/Noir - HT 105
Flat kabel 2x0,35 Rot/Schwarz - HT 105
Nero
Schwarz
Rouge
Rot
Cylindre separateur
Trennzylinder
Led vert ø5 mm.
Led Grün ø 5 mm.
Led autoblocant
Selbstblockierendes Led
PH1
N1
PH2
N2 230Vac
Battery - 3,6V - 2Ah / 4Ah
S1
1
2
3
4
R
B
Led
Inverled OB 12 - 48V
12V24V48V
5
4
3
2
1
S2
400mA 6-12V Lamp
200mA 6-24V Lamp
100mA 6-48V Lamp
Lamp
Driver IN
LED Lamp
LED Spot
Min 2 - Max 13 Led
LED Driver
Max 1A
_
_
_
+
++
_
+
_
PH1
N1
Battery - 3,6V - 2Ah / 4Ah
S1
1
2
3
4
R
B
Led
Inverled OB 12 - 48V
12V24V48V
5
4
3
2
1
400mA 6-12V Lamp
200mA 6-24V Lamp
100mA 6-48V Lamp
Lamp
Driver IN
LED Lamp
LED Spot
Min 2 - Max 13 Led
+
_
_
_
_
+
+
Schema di collegamento INVERLED OB 12-48V SA-SE in illuminazione permanente (SA = Sempre Accesa) - Permanent lighting INVERLED OB 12-48V SA-SE connection diagram
(SA = always on) - Schéma de branchement INVERLED OB 12-48V SA-SE en éclairage permanent (SA = toujours allumée) - Anschlussplan INVERLED OB 12-48V SA-SE bei
Dauerbeleuchtung (SA = Immer An) - Esquema de conexión del INVERLED OB 12-48V SA-SE con iluminación permanente (SA = Siempre Activa) - Ledningsdiagram INVERLED OB
12-48V SA-SE i permanent belysning (SA = Altid Tændt) - Esquema de ligação INVERLED OB 12-48V SA-SE em iluminação permanente (SA = Sempre Acesa)
Schema di collegamento INVERLED OB 12-48V SA-SE in illuminazione non permanente (SE = Solo Emergenza) - Non-permanent lighting INVERLED OB 12-48V SA-SE connection
diagram (SE = only emergency) - Schéma de branchement INVERLED OB 12-48V SA-SE en éclairage non permanent (SE = urgence uniquement) - Anschlussplan INVERLED OB
12-48V SA-SE bei Bereitschaftsbeleuchtung (SE = Nur Notleuchte) - Esquema de conexión del INVERLED OB 12-48V SA-SE con iluminación no permanente (SE = Solo Emergen-
cia) - Ledningsdiagram INVERLED OB 12-48V SA-SE i ikke-permanent belysning (SE = Kun Nødstilfælde) - Esquema de ligação INVERLED OB 12-48V SA-SE em iluminação não
permanente (SE = Apenas Emergência)
Via delle Azalee, 6/A
20090 - Buccinasco (MI) - Italy
www.relcogroup.com

This manual suits for next models

1

Other RELCO Lighting Equipment manuals

RELCO enerBI LED User manual

RELCO

RELCO enerBI LED User manual

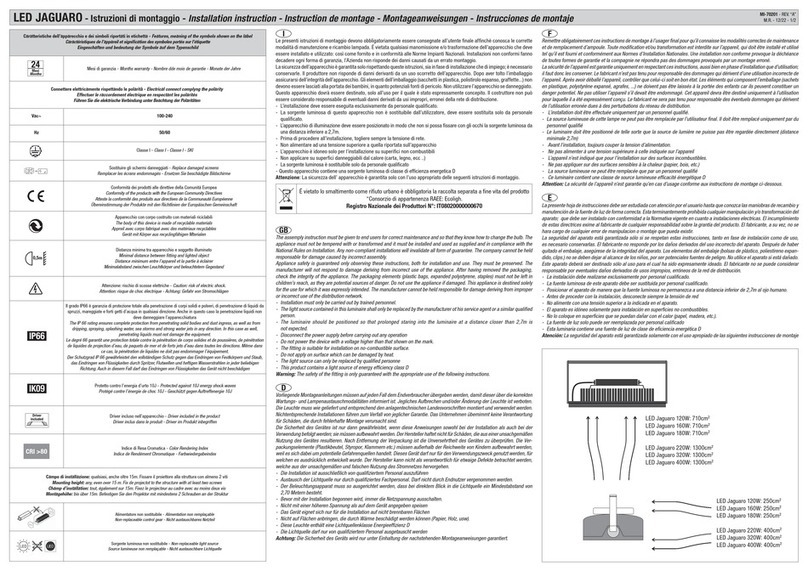
RELCO LED JAGUARO User manual

RELCO

RELCO LED JAGUARO User manual

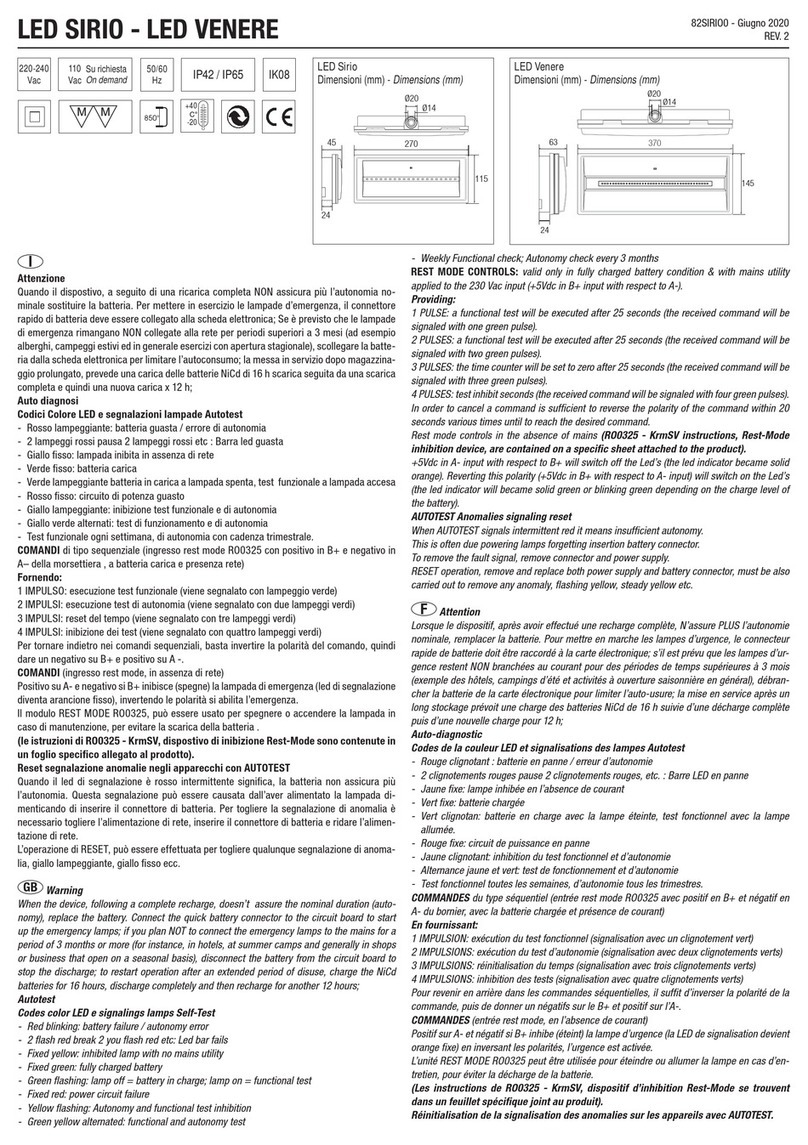
RELCO LED SIRIO User manual

RELCO

RELCO LED SIRIO User manual

RELCO INVERLED OB 12-48V SA-SE Guide

RELCO

RELCO INVERLED OB 12-48V SA-SE Guide

RELCO RP0714CP3 User manual

RELCO

RELCO RP0714CP3 User manual

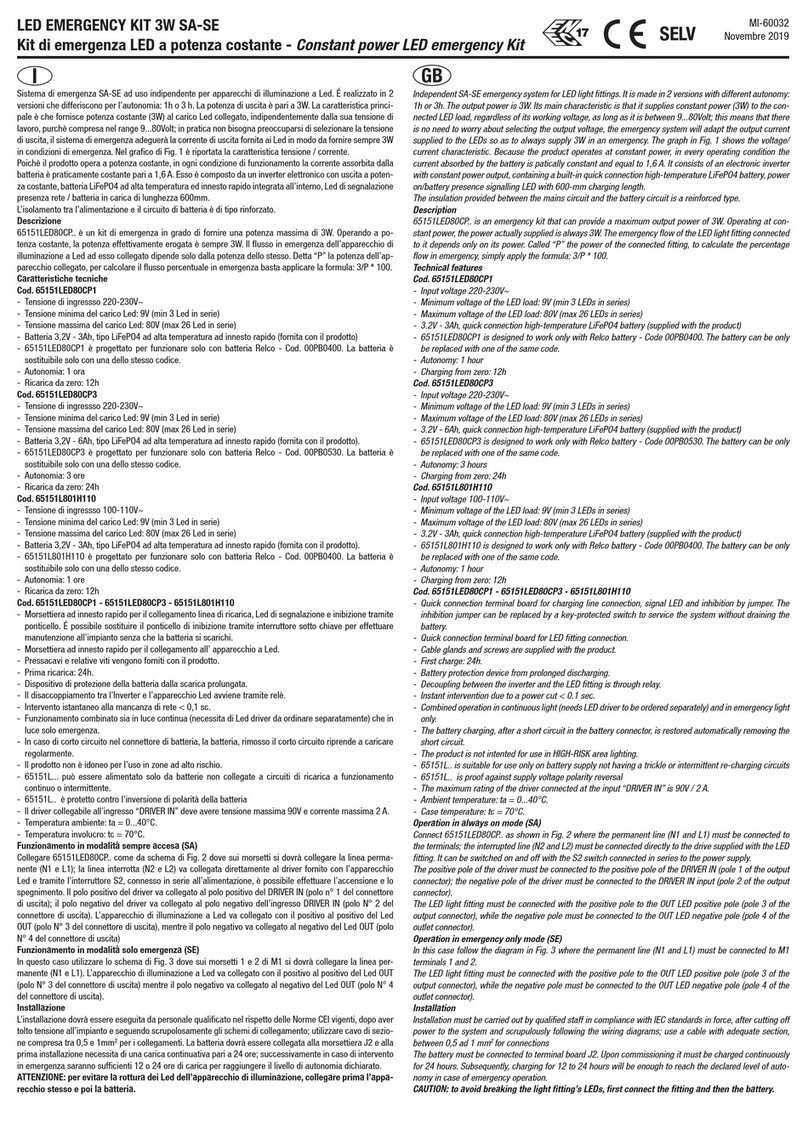
RELCO 65151LED80CP1 User manual

RELCO

RELCO 65151LED80CP1 User manual

RELCO 65151LED80CP1 User manual

RELCO

RELCO 65151LED80CP1 User manual

RELCO LED VIRGOLA User manual

RELCO

RELCO LED VIRGOLA User manual

RELCO INVERLED OB 12-48V SA-SE Guide

RELCO

RELCO INVERLED OB 12-48V SA-SE Guide

RELCO 65152IP67CP2 User manual

RELCO

RELCO 65152IP67CP2 User manual

RELCO 65151IP67CP1 User manual

RELCO

RELCO 65151IP67CP1 User manual

RELCO POLIFERMO User manual

RELCO

RELCO POLIFERMO User manual

Popular Lighting Equipment manuals by other brands

Heitronic RHODOS Installation and operating instructions

Heitronic

Heitronic RHODOS Installation and operating instructions

Uni-bond E-2111AC-M user manual

Uni-bond

Uni-bond E-2111AC-M user manual

Haneco SKYLUX G4 installation guide

Haneco

Haneco SKYLUX G4 installation guide

Luci FLEX a F IP65 instruction manual

Luci

Luci FLEX a F IP65 instruction manual

Laserworld GREEN-8000 user manual

Laserworld

Laserworld GREEN-8000 user manual

Somogyi home NLD 4 instruction manual

Somogyi

Somogyi home NLD 4 instruction manual

Inter-fab EDGESTONE SLIDE ROCK installation guide

Inter-fab

Inter-fab EDGESTONE SLIDE ROCK installation guide

ADJ MINI DEKKER User instructions

ADJ

ADJ MINI DEKKER User instructions

Odyssey STAR BLAZER LE-313 user guide

Odyssey

Odyssey STAR BLAZER LE-313 user guide

ALS PEN154R manual

ALS

ALS PEN154R manual

Chauvet Led Shadow user manual

Chauvet

Chauvet Led Shadow user manual

Lightolier Lytecaster 1104F13ES specification

Lightolier

Lightolier Lytecaster 1104F13ES specification

Cooper WaveLinx Wireless Wallstation installation guide

Cooper

Cooper WaveLinx Wireless Wallstation installation guide

Vision & Control LDLF60x540-R633/24V Instructions for use

Vision & Control

Vision & Control LDLF60x540-R633/24V Instructions for use

Vision X XIL-OP110 Installation instructions & user manual

Vision X

Vision X XIL-OP110 Installation instructions & user manual

Starblitz MINI PHOTO STUDIO LED user guide

Starblitz

Starblitz MINI PHOTO STUDIO LED user guide

Hubbell KILLARK VSQ Series Installation operation & maintenance

Hubbell

Hubbell KILLARK VSQ Series Installation operation & maintenance

Chauvet Followspot 1200 quick start guide

Chauvet

Chauvet Followspot 1200 quick start guide

manuals.online logo
manuals.online logoBrands
  • About & Mission
  • Contact us
  • Privacy Policy
  • Terms and Conditions

Copyright 2025 Manuals.Online. All Rights Reserved.