manuals.online logo
Brands
  1. Home
  2. •
  3. Brands
  4. •
  5. Renesas
  6. •
  7. Microcontroller
  8. •
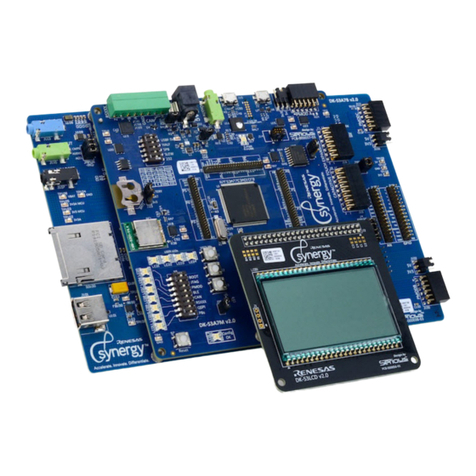
  9. Renesas Synergy DK-S7G2 User manual

Renesas Synergy DK-S7G2 User manual

QUICK START GUIDE
Design Journey Lab 1 –FL00IA/B Page 1 of 16
Console Swap Demonstration
Synergy
Description: This demonstration illustrates on of the key advantages of the Synergy Platform in
accelerating time to market and similifying development. SSP Frameworks use common interfaces that
make it very easy to swap in and out different versions of hardware based implementations. In this
demonstration a simple user interface Console will be quickly modified to switch between a USB
communications implementation and a Telnent communications implementation.The swap is easily
accomplished without writing any code since the Console Framework uses common API and structures
between the USB Communications Framework and the Telnet Server Communications Framework.
Demonstration Objectives
1. Illustrate, using a hands-on example,
how easy it is to modify Synergy
Platform designs for different
hardware implementations
Demonstration Materials
PC or Laptop
ISDE 4.2.0.012
SSP v1.00
J-Link Driver
TeraTerm Pro
DKS7G2 Kit
5V AC/DC power adapter
USB Cables Type-A to Micro-B (2)
Ethernet Cable
QUICK START GUIDE
Design Journey Lab 1 –FL00IA/B Page 2 of 16
1 Setup & Configure DK-S7G2
Procedural Steps
Step 1.1 Connect the DK-S7G2 (Figure 1) to power, the Seeger J-Link OB Debug port to the laptop and
the USB Console port to the laptop (Figure 2). Driver recognition for the console connection
isn’t found until the DK-S7G2 is running, so don’t worry if you don’t hear the audio indication
yet.
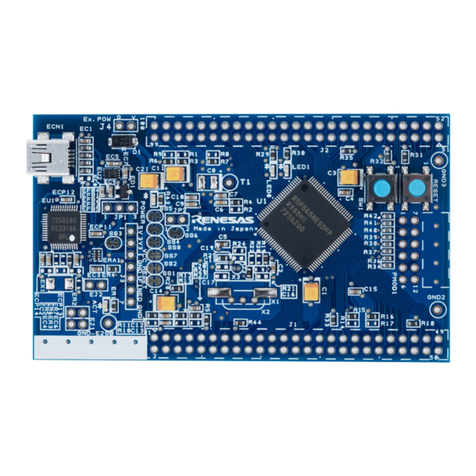
Figure 1: DK-S7G2
Figure 2: Power, Debug and USB Console Connections
QUICK START GUIDE
Design Journey Lab 1 –FL00IA/B Page 3 of 16
Once the Power and J-Link OB are connected to the DK-
S7G2, LED3 should be a solid Green. If LED3 is flashing and the J-
Link OB is connected to the correct USB port on the DK-S7G2, then
the Segger driver on the host computer is incorrectly installed. Refer
to the ISDE installation guide to resolve the issue.
Step 1.2 Turn ON the ‘JTAG’ switch, and the ‘ENET1’ switch on S5 on the main board (Figure 4).
Make sure all other switches are in the off position.
Figure 4: S5 Settings
QUICK START GUIDE
Design Journey Lab 1 –FL00IA/B Page 4 of 16
2 Import the Console Swap Demonstration Project
Procedural Steps
Step 2.1 Open e2 studio, click ‘File’ and then ‘Import’
QUICK START GUIDE
Design Journey Lab 1 –FL00IA/B Page 5 of 16
Step 2.2 Select ‘Existing Projects into Workspace’ and click ‘Next’
QUICK START GUIDE
Design Journey Lab 1 –FL00IA/B Page 6 of 16
Step 2.3 Select the ‘Select archive file’ radial button and click browse. Locate the ConsoleSwapUSB
zip file. Make sure the check box is selected and click ‘Finish’. (If this project name already
exists in your workspace, you won’t be able to select the check box. You will need to remove
that project in order to import).
QUICK START GUIDE
Design Journey Lab 1 –FL00IA/B Page 7 of 16
Step 2.4 To confirm the correct Synergy license, right click the project in Project Explorer. Select
‘Properties’ in the pop up menu. Type ‘License’ into the search bar on the left of the window
and click on ‘Synergy License’. Select the navigation button to the right of the ‘License file’
drop down menu and navigate to the address below. Once your correct license file is selected,
click ‘Apply’ and then ‘OK’. (An example location and file name is given below).
C:\Renesas\e2_studio\internal\projectgen\arm\Licenses\SSP_License_Example_EvalLicense_20151120.xml
Step 2.5 Once the project is open, double-click the ‘configuration.xml’ file as shown below to open the
Synergy Configuration tool.
QUICK START GUIDE
Design Journey Lab 1 –FL00IA/B Page 8 of 16
Step 2.6 Build the project. It sould compile without errors. (Note that some warnings may exist. You can
ignore these). Run the debugger. (If you need to create a debug configuration file, you can
create one by selecting Run > Debug Configurations, then double click Renesas GDB
Hardware Debugging, select the executable file from the Debug folder, and on the Debugger
tab, select target device R7FS7G2. Click Debug to begin a debugging session).
Step 2.7 Click on the Run icon a couple of times to get the program to begin executing. You should get
an audio indication that the Console USB connection has been recognized. (Open Device
manager to check that your Console USB connection is active and find the corresponding
COM port for use with the TeraTerm session).
Step 2.8 Start-up Tera Term. You should be able to select the Serial Interconnect session with the right
COM port and then connect. Type a carriage return and you should get the console prompt
and if you then type a “?” you will get the help menu as seen in the following figure.
QUICK START GUIDE
Design Journey Lab 1 –FL00IA/B Page 9 of 16
Step 2.9 Type in “TOGGLE” to toggle the LED on the DK-S7G2. Type it a few times to verify the toggle
works. Note that you can use an up arrow to ‘replay’the previous command. This feature is
supported automatically within the console framework.
QUICK START GUIDE
Design Journey Lab 1 –FL00IA/B Page 10 of 16
QUICK START GUIDE
Design Journey Lab 1 –FL00IA/B Page 11 of 16
3 Configure the Telnet Communications Interface
Procedural Steps
Step 3.1 Go to the ‘Threads’ tab of the Synergy Configuration tool and select the Console Thread.
Step 3.2 Select the Thread Modules associated with the USB Communications stack as shown below.
Click Remove.
QUICK START GUIDE
Design Journey Lab 1 –FL00IA/B Page 12 of 16
Step 3.3 Now add the Telnet Communciations Framework by selecting New/ Framework/ Connectivity/
Communications Framework on sf_el_nx_comms. By hovering over this selction you will see
the additional modules that need to be added. Select the g_sf_comms module and in its
parameters window change the Channel from 0 to 1.
Step 3.4 Add the additional modules required to complete the implementation of the Telnet
communications framework. These are:
Framework/ Networking/ NetX Telnet Server on nx_telnet_server
Framework/ Networking/ NetX on nx
Framework/ Networking/ NetX Port ETHER on sf_el_nx
oSet the required interrupt to Priority 0.
Step 3.5 The above actions should clear all configuration issues. Save the configuration. Build the
debug configuration. This should build without Errors.
Step 3.6 Remove the console USB cable (This is the one closer to the Ethernet connector.) and plug in
the Ethernet cable from the main board Ethernet port to the Laptop. If your laptop Ethernet
port hasn’t already been configured for Telnet operation, do this now. Refer to Appendix 1 for
a more detailed procedure if you are unfamiliar with how to make any of these changes.
Disable your wireless connection
Enable your wired Ethernet connection
Set a static IP address on the same subnet of the statically assigned IPV4
address of the board (The board address is 192.168.0.0, so you could set your
Ethernet port to 192.168.100.100 with a subnet mask of 255.255.0.0).
Step 3.7 Run the debugger and click on the Run icon a couple of times to get the program running. The
LEDs indicating an active Ethernet Connection shuld now light up. Now, connect with
TeraTerm using the settings of 192.168.0.0; Telnet Service; and the default settings for TCP
port (23), SSH and Protocol (UNSPEC) as seen in the figure below.
QUICK START GUIDE
Design Journey Lab 1 –FL00IA/B Page 13 of 16
Step 3.8 You should be able to get the Telnet console window after hitting Enter in the terminal window
as seen in the figure below. Type in the TOGGLE command a few times to see the LED blink.
When finished exit the debugger.
QUICK START GUIDE
Design Journey Lab 1 –FL00IA/B Page 14 of 16
QUICK START GUIDE
Design Journey Lab 1 –FL00IA/B Page 15 of 16
4 Appendix
This appendix provides detailed descriptions of how to set-up the console PC to use the Ethernet Port for
a Telnet session over TeraTerm. This process is for Windows 8, but should be similar for other versions
of Windows.
Procedural Steps
Step 4.1 Go to the Control Panel and select the Network and Sharing Center. Click on Change Adaptor
Settings. You will get a list of Network Connections similar to those shown in the figure below.
Step 4.2 If the Wireless Adaptor is enabled, you need to disable it. Select the Wireless Adaptor and
Right click on it. Select Disable.
Step 4.3 Select the Ethernet port you will use for the Console. Right click and open properties. Scroll
down and select Internet protocol Version 4 (TCP/IPv4). Refer to the figure below. Select
Properties. Select Use the following IP address and enter in 192.168.100.100 into the IP
address filed. Enter 255.255.0.0 into the Subnet mask field. Cick OK. Click OK in the Ethernet
Properties window. Close the Ethernet Status window, if open. Your Ethernet port should now
be configured to work with TeraTerm as a Telnet connection. You will need to reverse this
process to disable your wired Ethernet connection and Enable your wirless connection after
you are done with the demonstration.
QUICK START GUIDE
Design Journey Lab 1 –FL00IA/B Page 16 of 16

Other manuals for Synergy DK-S7G2

3

Other Renesas Microcontroller manuals

Renesas R7F0C80112ESP User manual

Renesas

Renesas R7F0C80112ESP User manual

Renesas RX111 User manual

Renesas

Renesas RX111 User manual

Renesas V850ES/F 3-L Series User manual

Renesas

Renesas V850ES/F 3-L Series User manual

Renesas RZ/T1 Series User manual

Renesas

Renesas RZ/T1 Series User manual

Renesas RL78/G15 User manual

Renesas

Renesas RL78/G15 User manual

Renesas YCONNECT-IT-TPS-1L User manual

Renesas

Renesas YCONNECT-IT-TPS-1L User manual

Renesas RX65N Series User manual

Renesas

Renesas RX65N Series User manual

Renesas RX Series User manual

Renesas

Renesas RX Series User manual

Renesas RA6M5 User manual

Renesas

Renesas RA6M5 User manual

Renesas R5F51105ADFM User manual

Renesas

Renesas R5F51105ADFM User manual

Renesas RA Series Guide

Renesas

Renesas RA Series Guide

Renesas rl78/g1g User manual

Renesas

Renesas rl78/g1g User manual

Renesas V850ES/IE2 User manual

Renesas

Renesas V850ES/IE2 User manual

Renesas M16C/29 User manual

Renesas

Renesas M16C/29 User manual

Renesas RL78/G13 Instruction Manual

Renesas

Renesas RL78/G13 Instruction Manual
Renesas R20UT2113EJ0100 User manual

Renesas

Renesas R20UT2113EJ0100 User manual
Renesas 7542 User manual

Renesas

Renesas 7542 User manual

Renesas RL78/G1P Instructions for use

Renesas

Renesas RL78/G1P Instructions for use

Renesas RAA604S00 Installation and operating instructions

Renesas

Renesas RAA604S00 Installation and operating instructions

Renesas RL78G14 User manual

Renesas

Renesas RL78G14 User manual

Renesas DA1459 PRO Devkit Series User manual

Renesas

Renesas DA1459 PRO Devkit Series User manual

Renesas V850E/D 3 Series User manual

Renesas

Renesas V850E/D 3 Series User manual

Renesas RH850 Series Installation and operating instructions

Renesas

Renesas RH850 Series Installation and operating instructions

Renesas SKP8CMINI15 User manual

Renesas

Renesas SKP8CMINI15 User manual

Popular Microcontroller manuals by other brands

Atmel AVR1605 quick start guide

Atmel

Atmel AVR1605 quick start guide

ARTERY AT32F415 Series Reference manual

ARTERY

ARTERY AT32F415 Series Reference manual

Texas Instruments TMS370 Series Getting started guide

Texas Instruments

Texas Instruments TMS370 Series Getting started guide

Texas Instruments MSP430F22x4 Series user guide

Texas Instruments

Texas Instruments MSP430F22x4 Series user guide

NXP Semiconductors SLN-VIZNLC-IOT-UG user guide

NXP Semiconductors

NXP Semiconductors SLN-VIZNLC-IOT-UG user guide

FLIR ADK Getting started

FLIR

FLIR ADK Getting started

Silicon Laboratories C8051F30 series user guide

Silicon Laboratories

Silicon Laboratories C8051F30 series user guide

MEDIATEK LinkIt Smart 7688 user manual

MEDIATEK

MEDIATEK LinkIt Smart 7688 user manual

National Semiconductor COP820CJ manual

National Semiconductor

National Semiconductor COP820CJ manual

Tadao Musashi 3 instructions

Tadao

Tadao Musashi 3 instructions

AWC APP-III manual

AWC

AWC APP-III manual

Laird RAMP user guide

Laird

Laird RAMP user guide

GigaDevice Semiconductor GD32130C-START user guide

GigaDevice Semiconductor

GigaDevice Semiconductor GD32130C-START user guide

Atmark Techno Armadillo-420 Startup guide

Atmark Techno

Atmark Techno Armadillo-420 Startup guide

QRP Labs Ultimate3S manual

QRP Labs

QRP Labs Ultimate3S manual

Texas Instruments MSP430F6748 manual

Texas Instruments

Texas Instruments MSP430F6748 manual

Atmel AT91SAM9 Application note

Atmel

Atmel AT91SAM9 Application note

Holtek HT32F54231 user manual

Holtek

Holtek HT32F54231 user manual

manuals.online logo
manuals.online logoBrands
  • About & Mission
  • Contact us
  • Privacy Policy
  • Terms and Conditions

Copyright 2025 Manuals.Online. All Rights Reserved.