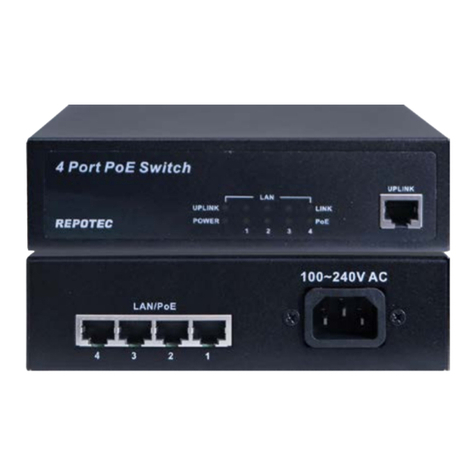
Repotec Powerline 85M User manual

User’s Manual
Powerline 85M
Ethernet Switch

Index
FCC Part 68..............................................................................................................................................................2
FCC Part 15..............................................................................................................................................................3
Chapter 1 Introduction..............................................................................................................................................4
1.1 Overview ...........................................................................................................................................4
1.2 Features............................................................................................................................................4
1.3 System Requirements.......................................................................................................................4
Chapter 2 Installation................................................................................................................................................5
2.1 Checklist............................................................................................................................................5
2.2 The Front LEDs.................................................................................................................................6
2.3 The Rear Ports..................................................................................................................................6
Chapter 3. Powerline Networking Utility...................................................................................................................7
3.1 Configuration Utility Setup.................................................................................................................7
3.1.1 Installation of the Utility..................................................................................................................7
3.2 Windows Configuration Utility ...........................................................................................................8
3.3 User Interface....................................................................................................................................9
3.3.1 Main Screen...................................................................................................................................9
3.3.2 Privacy Screen............................................................................................................................ 13
3.4 Diagnostics Screen ........................................................................................................................ 14
3.4.1 About Screen............................................................................................................................... 16
3.4.2 Preferences................................................................................................................................. 16
3.5 Troubleshooting.............................................................................................................................. 17
3.5.1 When the remote Powerline devices can not connect or access? ............................................. 17
Appendix A Glossary.............................................................................................................................................. 19
Appendix B Cabling / Connection.......................................................................................................................... 26
1

FCC Part 68
This equipment complies with Part 68 of the FCC Rules. On the bottom of this equipment is a label that contains
the FCC Registration Number and Ringer Equivalence Number (REN) for this equipment. You must provide this
information to the telephone company upon request.
The REN is useful to determine the quantity of devices you may connect to the telephone line and still have those
entire devices ring when your number is called. In most, but not all areas, the sum of the REN of all devices
connected to one line should not exceed five (5.0). To be certain of the number of devices you may connect to
your line, as determined by the REN, you should contact your local telephone company to determine the
maximum REN for your calling area.
If the modem causes harm to the telephone network, the telephone company may discontinue your service
temporarily.
If possible, they will notify you in advance. But if advance notice isn't practical, you will be notified as soon as
possible.
You will be advised of your right to file a complaint with the FCC.
The telephone company may make changes in its facilities, equipment, operations, or procedures that could
affect the proper operation of your equipment. If they do, you will be notified in advance to give you an opportunity
to maintain uninterrupted telephone service.
If you experience trouble with this modem, please contact your dealer for repair/warranty information. The
telephone company may ask you to disconnect this equipment from the network until the problem has been
corrected or you are sure that the equipment is not malfunctioning.
This equipment may not be used on coin service provided by the telephone company. Connection to party lines is
subject to state tariffs.
2

FCC Part 15
The modem generates and uses radio frequency energy. If it is not installed and used properly in strict
accordance with the user's manual, it may cause interference with radio and television reception. The modem has
been tested and found to comply with the limits for Class B computing devices in accordance with the
specifications in Subpart B, Part 15 of the FCC regulations. These specifications are designed to provide
reasonable protection against such interference in a residential installation. However, there is no guarantee that
interference will not occur in a particular installation. FCC regulations require that shielded interface cables be
used with your modem.
If interference does occur, we suggest the following measures be taken to rectify the problem:
1) Move the receiving antenna.
2) Move the modem away from the radio or TV.
3) Plug the modem into a different electrical outlet.
4) Discuss the problem with a qualified radio / TV technician.
CAUTION:
Changes or modifications not expressly approved by the party responsible for compliance to the FCC Rules could
void the user's authority to operate this equipment.
Cable connections:
All equipment connected to this modem must use shielded cable as the interconnection means.
Notes:
Operation is subject to the following two conditions:
1) This device may not cause harmful interference, and
2) This device must accept any interference received including interference that may cause undesired
operation.
3

Chapter 1 Introduction
Congratulations on your purchase of an Instant Powerline 4-port Fast Ethernet Switch. The Powerline Switch is
the perfect option to connect a small group of PCs to a high-speed Broadband Internet connection or to an
Ethernet backbone.
1.1 Overview
Like a simple hub or switch, the setup of the Powerline Switch is very easy. User doesn’t need any setup for this
device; through the existing power circuit can easy to connect to Powerline networks and the other Powerline
router to share the Internet connection.
1.2 Features
‧Connection with multiple PCs to a high-speed broadband Internet connection
‧The high-speed transfer rates of 85Mbps even make it possible to transmit video in DVD quality
‧Integrated with 4 ports 10/100M switch for more convenient to connect multiple network devices
‧No need new wires and use at any power socket with up to ranges of 200 meters
‧Simple plug, easy install and extends Internet coverage to the whole house, including areas where a wireless
network may not reach
‧Compliant with IEEE 802.3, 802.3u Ethernet standard and HomePlug 1.0 standard
‧Supports 56-bit DES link encryption for secure Powerline networking
‧Simple Plug and Play
‧Allow user to connect PCs and other devices with the wireless and Ethernet networking
‧Up to 85Mbps data rate on Powerline networking
1.3 System Requirements
1) Personal computer (PC)
2) Pentium II 233 MHz processor minimum
3) 32 MB RAM minimum
4) 20 MB of free disk space minimum
5) Ethernet Network Interface Controller (NIC) RJ45 Port
6) Internet Browser
4

Chapter 2 Installation
This chapter offers information about installing your router. If you are not familiar with the hardware or software
parameters presented here, please consult your service provider for the values needed.
2.1 Checklist
Check the shipping box carefully to ensure that the contents include the items you ordered. If any of the items are
missing or damaged, contact your local distributor. The contents of your carton may vary depending on your
service provider.
Contents description
1) Powerline Router for home/office use
2) Powerline Router Installation and Operation Guide (this publication)
3) Power Cord
4) Ethernet cable Ethernet category 5 twisted pair cable (6 ft)
Application for this device
5

2.2 The Front LEDs
LED State Description
POWER ON Press the button to power one the router.
ACT Flashing Data transfer between Powerline devices
PL
TURBO Flashing When link to other Powerline 85M devices
ON Link
Flashing TX or RX activity
LAN
1-4 OFF
No Link
These four LAN (Local Area Network) ports are where you will connect networked
devices, such as PCs, print servers remote hard drives, and anything else you
want to put on your network.
2.3 The Rear Ports
Connector Description
POWER Connect to power cord.
LAN (1-4) Router is successfully connected to a device through the corresponding port (1, 2, 3 or 4).
If the LED is flashing, the Router is actively sending or receiving data over that port.
6

Chapter 3. Powerline Networking Utility
Note. The Powerline Device can auto detect the other powerline bridges which plug in the same power circuit,
you don’t need to use this powerline utility except you want to encryption all the powerline devices as the same
group or you can not access the other computers.
Introduction of Configuration Utility
The Configuration Utility for Windows OS enables the user to find Powerline Ethernet devices on the Powerline
network; measures data rate performance, ensures privacy, performs diagnostics and secures Powerline
networks.
3.1 Configuration Utility Setup
3.1.1 Installation of the Utility
Please verify that no other Powerline Management Utilities are installed before installing this product. If other
utilities are installed, uninstall them and restart before installing this software.
To install, insert the Windows OS Configuration Utility Setup utility CD-ROM into the computer's CD-ROM drive.
The Setup utility shall run automatically. Alternatively this can also be done manually by double clicking the
setup.exe file on the CD. The CD will launch an installation utility similar to the one shown in Figure 1.
Click the Next button to continue.
Figure 1: Install Shield Screen
7

3.2 Windows Configuration Utility
In order to run the utility, double-click the utility icon. Figure 2 shows the main screen of the configuration utility.
This screen shot shows a Powerline Ethernet device connected as a local device and other Powerline Ethernet
devices as remote devices.
Figure 2: Main Screen with High-Speed Powerline Ethernet device Local
8

Figure 3 : Main Screen with Low-Speed Powerline Ethernet device Local
3.3 User Interface
3.3.1 Main Screen
The Main screen essentially provides a list of all Powerline Ethernet devices logically connected to the computer
where the utility is running.The top panel shows all local Powerline Ethernet devices found connected to the
computer's NIC (Network Interface Card). In most cases, only one device will be seen. In situations where there
are more than one device connected, such as a USB and also an Ethernet device, the user may click to select the
one to manage through and then click the Connect button to its right. The status area above the button indicates
that your PC is connected to that same device. Once connected to the chosen local device, the utility will
automatically scan the power line periodically for any other Powerline Ethernet devices. If no local Powerline
Ethernet devices are discovered, the status area above the connect button will indicate that accordingly.
Figure 4 illustrates the presence of two local devices in the computer.
9

Figure 4: Multiple Local Device Connection
10

The lower panel displays all the Powerline Ethernet devices, discovered on the current logical network (remote
devices). Displayed immediately above this panel is the number of remote devices found, the type of logical
network (Public or Private), and a message area that reports connectivity and scan status. The following
information is displayed for each of the devices discovered that appear in the lower panel:
Device Name column shows the default device name, which may be user re-defined. A user may change the
name by clicking on the name and editing in-place, or by using the rename button. An icon is optionally shown
with the name. A distinction in icons is made between low-speed and high-speed devices (14Mbps and 85Mbps).
By default, the icon is displayed with the name.
MAC Address column shows the device's MAC address.
Password column shows the user-supplied device password (initially left blank).
A user may enter the password by using the Set Password button. To set the Password of the device (required
when creating a private network), first select the device by clicking on its name in the lower panel and then click
on the Enter Password button .A dialog box will appear as shown in Figure 5 to type the password. The selected
device name is shown above the field for entering the password. Hit OK after entering the new password. A
confirmation box will appear if the password was entered correctly. If a device is not found, the user will be
notified and suggestions to resolve common problems will be presented.
Figure 5: Set Device Password
11

The Add button is used to add a remote device to your network that is not on the displayed list in the lower panel,
for example, a device currently on another logical network. Users are advised to locate the passwords for all
devices they wish to manage and add them to the local logical network by clicking on the Add button. A dialog box
will appear as seen below. The dialog box allows the user to enter both a device name and the password. A
confirmation box will appear if the password was entered correctly and if the device was found. If a device is not
found, the user will be notified and suggestions to resolve common problems will be presented.
Figure 6: Add Remote Device
Note: The device must be present on the power line (plugged in) in order for the password to be confirmed and
added to the network. If the device could not be located, a warning message will be shown.
The Scan button is used to perform an immediate search of the Powerline Ethernet devices connected to the
computer. By default the utility automatically scans every few seconds and updates the display. A typical screen
after naming and supplying passwords might appear as in Figure 7.
12

Figure 7: Main Screen of the Configuration Utility
3.3.2 Privacy Screen
The Privacy dialog screen provides a means for managing the local network and providing additional security. All
Powerline Ethernet devices are shipped using a default logical network (network name), which is normally
“HomePlug” . The Privacy dialog screen allows user to make the network private by changing the network name
(network password) of devices. The user can always reset a Powerline Ethernet network to the universal one
(public) by entering “HomePlug” as the network name or by clicking on the Use Default button.
Note : Changing the network name to any other name other than HomePlug will show the network type on the
main screen as Private.
13

Figure 8: Privacy Screen
The Set Local Device Only button is used to change the network name (network password) for the local device
only. After doing this, all the devices seen on the Main panel prior to this will no longer be able to communicate or
respond to the computer, as they will be on a different logical network. Devices previously set up with the same
logical network (same network name) will appear in the device list afterward selecting this option.
The Set All Devices button is used to change the logical network of all devices that appear on the Main panel.
The user must have entered the device's Password in order to set it to the new logical network. A notification
message will appear to report the success of this operation.
3.4 Diagnostics Screen
The Diagnostics screen shows system information and a history of all devices seen. The appearance is shown in
Figure 9.
The upper panel shows technical data concerning software and hardware on the host computer used to
communicate over Powerline Ethernet Network. It shall include the following:
14

‧Operating System Type/Version
‧Host Network Name
‧User Name
‧MAC Address of all NICs (network interface card)
‧Identify versions of all Driver DLLs and Libraries used (NDIS) and optionally
‧Powerline Ethernet device chipset manufacturer name (85Mbps version Only)
‧MAC Firmware Version (85Mbps version Only)
‧Vendor name
Figure 9: Diagnostics Screen
The lower panel contains a history of all remote devices seen on the computer, over time. Devices are shown
here regardless of whether or not they are on the same logical network. Devices that are active on the current
logical network will show a transfer rate in the Rate column; devices on other networks, or devices that may no
longer exist are shown with an “?” in the Rate column. The following remote device information is available from
the diagnostics screen:
‧Adapter Alias Name
‧Adapter MAC Address
‧Adapter Password
15

‧Adapter Last known rate
‧Adapter Last Known Network
‧HomePlug chipset manufacturer name
‧Date device last scanned
‧MAC Firmware Version (85Mbps version Only)
The diagnostics information displayed may be saved to a text file for later emailing to technical support of a
manufacturer, or printed for reference during a technical support call. Devices no longer part of the network can
be deleted using the delete button.
3.4.1 About Screen
The screen shows the software release date.
Figure 10: About dialog screen
3.4.2 Preferences
The lower part of the panel may display options for user preferences (such as turning the auto-scan feature on or
off) as shown Figure 10 above.
16

3.5 Troubleshooting
This section will introduce how to solve the connect problem for management remote Powerline devices.
3.5.1 When the remote Powerline devices can not connect or access?
When you find that the computer can not connect to another or the remote Powerline device can not found by
Powerline utility, please follow up the steps to check the problem.
Step 1: Open the utility to make sure you can or not access the device. You can check the Main tab for local or
remote Powerline devices status. If you can not detect the remote Powerline devices, that’s mean you or
somebody change the Powerline network ID.
17

Step 2: Connect to the other Powerline bridge or router directly which can not detect at Main tab at step 1. On
the Privacy page, you can change the Private Network name as the same name with other Powerline device
or just press the Use Default (Public Network). Please press the Set Local Device Only button for change
the network name. Please make sure the Private Network Name value must the same with the other Powerline
device.
Step 3: Connect the PC to the previous Powerline device, and you can find now the other Powerline device
can be found at the Main tab.
18

Appendix A Glossary
Address mask
A bit mask used to select bits from an Internet address for subnet addressing. The mask is 32 bits long and
selects the network portion of the Internet address and one or more bits of the local portion. Sometimes called
subnet mask.
AAL5
ATM Adaptation Layer - This layer maps higher layer user data intoATM cells, making the data suitable for
transport through theATM network.
ADSL
Asymmetric digital subscriber line.
ATM
Asynchronous Transfer Mode - A cell-based data transfer technique in which channel demand determines packet
allocation.
ATM offers fast packet technology, real time; demand led switching for efficient use of network resources.
AWG
American Wire Gauge - The measurement of thickness of a wire.
Bridge
A device connects two or more physical networks and forwards packets between them. Bridges can usually be
made to filter packets, that is, to forward only certain traffic. Related devices are: repeaters which simply forward
electrical signals from one cable to the other, and full-fledged routers which make routing decisions based on
several criteria.
Broadband
Characteristic of any network multiplexes independent network carriers onto a single cable. Broadband
technology allows several networks to coexist on one single cable; traffic from one network does not interfere with
traffic from another. Broadcast A packet delivery system where a copy of a given packet is given to all hosts
attached to the network. Example: Ethernet.
CO
Central Office. Refers to equipment located at a Telco or service provider's office.
CPE
19
Other manuals for Powerline 85M
2
Table of contents
Other Repotec Network Router manuals

Repotec
Repotec WD-5714 H User manual

Repotec
Repotec RP-S48G4 User manual

Repotec
Repotec RP-170508K User manual

Repotec
Repotec WA 2614 User manual

Repotec
Repotec RP-1716RT User manual

Repotec
Repotec RP-PE054 User manual

Repotec
Repotec ADSL2+ Powerline Router User manual

Repotec
Repotec RP-G3224DB User manual

Repotec
Repotec RP-G2602D User manual

Repotec
Repotec RP-1008W User manual