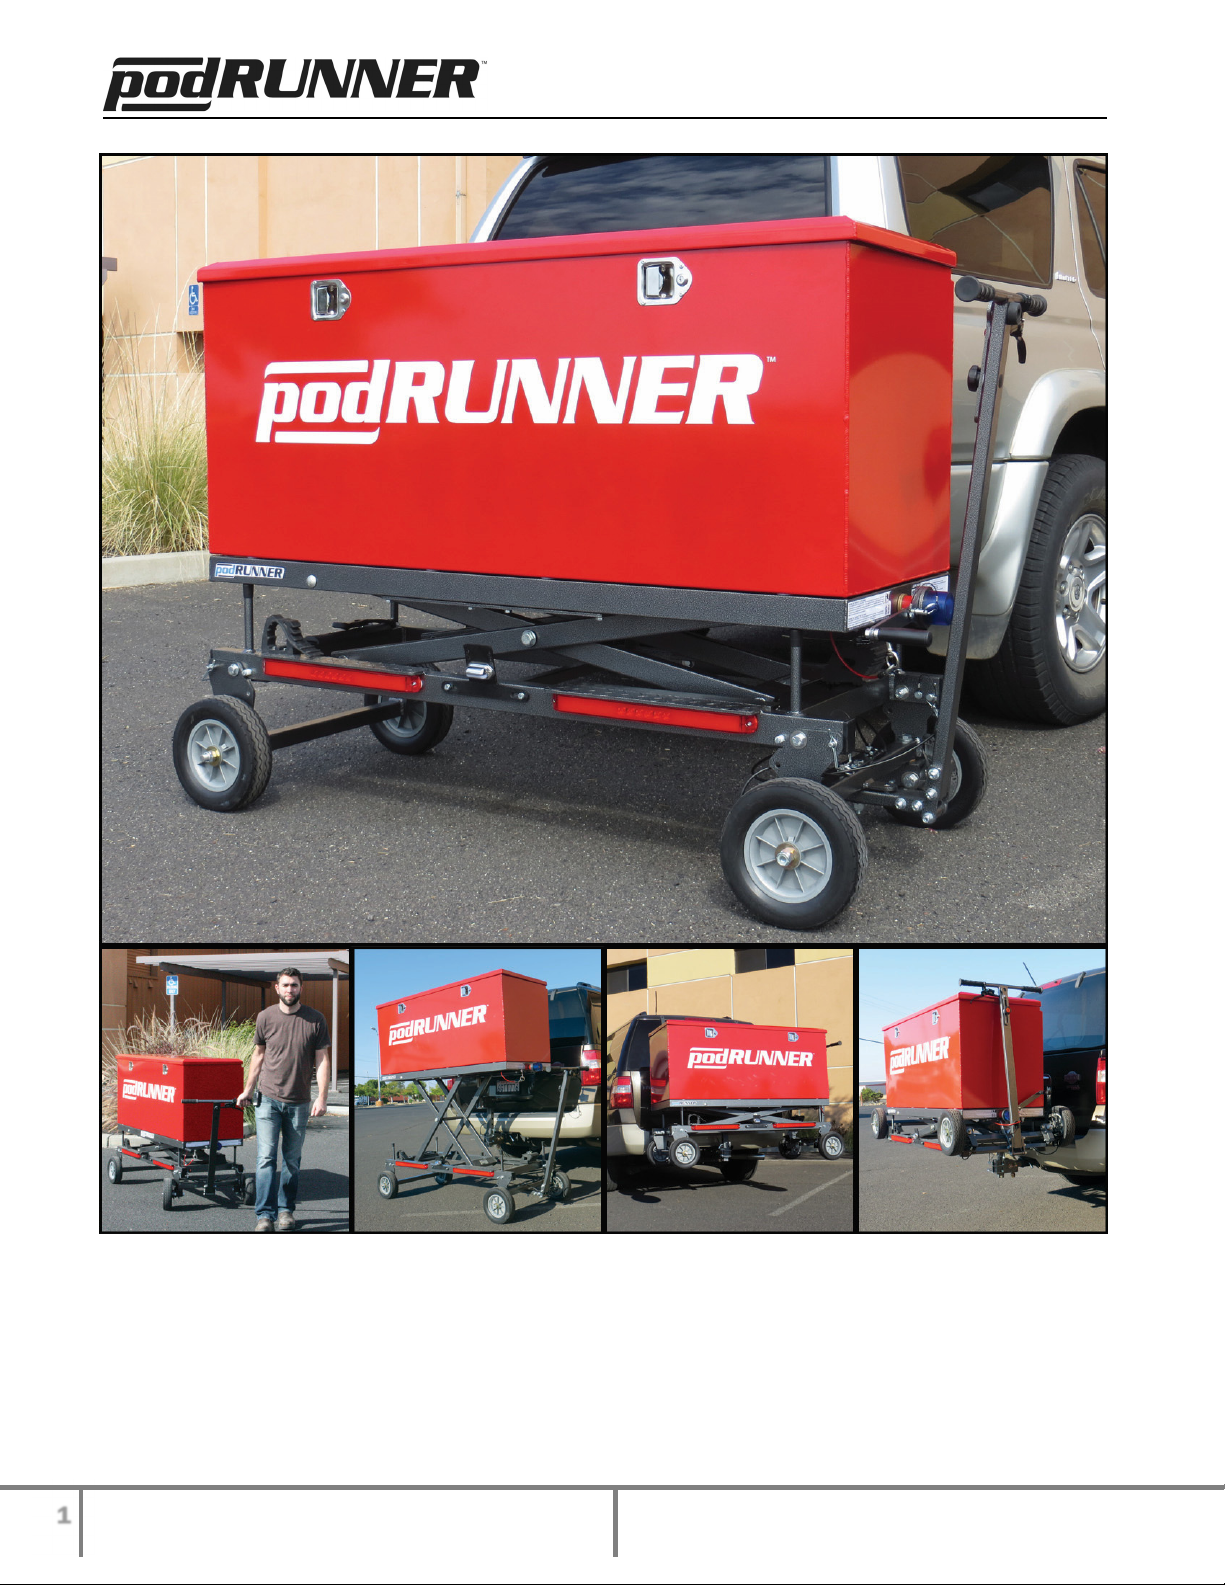
PodRunner™byRescue42,Inc.
POBox1242Chico,CA95927
TollFree:(888)427‐3728/Business:(530)891‐3473
www.ThePodRunner.com
STOP!
READ THESE WARNINGS BEFORE USING YOUR PODRUNNER
™
Failure to follow these instructions or heed these warnings may cause damage to the PodRunner™
unit, your vehicle or other property, cause bodily injury or death, and void your warranty.
You are always responsible for damage to your PodRunner™, other property, injury or death caused by incorrect use of a PodRunner™.
Vehicle transport of a PodRunner™ is limited to a class III (or higher), 2” receiver hitch. Never use a hitch extender or hitch size converter with a
PodRunner™.
Never exceed your vehicle and hitch receiver tongue weight specification. You are always responsible for the amount of load you carry.
Maximum weight allowed on the PodRunner™ chassis (Runner) is 500 lbs.
Never attempt to load or unload a PodRunner™ unless you are on level ground.
Always set the Runner’s parking brake prior to loading or unloading your PodRunner™.
Never attempt to use a drill to raise or lower a PodRunner™ scissor lift with the crank handle engaged.
Check all bolts and nuts for tightness prior to transporting a PodRunner™.
Never transport a PodRunner™ on a vehicle unless the handle’s safety lanyard is correctly connected to lock the pull handle in its upright stored
position.
Never transport a PodRunner™ on a carrying vehicle with a Hitch Adapter in the PodRunner’s™ Hitch Adapter Bed.
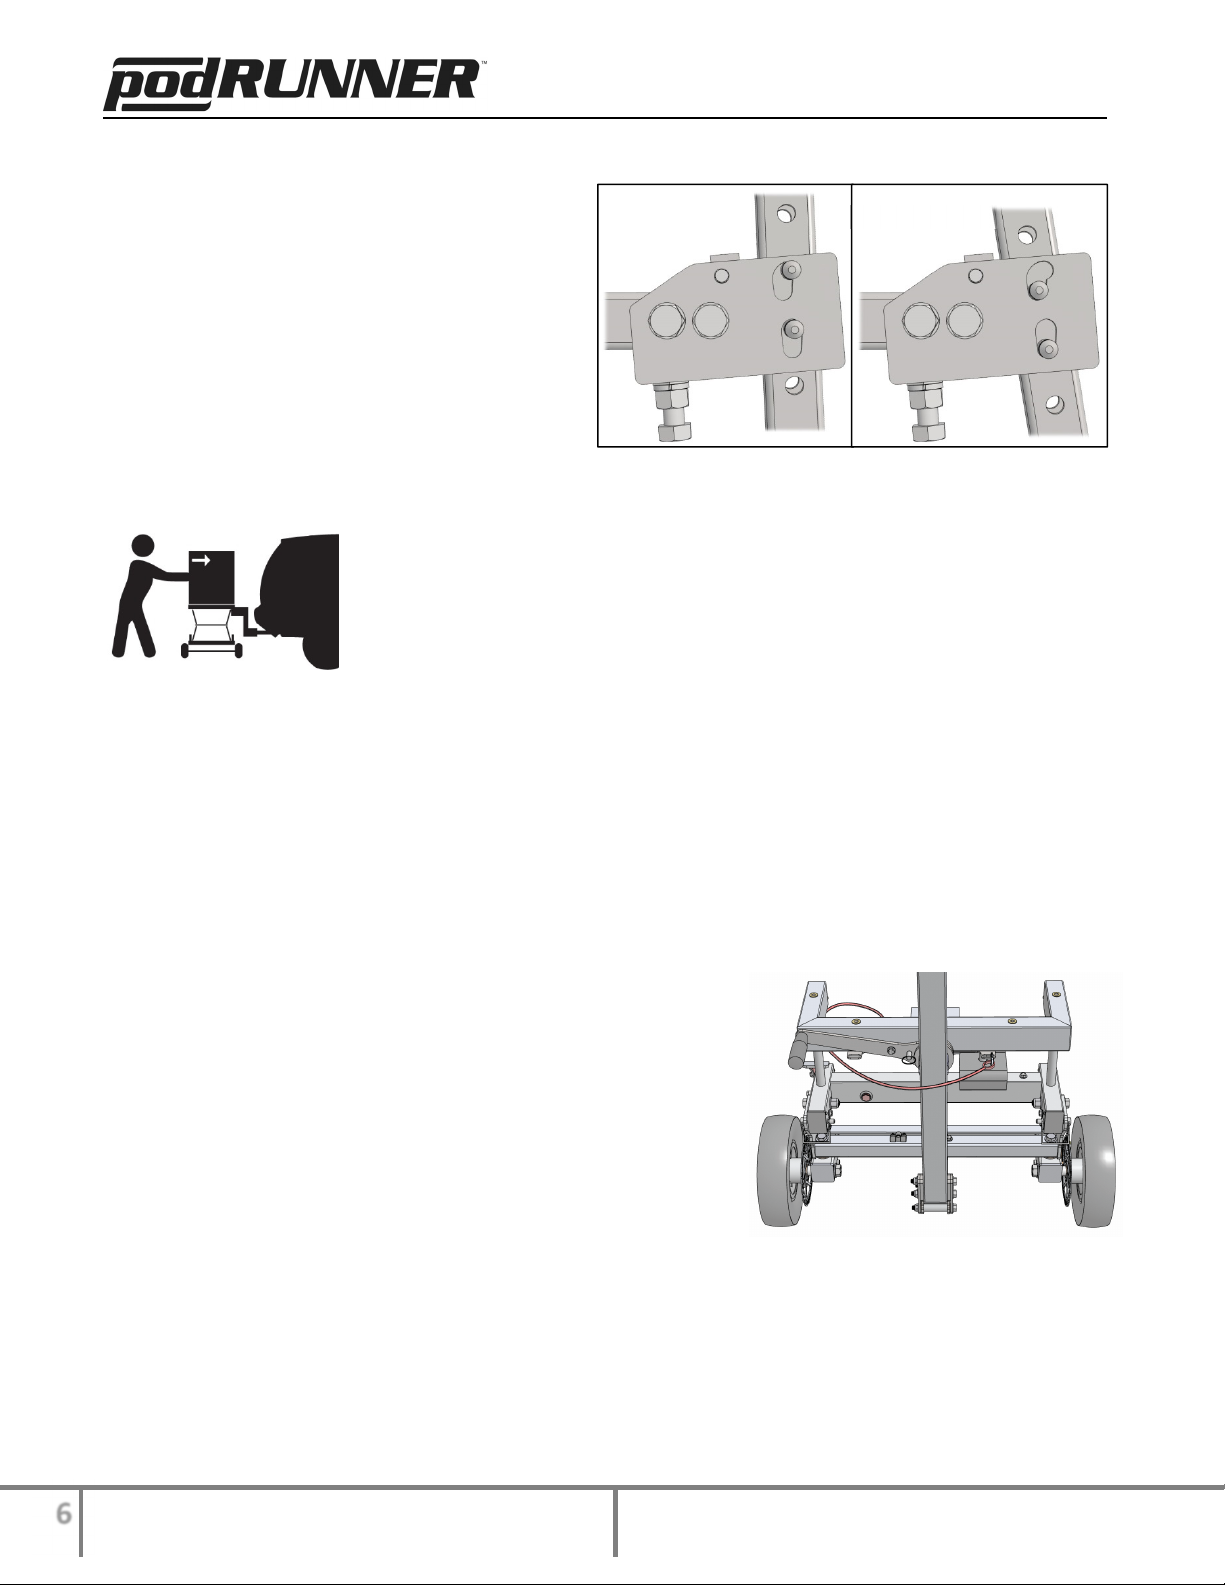
Never transport a PodRunner™ with the PitchLok™ pins in the “Load” position.
PodRunner™ is not for transport of people, animals, flammable liquids or other hazardous materials.
Never attempt to transport a PodRunner™ unless the Pod and all contents or other carried items are firmly and completely attached to the
PodRunner™. Insufficiently secured items may fall off. You are always responsible for damage to your PodRunner™ or other property caused
by incorrect use of a PodRunner™.
Do not use PodRunner™ as a seat or step.
Use extreme caution when maneuvering PodRunner™ on inclines or slopes. Never attempt to roll a PodRunner™ on terrain that is too steep or
soft to maintain control of the PodRunner™. It may roll away, sink or tip over.
Never attempt to move a PodRunner™ unless the upper frame is in a completely collapsed position.
Never transport a PodRunner™ on a vehicle unless the lower frame is in its completely raised position.
Always set the parking brake and deploy the wheel chocks before leaving a PodRunner™. In some cases even these devices may not be
sufficient to prevent the PodRunner™ from rolling away. You are always responsible for securing the PodRunner™ from unintentional
movement
It may be required by law (and we strongly recommend) using the PodRunner™ running and brake lights if the PodRunner™ blocks the taillights
or turn signals on your vehicle. Attach the four pin electrical connector and test the PodRunner™ lights prior to operating the vehicle.
Do not carry loads that are wider than your vehicle.
Relocate license plate if blocked by the unit (mounting brackets with proper illumination are provided).
Check the security of your load, fasteners and pins before driving your vehicle with the PodRunner™ attached. We recommend rechecking these
items at all rest/fuel stops.
Severe bumps can damage the PodRunner™ or the vehicle’s hitch. Drive slowly on rough roads. Stop and make a thorough inspection if your
PodRunner™ strikes the road. Correct any problems before resuming travel.
Check to see that your vehicle is equipped with an exhaust system that does not direct exhaust directly onto the Runner or Pod as damage to
the unit and its contents may occur.
Do not drill, weld or modify any part of a PodRunner™. Never alter or replace a component on the Runner with any part except one supplied by
Rescue 42, Inc.
Always unpin, rotate and repin the PodRunner™ landing gear to its raised position before attempting to drive on or over any terrain that might
cause the wheels to strike the ground. In some cases rotating the landing gear to its raised position still may not provide enough ground
clearance. Do not operate your vehicle in this situation. You are always responsible for damage to your PodRunner™ or other property caused
by incorrect use of a PodRunner™.
Use extreme caution when operating a vehicle with a PodRunner™ attached. Backing, cornering, bumps, speed and vehicle control are all areas
where you need to be aware that you have an extension off the back of your vehicle and extra load in your hitch. You are always responsible for
damage to your PodRunner™ or other property caused by incorrect use of a PodRunner™. Review and follow the guidelines for “Vehicle
Operations” in this owner’s manual.
Never use a PodRunner™ that is damaged in any way.
Not for use with ATV’s, trailers or towed vehicles.
PodRunner™ may not mount to the back of some vehicles with a rear mounted spare tire.