manuals.online logo
Brands
  1. Home
  2. •
  3. Brands
  4. •
  5. ReSound
  6. •
  7. Hearing Aid
  8. •
  9. ReSound ENZO 2 Assembly instructions

ReSound ENZO 2 Assembly instructions

Other ReSound Hearing Aid manuals
ReSound MINI BTE 61 User manual

ReSound

ReSound MINI BTE 61 User manual

ReSound LINX 3D User manual

ReSound

ReSound LINX 3D User manual

ReSound Vea VE30 User manual

ReSound

ReSound Vea VE30 User manual

ReSound Linx Quattro User manual

ReSound

ReSound Linx Quattro User manual

ReSound LiNX 2 88 User manual

ReSound

ReSound LiNX 2 88 User manual

ReSound Azure User manual

ReSound

ReSound Azure User manual

ReSound f861-drw User manual

ReSound

ReSound f861-drw User manual

ReSound Vea User manual

ReSound

ReSound Vea User manual

ReSound ESSENCE LITE User manual

ReSound

ReSound ESSENCE LITE User manual

ReSound MATCH BTE User manual

ReSound

ReSound MATCH BTE User manual

ReSound PH13 User manual

ReSound

ReSound PH13 User manual

ReSound LX800-M User manual

ReSound

ReSound LX800-M User manual

ReSound Aventa 3 User manual

ReSound

ReSound Aventa 3 User manual

ReSound Nexia 62 User manual

ReSound

ReSound Nexia 62 User manual

ReSound V 70 User manual

ReSound

ReSound V 70 User manual

ReSound RP30 User manual

ReSound

ReSound RP30 User manual

ReSound LiNX Quattro CSX12 User manual

ReSound

ReSound LiNX Quattro CSX12 User manual

ReSound ALERA User manual

ReSound

ReSound ALERA User manual

ReSound IIC User manual

ReSound

ReSound IIC User manual

ReSound Phone Clip User manual

ReSound

ReSound Phone Clip User manual

ReSound Linx Quattro User manual

ReSound

ReSound Linx Quattro User manual

ReSound Unite Phone Clip+ Instruction Manual

ReSound

ReSound Unite Phone Clip+ Instruction Manual

ReSound ONE 62 User manual

ReSound

ReSound ONE 62 User manual

ReSound 60 series User manual

ReSound

ReSound 60 series User manual

Popular Hearing Aid manuals by other brands

BTE Alta2 Pro Ti Instructions for use

BTE

BTE Alta2 Pro Ti Instructions for use

Sonic Bliss miniBTE user guide

Sonic

Sonic Bliss miniBTE user guide

Lexie B1 Replacement guide

Lexie

Lexie B1 Replacement guide

Camplicomms HC-200 user guide

Camplicomms

Camplicomms HC-200 user guide

Siemens MUSIC Pro Pro IT user guide

Siemens

Siemens MUSIC Pro Pro IT user guide

Phonak Q90 user guide

Phonak

Phonak Q90 user guide

Williams Sound SoundPlus WIR 237 Manual and user guide

Williams Sound

Williams Sound SoundPlus WIR 237 Manual and user guide

Panasonic WH-216KZ Quick tips

Panasonic

Panasonic WH-216KZ Quick tips

Oticon Medical Ponto SoundConnector Instructions for use

Oticon Medical

Oticon Medical Ponto SoundConnector Instructions for use

Siemens Life micon user guide

Siemens

Siemens Life micon user guide

Starkey Destiny Operation manual

Starkey

Starkey Destiny Operation manual

Audicus The Icon instruction manual

Audicus

Audicus The Icon instruction manual

Advanced Bionics Slim HP Standard Instructions for use

Advanced Bionics

Advanced Bionics Slim HP Standard Instructions for use

Widex DREAM440 THE DREAM SERIES User instructions
Widex

Widex DREAM440 THE DREAM SERIES User instructions
Phonak myPilot user guide

Phonak

Phonak myPilot user guide

NIKEN NK-401 instruction manual

NIKEN

NIKEN NK-401 instruction manual

ON Semiconductor Ezairo 7111 Pre Suite Getting started guide

ON Semiconductor

ON Semiconductor Ezairo 7111 Pre Suite Getting started guide

Sonetik GOHEAR user guide

Sonetik

Sonetik GOHEAR user guide

manuals.online logo
manuals.online logoBrands
  • About & Mission
  • Contact us
  • Privacy Policy
  • Terms and Conditions

Copyright 2025 Manuals.Online. All Rights Reserved.

resoundpro.com
1
ReSound Aventa®3 .10
fitting guide
SMART HEARING™
2 3
The hearing instruments will appear in the “Select Instruments”
section. When all hearing instruments to be programmed have been
discovered, click on “Beep” to identify each hearing instrument, and
assign it as a right or left device. When each hearing instrument has
been assigned, click “Continue”.
Getting started
Prior to connecting to ReSound Aventa 3:
1. ReSound devices require a battery when fitting. Make sure the
battery is fresh and that it is inserted correctly.
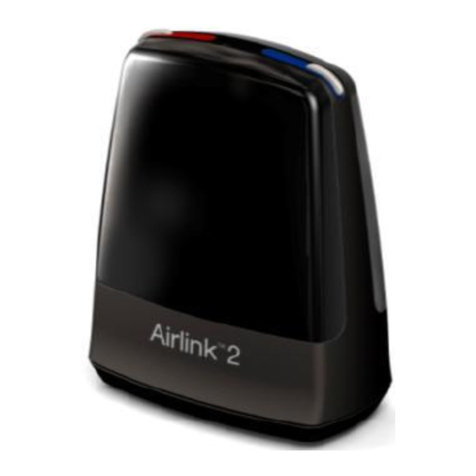
a. For wireless fittings, insert AirlinkTM/Airlink II in a USB slot on
the fitting PC and wait for the message that new hardware
has been found. Then open ReSound Aventa 3.
b. For wired fittings, ensure that the programming interface
(Speedlink, Hi-PRO or NOAHlink) is connected to the PC
before launching ReSound Aventa 3.
2. Launch ReSound Aventa 3. For new fittings, ReSound Aventa 3
begins in the Start screen, where the patient’s experience with
amplification can be selected. Selection of fitting interface and
connection to the hearing aids is done in the upper part of the
Start screen.
Remove the stickers from the size 675 batteries to activate them.
Wait for one minute for best results. Click “Connect” in the center of
the top ribbon of the ReSound Aventa 3 Start screen.
Insert the battery and close the battery door of each hearing
instrument to be programmed, and then click “Connect.”
Choose patient’s
experience level Click “Connect”
Play a beep to
determine right
from left hearing
instrument
Assign hearing
instrument to right
or left ear
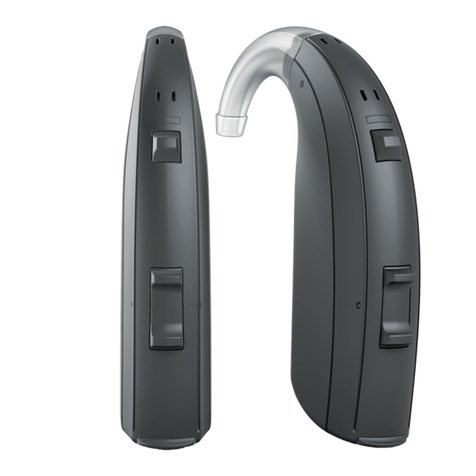
This fitting guide gives an overview of how to fit
ReSound ENZO2TM wireless hearing instruments with
ReSound Aventa®3.10. A ReSound ENZO2998 wireless
binaural fitting is depicted.
ReSound Aventa 3.10 fitting software supports all
ReSound instruments built on the ReSound RangeTM,
ReSound Range II and SmartRangeTM chips.
4 5
At this point, you may pair ReSound wireless accessories by
clicking “Accessories”, or proceed to the fitting by clicking
“Continue”. In this guide, “Continue” is selected.
Next, a window will appear to prompt calibrating DFS UltraTM II.
Click “Calibrate” to begin the calibration procedure. The progress of
the calibration will be shown. Click “Continue” after calibration is
completed.
A window will appear showing the status of the connection, and will
alert you to recommendations for venting. Choose to either keep
the “Current” configuration or the “Recommended” configuration.
Click “Continue.”
If you have selected “Experienced linear” in the Pre-Fit screen, you
will be prompted to choose an amplification mode. Linear mode
provides the same gain for all input levels and has only one input
level control. Semi linear provides a lower compression ratio than
WDRC.
A progress window will alert you to the capability of the hearing
instrument to exceed 132 dB SPL. Click “Continue.”
6 7
ReSound Aventa®3.10 includes three input level controls at 50,
65 and 80 dB SPL. This allows for greater flexibility for fine-tuning
gains. ReSound Aventa®calculates the gain settings for the
particular audiogram using the Audiogram+ fitting rationale. To
fine-tune a program, adjust the gain manually by using the gain
handles or by using the ReSound Aventa®Guide, where fine-tuning
solutions to patient complaints can be automatically applied.
Once fine-tuning is complete, the relative gain changes can be
applied to any or all other programs by clicking the “Autorelate”
button in the program handling tool bar beneath the program tabs.
Select which programs to autorelate to by checking the boxes. You
may choose whether to apply changes made to MPO or Sound
Shaper or compression mode for each program.
Gain adjustment
When the Fit screen is displayed, the hearing instrument gains
and MPOs can be adjusted, and feature settings are accessed by
clicking “Advanced Features” in the “Tools” menu on the left side of
the screen.
Fine-tune and Save hearing instruments settings
Saving and completing the fitting
Once the fitting is complete, click “Save” at the bottom right
of the Fit or Summary screens. Once the data is saved to the
instruments and to the database, it is safe to disconnect the hearing
instrument(s).
Summary screen
The Summary screen allows the clinician to print information for
the patient, a third party, or for chart notes. Notes can be entered,
saved and printed as needed.
M 2 01 317- G B -15 .11- R e v. A
© 2016 GN ReSound A/S. All rights reserved. ReSound is a trademark of GN ReSound A/S. Apple, the Apple logo, iPhone, iPad and iPod
are trademarks of Apple Inc., registered in the U.S. and other countries. Bluetooth is a trademark of Bluetooth SIG, Inc.
ReSound helps people rediscover hearing with hearing solutions that emulate the function of the natural ear. Our aim is to help you give your clients the
opportunity to live a rich, active and fulfilling life.
ReSound ENZO2is the next step in Smart Hearing for super power users. It streams stereo sound from iPhone, iPad and iPod touch without an
intermediate device, and with the ReSound Smart™app it offers smart new ways to control and personalize the hearing experience with a touch on the
iPhone or Apple Watch.
resoundpro.com/enzo2
WORLDWIDE HEADQUARTERS
GN ReSound A/S
Lautrupbjerg 7
DK-2750 Ballerup, Denmark
Tel.: +45 45 75 11 11
resound.com
UNITED KINGDOM
GN ReSound Ltd.
Kirtlington Business Centre
Portway
Kirtlington
Oxon OX5 3JA
Tel.: +44 1869 352 800
gnresound.co.uk
NEW ZEALAND
GN ReSound (NZ) Ltd.
Ground Floor, North Entrance
4 Fred Thomas Drive
Takapuna
Auckland, 0622
Tel.: (free) 0800 900 126
gnresound.co.nz
AUSTRALIA
GN ReSound Pty. Ltd.
Gate C, 19-25 Khartoum Rd
Macquarie Technology Park
Macquarie Park NSW 2113
Tel.: (free) 1800 658 955
gnresound.com.au