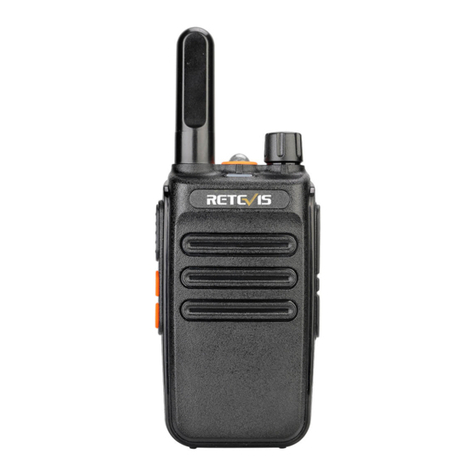
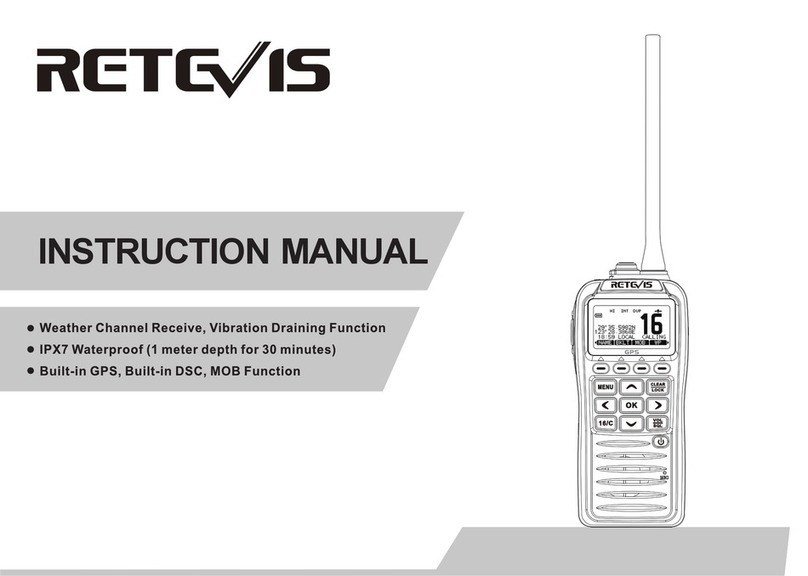
Retevis RB29 User manual

RB29
5RRP)&=KRQJKDL[LQ6FLHQFH7HFKQRORJ\3DUN
1R*DQOLWK5RDG-LKXD6WUHHW/RQJJDQJ'LVWULFW
6KHQ]KHQ&KLQD

For downloading further resources: Brochures, Software/Firmware, Manual etc,
Pls contact your direct reseller first OR go to website retevis.com and check “support”
in the each product link to download it.
EU Importer:Germany Retevis Technology GmbH
Address:Uetzenacker 29,38176 wendeburg
Warning
Please read this manual carefully before using this radio.
• Please do not communicate or charge this radio in flammable, explosive
and area which radio communication is prohibited (such as oil station, gas
station, airport etc.)
• Please do not operate this radio without license in govemment laws banned
areas.
• Please make sure this radio avoids the sunshine, and avoids to put it near
any heating device.
• Please make sure this radio avoids any dusty, humid and water splashed
place, and also avoids to put it near any heating device.
• If radio smells or smokes, please remove the battery pack from radio at
once, and then please contact your nearest distributor.
• The repair job of this radio is in the charge of professionals & technical's,
self-disassembly is prohibited.

Using tips
Unpacking and Checking the Equipment
·Carefully unpack the radio.We recommend that you confirm the items in the following table
before discarding the packing material. If any item is missing or has been damaged during
shipment, please contact your first seller.
Accessories list
Item name
Battery
Belt Clip
Hand strap
Charger
Screw
Quantity
User's Manual
2
2
2
2
1
4
Using the battery
The battery is not completely charged at the factory, please charge it before using.
After purchase or extended storage (more than two months), the first time to charge battery
cannot make battery reach its normal operating capacity. After repeating charge /discharge it two
or three times, the operating capacity will increase to its normal capacity.
Notice: After fully charge the battery, please do not charge it again and should take it off from the
charger. If not, it will short or damage the battery life for over charge.
Installing / Removing the Battery
To install the battery into the battery positioning hole of radio bottom, then press the battery,
make the button completely to lock battery. To remove the battery, please turn off the radio, and
then push up the battery button of radio top, finally take off the battery.
(Install the battery) (Remove the battery)
Installing Earphone /Programming Jack
Uncover earphone lid, directly insert earphones into earphone
holes (earphones need to be additionally purchased).
You can use computer programming software to operate (please
consult with local dealers about the information of computer
programming software).
Note: If your radio developed with VOX function, you should
re-turn on radio power once to active VOX function.
01 Usingtips
01 UnpackingandCheckingtheEquipment
01 Installing/RemovingtheBattery
02 Installingthebeltclip
02 GettingAcquainted
03 Basicopeartions
04 Troubleshootingguide
05 Specification
06 CHANNELANDFREQUENCIES

Installing the belt clip
If necessary, attach the belt clip to the back of battery
with the screws supplied carry conveniently.
Getting Acquainted
PTT switch
Side-key
(You can customize
it in the software)
Moni switch
Speaker/Microphone Jack
Battery Pack
Battery release latch
Antenna
Channel-selecting knob
Power/volume knob(Power on by
rotating clockwise,Power off by
rotating counter clockwise till
hear the "kata" sound.
VOL control by rotating.)
LED indicator light
(The indicator light turns red
when transmit, turns green
when receive.)
Speaker
Microphone
Basic opeartions
LED indicator
It lights red when transmitting, and lights green when receiving.
Channel-selecting knob
Rotate it to select channel 1-16, clockwise rotation to increase, counter-clockwise rotation to
decrease. An alert tone will sound when an empty channel is selected.
Power/Volume knob
Rotate it by clockwise to power on the radio. To turn off the radio, rotate it by counterclockwise
until a click sound is heard, VOL control by rotating.
PTT switch
Press PTT switch and then talk to the microphone, the indicator light turns red, if the channel
does not have transmitting frequency, a "Du Du" tone sounds, and indicator light turns red.
Release PTT switch to receive. It lights green when there is signal.
Side-key
Can be defined in the software as null / VOX/ emergency alarm / scan / busy lock, the default
definition is short press scan switch, long press VOX switch.
Moni switch
Press the button to monitor calls with different mute tones at the same frequency, and also press
to listen when the signal strength does not reach the opening threshold.
Squelch level
The squelch level will determine the signal strength to open the speaker of the radio. If the
squelch level is lower, the background noise of opening the radio's speaker will be higher,
and the corresponding communication range will be further, but the anti-interference
ability will be weaker. The default setting of squelch level is 3, you can adjust it through
the menu "Squelch level" of the "Optional features" in the software, level 0 to 9 can be
selected. 0 is the lowest level.
Time out timer (TOT)
The purpose of TOT is to prevent any radio from talking in one channel for too long, and to
prevent the radio from being damaged due to continuous transmission. If the transmitting time
exceeds the TOT pre-set time, the radio will stop transmission and an alert tone sounds.Release
PTT switch to stop the alert tone, the radio resume to receiving mode.
Scan On/Off
When the radio is set as scan via software, rotate the channel-selecting knob to channel 16, it
will start scanning. It will scan all scannable channels from channel 1 to 16. You can define as
channel added or deleted in software. When there is signal in the scanning channel, it stops in
the channel for talk.
Note:
a. The radio will stay in the channel which has signal, and 15 seconds after the signal disappears,
it will continue scanning.
b. It can not scan when there is less than 2 scannable channels.
VOX
Speak to the microphone in normal voice to transmit directly, no need to press PTT switch.
Side-key can be defined as VOX switches in the software.
1) When VOX is on in your working channel.
Speak to the microphone directly, it will transmit automatically.
The radio stops transmitting when there is no voice, and waits for receiving.
2) When a headset with a microphone is used.
When VOX is on, you should increase the VOX gain for the radio to identify voice volume.
lf microphone is too sensitive, the noise around radio will start transmitting. If microphone is not
sensitive, the radio can not collect your voice.

Please adjust VOX level well to guarantee smooth communications.
Note: When turn on VOX and VOX gain is in high and sensitive level, if connect mic/speaker
with radio, the signal of mic/speaker will probably cause radio transmit. Whether it is in Chinese
or English speech, press and hold the PTT button or VOX are all invalid and issued a "please
change battery" voice prompt, and loud "Di" sound until PTT release or end VOX.
Busy channel lockout(BCLO)
If you set busy channel lockout, press PTT after receiving a signal of prohibiting transmit, and
issue "Di" sound until PTT release.
QT/DQT
You can select the QT/DQT via program software. When a channel has QT/DQT, the speaker
will be turned on when it receives the same QT/DQT. If there is transmitted signal with different
QT/DQT in the same channel, the speaker will not open and indicator light turns green
One-Key Frequency Copy
Press the PTT button and the Moni switch on the receiver radio channel 1 at the same time to
turn on, the receiver radio will play the voice " Turn on the Radio-One " and then the green light
will flash slowly, the receiver radio and transmitter radio respectively turn the channel switch to
the channel to be stored, the transmitter radio Press PTT to transmit, the green light of the
receiver flashes quickly and then the green light flashes slowly after the receiver stops with a
beep. After copying is completed, just turn off and restart.
Ÿ6XSSRUWGLIIHUHQWEUDQGZDONLHWDONLHFRS\
Frequency Copy all channels at one times
Press the PTT key and the Moni switch on the transmitter and receiver channel 2 at the same
time, the transmitter and receiver indicator light green light slowly flash, the transmitter press
PTT for 3 seconds and then release, the transmitter indicator light changes from red light to slow
flash green light, at the same time, the receiver indicator light changes from fast flash green light
to slow flash green light, then the copy is completed, and the computer can be turned off and
rebooted.
Ÿ2QO\VXSSRUWWKHVDPHVROXWLRQVZDONLHWDONLH
Trouble shooting guide
Troubles
No Electrical Source
The operating time becomes short, even the
battery is fully charged.
Not able to communicate with the
transceivers of the same group
The voice of another group can be heard.
Other radios can not receive the TX signals
or receive signals in a low volume
Noise is always heard
Solution
•The battery has been exhausted.
Replace or recharge the battery.
•The battery is installed incorrectly.
Remove it and install again.
ƒ&RQILUPWKH47'47LVWKHVDPH
ƒ7KHGLVWDQFHLVRXWVLGHRIUDQJH
ƒ6ZLWFKWKHYROXPHNQREWRWKHKLJKHVWOHYHO
ƒ7KHPLFURSKRQHPD\EHGDPDJHG
send it to the local dealer for check.
ƒThe distance is outside of range.
ƒTurn on the radio in nearer range and try
again
Replace the battery.
Change all QT/DQT of the group.
Specification
GENERAL
Frequency Range FRS
Rated Voltage 3.7V DC
Memory Channel 16
Frequency SensiƟvity f0.5ppm
Antenna Impendance 50¡
OperaƟon Temperature Range -30ć~+60ć
TRANSMITTER
RF power İ2W
ModulaƟon type 16kɌF3E
ModulaƟon distorƟon <5%
Adjacent channel power ı65dB
Audio response +6.5 ~ -14dB
Max FR.DeviaƟon İf5KHz
Spurious RadiaƟon İ7.5W
Current İ1200mA
ModulaƟon Noise ˘-40dB
IntermediaƟon sensiƟvity 8-12mv
RECEIVER
Receiving sensiƟvity 0.2ʅV
Adjacent channel selecƟvity 65dB
Occupied Bandwidth İ16KHz
Current Standby 55mA, working 150mA
Reference Frequency 26.000MHz
Inter-modulaƟon ı60dB
Spurious ı55dB
Audio response +7-12.5dB
Audio distorƟon <5%
Audio power 500mW
Note: Specification will be revised without notice due to technical improvement. Thank you.
CHANNEL AND FREQUENCIES
Channe Frequency
(MHz) Max Power Output CTCSS/DCS
1 462.5625 2W 67.0
2 462.5875 2W 118.8
3 462.6125 2W 127.3
4 462.6375 2W 131.8
5 462.6625 2W 136.5
6 462.6250 2W 127.3
7 462.7250 2W 136.5
8 462.6875 2W 141.3
9 462.7125 2W 146.2
10 462.5500 2W 123.0
11 462.5750 2W D743I
12 462.6000 2W D332I
13 462.6500 2W D243I
14 462.6750 2W D606N
15 462.7000 2W D731I
16 462.7250 2W D462I

09
08

10 11

Guarantee
ModelNumber:
SerialNumber:
PurchasingDate:
Dealer: Telephone:
User’sName: Telephone:
Country:
Address:
PostCode: Email:
Remarks:
1. This guarantee card should be kept by the user, no replacement if lost.
2. Most new products carry a two-year manufacturer’s warranty from the date of purchase.
Further details, pls read http://www.retevis.com/after-sale/
3. The user can get warranty and after-sales service as below:
zContact the seller where you buy.
zProducts Repaired by Our Local Repair Center
4. For warranty service, you will need to provide a receipt proof of purchase from the actual
seller for verification
Exclusions from Warranty Coverage:
1. To any product damaged by accident.
2. In the event of misuse or abuse of the product or as a result of unauthorized alterations
or repairs.
3. If the serial number has been altered, defaced, or removed.
12
Table of contents
Other Retevis Two-way Radio manuals

Retevis
Retevis RB19P User manual

Retevis
Retevis H-777 User manual

Retevis
Retevis RT30 User manual

Retevis
Retevis RT-628 Manual

Retevis
Retevis RB85 User manual

Retevis
Retevis RT628S User manual

Retevis
Retevis RB17A User manual

Retevis
Retevis RB17 User manual

Retevis
Retevis RT21 User manual

Retevis
Retevis RT622 User manual

Retevis
Retevis RT25 User manual

Retevis
Retevis RB23 User manual

Retevis
Retevis RT15 User manual

Retevis
Retevis RT46 User manual

Retevis
Retevis RT33 User manual

Retevis
Retevis RT18 User manual

Retevis
Retevis RT30M User manual

Retevis
Retevis RT32 User manual

Retevis
Retevis RB22 User manual

Retevis
Retevis RT45 User manual