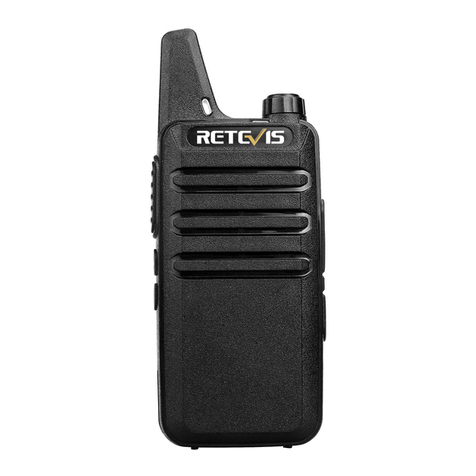
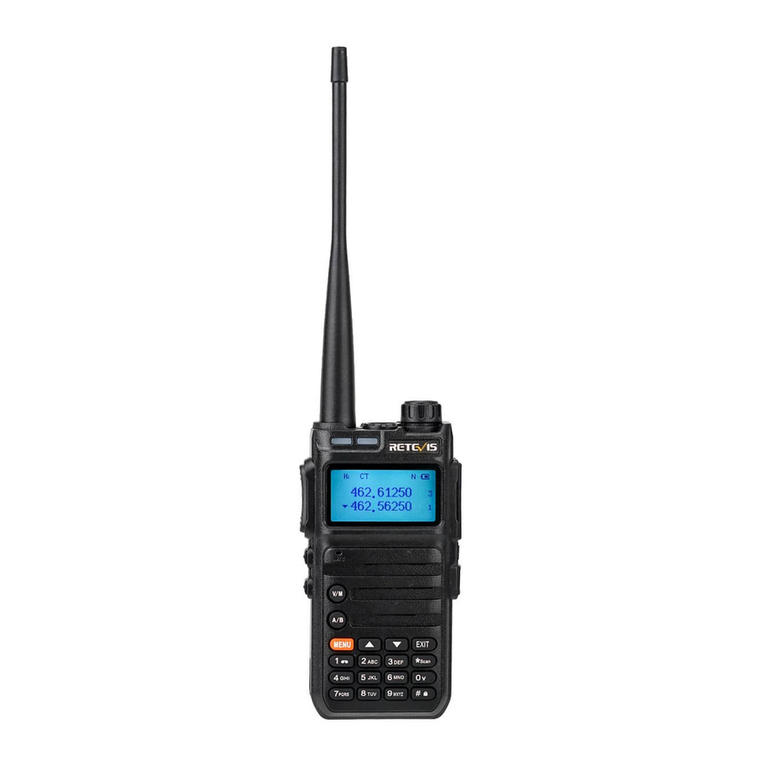
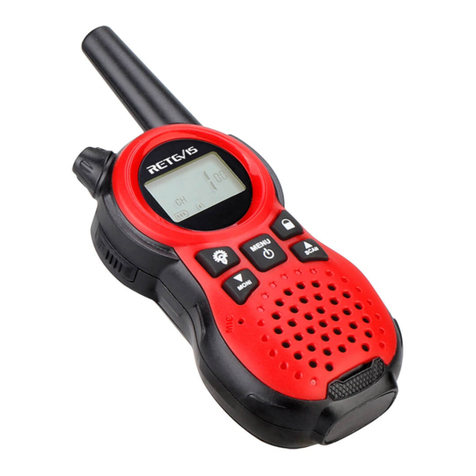
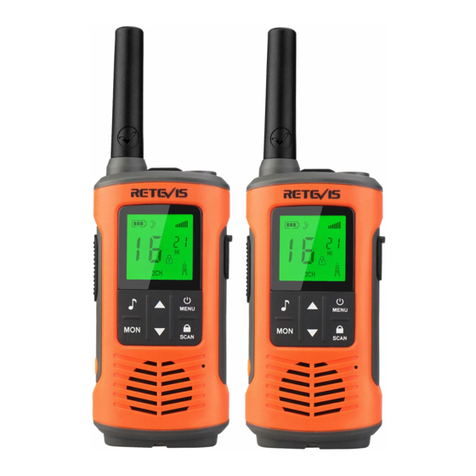
Retevis RT616 User manual

RT616
(EN / DE / FR / IT / ES)

TO USER
Thank you for your favor with our products.
We believe that this easy-to-use products will provide dependable and cost-effective
communications for you. Our professional two-way radios incorporate the latest in
advanced technology and craft. So you will be pleased with the quality and features
of our products. Please read this manual carefully to ensure you know how to properly
the radio before use.
■ LCD display monitor ■ Frequencey range: PMR446 ■ Wide/narrow band selection: 12.5KHz
■ LED Flashlight ■ Output power: 0.5W ■ Support USB charging function
■ 50 Group CTCSS, 105 Groups DCS ■ VOX ■ Up to 99 Channel ■ Time-out-time (TOT)
■ Keyboard Beep ■ Secreen backlight ■ Battery saving function ■ Monitoring function
■ Keyboard Locks ■ FM Radio: 87-108MHz ■ Dual standby function
■ Multiple working modes are available ■ Restore factory settings
■ Weather forecast function (Only available in North Ameriaca) ■ 10 ringtone are available
Function Introduction
Please read the following information in order to use this two-way radio safety an effeciently.
1. The maintenance work of the two-way radio can only be carried out by professional technical personnel;
assembly/disassembly without permission is prohibited;
2. To avoid problems caused by electromagnetic interference and/or electromagnetic compatililigy, please turn
off the two-way radio in places with the gign “Please turn off two-way radio”, such as hospitals and other
health care facilities.
3. When taking airplane, please turn off the two-way radio when the crew request.
4. In automobile with airbags, do not place the two-way radio in the inflation area of the airbags.
5. Turn off the two-way radio before entering the flammable and explosive environment;
6. Do not raplace or charge the battery in flammable and explosive environments;
7. Turn off the two-way radio before approaching the blasting area and detonator area;
8. Do not use the two-way radio if the antenna is damaged, or else it may cause minor skin burns;
9. Do not expose the two-way radio to direct sunlight or near the heating device.
10. While the portable two-way radio is transmitting, keep the radio in a vertical position and keep the
microphone about 5cm from teh mouth.
11. Keep the two-way radio at least 2.5cm from the head or body during transmitting.
12. If you are wearing the portable two-way radio on your body, make sure that the antenna is at least 2.5cm
away from the body when the two-way radio is transmitting.
13. If the two-way radio has any odor or smoke, turn off the power immediately and contact your dealer.
Satety Information

LED Flashligt
Power and Volume Knob
Antenna
Earphone Socket
LCD Screens
LAMP Button
PTT Button
Micro USB Part
MEMU Button
[ ]/[ ] Button
[▲]/[▼] Button
MONI Button
FM Button
Microphone
Speaker
Familiar with the machine
01
[Power and Volume]: Power switch, adjust the volume.
[PTT]: When transmittiong, press this button and speak to the microphone; release the button to receive.
[FM]: Press the button once to turn on the FM radio function, and then press the button again to turn off the
FM radio function.
[LAMP]: Press to turn on the flashlight, press it again to make the flashlight flash, and press it again to turn
off the flashlight.
[MENU]: Short press to enter menu setting function.
[MONI]: Monitoring Button, short press for Monitoring function in normal mode; In menu mode press this key
to exit.
[ / Ringtone]: Long press this button to turn on/off keypad lock, short press for ringtone call. (Note: After
the keyboard lock is opened, the function key and confirm key operations are invalid)
[▲]: Short press this button to up; Long press to switch A/B frequency.
[▼]: Short press this button to down; Long press to switch A/B frequency.
Combination key function
Call Tone: Press and hold [PTT] button and [MONI] button to transmit 1750Hz tone signaling, Release the
[MONI] button to exit; Press and hold [PTT] button and [FM] button to transmit 1450Hz tone
signaling; Press and hold [PTT] button and [ ] button to transmit 1750Hz tone signaling.
Description of the Buttons
02

Receiving display: , Transmitting display:
03 04
LCD icon and Function Description LCD icon and Function Description
Icon Icon name Description
Receiving and Transmitting
Normal mode display
frequency; PMR and FRS
mode display channels
Battery level indicator
Channel number indication
Frequency offset direction
VOX indication
Keypad lock indication
Field Strength
Ringtone
Display current channel, Press the [▲]/[▼] button to select
The more cells in the display, the more power the battery
01-99
When “+” is displayed, it represents positive difference frequency;
when “-” is displayed, it represents negative difference frequency. Do
not display for the same frequency transceiver.
VOX has been turned on
Low Power (Normal Mode)
Dual Standby
Narrow Band
(Normal Mode)
CTCSS CTCSS: 50 Group (Normal Mode) 38 Group (FRS/PMR)
DCS: 104 Group (Normal Mode) 83 Group (FRS/PMR)
DCS
When “L” is displayed, it represents low power transmission of the
current channel; when is not displayed, it represents high power
transmission.
When “N” is displayed, it represents in the Narrow-band mode; when
is not displayed, it represents in the broad-band mode
Keypad lock has been turned on(PTT button are not restricted)
The signal intensity is displayed when receiving, the first five grids are
displayed when low power is transmitted, and the full grid is displayed
when high power is transmitted.
1-10 Category
Brief of the Function
1. Output Power:
PMR446:0.5W
2. Frequency Range:
409(China) 467(TaiWan, China) 446(Europe) 442(USA) 447(Southeast Asia) 325(Philippines)
476-477(Australia) 433(Russia) 444(Norway) 448-447(Korea) 464(South Africa)
3. Channel: Up to 99 Channel (Preset according to different countries or regions)

05
Select the RX CODE
1) Press the [MENU] button to enter into the MENU mode. Press the [▲]/[▼] button to select 10 and display
RXCODE;
2) Press the [MENU] button to enter the MENU item;
3) Press the [▲]/[▼] button to select the required code: OFF/67.0-754N;
Note: CTCSS: 67Hz-254.1Hz (50 group) DCS: 023N-754N/023I-754I (104 group)
4) Press the [▲]/[▼] button to select the CTCSS/DCS;
5) Press [MENU] button to confirm;
6) Press [PTT] or [MONI] button exit to the menu mode.
Select the TX CODE
1) Press the [MENU] button to enter into the MENU mode. Press the [▲]/[▼] button to select 02 and display
TXCODE;
2) Press the [MENU] button to enter the MENU item;
3) Press the [▲]/[▼] button to select the required code: OFF/67.0-754N;
Note: CTCSS: 67Hz-254.1Hz (50 group) DCS: 023N-754N/023I-754I (104 group)
4) Press the [▲]/[▼] button to select the CTCSS/DCS;
5) Press [MENU] button to confirm;
6) Press [PTT] or [MONI] button exit to the menu mode.
Squelch level
1) Press the [MENU] button to enter into the MENU mode. Press the [▲]/[▼] button to select 03 and display
SQL;
2) Press the [MENU] button to enter the MENU item;
3) Press the [▲]/[▼] button to select: 0/1/2/3/4/5/6/7/8/9. (The lowest level is 0, The highest level is 9, Usually
Menu Item List
06
Menu
1
2
3
4
5
6
7
8
9
10
11
12
13
14
15
Display Character
RXCODE (Receive CTCSS/DCS)
TXCODE (Transmit CTCSS/DCS)
SQL (Squelch Level)
LIGHT (Backlight)
BEEP (Keyboard Beep)
VOX
PWR (Transmission Power)
TDR (Dual Standby)
W/N (Wide Band and Narrow Band)
SAVE (Power Saving Mode)
TOT (Transmission Time Limit)
BCLO (Busy Channel Lockout)
RING (Ringtone)
WEATHE (Wheather forecast)
VOICE (Language)
Set Options
OFF, CTCSS, DCS
OFF, CTCSS, DCS
0-9 (Factory set to level 3)
OFF/ON Key
OFF/ON
OFF / 1-5 level
HIGH/LOW
ON/OFF
WIDE/NARROW
OFF/ON
OFF/30/60/90/120/150/180S
OFF/ON
OFF, 10 ringtone are available
OFF/ON
OFF / CHI (Chinese) / ENG (English)
Menu Item List

set to level 3)
4) Press [MENU] button to confirm;
5) Press [PTT] or [MONI] button exit to the menu mode.
Backlight
1) Press the [MENU] button to enter into the MENU mode. Press the [▲]/[▼] button to select 04 and display
LIGHT;
2) Press the [MENU] button to enter the MENU item;
3) Press the [▲]/[▼] button to select : ON/OFF/KEY;
4) Press [MENU] button to confirm;
5) Press [PTT] or [MONI] button exit to the menu mode.
Keyboard Beep
1) Press the [MENU] button to enter into the MENU mode. Press the [▲]/[▼] button to select 05 and display
BEEP;
2) Press the [MENU] button to enter the MENU item;
3) Press the [▲]/[▼] button to select: ON/OFF;
4) Press [MENU] button to confirm;
5) Press [PTT] or [MONI] button exit to the menu mode.
VOX
1) Press the [MENU] button to enter into the MENU mode. Press the [▲]/[▼] button to select 06 and display
VOX;
2) Press the [MENU] button to enter the MENU item;
3) Press the [▲]/[▼] button to select: OFF/1/2/3/4/5;
4) Press [MENU] button to confirm;
5) Press [PTT] or [MONI] button exit to the menu mode.
Note: The minimum sensitivity is 5, when background noise is high to use.
The highest sensitivity is 1, when background noise is low to use.
When VOX is opended, VOX icon appears in the upper left corner of the LCD.
Transmitting Power
1) Press the [MENU] button to enter into the MENU mode. Press the [▲]/[▼] button to select 07 and display
PWR;
2) Press the [MENU] button to enter the MENU item;
3) Press the [▲]/[▼] button to select : HIGH/LOW;
4) Press [MENU] button to confirm;
5) Press [PTT] or [MONI] button exit to the menu mode.
Dual Standby
1) Press the [MENU] button to enter into the MENU mode. Press the [▲]/[▼] button to select 08 and display
TDR;
2) Press the [MENU] button to enter the MENU item;
3) Press the [▲]/[▼] button to select: OFF/ON;
4) Press [MENU] button to confirm;
5) Press [PTT] or [MONI] button exit to the menu mode.
Wide Band and Narrow Band
1) Press the [MENU] button to enter into the MENU mode. Press the [▲]/[▼] button to select 09 and display
W/N;
Menu Item List
07
Menu Item List
08

2) Press the [MENU] button to enter the MENU item;2) Press the [MENU] button to enter the MENU item;
3) Press the [▲]/[▼] button to select : WIDE/NARROW;
4) Press [MENU] button to confirm;
5) Press [PTT] or [MONI] button exit to the menu mode.
Power Saving Mode
1) Press the [MENU] button to enter into the MENU mode. Press the [▲]/[▼] button to select 10 and display
SAVE;
2) Press the [MENU] button to enter the MENU item;
3) Press the [▲]/[▼] button to select : ON/OFF;
4) Press [MENU] button to confirm;
5) Press [PTT] or [MONI] button exit to the menu mode.
Transmission time limit (TOT)
1) Press the [MENU] button to enter into the MENU mode. Press the [▲]/[▼] button to select 11 and display
TOT;
2) Press the [MENU] button to enter the MENU item;
3) Press the [▲]/[▼] button to select: OFF/30S/60S/90S/120S/150S/180S;
4) Press [MENU] button to confirm;
5) Press [PTT] or [MONI] button exit to the menu mode.
Busy Channel Lockout (BCLO)
1) Press the [MENU] button to enter into the MENU mode. Press the [▲]/[▼] button to select 12 and display
BCLO;
2) Press the [MENU] button to enter the MENU item;
Menu Item List
09
3) Press the [▲]/[▼] button to select : ON/OFF;
4) Press [MENU] button to confirm;
5) Press [PTT] or [MONI] button exit to the menu mode.
Ringtone
1) Press the [MENU] button to enter into the MENU mode. Press the [▲]/[▼] button to select 13 and display
RING;
2) Press the [MENU] button to enter the MENU item;
3) Press the [▲]/[▼] button to select : OFF/1/2/3/4/5/6/7/8/9/10;
Note: Each time you select a call tone, you can listen to the call tone
4) Press [MENU] button to confirm;
5) Press [PTT] or [MONI] button exit to the menu mode. Press the / button to send the selected ring tone.
Weather Forecast Menu Setting
1) Press the [MENU] button to enter into the MENU mode. Press the [▲]/[▼] button to select 14 and display
WEATHE;
2) Press the [MENU] button to enter the MENU item;
3) Press the [▲]/[▼] button to select: OFF/ON;
4) Press [MENU] button to confirm;
5) Press [PTT] button exit to the menu mode.
- If the menu item is selected as ON, the radio enters the weather forecast mode.
- If the menu item is selected as OFF, the radio enters the weather forecast mode.
Wheather Forecast Channel Setting
In wheather forecast receiving mode. Press the [▲]/[▼] button to select wheather forecast channel
Menu Item List
10

(CH1-CH11).
Note: In weather forecast receiving mode, the radio receiving and transmitting function is deactivated.
Language
1) Press the [MENU] button to enter into the MENU mode. Press the [▲]/[▼] button to select 15 and display
VOICE;
2) Press the [MENU] button to enter the MENU item;
3) Press the [▲]/[▼] button to select: OFF/CHI/ENG;
4) Press [MENU] button to confirm;
5) Press [PTT] button exit to the menu mode.
- If the menu item is selected as OFF, the radio turn off the voice mode.
- If the menu item is selected as CHI, the radio voice prompt is Chinese.
- If the menu item is selected as ENG, the radio voice prompt is English.
Note: In Normal Mode, the LCD display frequency and channel;
In PMR/FRS Mode, the LCD display channel number;
Menu Item List
11
0
1
2
3
4
5
6
7
8
9
OFF
67.0
71.9
74.4
77.0
79.7
82.5
85.4
88.5
91.5
CH1: 162.550 CH2: 162.400 CH3: 162.475 CH4: 162.425 CH5: 162.450
CH6: 162.500 CH7: 162.525 CH8: 161.650 CH9: 161.775 CH10:161.750
CH11:162.000
CTCSS List
12
Serial
Number CTCSS
10
11
12
13
14
15
16
17
18
19
94.8
97.4
100.0
103.5
107.2
110.9
114.8
118.8
123.0
127.3
Serial
Number CTCSS
20
21
22
23
24
25
26
27
28
29
131.8
136.5
141.3
146.2
151.4
156.7
162.2
167.9
173.8
179.9
Serial
Number CTCSS
30
31
32
33
34
35
36
37
38
Serial
Number CTCSS

Frequency range
Operation voltage
Frequency stability
Sensitivity
Squelch sensitivity
Audio power
Audio distortion
Internediation(W/N)
Receiver current
RF Power
Maximum deviation
Spurious emission
Transmission current
Preemphasis Character
<0.16uv (12dB SINAD)
<0.2uv
≥380mW
<10%
≥65dB
≤380mA
≤0.5W
≤± 5KHz
≤-60dB
≤1000mA
6dB per octave
Operation temperature
Mode of operation
Antenna impedance
PMR446
DC 3.7V
± 2.5ppm
-20℃ ~ +50℃
Simplex
50Ω
Memory channel 16 Groups
DCS List
13
Technical Specification
14
39
40
41
42
43
44
45
46
47
48
49
50
51
52
53
54
55
023
025
026
031
032
043
047
051
054
065
071
072
073
074
114
115
116
Serial
Number DCS
56
57
58
59
60
61
62
63
64
65
66
67
68
69
70
71
72
125
131
132
134
143
152
155
156
162
165
172
174
205
223
226
243
244
Serial
Number DCS
73
74
75
76
77
78
79
80
81
82
83
84
85
86
87
88
89
245
251
261
263
265
271
306
311
315
331
343
346
351
364
365
371
411
Serial
Number DCS
90
91
92
93
94
95
96
97
98
99
100
101
102
103
104
105
106
412
413
423
431
432
445
464
465
466
503
506
516
532
546
565
606
612
Serial
Number DCS
107
108
109
110
111
112
113
114
115
116
117
118
119
120
121
624
627
631
632
654
662
664
703
712
723
731
732
734
743
754
Serial
Number DCS General
Receiver Transmitter

RF ENERGY EXPOSURE AND PRODUCT SAFETY GUIDE FOR PORTABLE TWO-WAY RADIOS
This two-way radio uses electromagnetic energy in the radio frequency (RF) spectrum to provide communicati-
ons between two or more users over a distance. RF energy, which when used improperly, can cause biological
damage.
All Retevis two-way radios are designed, manufactured, and tested to ensure they meet government-established
RF exposure levels. In addition, manufacturers also recommend specific operating instructions to users of
two-way radios. These instructions are important because they inform users about RF energy exposure and
provide simple procedures on how to control it.
Please refer to the following websites for more information on what RF energy exposure is and how to control
your exposure to assure compliance with established RF exposure limits:http://www.who.int/en/
Local Government Regulations
When two-way radios are used as a consequence of employment, the Local Government Regulations requires
users to be fully aware of and able to control their exposure to meet occupational requirements. Exposure
awareness can be facilitated by the use of a product label directing users to specific user awareness information.
Your Retevis two-way radio has a RF Exposure Product Label. Also, your Retevis user manual, or separate
safety booklet includes information and operating instructions required to control your RF exposure and to
satisfy compliance requirements.
Radio License
Governments keep the radios in classification, business two-way radios operate on radio frequencies that are
regulated by the local radio management departments (FCC, ISED, OFCOM, ANFR, BFTK, Bundesnetzagentur...).
To transmit on these frequencies, you are required to have a license issued by them. The detailed classification
ATTENTION
15 16
Before using this radio, read this guide which contains important
operating instructions for safe usage and RF energy awareness
and control for compliance with applicable standards and
regulations.
ATTENTION!
and the use of your two radios, please contact the local government radio management departments.
Use of this radio outside the country where it was intended to be distributed is subject to government regulations
and may be prohibited.
Unauthorized modification and adjustment
Changes or modifications not expressly approved by the party responsible for compliance may void the user’s
authority granted by the local government radio management departments to operate this radio and should not
be made. To comply with the corresponding requirements, transmitter adjustments should be made only by or
under the supervision of a person certified as technically qualified to perform transmitter maintenance and
repairs in the private land mobile and fixed services as certified by an organization representative of the user
of those services.
Replacement of any transmitter component (crystal, semiconductor, etc.) not authorized by the local government
radio management departments equipment authorization for this radio could violate the rules.
FCC Requirements:
This device complies with part 15 of the FCC Rules. Operation is subject to the condition that this device does
not cause harmful interference. (Licensed radios are applicable);
This device complies with part 15 of the FCC Rules. Operation is subject to the following two conditions: (Other
devices are applicable)
(1) This device may not cause harmful interference, and
(2) this device must accept any interference received, including interference that may cause undesired operation.
NOTE: This equipment has been tested and found to comply with the limits for a Class A digital device, pursuant
to part 15 of the FCC Rules. These limits are designed to provide reasonable protection against harmful
interference when the equipment is operated in a commercial environment. This equipment generates,
uses, and can radiate radio frequency energy and, if not installed and used in accordance with the ins-
truction manual, may cause harmful interference to radio communications. Operation of this equipment
in a residential area is likely to cause harmful interference in which case the user will be required to
correct the interference at his own expense.
ATTENTION
17
CE Requirements:
• (Simple EU declaration of conformity) Shenzhen Retevis Technology Co., Ltd. declares that the radio equip-
ment type is in compliance with the essential requirements and other relevant provisions of RED Directive
2014/53/EU and the ROHS Directive 2011/65/EU and the WEEE Directive 2012/19/EU; the full text of the EU
declaration of conformity is available at the following internet address: www.retevis.com.
• Restriction Information
This product can be used in EU countries and regions, including: Belgium (BE), Bulgaria (BG), Czech Republic
(CZ), Denmark (DK), Germany (DE), Estonia (EE), Ireland (IE), Greece (EL), Spain (ES), France (FR), Croatia
(HR), Italy (IT), Cyprus (CY), Latvia (LV), Lithuania (LT), Luxembourg (LU), Hungary (HU), Malta (MT), Neth-
erlands (NL), Austria (AT), Poland (PL), Portugal (PT), Romania (RO), Slovenia (SI), Slovakia (SK), Finland
(FI), Sweden (SE) and United Kingdom (UK).
For the warning information of the frequency restriction, please refer to the package or manual section.
• Disposal
The crossed-out wheeled-bin symbol on your product, literature, or packaging reminds you that in
the European Union, all electrical and electronic products, batteries, and accumulators (recharge-
able batteries) must be taken to designated collection locations at the end of their working life. Do
not dispose of these products as unsorted municipal waste. Dispose of them according to the laws
in your area.
IC Requirements:
Licence-exempt radio apparatus
This device contains licence-exempt transmitter(s)/receiver(s) that comply with Innovation, Science and Econ-
omic Development Canada’s licence-exempt RSS(s). Operation is subject to the following two conditions:
(1) This device may not cause interference.
(2) This device must accept any interference, including interference that may cause undesired operation of the
device.
Le présent appareil est conforme aux CNR d’Industrie Canada applicables aux appareils radio exempts de
licence. L’exploitation est autorisée aux deux conditions suivantes:
ATTENTION
18
(1) l’appareil ne doit pas produire de brouillage;
(2) l’utilisateur de l’appareil doit accepter tout brouillage radioélectrique subi, même si le brouillage est susce-
ptible d’en compromettre le fonctionnement.
RF Exposure Information
• DO NOT operate the radio without a proper antenna attached, as this may damage the radio and may also
cause you to exceed RF exposure limits. A proper antenna is the antenna supplied with this radio by the ma-
nufacturer or an antenna specifically authorized by the manufacturer for use with this radio, and the antenna
gain shall not exceed the specified gain by the manufacturer declared.
• DO NOT transmit for more than 50% of total radio use time, more than 50% of the time can cause RF expo-
sure compliance requirements to be exceeded.
• During transmissions, your radio generates RF energy that can possibly cause interference with other devices
or systems. To avoid such interference, turn off the radio in areas where signs are posted to do so.
• DO NOT operate the transmitter in areas that are sensitive to electromagnetic radiation such as hospitals,
aircraft, and blasting sites.
• Portable Device, this transmitter may operate with the antenna(s) documented in this filing in Push-to-Talk
and body-worn configurations. RF exposure compliance is limited to the specific belt-clip and accessory
configurations as documented in this filing and the separation distance between user and the device or its
antenna shall be at least 2.5 cm.
• Mobile Device, during operation, the separation distance between user and the antenna subjects to actual
regulations, this separation distance will ensure that there is sufficient distance from a properly installed
externally-mounted antenna to satisfy the RF exposure requirements.
• Occupational/Controlled Radio, this radio is designed for and classified as “Occupational/Controlled Use
Only”, meaning it must be used only during the course of employment by individuals aware of the hazards,
and the ways to minimize such hazards; NOT intended for use in a General population/uncontrolled
environment.
• General population/uncontrolled Radio, this radio is designed for and classified as “General population/
uncontrolled Use”.
ATTENTION

19
RF Exposure Compliance and Control Guidelines and Operating Instructions
To control your exposure and ensure compliance with the occupational/controlled environment exposure limits,
always adhere to the following procedures.
Guidelines:
•User awareness instructions should accompany the device when transferred to other users.
•Do not use this device if the operational requirements described herein are not met.
Operating Instructions:
• Transmit no more than the rated duty factor of 50% of the time. To Transmit (Talk), push the Push to Talk (PTT)
button. To receive calls (listen), release the PTT button. Transmitting 50% of the time, or less, is important
because the radio generates measurable RF energy exposure only when transmitting in terms of measuring
for standards compliance.
• Transmit only when people outside the vehicle are at least the recommended minimum lateral distance away
from a properly installed according to installation instructions, externally mounted antenna.
• When operating in front of the face, worn on the body, always place the radio in a Retevis approved clip,
holder, holster, case, or body harness for this product. Using approved body-worn accessories is important
because the use of Non-Retevis approved accessories may result in exposure levels, which exceed the
IEEE/ICNIRP RF exposure limits.
Hand-held Mode
• Hold the radio in a vertical position with the microphone (and other parts of the radio including
the antenna) at least 2.5 cm (one inch) away from the nose or lips. The antenna should be
kept away from the eyes. Keeping the radio at a proper distance is important as RF exposure
decreases with increasing distance from the antenna.
Phone Mode
• When placing or receiving a phone call, hold your radio product as you would a wireless telephone. Speak
ATTENTION
20
directly into the microphone.
Electromagnetic Interference/Compatibility
NOTE: Nearly every electronic device is susceptible to electromagnetic interference (EMI) if inadequately
shielded, designed, or otherwise configured for electromagnetic compatibility.
Avoid Choking Hazard
Small Parts. Not for children under 3 years.
Turn off your radio power in the following conditions:
• Turn off your radio before removing (installing) a battery or accessory or when charging battery.
• Turn off your radio when you are in a potentially hazardous environments: Near electrical blasting
caps, in a blasting area, in explosive atmospheres (inflammable gas, dust particles, metallic
powders, grain powders, etc.).
• Turn off your radio while taking on fuel or while parked at gasoline service stations.
To avoid electromagnetic interference and/or compatibility conflicts
• Turn off your radio in any facility where posted notices instruct you to do so, hospitals or health
care facilities (Pacemakers, Hearing Aids and Other Medical Devices) may be using equipment
that is sensitive to external RF energy.
• Turn off your radio when on board an aircraft. Any use of a radio must be in accordance with
applicable regulations per airline crew instructions.
Protect your hearing:
• Use the lowest volume necessary to do your job.
• Turn up the volume only if you are in noisy surroundings.
ATTENTION
WARNING

21
• Turn down the volume before adding headset or earpiece.
• Limit the amount of time you use headsets or earpieces at high volume.
• When using the radio without a headset or earpiece, do not place the radio's speaker directly
against your ear
• Use careful with the earphone maybe possible excessive sound pressure from
earphones and headphones can cause hearing loss
Note: Exposure to loud noises from any source for extended periods of time may temporarily or
permanently affect your hearing. The louder the radio's volume, the less time is required
before your hearing could be affected. Hearing damage from loud noise is sometimes
undetectable at first and can have a cumulative effect.
Avoid Burns
Antennas
• Do not use any portable radio that has a damaged antenna. If a damaged antenna comes into
contact with the skin when the radio is in use, a minor burn can result.
Batteries (If appropriate)
• When the conductive material such as jewelry, keys or chains touch exposed terminals of the
batteries, may complete an electrical circuit (short circuit the battery) and become hot to cause
bodily injury such as burns. Exercise care in handling any battery, particularly when placing it
inside a pocket, purse or other container with metal objects
Long transmission
• When the transceiver is used for long transmissions, the radiator and chassis will become hot.
Safety Operation
Forbid
• Do not use charger outdoors or in moist environments, use only in dry locations/conditions.
• Do not disassemble the charger, that may result in risk of electrical shock or fire.
ATTENTION
WARNING
WARNING
WARNING
22
• Do not operate the charger if it has been broken or damaged in any way.
• Do not place a portable radio in the area over an air bag or in the air bag deployment area. The
radio may be propelled with great force and cause serious injury to occupants of the vehicle when
the air bag inflates.
To reduce risk
• Pull by the plug rather than the cord when disconnecting the charger.
• Unplug the charger from the AC outlet before attempting any maintenance or cleaning.
• Contact Retevis for assistance regarding repairs and service.
• The adapter shall be installed near the equipment and shall be easily accessible
Approved Accessories
• This radio meets the RF exposure guidelines when used with the Retevis accessories supplied
or designated for the product. Use of other accessories may not ensure compliance with the RF
exposure guidelines and may violate regulations.
• For a list of Retevis-approved accessories for your radio model, visit the following website:
http://www.Retevis.com
ATTENTION
WARNING

AN DEN BENUTZERN
Vielen Dank für Ihre Unterstützung bei unseren Produkten.
Wir glauben, dass diese benutzerfreundlichen Produkte eine zuverlässige und
kostengünstige Kommunikation für Sie bieten. Unsere professionellen Funkgeräte
verfügen über modernste Technologie und Handwerkskunst. So werden Sie mit der
Qualität und den Eigenschaften unserer Produkte zufrieden sein. Bitte lesen Sie
dieses Handbuch sorgfältig durch, um sicherzustellen, dass Sie wissen, wie Sie
das Funkgerät richtig bedienen, bevor Sie es verwenden.
■ LCD-Monitor ■ Frequenzbereich: PMR446 ■ Breit- / Schmalbandauswahl: 12,5 kHz
■ LED-Taschenlampe ■ Ausgangsleistung: 0.5W ■ USB-Ladefunktion unterstützen
■ 50 Gruppen CTCSS, 105 Gruppen DCS ■ VOX ■ Bis zu 99 Kanäle ■ Timeout-Timer (ToT)
■ Tastenton ■ Bildschirmbeleuchtung ■ Batteriesparfunktion ■ Überwachungsfunktion
■ Tastatursperren ■ FM Radio: 87-108 MHz ■ Es stehen mehrere Arbeitsmodi zur Verfügung
■ Dual-Standby-Funktion ■ Programmierbar über PC (dedizierte Datenleitung)
■ Werkseinstellungen wiederherstellen ■ Wettervorhersagefunktion ■ 10 Klingeltöne sind verfügbar
Funktion Einführung
Bitte lesen Sie die folgenden Informationen, um dieses Funkgerät sicher und effizient zu nutzen.
1. Wartungsarbeiten am Funkgerät dürfen nur von qualifiziertem technischen Personal ausgeführt werden.
Montage / Demontage ohne Genehmigung ist untersagt;
2. Um Probleme durch elektromagnetische Interferenzen und / oder elektromagnetische Verträglichkeit zu
vermeiden, schalten Sie das Funkgerät an Orten mit dem Zeichen "Schalten Sie das Funkgerät aus" aus,
wie z. B. Krankenhäusern und anderen Gesundheitseinrichtungen
3. Wenn Sie mit dem Flugzeug reisen, schalten Sie bitte das Funkgerät aus, wenn die Crew dies wünscht.
4. Platzieren Sie bei Fahrzeugen mit Airbag das Funkgerät nicht im Aufblasbereich der Airbags
5. Schalten Sie das Funkgerät aus, bevor Sie sich in einer brennbaren und explosionsgefährdeten Umgebung
befinden.
6. Ersetzen oder laden Sie den Akku nicht in brennbaren und explosiven Umgebungen
7. Schalten Sie das Funkgerät aus, bevor Sie sich der Sprengzone und dem Sprengzünder nähern
8. Verwenden Sie das Funkgerät nicht, wenn die Antenne beschädigt ist. Andernfalls kann es zu leichten
Hautverbrennungen kommen
9. Setzen Sie das Funkgerät keinem direkten Sonnenlicht oder in der Nähe des Heizgeräts aus
10. Halten Sie das Funkgerät in senkrechter Position, während das tragbare Funkgerät sendet, und halten
Sie das Mikrofon etwa 5 cm vom Mund entfernt.
11. Halten Sie das Funkgerät während des Sendens mindestens 2,5 cm vom Kopf oder Körper entfernt
12. Wenn Sie das tragbare Funkgerät an Ihrem Körper tragen, stellen Sie sicher, dass sich die Antenne
mindestens 2,5 cm vom Körper entfernt befindet, wenn das Funkgerät sendet
13. Wenn das Funkgerät geruch- oder rauchfrei ist, schalten Sie es sofort aus und wenden Sie sich an Ihren
Händler
Sicherheitsinformation

LED Taschenlampe
Power- und Volume-Knopf
Antenne
Kopfhöreranschluss
LCD Bildschirm
LAMP-Tast
PTT-Tast
Micro USB und
Programmatic
Interface
Menütaste
[ ]/[ ] Taste
[▲]/[▼] Taste
MONI-Taste
FM-Taste
Mikrofon
Laursprecher
Kennen Sie sich gut mit der Maschine aus
01
[Energie und Lautstärke]: Netzschalter, die Lautstärke einstellen
[PTT]: Drücken Sie beim Senden diese Taste und sprechen Sie mit dem Mikrofon:
Lassen Sie die Taste los, um zu empfangen
[FM]: Drücken Sie die Taste einmal, um die FM Radiofunktion einzuschalten. Drücken Sie die Taste erneut,
um die FM Radiofunktion auszuschalten
[LAMPE]: Drücken Sie, um die Taschenlampe einzuschalten, drücken Sie sie erneut, um die Taschenlampe
zum Blinken zu bringen, und erneut, um die Taschenlampe auszuschalten
[MENU]: Kurz drücken, um die Menüeinstellungsfunktion aufzurufen.
[MONI]: Überwachungstaste, kurzes Drücken für die Überwachungsfunktion im Normalmodus;
Drücken Sie im Menümodus diese Taste, um das Menü zu verlassen
[ /Ringtone]: Halten Sie diese Taste gedrückt, um die Tastensperre ein- oder auszuschalten, kurzes
Drücken für Klingelton. (Hinweis: Nach dem Öffnen der Tastatursperre sind die Funktionstasten- und
die Bestätigungstaste ungültig)
[▲]: Drücken Sie kurz auf diese Taste, um nach oben zu gelangen; Lang drücken, um die A / B-Frequenz
umzuschalten.
[▼]: Drücken Sie kurz auf diese Taste, um nach unten zu gelangen; Lang drücken, um die A / B-Frequenz
umzuschalten
Kombinationstastenfunktion
Rufton: Halten Sie die [PTT] -Taste und die [MONI] -Taste gedrückt, um eine 1750-Hz-Tonsignalisierung
zu übertragen. Lassen Sie die [MONI] -Taste los, um den Vorgang zu beenden. Halten Sie die
[PTT] -Taste und die [FM] -Taste gedrückt, um die 1450Hz-Tonsignalisierung zu übertragen:
Halten Sie die [PTT] -Taste und die [ ] -Taste gedrückt, um die 1750Hz-Tonsignalisierung zu
übertragen.
Beschreibung der Tasten
02

Empfangsanzeige: , Sendeanzeige:
03 04
LCD-Symbol und Funktionsbeschreibung LCD-Symbol und Funktionsbeschreibung
Symbol Symbolname Beschreibung
Empfangen und Senden
Normalmodus-Anzeigefreq-
uenz; Anzeige der Kanäle
im PMR Modus
Batteriestandsanzeige
Anzeige der Kanalnummer
Frequenzversatzrichtung
VOX Indikation
Keypad Sperre Indikation
Feldstärke
Klingelton
Display current channel, Press the [▲]/[▼] button to select
Je mehr Zellen auf dem Display angezeigt werden, desto mehr
Energie erhält der Akku
01-99
Wenn “+” angezeigt wird, repräsentiert es eine positive Differenzfrequenz;
wenn “-” angezeigt wird, repräsentiert es eine negative Differenzfrequenz.
Keine Anzeige für den gleichen Frequenztransceiver.
VOX wurde eingeschaltet
Geringere Leistung
(Normalmodus)
Dual-Standby
Schmalband
(Normalmodus)
CTCSS CTCSS:50 Gruppe(Normaler Modus) 38 Gruppe(PMR)
CDCSS:104 Gruppe(Normaler Modus) 83 Gruppe(PMR)DCS
Wenn "L" angezeigt wird, stellt dies eine Übertragung mit geringer
Leistung des aktuellen Kanals dar. Wenn es nicht angezeigt wird,
stellt es eine Übertragung mit hoher Leistung dar.
Wenn "N" angezeigt wird, steht es im Schmalbandmodus. Wenn es
nicht angezeigt wird, wird es im Breitbandmodus dargestellt
Keypad Sperre wird eingeschaltet (Die PTT-Taste ist nicht eingeschränkt)
Die Signalintensität wird beim Empfang angezeigt, die ersten fünf Gitter
werden angezeigt, wenn eine geringe Leistung übertragen wird, und das
volle Netz wird angezeigt, wenn eine hohe Leistung übertragen wird.
1-10 Kategorie
Kurze Einführung in die Funktion
1. Ausgangsleistung
PMR446: 0,5 W
2. Frequenzbereich:
409(China) 467(TaiWan,China) 446(Europa) 442(USA) 477(Südostasien) 325(Philippines)
476-477(Australien) 433(Russland) 444(Norway) 448-447(Korea) 464( Südafrika)
3. Kanal: bis zu 99 Kanäle (voreingestellt nach verschiedenen Ländern oder Regionen)

05
Wählen Sie den RX-Code
1) Drücken Sie die [MENU] -Taste, um den MENU-Modus aufzurufen. Drücken Sie die Taste [▲] [▼], um 01
auszuwählen und RXCODE anzuzeigen.
2) Drücken Sie die [MENU] -Taste, um den Menüpunkt MENU aufzurufen.
3) Drücken Sie die Taste [▲] [▼], um den gewünschten Code auszuwählen: OFF / 67.0-754N;
Anmerkung: CTCSS: 67 Hz-254,1 Hz (50 Gruppe) DCS: 023N-754N / 023I-754I (104 Gruppe)
4) Drücken Sie die Taste [▲] [▼], um CTCSS / DCS auszuwählen.
5) Drücken Sie zur Bestätigung die MENU-Taste
6) Drücken Sie die [PTT] - oder [MONI] -Taste, um zum Menümodus zu gelangen.
Wählen Sie den TX CODE aus
1) Drücken Sie die [MENU] -Taste, um in den MENU-Modus zu gelangen. Drücken Sie die Taste [▲] [▼], um
02 auszuwählen und TXCODE anzuzeigen.
2) Drücken Sie die [MENU] -Taste, um den Menüpunkt MENU aufzurufen.
3) Drücken Sie die Taste [▲] [▼], um den gewünschten Code auszuwählen: OFF / 67.0-754N;
Anmerkung: CTCSS: 67 Hz-254,1 Hz (50 Gruppe) DCS: 023N-754N / 023I-754I (104 Gruppe)
4) Drücken Sie die Taste [▲] [▼], um CTCSS / DCS auszuwählen.
5) Drücken Sie zur Bestätigung die [MENU] -Taste.
6) Drücken Sie die [PTT] - oder [MONI] -Taste, um zum Menümodus zu gelangen.
Squelch Level
1) Drücken Sie die [MENU] -Taste, um den MENU-Modus aufzurufen. Drücken Sie die Taste [▲] [▼], um 03
auszuwählen und SQL anzuzeigen.
2) Drücken Sie die [MENU] -Taste, um den Menüpunkt MENU aufzurufen.
3) Drücken Sie die Taste [▲] [▼], um Folgendes auszuwählen: 0/1/2/3/4/5/6/7/8/9. (Die niedrigste Stufe ist 0,
06
Menü
1
2
3
4
5
6
7
8
9
10
11
12
13
14
15
Zeichen anzeigen
RXCODE( Receive CTCSS/DCS)
TXCODE(Transmit CTCSS/DCS)
SQL (Squelch level)
LIGHT( Hintergrundbeleuchtung)
BEEP(Keyboard Beep)
VOX
PWR (Übertragungsleistung)
TDR( Dual Standby)
W/N(Breitband und Schmalband)
SAVE(Energiesparmodus)
TOT(Übertragungszeitlimit)
BCLO(Beschäftigter Kanal Sperre)
RING(Klingelton)
WEATHE(Wettervorhersage)
VOICE(Sprache)
Optionen einstellen
OFF, CTCSS, DCS
OFF, CTCSS, DCS
0-9(Werkseitig auf Stufe 3 eingestellt)
OFF/ON /Taste
OFF/ON
OFF/1---5 Stufe
HOCH NIEDRIG
ON/OFF
WIDE/NARROW
OFF/ON
OFF/30/60/90/120/150/180s
OFF/ON
OFF, 10 Klingeltöne sind verfügbar
OFF/ON
OFF/CHI(Chinesisch )ENG(Englisch)
Menüpunktliste Menüpunktliste

4) Drücken Sie zur Bestätigung die [MENU] -Taste.
5) Drücken Sie die [PTT] - oder [MONI] -Taste, um zum Menümodus zu gelangen.
Hinweis: Die Mindestempfindlichkeit beträgt 5, wenn das Hintergrundgeräusch hoch ist.
Die höchste Empfindlichkeit ist 1, wenn Hintergrundgeräusch gering ist.
Wenn VOX geöffnet ist, erscheint das VOX-Symbol in der oberen linken Ecke des LCD
Sendeleistung
1) Drücken Sie die [MENU] -Taste, um in den [MENU] -Modus zu wechseln. Drücken Sie die Taste [▲] [▼],
um 07 auszuwählen und PWR anzuzeigen
2) Drücken Sie die [MENU] -Taste, um den Menüpunkt MENU aufzurufen
3) Drücken Sie die [▲] [▼] -Taste, um auszuwählen: HIGH / LOW
4) Drücken Sie zur Bestätigung die [MENU] -Taste.
5) Drücken Sie die [PTT] - oder [MONI] -Taste, um zum Menümodus zu gelangen.
Dual-Standby
1) Drücken Sie die [MENU] -Taste, um den MENU-Modus aufzurufen. Drücken Sie die Taste [▲] [▼], um 08
auszuwählen und TDR anzuzeigen.
2) Drücken Sie die [MENU] -Taste, um den Menüpunkt MENU aufzurufen
3) Drücken Sie die [▲] [▼] -Taste, um auszuwählen: OFF / ON
4) Drücken Sie zur Bestätigung die [MENU] -Taste
5) Drücken Sie die [PTT] - oder [MONI] -Taste, um zum Menümodus zu gelangen
Breitband und Schmalband
1) Drücken Sie die [MENU] -Taste, um den MENU-Modus aufzurufen. Drücken Sie die Taste [▲] [▼], um 09
auszuwählen und WN anzuzeigen
08
Die höchste Stufe ist 9, normalerweise auf Stufe 3 eingestellt.)
4) Drücken Sie zur Bestätigung die [MENU] -Taste.
5) Drücken Sie die [PTT] - oder [MONI] -Taste, um zum Menümodus zu gelangen
Hintergrundbeleuchtung
1) Drücken Sie die [MENU] -Taste, um den MENU-Modus aufzurufen. Drücken Sie die Taste [▲] [▼], um 04
auszuwählen und LIGHT anzuzeigen.
2) Drücken Sie die [MENU] -Taste, um den Menüpunkt MENU aufzurufen.
3) Drücken Sie die Taste [▲] [▼], um auszuwählen: ON / OFF / KEY;
4) Drücken Sie zur Bestätigung die [MENU] -Taste.
5) Drücken Sie die [PTT] - oder [MONI] -Taste, um zum Menümodus zu gelangen
Tastenton
1) Drücken Sie die [MENU] -Taste, um den MENU-Modus aufzurufen. Drücken Sie die Taste [▲] [▼], um 05
auszuwählen und BEEP anzuzeigen.
2) Drücken Sie die [MENU] -Taste, um den Menüpunkt MENU aufzurufen.
3) Drücken Sie die [▲] [▼] -Taste, um ON / OFF auszuwählen
4) Drücken Sie zur Bestätigung die [MENU] -Taste
5) Drücken Sie die [PTT] - oder [MONI] -Taste, um zum Menümodus zu gelangen
VOX
1) Drücken Sie die [MENU] -Taste, um den MENU-Modus aufzurufen. Drücken Sie die Taste [▲] [▼], um 06
auszuwählen und wählen Sie die Option vox.
2) Drücken Sie die [MENU] -Taste, um den Menüpunkt MENU aufzurufen.
3) Drücken Sie die Taste [▲] [▼], um auszuwählen: OFF / 1/2/3/4/5;
07
Menüpunktliste Menüpunktliste

Menüpunktliste Menüpunktliste
2) Drücken Sie die [MENU] -Taste, um den Menüpunkt MENU aufzurufen
3) Drücken Sie die [▲] [▼] -Taste, um auszuwählen: WIDE / NARROW
4) Drücken Sie zur Bestätigung die [MENU] -Taste
5) Drücken Sie die [PTT] - oder [MONI] -Taste, um zum Menümodus zu gelangen
Energiesparmodus
1) Drücken Sie die [MENU] -Taste, um den MENU-Modus aufzurufen. Drücken Sie die Taste [▲] [▼], um 10
auszuwählen und SAVE anzuzeigen
2) Drücken Sie die [MENU] -Taste, um den Menüpunkt MENU aufzurufen
3) Drücken Sie die [▲] [▼] -Taste, um ON / OFF auszuwählen
4) Drücken Sie zur Bestätigung die [MENU] -Taste
5) Drücken Sie die [PTT] - oder [MONI] -Taste, um zum Menümodus zu gelangen
Übertragungszeitlimit (TOT)
1) Drücken Sie die [MENU] -Taste, um den MENU-Modus aufzurufen. Drücken Sie die Taste [▲] [▼], um 11
auszuwählen und TOT anzuzeigen
2) Drücken Sie die [MENU] -Taste, um den Menüpunkt MENU aufzurufen
3) Drücken Sie die [▲] [▼] -Taste, um auszuwählen: OFF / 30S / 60S / 90S / 120S / 150S / 180S
4) Drücken Sie zur Bestätigung die [MENU] -Taste
5) Drücken Sie die [PTT] - oder [MONI] -Taste, um zum Menümodus zu gelangen
Besetzte Kanalsperre (BCLO)
1) Drücken Sie die [MENU] -Taste, um den MENU-Modus aufzurufen. Drücken Sie die Taste [▲] [▼], um 12
auszuwählen und BCLO anzuzeigen
2) Drücken Sie die [MENU] -Taste, um den Menüpunkt MENU aufzurufen
09
3) Drücken Sie die [▲] [▼] -Taste, um ON / OFF auszuwählen
4) Drücken Sie zur Bestätigung die [MENU] -Taste
5) Drücken Sie die [PTT] - oder [MONI] -Taste, um zum Menümodus zu gelangen
Klingelton
1) Drücken Sie die [MENU] -Taste, um den MENU-Modus aufzurufen. Drücken Sie die Taste [▲] [▼], um 13
auszuwählen und RING anzuzeigen
2) Drücken Sie die [MENU] -Taste, um den Menüpunkt MENU aufzurufen.
3) Drücken Sie die [▲] [▼] -Taste, um auszuwählen: OFF / 1/2/3/4/5/6/7/8/9/10
Hinweis: Jedes Mal, wenn Sie einen Rufton auswählen, können Sie den Rufton hören
4) Drücken Sie zur Bestätigung die [MENU] -Taste.
5) Drücken Sie die [PTT] - oder [MONI] -Taste, um zum Menümodus zu gelangen. Drücken Sie die /
Taste, um den ausgewählten Klingelton zu senden.
Wettervorhersage-Menüeinstellung
1) Drücken Sie die [MENU] -Taste, um den MENU-Modus aufzurufen. Drücken Sie die Taste [▲] [▼], um 14
auszuwählen und WEATHE anzuzeigen
2) Drücken Sie die [MENU] -Taste, um den Menüpunkt MENU aufzurufen.
3) Drücken Sie die [▲] [▼] -Taste, um auszuwählen: OFF / ON
4) Drücken Sie zur Bestätigung die [MENU] -Taste.
5) Drücken Sie die [PTT] -Taste, um zum Menümodus zu gelangen.
- Wenn der Menüpunkt auf ON gestellt ist, wechselt das Radio in den Wettervorhersagemodus.
Wenn der Menüpunkt auf OFF gestellt ist, kehrt das Radio in den normalen Betriebsmodus zurück.
10

Menüpunktliste
Wettervorhersage-Kanaleinstellung
Drücken Sie im Empfangsmodus für die Wettervorhersage die Taste [▲] [▼], um den Kanal für die
Wettervorhersage (CH1-CH11) auszuwählen.
Hinweis: Im Wetterempfangsmodus ist die Funkempfangs- und -sendefunktion deaktiviert.
Sprache
1) Drücken Sie die [MENU] -Taste, um den MENU-Modus aufzurufen. Drücken Sie die Taste [▲] [▼], um 15
auszuwählen und VOICE anzuzeigen
2) Drücken Sie die [MENU] -Taste, um den Menüpunkt MENU aufzurufen.
3) Drücken Sie die [▲] [▼] -Taste, um auszuwählen: OFF / CHI / ENG
4) Drücken Sie zur Bestätigung die [MENU] -Taste.
5) Drücken Sie die [PTT] -Taste, um zum Menümodus zu gelangen.
-Wenn der Menüpunkt auf AUS gestellt ist, wird die Sprachaufforderung durch das Radio deaktiviert.
-Wenn der Menüpunkt als CHI ausgewählt ist, lautet die Sprachansage des Radios Chinesisch.
-Wenn der Menüpunkt als ENG ausgewählt ist, ist die Sprachansage des Radios Englisch.
Hinweis: Im Normalmodus zeigt LCD-Anzeige die Frequenz und der Kanal an.
Im PMR-Modus die Kanalnummer der LCD-Anzeige.
11
CH1: 162.550 CH2: 162.400 CH3: 162.475 CH4: 162.425 CH5: 162.450
CH6: 162.500 CH7: 162.525 CH8: 161.650 CH9: 161.775 CH10:161.750
CH11:162.000
0
1
2
3
4
5
6
7
8
9
OFF
67.0
71.9
74.4
77.0
79.7
82.5
85.4
88.5
91.5
CTCSS List
12
Serial
Number CTCSS
10
11
12
13
14
15
16
17
18
19
94.8
97.4
100.0
103.5
107.2
110.9
114.8
118.8
123.0
127.3
Serial
Number CTCSS
20
21
22
23
24
25
26
27
28
29
131.8
136.5
141.3
146.2
151.4
156.7
162.2
167.9
173.8
179.9
Serial
Number CTCSS
30
31
32
33
34
35
36
37
38
Serial
Number CTCSS
Table of contents
Languages:
Other Retevis Two-way Radio manuals

Retevis
Retevis RT-628 Manual

Retevis
Retevis RB28 User manual

Retevis
Retevis RB17A User manual

Retevis
Retevis RT622 User manual

Retevis
Retevis RB85 User manual

Retevis
Retevis RT56 User manual

Retevis
Retevis RB618 User manual

Retevis
Retevis RT33 User manual

Retevis
Retevis RT30 User manual

Retevis
Retevis RT25 User manual

Retevis
Retevis RB20 User manual

Retevis
Retevis NR10 User manual

Retevis
Retevis RT-628 User manual

Retevis
Retevis RB16 User manual

Retevis
Retevis RT67 User manual

Retevis
Retevis RT37 User manual

Retevis
Retevis A518 User manual

Retevis
Retevis RB23 User manual

Retevis
Retevis RT22 User manual

Retevis
Retevis RT46 User manual