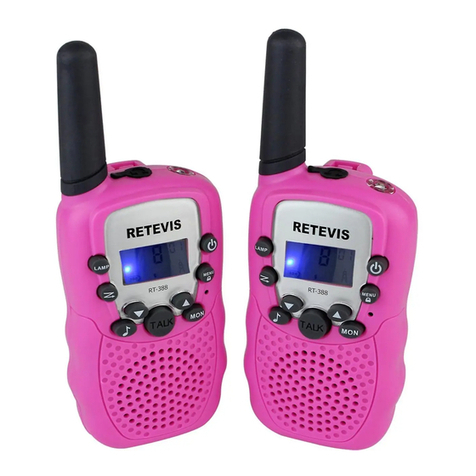
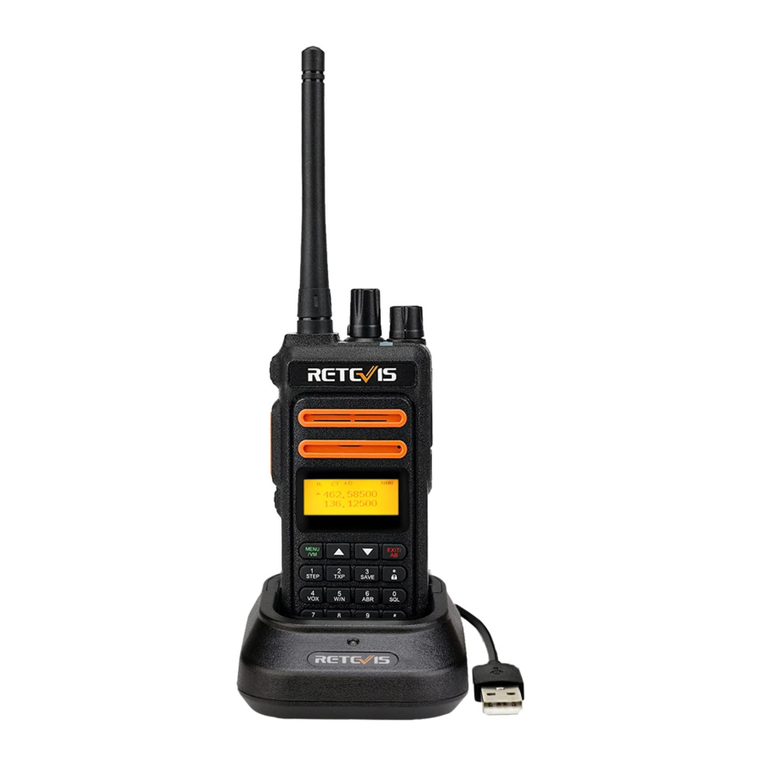
Retevis RT32 User manual

RT 32
RT32
EU
DE
FR
IT
ES
Room 700, 7/F, 13-C, Zhonghaixin Science&Technology Park,
No.12 Ganli 6th Road, Buji Street, Longgang District, Shenzhen, China
Web:www.retevis.com
E-mail:[email protected]
Facebook:facebook.com/retevis MADE IN CHINA

PIC 01
2.TX/RX Icon
3.TX Power HI/LO
English
PIC 02
0201

This set includes 2 walkie-talkie units: these are communication devices
which operate on mobile radio frequencies. They come with 8 channels as
well as a back-lit LCD screen, enabling you to communicate over several
kilometers free-of-charge.
NOTE: Please read these user instructions carefully before using the
equipment and retain for future consultation!
SPECIFIC RECOMMENDATIONS
• If you carry any kind of personal medical disease, consult a doctor before
use.
• To avoid the risk of burns, do not use the device if the antenna is
damagedin any way.
• Do not use the device in a potentially explosive environment (e.g. around
petrol pumps, on the lower deck of a boat or around a fuel storage
installation or chemical products)
• Switch off the device if on an airplane or in a hospital.
• Never use the device in close proximity to a radio to avoid interference.
• Remove the batteries if the device is not in use for an extended period of
time. Never mix used and new batteries
• Leave the transmitter and antenna at least 5 cm from your face.
• Direct the antenna upwards and speak normally.
• Clean the device with a damp cloth. Do not use cleaning agents and
solvents.
• Do not modify the device in any way. If the device damaged, please
checked by a qualified professional.
• The device cannot be used to contact the emergency services.
ITEM DESCRIPTION (Pic01,02)
1. Antenna
2. RX icon -Displayed when receiving
TX icon -Displayed when transmitting
3. TX power high or low
4. Up adjustor button (▲)
5. Continued reception (MON)
6. On / off button ( )
7. Down adjustor button (▼)
8. Earphone socket
9. Loud speaker
10. Microphone
11. Enter the menu settings (Menu)
Instructions for use
03
12. Call button ( )
13. Keypad lock indicator
14. Battery level indicator
15. Push to talk (TALK) button
16. VOX indication
17. Scanning indication:
Displayed during scan mode
18. Channel/Menu item indication
19. CTCSS/Menu option-value
20. Lamp Button
21. Scan Button
22. Lamp
23. Belt attachment clip
24. Belt attachment
25. Batteries (not supplied)
26. Battery compartment
To install the batteries
Remove the belt clip:there are a secret button to press, then take the belt
off.Open the battery compartment (26) and insert 4AAA batteries (25)(not
supplied),ensuring that the poles are correctly alighed.The closed the lid
USING THE WALKIE TALKIE
1. Turning the divice on/off:
To turn the divice on or off, hold down the on/off button(6) for
3 seconds, a beep sound will be played to cofirm.
2.Adjusting the volume:
To increase the volume, press the Up adjustor button ▲(4) and press the
▼(7) button to decrease volume.
Note: The volume level number is displayed on the screen.
3.Battery Charge Level/Low Battery Indication
The battery charge level is indicated by the number of squares present
inside the battery icon on the LCD screen.
Battery Full
Battery 2/3 charged
Battery 1/3 charged
Battery empty
When the battery charge level is low, the battery icon will flash and a beep
will be heard to indicate that the batteries need to be replaced or
recharged.
04

4. Receiving/Transmitting communications:
The devices are in ‘Reception’ mode when lit up, i.e. they are ready to
receive a call or sound transmitting on the activated frequency.
• When you press the Call tone button (12), the device switches
to ‘Transmission’ mode. You are then transmitting a sound signal
to the other device.
• To send a voice message, press the TALK button (15) and speak into the
microphone (10). Continue to press the button until you have finished
transmitting your message.
Hold the Mic with a minimum distance of 5 cm from your face.
Note:
- The other device must be set to the same channel and same
CTCSS code.
- When you finish the communication, please lose the hand, the
other device will email the beep to indicate that the this device is
ready to transmit.
5. Changing Channels
• Press the MENU button (11) once, the current channel number flashes on
the display.
• Press the ▲ button (4) or ▼ button (7) to change the channel .
• Press the TALK button to (15) confirm and return to stand-by.
Note: If no button is pressed within 15 seconds during setting, the unit will
return to standby .
6.CTCSS (Continuous Tone Coded Squelch System)
Licence free radio’s operating on the 400~470 MHZ frequency band, like
the Twintalker, have 8/20/22 available radio channels. If there are many
radio’s users in your neighborhood, there is a chance that some of these
users are operating on the same radio channel. To prevent that you receive
signals from other users, sub-channels have been integrated.
Two radios only be able to communicate with each other not only on the
same channel but also set to the same sub-channels.
The sub-channels:continuous tone squelch system(CTCSS)
When using CTCSS, a low frequency tone(67-250Hz)will be transmitted
along with the voice signal. There are 99 available tons to choose.
Note: To disable CTCSS, select code "0F” for CTCSS in the menu.
When pressing TALK button to confirm.
7.CTCSS
• Press the MENU-button (11) twice: The current CTCSS code flashes
05
onthe display.
• Press the ▲-button (4) or the ▼-button (7) to change to another code.
• Press the TALK-button (15) to confirm and return to stand-by.
Note: To disable CTCSS, select code "0F” for CTCSS in the menu.
Whe pressing TALK button to confirm
8.Monitor
You can use the monitor feature to check for weaker signals in the
current channel.
• Press the MON-button to activate channel monitoring.
• Press the MON-button to stop channel monitoring.
Note: During channel monitoring the receiver circuit in the Radios
will not not listen to CTCSS codes.
9. VOX Selection
The radios is capable of voice activated (VOX) transmission. In VOX
mode,the radio will transmit a signal when it pick up your voice or other
sound around you. VOX operation is not recommended if you plan to use
your radio in a noisy or windy environment.
Note: VOX mode will be overrided when you press the TALK-button (15).
• Press the MENU(11) three times, the current VOX setting
flashes on the display and the VOX icon is displayed.
• Press ▲-button (4) to set the VOX sensitivity level between 1 and 3 (level
3 is the most sensitive level).
• Press ▼-button (7) until OF appears on the display, to turn VOX off.
• Press the TALK -button (15) to confirm and return to stand-by.
10.Scanning for an active radio channel
• Press the SCAN-button (21):The ‘Scan’ function indicator (17) will appear
on the screen and the channel (18) will scan continuously from 1 to
8/20/22.
• Press the ▼ -button (7) to start the channel scan from 8/20/22 to 1.
Once an active channel is found, the scanning will stops and you can listen
to the transmission.
When the transmission on the found channel stops, the scanning will
resume automatically.
NOTE: If you press the TALK button (15) while listening to a found
channel,the Radios will go back in stand-by on the found channel.
11. Call Tones
A call tone alerts others that you want to start talking.
06

11.1 Setting the Call Tone
The walkie talkies have 10 call tones.
• Press the MENU-button (11) four times, “CA”is displayed and the current
call toneis flashing.
• Press the ▲-button (4) or the▼-button (7) to change to another Call Tone.
• Press the TALK-button (15) to confirm and return to stand-by.
11.2 Sending a call tone
Press the CALL-button (12) briefly. The call tone will be transmitted on the
set channel.
12.Setting the double channel monitor
• Press the MENU-button (11) five times ,until the “CH” displays the current
channel flashes.
• Press up or down key to set the scond channe or turn off.
• Press the TALK -button (15) to confirm and return to stand-by.
13.Key-Tone On/Off
When a button is pressed, the unit will beep briefly.
To set the key-tone.
• Press the MENU-button (11) six times.
• Press ▲ to enable (ON) or ▼ disable the Key Tones (OF).
• Press the TALK -button (15) to confirm and return to stand-by.
14.Roger Beep On/Off
After the TALK-button is released, the unit send out a roger beep to confirm
that you have stopped talking.
To set the Roger Beep.
• Press the MENU-button (11) seven times, “ro” will displays.
• Press ▲ to enable (ON) ▼ disable the Key Tone (OF)
• Press the TALK -button (15) to confirm and return to stand-by.
15.Setting the TX power high/low
• Press the MENU-button (11) eight times, “Pr” will be displayed
• Press up or down key to set the HIor LO lever.
• Press the TALK -button (15) to confirm and return to stand-by.
16.Button Lock
• Press and hold the MENU-button (11) for two seconds to activate the
Button lock mode. The button lock icon is displayed on the LCD Screen.
• Press and hold Menu button until there are the Lock icon displayed on the
LCD Screen.The same step to unlock the button.
Note: The TALK-button (15), the CALL-button (12), MON-button (5) and the
07
on/off button (6) will still be functional when the Button Lock is activated.But
the other button deactivated.
17. Display back light
To activate the backlight of the LCD display, press any button .
The LCD backlight will light up for 5 seconds.
18.Earpiece connection
The Twintalker can be used with the included earpiece.
The connector is located on the top of the device.
Insert the earpiece plug into the connector (2.5mm jack).
The small button on the earpiece has the same function as the
TALK-button(15) on the unit.
When you use the microphone from the earpiece to talk into.
Note: Do not connect other earpieces. This may damage your device.The
connector is located on the top of the device.
19.Battery saving function
When the device has not been used for 6 seconds, the economy mode is
automatically activated. This does not affect the reception of
transmissionsand the standard mode is automatically reactivated as soon
as a signal is detected.
20. BUILT-IN FLASH LIGHT
The radio flashlight can offer more convenient in the dark and can send
light signals.
08
Channel
Frequency
Channel
Frequency
Channel
Frequency
Channel
Frequency
Channel
Frequency
Channel
Frequency
1
462.5625
5
462.6625
9
467.5875
13
467.6875
17
462.6000
21
462.7000
2
462.5875
6
462.6875
10
467.6125
14
467.7125
18
462.6250
22
462.7250
3
462.6125
7
462.7125
11
467.6375
15
462.5500
19
462.6500
4
462.6375
8
467.5625
12
467.6625
16
462.5750
20
462.6750
USA Channel Frequency

09 10
EU Channel Frequency
Channel
Frequency
Channel
Frequency
1
446.00625
5
446.05625
2
446.01875
6
446.06875
3
446.03125
7
446.08125
4
446.04375
8
446.09375
Guarantee
Remarks:
1.This guarantee card should be kept by the user, no replacement if lost.
2.Most new products carry a two-year manufacturer’s warranty from the
date of purchase. Further details, pls read
http://www.retevis.com/after-sale/
3.The user can get warranty and after-sales service as below:
• Contact the seller where you buy.
• Products Repaired by Our Local Repair Center.
4.For warranty service, you will need to provide a receipt proof of purchase
from the actual seller for verification.
Exclusions from Warranty Coverage:
1.To any product damaged by accident.
2.In the event of misuse or abuse of the product or as a result of
unauthorized alterations or repairs.
3.If the serial number has been altered, defaced, or removed.
Compliance with RF Exposure Standards (If appropriate, Reference to
the actual product’s Safety Marking)
Your Retevis walkie talkie is designed and tested to comply with a number
of national and International standards and guidelines (listed below) for
human exposure to radio frequency electro-magnetic energy.
The CE marking means: Hereby, Shenzhen Retevis Technology Co., Ltd.
declares that the radio equipment type RT32 is in compliance with the RED
Directive 2014/53/EU and the ROHS Directive 2011/65/EU and the
WEEE Directive 2012/19/EU. The full text of the EU declaration of
conformity is available at the following internet address: www.retevis.com
NOTE: The approved batteries, supplied with this radio, are rated for a
5-5-90 duty factor (5% talk-5% listen-90% standby) even though this radio
complies with FCC occupational exposure limits and may operate at
duty factors of up to 50% talk.
RF energy exposure standards and guidelines (if appropriate)
Your Retevis walkie talkie complies with the following RF energy exposure
standards and guidelines:
• American National Standards Institute (ANSI) / Institute of Electrical &
Electronic Engineers (IEEE) C95. 1-2005
• Institute of Electrical and Electronic Engineers (IEEE) C95.3-2002
• International Commission on Non-Ionizing RadiationProtection (ICNIRP)
• International Electrotechnical Com-mission IEC62209-2:2010]

0201
PIC 01
1.Antenne
4.Nach Oben
5.Monitor Button
17.Scann Icon
16.VOX Icon
15.PTT
14.Ladestand der
Batterie
10. Mikrofon
9.Lautsprecher
8.Kopfhöreranschluss
18.Kanal-/Menüpunkt
11.Menü/Lock
6.Ein-/Ausschalter
12.Ruf-Button
7.Nach Unten
13.Tastatursperre
20.Leuchte button
19.CTCSS/DCS
22.Leuchte
21.Scann button
2.TX/RX Icon
3.TX Power HI/LO
PIC 02
Deutsch

Dieses Set beinhaltet 2 Walkie-Talkies. Es handelt sich um Geräte zur
Kommunikation über Mobilfunkfrequenzen.
Die Geräte verfügen über 8 Kanäle sowie eine LCD-Anzeige mit
Hintergrundbeleuchtung.
Diese Walkie-Talkies ermöglichen auf offenem Gelände eine gebührenfreie.
Anmerkung:Bitte lesen Sie die Gebrauchsanweisung vor Gebrauch
sorgfältig und bewahren Sie diese für späteren Gebrauch auf.
Spezielle Anmerkungen
• Wenn Sie medizinische Geräte verwenden, befragen Sie vor Gebrauch
Ihren Hausarzt.
• Um Verbrennungen vorzubeugen verwenden Sie das Gerät nicht, wenn
die Antenne in irgendeiner Weise beschädigt ist.
• Verwenden Sie das Gerät nicht in potentiell explosiven Umgebung
(Zapfsäulen, einem niedrigeren Deck eines Bootes, in der Nähe von
Heizöltanks oder chemischen Produkten)
• Wenn Sie mit dem Auto oder dem Fahrrad unterwegs sind, halten Sie vor
Verwendung des Produktes an. Schalten Sie das Gerät in Flugzeugen
oderKrankenhäusern komplett ab.
• Um Störungen zu vermeiden, nutzen Sie das Gerät nicht in der Nähe
anderer funkenden Geräte.
• Entfernen Sie die Batterien, wenn das Gerät längere Zeit nicht verwendet
wird.
• Mischen Sie nicht gebrauchte und neue Batterien.
• Halten Sie das Funkgerät mindestens 5 cm von Ihrem Gesicht weg.
Halten Sie die Antenne nach Oben und und sprechen Sie normal.
• Reinigen Sie das Gerät mit einem feuchten Lappen. Vermeiden Sie den
Gebrauch von Reinigungs- und Lösungsmitteln.
• Verändern Sie das Gerät in keinster Weise. Sollte das Gerät beschädigt
werden, lassen Sie es bei einem qualifizierten Fachhändler überprüfen.
• Mit diesem Gerät ist es nicht möglich, Not fallhotlines anzurufen.
Beschreibung der einzelnen Elemente
1. Antenne
2. RX-Symbol TX - Anzeige bei Empfang
TX-Symbol RX - Anzeige bei Senden
3. TX hohe/ niedrige Leistung einstellen
4. Einstellknopf nach Oben ▲
5. Monitor-Button
6. Ein-/Ausschalter ( )
Gebrauchsanweisiung zur Verwendung
03
7. Einstellknopf nach Unten ▼
8. Kopfhöreranschluss
9. Lautsprecher
10. Mikrofon
11. Menü: Menüeinstellungen öffnen
12. Ruf-Button (Call)
13. Anzeige für Tastensperre
14. Anzeige des Batterieladestandes
15. Push to talk (TALK)-Button
16. VOX-Anzeige
17. Scanning-Anzeige: Wird während des Scanmodus angezeigt
18. Kanal-/Menüpunkt anzeige
19. CTCSS/Menü nummer
20. Button für die Leuchte
21. Scan Button
22. Leuchte
23. Gürtelhalterungsclip
24. Gürtelhalterung
25. Batterien (nicht im Lieferumfang enthalten)
26. Batterieabdeckung
Vor Verwendung (PIC 02)
Zum Einlegen der Batterien muss zuerst die Gürtelhalterung abgenommen
werden. Heben Sie den Gürtelhalterungsclip an (23) und schieben Sie die
Gürtelhalterung nach oben (24). Öffnen Sie die Batterieabdeckung (26) und
legen Sie 4 AAA-Batterien (25)(nicht im Lieferumfang enthalten), ein.
Versichern Sie sich, dass Sie die Batterien richtig herum eingelegt haben.
Anschließend schließen Sie die Abdeckung.
Verwendung der TWINTALKER
1.Ein- und Ausschalten des Gerätes:
Um das Gerät einzuschalten, halten Sie den Ein-/Ausschalte knopf (6) für 3
Sekunden gedrückt. Zur Bestätigung ist ein BEEP-Sound zu hören.
2. Einstellung der Lautstärke:
Um die Lautstärke zu erhöhen, drücken Sie den button ▲(4).
Um die Lautstärke zu reduzieren betätigen Sie den button▼(7).
3.Ladeanzeige/Anzeige für niedrigen Batterieladestand
Der Ladestand wird anhand der Anzahl der Vierecke in der Batterie auf
dem LCD-Bildschirm dargestellt.
04

Batterievoll
Batterie zu 2/3 geladen
Batterie zu 1/3 geladen
Batterie leer
Bei niedrigem Ladestand der Batterie blinkt das Batterie-Symbol und ein
beep-Warnton um Sie darauf aufmerksam zu machen, dass die Batterien
ersetzt bzw. Akkumulatoren geladen werden müssen, ist zu hören.
4.Gespräche senden und empfangen:
Die Geräte sind nach Einschalten im Empfangsmodus und sind bereit, die
eingestellte Frequenz zu empfangen.
• Wenn Sie den Ruf-Button (12) drücken, wechselt das Geräte in den
Übertragungsmodus. Sie übertagen dann ein Soundsignal auf die anderen
Geräte.
• Um eine Sprachnachricht zu übertragen drücken Sie den TALK-Button(15)
und sprechen in das Mikrofon (10). Halten Sie die Taste so lange Sie
sprechen gedrückt. Halten Sie das.
Mikrofon mindestens 5 cm von Ihrem Gesicht weg.
Anmerkung:
- Das andere Gerät muss den selben Kanal nutzen und es muss der selbe
CTCSS Code eingestellt sein.
- Wenn die Übertragung komplett ist und der TALK-Button (15) nicht länger
gedrückt wird, spielt das andere Gerät einen Sound (BEEP) ab, um
anzuzeigen, dass das Gerät bereit zur Übertragung ist.
5.Ändern des Kanales
• Drücken Sie den MENU-Button (11) einmal. Die derzeitige Kanal-Nummer
blinkt im Display.
• Drücken Sie den Button▲(4) oder den Button▼(7), um den Kanal zu
ändern.
• Drücken Sie den TALK-Button (15) zum bestätigen und um in den
stand-by-Modus zurückzukehren.
Anmerkung: Wenn während des Einstellens innerhalb von 15 Sekunden
kein Knopf gedrückt wird, wechselt das Gerät automatisch zurück in den
Stand-by Modus.
6.CTCSS (Continious Tone Coded Squelch System)
Lizenzfreie Funkgeräte wie die Twintalker arbeiten im 446 MHzFrequenz
und verfügen über 8 Funkkanäle. Wenn in der Nachbarschaft mehrere
Funkgeräte im Einsatz sind, kann es vorkommen, dass andere Nutzer auf
dem selben Funkkanal sprechen.Um vorzubeugen, dass Signale anderer
Nutzer empfangen werden, sind Sub-Kanäle eingerichtet worden. Zwei
05
Funkgeräte können nur miteinander kommunizieren, Wenn derselbe
Funkkanal und derselbe Sub-Channel exakt ausgewählt wurden.Es gibt
zwei Arten von Sub-Channel:
• Continuous Tone Coded Sequelch System (CTCSS)
Wenn Sie CTCSS verwenden, wird während der Übertragung ein Nieder
frequenzton (zwischen 67 und 250 Hz) mitgesendet. Es sind 38 verfügbare
Töne zur Auswahl. Von diesen 38 verfügbaren Tönen kann beliebig einer
davon ausgewählt werden.
Durch einen Filter sind diese Töne generell nicht hörbar, sodass die
Kommunikation nicht gestört wird.
7.CTCSS
• Drücken Sie den MENU-Button (11) zwei mal: der derzeitige
CTCSS-Code blinkt auf dem Display.
• ·Drücken Sie den button▲ (4) oder den button ▲(7),um zu einen anderen
Code zu wechseln.
• Drücken Sie den TALK-Button (15), um zu bestätigen und zurück in den
Stand-By Modus zu wechseln.
Anmerkung: Um CTCSS zu deaktivieren, wählen Sie den Code "0F" für
CTCSS im Menü. Wenn dies bestätig wurde, wird im Display "0F" angezeigt.
8.Monitor
Sie können die Monitor-Funktion verwenden, um auf schwächere Signale
im derzeitigen Kanal zu überprüfen.
• Drücken Sie die MON-Taste, um Kanalmonitoring zu aktivieren
• Drücken Sie die MON-Taste erneut, um das Kanalmonitoring wieder zu
beenden.
Anmerkung: Während des Kanalmonitorings empfängt das Gerät
keine CTCSS Codes.
9.VOX-Auswahl
Die Funkgeräte sind dazu in der Lage, Sprachaktivierung zu verwenden
(VOX). Im VOX-Modus überträgt das Funkgerät ein Signal, wenn es durch
Ihre Stimme oder durch ein anderes Geräusch in der Umgebung aktiviert
wird. Der VOX-Modus ist nicht zu empfehlen, wenn Sie die Geräte in einem
lauten oder windigen Umfeld einsetzen wollen.
Anmerkung: Der VOX-Modus wird außer Kraft gesetzt, wenn Sie den
TALK-Button(15) betätigen.
• Drücken Sie den MENU-Button (11) dreimalig. Die derzeitigen
VOX-Einstellungen blinken auf sowie das VOX-Symbol wird im Display
angezeigt.
06

• Drücken Sie den ▲-Button (4), um die Empfindlichkeit zwischen 1 und 3
zu ändern.
(Level 3 ist hierbei die mpfindlichste Einstellung).
• Drücken Sie den ▼-Button (7), bis "OF" im Display angezeigt wird, um
den VOX-Modus zu deaktivieren.
• Drücken Sie den TALK-Button (15) zum Bestätigen und um in
den Stand-By Modus zurückzukehren.
10. Nach einem aktiven Funkkanal scannen
• Betätigen Sie den SCAN-Button (21). Auf dem Display wird das Icon zur
SCAN-Funktion angezeigt (17) und die Kanäle (18) werden kontinuierlich
von 1 bis8 durchgescannt.
• Drücken Sie den Button ▼(7), um einen Kanal-Scan von 8 bis 1 zu
starten.Wenn ein aktiver Kanal gefunden wurde, stoppt der Scan-Vorgang
und die Übertragung kann gehört werden.Wenn die Übertragung im
gefundenen Kanal stoppt, fährt der Scan automatisch fort.
Anmerkung: Wenn Sie den TALK-Button (15) drücken, währen
Sie in einem gefundenen Kanal hören, wechselt das Funkgerät
im gefundenen Kanal automatisch in den Stand By zurück.
11. Ruftöne
Ein Rufton weist andere darauf hin, dass Sie anfangen wollen, zu sprechen.
11.1 Einstellen des Ruftones
Die Twintalker haben 10 Ruftöne.
• Drücken Sie den MENU-Button (11) vier mal. "CA" wird angezeigt und der
aktuell eingestellte Rufton blinkt.
• Drücken Sie den ▲-Button (4) oder den ▼-Button (7),um einen anderen
Rufton zu wählen.
• Drücken Sie den TALK-Button (15) zum bestätigen und um in den
Stand-By-Modus zurückzukehren.
11.2 Senden eines Ruftones
Drücken Sie kurz den CALL-Button (12). Der Rufton wird kurz
im eingestellten Kanal übertragen.
12.Doppelte Kanäle Monitor einstellen
• Drücken Sie die Taste Menü(11) fünf mal,bis das Sysmbol “CH” auf dem
Display anzeigt und der derzeitige Kanal blinkt.
• Drücken Sie die Taste Oben oder Unten,um den zweiten Kanel zu
erstellen oder auszuschlaten
• Druch einen Druck auf die Taste Talk(15),um die Bedienung zu bestätigen
und zu dem Stand-by Modus zurückzukehren
07
13. Tastentöne Ein/Aus
Wenn eine Taste gedrückt wird, bestätigt das Gerät dies durch einen
kurzen beep.Um den Tastenton einzustellen gehen Sie wie folgt vor:
• Drücken Sie den MENU-Button (11) sechs mal. "tO" erscheint im Display.
• Drücken Sie den ▲ Button, um die Tastentöne einzuschalten oder den ▼
Button, um sie auszuschalten. Es erscheint entweder ON(eingeschalten)
oder (OF) (ausgeschalten) im Display.
• Drücken Sie den TALK-Button (15) zur Bestätigung und um in den
Stand-By-Modus zurückzukehren.
14.Roger Beep Ein/Aus
Wenn der TALK-Button losgelassen wird, sendet das Gerät einen
Roger-Beep um zu bestätigen, dass Sie aufgehört haben zu reden.
Um den Roger-Beep einzustellen gehen Sie wie folgt vor:
• Drücken Sie den MENU-Button (11) sieben mal. "rO" wird angezeigt.
• Drücken Sie die ▲ -Button um den Beep einzuschalten (ON) oder, die ▼
-Button, um den Roger Beep auszuschalten (OF).
• Drücken sie die TALK-Taste (15) zum bestätigen und um in den
Stand-By-Modus zurückzukehren.
15.Die TX hohe/ niedrige Leistung einstellen
• Drücken Sie die Menü-Taste(11) acht mal, “Pr” wird auf dem Display
angezeigt.
• Mithilfe der Taste Oben oder Unten können Sie das hohe oder niedrige
Level auswählen.
• Drücken Sie die Talk Taste(15)um die Bedienung zu bestätigen und zu
dem Stand-by Modus zurückzukehren.
16.Tastensperre
• Drücken und halten Sie den MENU-Button (11) für zwei Sekunden
gedrückt, um die Tastensperre zu aktivieren. Das Icon für die Tastensperre
wird im Display angezeigt.
• Drücken und halten Sie den MENU-Button (11) erneut für zwei Sekunden,
um die Tastensperre wieder zu deaktivieren.
Anmerkung: Der PTT-Knopf (15), der CALL-Button (12), MON-Button (5)
und der Ein/Aus-Button (6) sind auch bei eingeschaltener Tastensperre
noch funktionstüchtig.
17.Display hintergrundbeleuchtung
Um die Hintergrundbeleuchtung für das LCD Display zu aktivieren, drücken
Sie irgendeinen Knopf außer. Die LCD Hintergrundbeleuchtung leuchten für
5 Sekundne auf.
08
18.Anschluss eines Kopfhörers
Die Twintalker können mit dem Kopfhörer verwendet werden.
Die Anschlussbuchse befindet sich auf der Oberen Seite des Gerätes (8).
Stecken Sie den Kopfhörer in die Anschlussbuchse (2.5 mm Stecker).
Der kleine Button an den Kopfhörern hat die selbe Funktion wie der
TALK-Button (15) am Gerät selbst.Wenn Sie den TALK-Button (15) am
Kopfhörer betätigen, müssen Sie auch in das Mikrofon des Kopfhörers
sprechen.
Anmerkung: Stecken Sie keine anderen Köpfhörer an das
Funkgerät an. Dies könnte das Gerät beschädigen.
19.Batteriesparmodus
Wenn das Gerät für 6 Sekunden nicht genutzt wird, schaltet das Funkgerät
automatisch in den Economy-Modus. Dies hat keine Auswirkung auf den
Empfang von Funkübertragungen.
Der Standard-Modus wird automatisch wieder ausgeführt, sobald ein Signal
übertragen wird oder eine Taste gedrückt wurde.
20.Eingebaute Taschenlampe
Eine weitere Funktion des Funkgerätes ist die eingebaute Taschenlampe.
Diese kann zum Senden von Lichtsignalen verwendet werden, oder wenn
Sie Licht benötigen.
Bemerkungen
1. Diese Garantiekarte sollte vom Benutzer aufbewahrt werden, kein Ersatz
bei Verloren.
2. Die meisten neuen Produkte gibt es ab dem Kaufdatum eine zweijährige
Herstellergarantie. Weitere Details, lesen Sie bitte
http://www.retevis.com/after-sale/
3. Der Benutzer kann Garantie und Kundendienst wie unten erhalten:
• Kontaktieren Sie den Verkäufer, wo Sie kaufen.
• Von unserem lokalen Reparaturzentrum
4. Für den Garantieservice müssen Sie dem Verkäufer eine
Kaufbestätigung als Nachweis vorlegen
Exclusions from Warranty Coverage:
1.To any product damaged by accident.
2.In the event of misuse or abuse of the product or as a result of
unauthorized alterations or repairs.
3.If the serial number has been altered, defaced, or removed.
09
EU Channel Frequency
Channel
Frequency
Channel
Frequency
1
446.00625
5
446.05625
2
446.01875
6
446.06875
3
446.03125
7
446.08125
4
446.04375
8
446.09375
10
Channel
Frequency
Channel
Frequency
Channel
Frequency
Channel
Frequency
Channel
Frequency
Channel
Frequency
1
462.5625
5
462.6625
9
467.5875
13
467.6875
17
462.6000
21
462.7000
2
462.5875
6
462.6875
10
467.6125
14
467.7125
18
462.6250
22
462.7250
3
462.6125
7
462.7125
11
467.6375
15
462.5500
19
462.6500
4
462.6375
8
467.5625
12
467.6625
16
462.5750
20
462.6750
USA Channel Frequency Garantiekarte
Modell-Nr
Seriennummer
Kaufdatum
Händler
Telefon
Benutzername
Telefon
Land
Adresse
Postleitzahl
Email

Einhaltung der RF-Expositionsstandards (ggf. Verweis auf die
Sicherheitskennzeichnung des Produkts)
Ihr Retevis Walkie Talkie ist so konzipiert und getestet, dass es eine Reihe
nationaler und internationaler Normen und Richtlinien (siehe unten) für die
Exposition von Menschen mit hochfrequenter elektromagnetischer Energie
erfüllt.
Die CE-Kennzeichnung bedeutet: Hiermit erklärt Shenzhen Retevis
Technology Co., Ltd., dass der Typ des Funkgeräts RT32 der
RED-Richtlinie 2014/53/EU und der ROHS-Richtlinie 2011/65/EU und die
WEEE-Richtlinie 2012/19/EU entspricht. Der vollständige Text der
EU-Konformitätserklärung ist unter folgender Internetadresse verfügbar:
www.retevis.com
HINWEIS: Die mit diesem Funkgerät gelieferten zugelassenen Batterien
sind für ein Tastverhältnis von 5-5-90 ausgelegt (5% Senden - 5%
Empfangen - 90% Standby), obwohl dieses Funkgerät den
FCC-Grenzwerten entspricht und im Betrieb eingesetzt werden kann
Faktoren von bis zu 50% sprechen.
RF-Expositionsstandards und -richtlinien (falls zutreffend)
Ihr Retevis Walkie Talkie entspricht den folgenden Normen und Richtlinien
zur RF-Exposition:
• American National Standards Institute (ANSI)/ Institute of Electrical &
Electronic Engineers (IEEE) C95. 1-2005
• Institute of Electrical and Electronic Engineers (IEEE) C95.3-2002
• International Commission on Non-Ionizing Radiation Protection (ICNIRP)
• International Electrotechnical Com-mission IEC62209-2:2010
11 01
PIC 01
1. Antenne
2. TX/RX icône
4. Bouton montante
5. Bouton moniteur
6. Bouton d'alimentation
7. Bouton de baisse
10.Microphone
18.Canal/Article de menu
12.Bouton d'appel
11.Bouton de menu
15.TALK
16.VOX
9. Haut-parleur
14.Niveau de la
batterie
22.Torche
17.Balayage
21.Bouton de balayage
13.Verrouillage clavier
19.CTCSS
8. Prise de haut-parleur/
microphone
20.Bouton de torche
3.TX Power HI/LO
Français

Le kit comprend 2 unités talkie-walkie. Ce sont des dispositifs de
communication qui fonctionnent sur fréquences de radio mobile.
Ils disposent de 8 canaux et un écran LCD rétro-éclairé, et ils vous
permettent de communiquer sur plusieurs kilomètres sans frais.
Note:Lisez attentivement ces instructions avant l’utilisation de l'équipement
s'il vous plaît et conservez le pour consultation ultérieure!
Recommandation spécifiques
• Si vous êtes malade, veuillez consulter avant utilisation votre médecin si
c’est pas mal d’utiliser ces appareils.
• Pour éviter le risque de brûlures, n’utiliser pas l'appareil si l'antenne est
endommagé de quelque façon.
• N’utiliser pas l'appareil dans un environnement potentiellement explosif
(par exemple autour de pompes à essence, sur le pont inférieur d'un
bateau ou autour d'une installation de stockage de carburant ou de produits
chimiques).
• Si vous voyagez en voiture ou en vélo, arrêtez avant d'utiliser l'appareil.
Gardez l'appareil éteind dans les avions ou dans les hôpitaux.
• Ne jamais utiliser l'appareil à proximité d'un poste de radio pour éviter
interférences.
• Retirez les piles si l'appareil n’est pas en cours d'utilisation pour une
longue période de temps. Ne mélangez jamais des piles neuves etusagées.
• Placez l'émetteur et l'antenne à au moins 5 cm de votre visage. Dirigez
l'antenne vers le haut et parler normalement.
• Nettoyez l'appareil avec un chiffon humide. Évitez l'utilisation de
nettoyage d'agents solvants.
• Ne modifier l'appareil en aucune facon. En cas de dommage, veiller à ce
que l'appareil soit contrôlé par un professionnel qualifié.
• Le dispositif ne peut pas être utilisé pour communiquer avec les services
d'urgence.
Description de l'article (Pic01,02)
1. Antenne
2.RX icône -Affiché lors de la réception
TX icône -Affiché lors de la transmission
3.TX Power haute/ basse
4.Bouton ajusteur de hausse ▲
5.Réception continue (MON)
6.Bouton marche / arrêt( )
7.Bouton ajusteur de baisse ▼
Instruction d'emploi
0302
PIC 02

8.Prise d’écouteur
9.Haut-parleur
10.Microphone
11. Entrez le menu de réglages (Menu)
12. Bouton d'appel (CALL)
13. Indicateur de verrouillage clavier
14. Indicateur de niveau de batterie
15. Bouton «Push to talk» (PTT)
16. Indicateur de VOX
17.Indicateur de balayage: Affiché pendant le mode de balayage
18.Indicateur de canal/article de menu
19.CTCSS/Option de menu
20.Bouton de torche
21.Bouton de balayage
22.Torche
23. Fixationde clip de ceinture
24. Clip de ceinture
25. Batteries (non fourni)
26. Compartiment de batterie
Avant utilisation
Pour insérer les piles dans les dispositifs, retirez d'abord le clip de ceinture:
appuyez sur la fixation(23) et relevez le clip de ceinture(24) vers le haut.
Ouvrez le compartiment de la batterie (26) et insérez 4 piles AAA(25)(non
fournis), en veillant à ce que les pôles sont correctement alignés. Alors
fermer le couvercle.
Utilisation
1. Allumer ou éteindre le dispositif:
Pour allumer les appareils, appuyer sur le bouton marche / arrêt (6) pour 3
secondes, un signal sonore sera joué pour confirmer.
2.Réglage du volume:
Pour augmenter le volume, appuyer sur le boutonde montante ▲(4) et
appuyer sur le bouton de baisse ▼(7) pourdiminuer.
3.Indicateur de niveau de batterie/ Batterie faible
Le niveau de la batterie est indiqué par le nombre de carreaux présentés à
l'intérieur de l'icône de la batterie sur l'écran LCD.
Batterie pleine
Batterie 2/3 charge
Batterie 1/3 charge
Batterie vide
04
Lorsque le niveau de la batterie est faible, l'icône de la batterie
clignote et un bip retentit pour indiquer que les piles doivent être
remplacées.
4. Réception / transmission des communications:
L’appareils est en mode «réception» lorsqu'il est éclairé, il est prêt à
recevoir un appel ou le son émis sur la fréquence activé.
• Lorsque vous appuyez sur le bouton d'appel (12), l'appareil passe à mode
«transmission». Vous êtes alors en train d’émettre un signal sonore à un
autre dispositif.
• Pour envoyer un message vocal, appuyez sur le bouton TALK(15) et
parlez dans le microphone (10).
• Continuez à appuyer sur le bouton jusqu'à ce que vous avez fini de
transmettre votre message.
Tenez le microphone à un minimum de 5 cm de votre visage.
Note:
- L'autre appareil doit être réglé sur le même canal et avoir mis le même
code CTCSS (consulter point 7)
5. Changement de canal
• Appuyez sur le bouton MENU (11)une fois, le numéro de
canal en cours clignote sur l'écran.
• Appuyez sur le bouton▲(4) ou le bouton ▼(7)pour changer le canal.
• Appuyez sur le bouton TALK(15) pour confirmer et revenir en stand-by.
Note:Si aucun bouton est appuyé dans les 15 secondes pendant le
réglage, l’appareil revient en mode stand-by.
6.CTCSS (Continuous Tone Coded Squelch System)
Les talkies walkies amateurs fonctionnant sur la bande de fréquence 446
MHz, comme ce talkie walkie, ont 8 canaux disponibles. S’il y a de
nombreux utilisateurs de talkies walkies dans votre quartier, il y a une
chance que certains de ces utilisateurs opèrent sur le même canal. Pour
éviter que vous receviez des signaux d'autres utilisateurs, des sous-canaux
ont été intégrés.
Talkies walkies sont uniquement en mesure de communiquer les uns
avecles autres lorsque ils fonctionnent sur le même canal et quand ils ont
choisi exactement le même sous-canal. Il y a deux types de sous-canaux:
• Continuous Tone Coded Squelch System (CTCSS)
Lorsque vous utilisez CTCSS, une tonalité basse (fréquence entre 67 et
250 Hz) est transmise en même temps que le signal vocal. Il y a 38 tons
disponibles à choisir. Vous êtes libre de choisir l'un de ces 38 tons
disponibles.
05

canaux 8-1.
Une fois qu’un canal actif est trouvé, le balayage sera interrompue et vous
pouvez écouter la transmission. Lorsque la transmission sur le canal trouvé
s’arrête, le balayage reprendre automatiquement.
NOTE: Si vous appuyez sur le bouton TALK (15) en écoutant un
canal trouvé, le talkie walkie va revenir en mode stand-by.
11. Sonneries d'appel
Une sonnerie d'appel avertit les autres que vous voulez commencer à
parler.
11.1 Réglage la sonnerie d'appel
Le talkie walkie dispose de 10 sonneries d'appel.
• Appuyez sur le bouton MENU(11) quatre fois, "CA" est affiché et la
sonnerie d'appel actuel clignote.
• Appuyez sur le bouton ▲(4) ou le bouton ▼(7) pour passer à une autre
sonnerie d'appel.
• Appuyez sur le bouton TALK(15) pour confirmer et retourner.
11.2 Envoi d'une sonnerie d'appel
Appuyez sur le bouton d'appel CALL(12) brièvement. La
sonnerie d'appel sera transmise sur le canal actif
12.Double canal
• Appuyez sur le bouton de MENU(11) 5 fois jusqu’à l’icône “CH ”affiche et
clignote.
• Appuyez sur le bouton de haut ou bas pour régler le deuxième canal et
sortie.
• Appuyez sur le bouton TALK(15) pour confirmer et retourner.
13.Activer / déactiver la touche-bip sonore
Quand un bouton est appuyé, l'appareil émet un bip sonore.
• Appuyez sur le bouton MENU (11) 6 fois. "tO" sera affiché.
• Appuyez sur le bouton ▲(4) pour activer (ON) et le bouto▼(7) pour
déactiver(OF) la touche-bip sonore.
• Appuyez sur le bouton TALK (15) pour confirmer et revenir.
14.Activer / déactiver Roger Beep
Après que le bouton TALK est relâché, l'appareil enverra un roger beep
pour confirmer que vous avez arrêté de parler.
• Appuyez sur la touche MENU (11) 7 fois, "ro" sera affiché.
• Appuyez sur le ▲bouton(4) pour activer (ON) et le ▼bouton(7) pour
07
7.CTCSS
• Appuyez sur le bouton MENU(11)deux fois: le code CTCSS utilisé clignote
sur l'écran.
• Appuyez sur le bouton ▲(4)ou le bouton▼(7) pour changer le code
CTCSS.
• Appuyez sur le bouton TALK(15) pour confirmer et revenir en mode
stand-by.
Note: Pour désactiver CTCSS, choisissez le code "0F" dans le menu.Après
que la sélection est confirmée, "OF" sera affiché. passe à mode
«transmission». Vous êtes alors en train d’émettre
8.Moniteur
Vous pouvez utiliser la fonction moniteur pour vérifier les signaux
lesplus faibles dans le canal actuel.
• Appuyez sur le bouton MON pour activer la fonction moniteur.
• Appuyez sur le bouton MON pour arrêter la fonction moniteur.
Note: Lorsque la fonction moniteur est activé, nous pouvons entendre
d'autres talkies walkies dans la même fréquence, peu importe ce que leurs
codes CTCSS sont.
9. VOX
Le talkie walkie est capable de s'activer vocalement (VOX). Dans mode
VOX, le talkie walkie transmet un signal quand il est activé par votre voix
ou d'autres sons autour de vous. Le mode VOX n’est pas recommandé si
vous prévoyez d'utiliser votre talkie wallkie dans un environnement bruyant
ou venteux.
Note: Le mode VOX sera remplacée lorsque vous appuyez sur le
boutonTALK(15).
• Appuyez sur la touche MENU(11) trois fois, le réglage actuel de VOX
clignote sur l'écran et l'icône VOX est affiché.
• Appuyez sur le bouton ▲(4) pour régler le niveau de sensibilité deVOX
entre 1 et 3(niveau 3 est le niveau le plus sensible).
• Appuyez sur le bouton ▼(7) jusqu'à ce que "OF" apparaît sur l'affichage,
pour désactiver la fonction VOX
• Appuyez sur le bouton TALK (15) pour confirmer et revenir au stand-by.
10.Balayage d'un canal actif
• Appuyez sur le bouton SCAN(21): L'indicateur de fonction balayage (17)
apparaîtra sur l'écran et le canal (18) fera un balayage de canaux
successivement 1 à 8.
• Appuyez sur le bouton▼ (7) pour lancer le balayage des
06

déactiver(OF) le roger beep.
• Appuyez sur le bouton TALK (15) pour confirmer et revenir.
15.Puissance de transmettre haute/ basse
• Appuyez sur le bouton MENU(11) 8 fois, icône Pr va afficher.
• Appuyez sur Haut ou Bas pour régler le niveau.
• Appuyez sur le bouton TALK(15) pour confirmer et retourner.
16.Verrouillage clavier
• Appuyez et maintenez le bouton MENU(11) pendant deux secondes pour
activer le mode de verrouillage des boutons. L'icône de verrouillage sera
affiché sur l'écran LCD.
• Appuyez et maintenez le bouton MENU(11) à nouveau pendant deux
secondes pour désactiver le verrouillage.
Note: Le bouton TALK (15), le bouton CALL (12), le bouton MON (5)et le
bouton d'alimentation (6) seront toujours fonctionnels, même si le
verrouillage de clavier est activé.
17. Affichage rétro-éclairage
Pour activer le rétroéclairage de l'écran LCD, n’appuyez sur aucun bouto.
Le rétroéclairage de l'écran LCD éclaire pour 5 secondes.
18.Connexion d’écouteur
Le connecteur est situé sur le côté supérieur de l'appareil (8). Insérez la
fiche de l'écouteur dans le connecteur (jack 2.5mm). Lorsque vous utilisez
le bouton PTT de l'écouteur, vous devez également utiliser le microphone
de l'écouteur pour parler.
19.Torche intégrée
Caractéristique supplémentaire, votre talkie walkie dispose d'une lampe de
poche intégrée qui peut être utilisé pour envoyer des signaux lumineux ou
pour vos besoins d'éclairage.
08
EU Channel Frequency
Channel
Frequency
Channel
Frequency
1
446.00625
5
446.05625
2
446.01875
6
446.06875
3
446.03125
7
446.08125
4
446.04375
8
446.09375
09
Channel
Frequency
Channel
Frequency
Channel
Frequency
Channel
Frequency
Channel
Frequency
Channel
Frequency
1
462.5625
5
462.6625
9
467.5875
13
467.6875
17
462.6000
21
462.7000
2
462.5875
6
462.6875
10
467.6125
14
467.7125
18
462.6250
22
462.7250
3
462.6125
7
462.7125
11
467.6375
15
462.5500
19
462.6500
4
462.6375
8
467.5625
12
467.6625
16
462.5750
20
462.6750
USA Channel Frequency
Garantie
Remarques:
1. Diese Garantiekarte sollte vom Benutzer aufbewahrt werden, kein Ersatz
bei Verloren.
2. Die meisten neuen Produkte gibt es ab dem Kaufdatum eine zweijährige
Herstellergarantie. Weitere Details, lesen Sie bitte
http://www.retevis.com/after-sale/
3. Der Benutzer kann Garantie und Kundendienst wie unten erhalten:
• Kontaktieren Sie den Verkäufer, wo Sie kaufen.
• Von unserem lokalen Reparaturzentrum
4. Für den Garantieservice müssen Sie dem Verkäufer eine
Kaufbestätigung als Nachweis vorlegen
Exclusions from Warranty Coverage:
1.To any product damaged by accident.
2.In the event of misuse or abuse of the product or as a result of
unauthorized alterations or repairs.
3.If the serial number has been altered, defaced, or removed.

Einhaltung der RF-Expositionsstandards (ggf. Verweis auf die
Sicherheitskennzeichnung des Produkts)
Ihr Retevis Walkie Talkie ist so konzipiert und getestet, dass es eine Reihe
nationaler und internationaler Normen und Richtlinien (siehe unten) für die
Exposition von Menschen mit hochfrequenter elektromagnetischer Energie
erfüllt.
Le marquage CE signifie: Par la présente, Shenzhen Retevis Technology
Co., Ltd. déclare que le type d'équipement radio RT32 est conforme à la
Directive RED 2014/53/EU et à la Directive ROHS 2011/65/EU et la
directive DEEE 2012/19/EU. Le texte intégral de la déclaration de
conformité EU est disponible à l'adresse internet suivante: www.retevis.com
Remarque: Les batteries agréées, fournies avec cette radio, sont conçues
pour un facteur d’utilisation de 5-5-90 (5% émission-5% réception-90%
veille) alors que cette radio est conforme aux limites d’exposition de la FCC
et peut fonctionner dans des facteurs de fonctionnement allant jusqu’à 50%
d’émission.
Normes d'exposition à l'énergie RF et lignes directrices (le cas échéant)
Votre talkie-walkie Retevis est conforme aux normes
et directives d'exposition à l'énergie RF suivantes:
• American National Standards Institute (ANSI)/ Institute of Electrical &
Electronic Engineers (IEEE) C95. 1-2005
• Institute of Electrical and Electronic Engineers (IEEE)C95.3-2002
• International Commission on Non-Ionizing Radiation Protection (ICNIRP)
• International Electrotechnical Com-mission IEC62209-2:2010
10 11
Garantie
Numéro de modèle
Numéro de série
Date d’achat
Distributeur
Téléphone:
Nom d’acheteur
Téléphone:
Pays
Adresse:
Code postal
Email
PIC 01
1.Antenna
2.Icone TX/RX
4.Tasto sù
5.Tasto monitor
17.Icone Scansione
16.Icone VOX
14.Livello batteria
10. Microfono
9.Altoparlante
8.Auricolare/Microfono/
Jack ricarica
18.Canale/Menù voce
11.Tasto menù/Lock
6.Tasto accensione
12.Tasto chiamata
7.Tasto giù
13.Blocco tasto
21.Tasto scan
19.CTCSS/Menù opzione
22.LED
20.Tasto torcia
15.PTT
3.TX Power HI/LO
Italiano

Questo set include 2 walkie-talkie: si tratta di dispositivi dicomunicazione
che operano su frequenze di telefonia mobile. Essi sono dotati di 8 canali,
nonché di uno schermo LCD retroilluminato, che permette di comunicare su
diversi chilometri free-of-charge .
NOTA:Si prega di leggere le istruzioni per l'uso prima di utilizzare
l'attrezzatura e conservare per future consultazioni!!
RACCOMANDAZIONI SPECIFICHE
• Se si esegue qualsiasi tipo di dispositivo medico personale, consultare un
medico prima dell'uso.
• Per evitare il rischio di ustioni, non utilizzare il dispositivo se l'antenna è
danneggiato in alcun modo.
• Non utilizzare il dispositivo in un ambiente potenzialmente esplosiva (ad
esempio pompe di benzina in tutto, sul ponte inferiore di una barca o
intorno a un impianto di stoccaggio del carburante o prodotti chimici).
• Se si viaggia in auto o in bicicletta, fermarsi prima di utilizzare il
dispositivo. Spegnere il dispositivo se su un aereo o in un ospedale.
• Non utilizzare il dispositivo in prossimità di una radio per evitare
interferenze.
• Rimuovere le batterie se il dispositivo non è in uso per un periodo di
tempo prolungato. Non mischiare mai batterie usate e nuove.
• Posizionare il trasmettitore e l'antenna ad almeno 5 cm dal viso. Orientare
l'antenna verso l'alto e parlare normalmente.
• Pulire il dispositivo con un panno umido. Evitare l'uso di detergenti e
solventi.
• Non modificare il dispositivo in alcun modo. In caso di danni verificatisi,
assicurarsi che il dispositivo è controllato da un professionista qualificato.
• Il dispositivo non può essere utilizzato per contattare i servizi di
emergenza.
DESCRIZIONE (Pic 01,02)
1. Antenna
2. Icone TX-
Icone RX-
3. TX alto / basso
4. Tasto sù
5. Tasto monitor
6. Tasto accensione( )
7. Tasto giù
8. Auricolare/Microfono/Jeck ricarica
IT ~ Istruzioni per l'uso
0201
PIC 02

9. Altoparlante
10. Microfono
11. Tasto menù
12. Tasto chiamata (CALL)
13. Blocco tasto
14. Livello batteria
15. Tasto PTT(TALK)
16. VOX
17. Scansione
18. Canale/Menù voce
19. CTCSS/Menù opzione
20. Tasto torcia
21. Tasto scan
22. LED
23. l'attaco del clip
24. Clip da cintura
25. Batterie (Non incluse)
26. Coperchio della batteria
PRIMA DELL'USO (Pic 02)
Per inserire le batterie nei dispositivi, prima rimuovere l'attacco del clip:
sollevare la clip di fissaggio (23) quindi premere l'attacco del clip verso l'alto
(24).
Aprire il coperchio delle batterie (26) e inserire 4 batterie AAA (non incluse)
(25) , assicurando che i poli siano correttamente allineati. Poi chiudere il
coperchio.
UTILIZZO DEL TWINTALKER
1. Girare il dispositivo di accensione / spegnimento:
Per attivare i dispositivi o disattivare, tenere premuto il pulsante on / off (6)
per 3 secondi un segnale acustico viene riprodotto per confermare.
2. Aumentare il volume:
Per aumentare il volume, premere il pulsante regolatore busto ▲(4) e
premere il pulsante Giù ▼(7) per diminuire volume.
3.Indicazione livello batteria carica / scarica
Il livello di carica della batteria è indicato dal numero di caselle
presenti all'interno l'icona della batteria sullo schermo LCD:
Batteria carica 3/3
Batteria carica 2/3
Batteria carica 1/3
Batteria carica 0/3
03
Quando il livello di carica della batteria è basso, l'icona della batteria
lampeggia e un segnale acustico verrà emesso per indicare che le batterie
devono essere sostituite o cambiate.
4. Ricezione / trasmissione delle comunicazioni:
I dispositivi sono in modalità 'ricezione', quando illuminati, vale a dire che
sono pronti a ricevere una chiamata o suono trasmesso sulla frequenza
attivata.
• Quando si preme il pulsante di tono di chiamata (12), il dispositivo passa
alla modalità 'di trasmissione'. Si sono poi trasmettere un segnale audio a
un altro dispositivo.
• Per inviare un messaggio vocale, premere il tasto TALK (15) e parlare nel
microfono (10). Continuare a premere il pulsante fino a quando hai finito di
trasmettere il messaggio.
Tenere il microfono di un minimo di 5 cm dal viso.
Nota:
-Il Altro dispositivo deve essere impostato sullo stesso canale e hanno
fissato lo stesso codice CTCSS (vedi punto 7).
-Quando La trasmissione è stata completata e il pulsante TALK (15) non è
più tenuto premuto, l'altro dispositivo emette un suono (BIP) per indicare
che il dispositivo è pronto a trasmettere.
5. Cambiare canale
• Premere il tasto MENU (11) una volta, l'attuale numero del canale
lampeggia sul display.
• Premere il tasto-▲(4) o tasto-▼(7) per cambiare il canale.
• Premere il TALK - pulsante(15) per confermare e tornare in stand-by.
Nota:Se nessun tasto viene premuto entro 15 secondi durante
l'impostazione, l'unità tornerà in standby.
6.CTCSS (Continious Tone Coded Squelch System)
Operativo licenza di radio libere sulla banda di frequenza 446.00625
~446.09375Mhz, come il Twintalker, hanno 8 canali radio disponibili. Se ci
sono utenti di molti radiofonici nel tuo quartiere, c'è la possibilità che alcuni
di questi utenti stanno operando sullo stesso canale radio.
Per evitare di ricevere segnali da altri utenti, sotto-canali sono stati integrati.
Due della radio di solo sarà in grado di comunicare con l'altro quando essi
operano sullo stesso canale radio e quando hanno scelto esattamente sulla
stessa canale.Questi sono due tipi di sub-canali:
• Tono continuo squelch codificato (CTCSS)
Quando si utilizza CTCSS, un tono a bassa frequenza (tra 67 e 250 Hz)
verranno trasmesse insieme al segnale vocale. Ci sono 38 toni disponibili
04

tra cui scegliere. Siete liberi di scegliere uno di questi 38 toni disponibili. A
causa di filtraggio, questi toni generalmente non essere udibili in modo da
non disturbare la comunicazione.
7.CTCSS
• Premere il tasto PTT (11) due volte: Gli attuali lampeggia codice CTCSS
sul display.
• Premere il tasto- ▲(4) o il tasto - ▼(7) per passare a un altro codice.
• Premere il pulsante TALK (15) per confermare e tornare alla modalità
stand-by.
Nota: per disattivare CTCSS, selezionare il codice "0F" per CTCSS nel
menu. Quando la voce viene confermata, "OF" sarà visualizzato.
8. Monitor
Potrebbe utilizzare la funzione monitor per verificare i segnali più deboli nel
canale attuale.
• Premere il tasto MONITOR per attivare il monitore del canale.
• Premere di nuovo il tasto MONITOR per arrestare il monitore del canale.
Nota: Durante il monitore del canale il ricevitore circuito sulla radio non
ascolterà i CTCSS codici.
9. Selezione VOX
La Radio è in grado di attivare a funzione(VOX) la trasmissione della voce.
In modalità VOX, la radio trasmetterà un segnale quando viene attivato
dalla vostra voce o altri suoni intorno a voi. Operazione VOX non è
consigliato se si prevede di utilizzare la radio in un ambiente rumoroso o
ventoso.
Nota: la modalità VOX sarà overrided quando si preme il
TALK pulsante (15).
• Premere il pulsante (11) per tre volte, viene visualizzato premere il
pulsante MENU- la corrente VOX impostazione lampeggia sul display e
l'icona VOX.
• Premere verso l'alto-tasto ▲(4) per impostare il livello di sensibilità VOX
tra 1 e 3(Livello 3 è il livello più sensibile).
• Viene visualizzato Premere tasto ▼(7) fino a "OF" sul display, per
trasformare VOX su OFF.
• Premere il TALK (15) per confermare e tornare in stand-by.
10. Ricerca di un canale radio attiva
• Tenere premuto il -per SCAN (21): Indicatore funzione 'Scan' (17) apparirà
sullo schermo e il canale (18) esegue la scansione continuamente 1-8.
05
Once un canale attivo viene trovato, la scansione viene interrotta e si può
ascoltare la trasmissione.
Quando la trasmissione sul canale trovato si ferma, la scansione
riprenderà automaticamente.
NOTA: Se si preme il pulsante TALK (15) durante l'ascolto di un canale
trovato, la radio la volontà di tornare in modalità stand-by sul canale trovato.
11. Toni di chiamata
Un tono di chiamata avvisa gli altri che si desidera iniziare a parlare.
11.1 Impostazione tono di chiamata
Il Twintalker ha 10 toni di chiamata.
• Premere il pulsante MENU- (11) quattro volte, viene visualizzato "CA" e il
tono di chiamata in corso lampeggia.
• Premere il tasto-▲ (4) o il tasto- ▼(7) per passare ad un altro tono di
chiamata.
• Premere il TALK (15) per confermare e tornare in stand-by.
11.2 Invio di un tono di chiamata
Premere il pulsante di chiamata (12) brevemente. Il tono di chiamata sarà
trasmesso su il canale impostato.
12. Impostare il doppio canale monitor
• Premere il pulsante Menù (11) cinque volte, fino a quando icone "CH"
viene lampeggiato sul display.
• Premere il pulsante Sù o Giù per impostare il secondo canale o
spegnere canale.
• Premere il TALK (15) per confermare e tornare in stand-by.
13. Tasto-Tone ON / OFF
Quando si preme un tasto, l'apparecchio emette un segnale acustico breve.
Per impostare il tono chiave.
• Premere il pulsante MENU- (11) sei volte. "to" sarà visualizzato.
• Premere ▲per attivare (ON) o ▼disattivare i toni chiave (DI).
• Premere il TALK (15) per confermare e tornare in stand-by.
14. Roger Beep On / Off
Dopo il tasto TALK viene rilasciato, l'unità invierà un segnale acustico
Roger per confermare che si è smesso di parlare.
Per impostare il Roger Beep.
• Premere il pulsante MENU- (11) sette volte. "Ro" sarà visualizzato.
• Premere ▲per attivare (ON) o ▼disabilitare il Roger Beep (DI).
06
Other manuals for RT32
1
Table of contents
Languages:
Other Retevis Two-way Radio manuals

Retevis
Retevis RB20 User manual

Retevis
Retevis RT38 User manual

Retevis
Retevis RT33 User manual

Retevis
Retevis H-777 User manual

Retevis
Retevis RB17 User manual

Retevis
Retevis RB28 User manual

Retevis
Retevis RB19P User manual

Retevis
Retevis RB616 User manual

Retevis
Retevis RB86 User manual

Retevis
Retevis RT28 User manual

Retevis
Retevis RT53 User manual

Retevis
Retevis RA635 User manual

Retevis
Retevis RB618 User manual

Retevis
Retevis RM40 User manual

Retevis
Retevis RB19 User manual

Retevis
Retevis RB26 User manual

Retevis
Retevis RT618 User manual

Retevis
Retevis RT22 User manual

Retevis
Retevis RT33 User manual

Retevis
Retevis RB27 User manual