CAUTION:
RISK OF ELECTRIC SHOCK! ATTENTION :
RISQUE DE CHOC ÉLECTRIQUE ! PRECAUCIÓN:
¡RIESGO DE CHOQUE ELÉCTRICO!
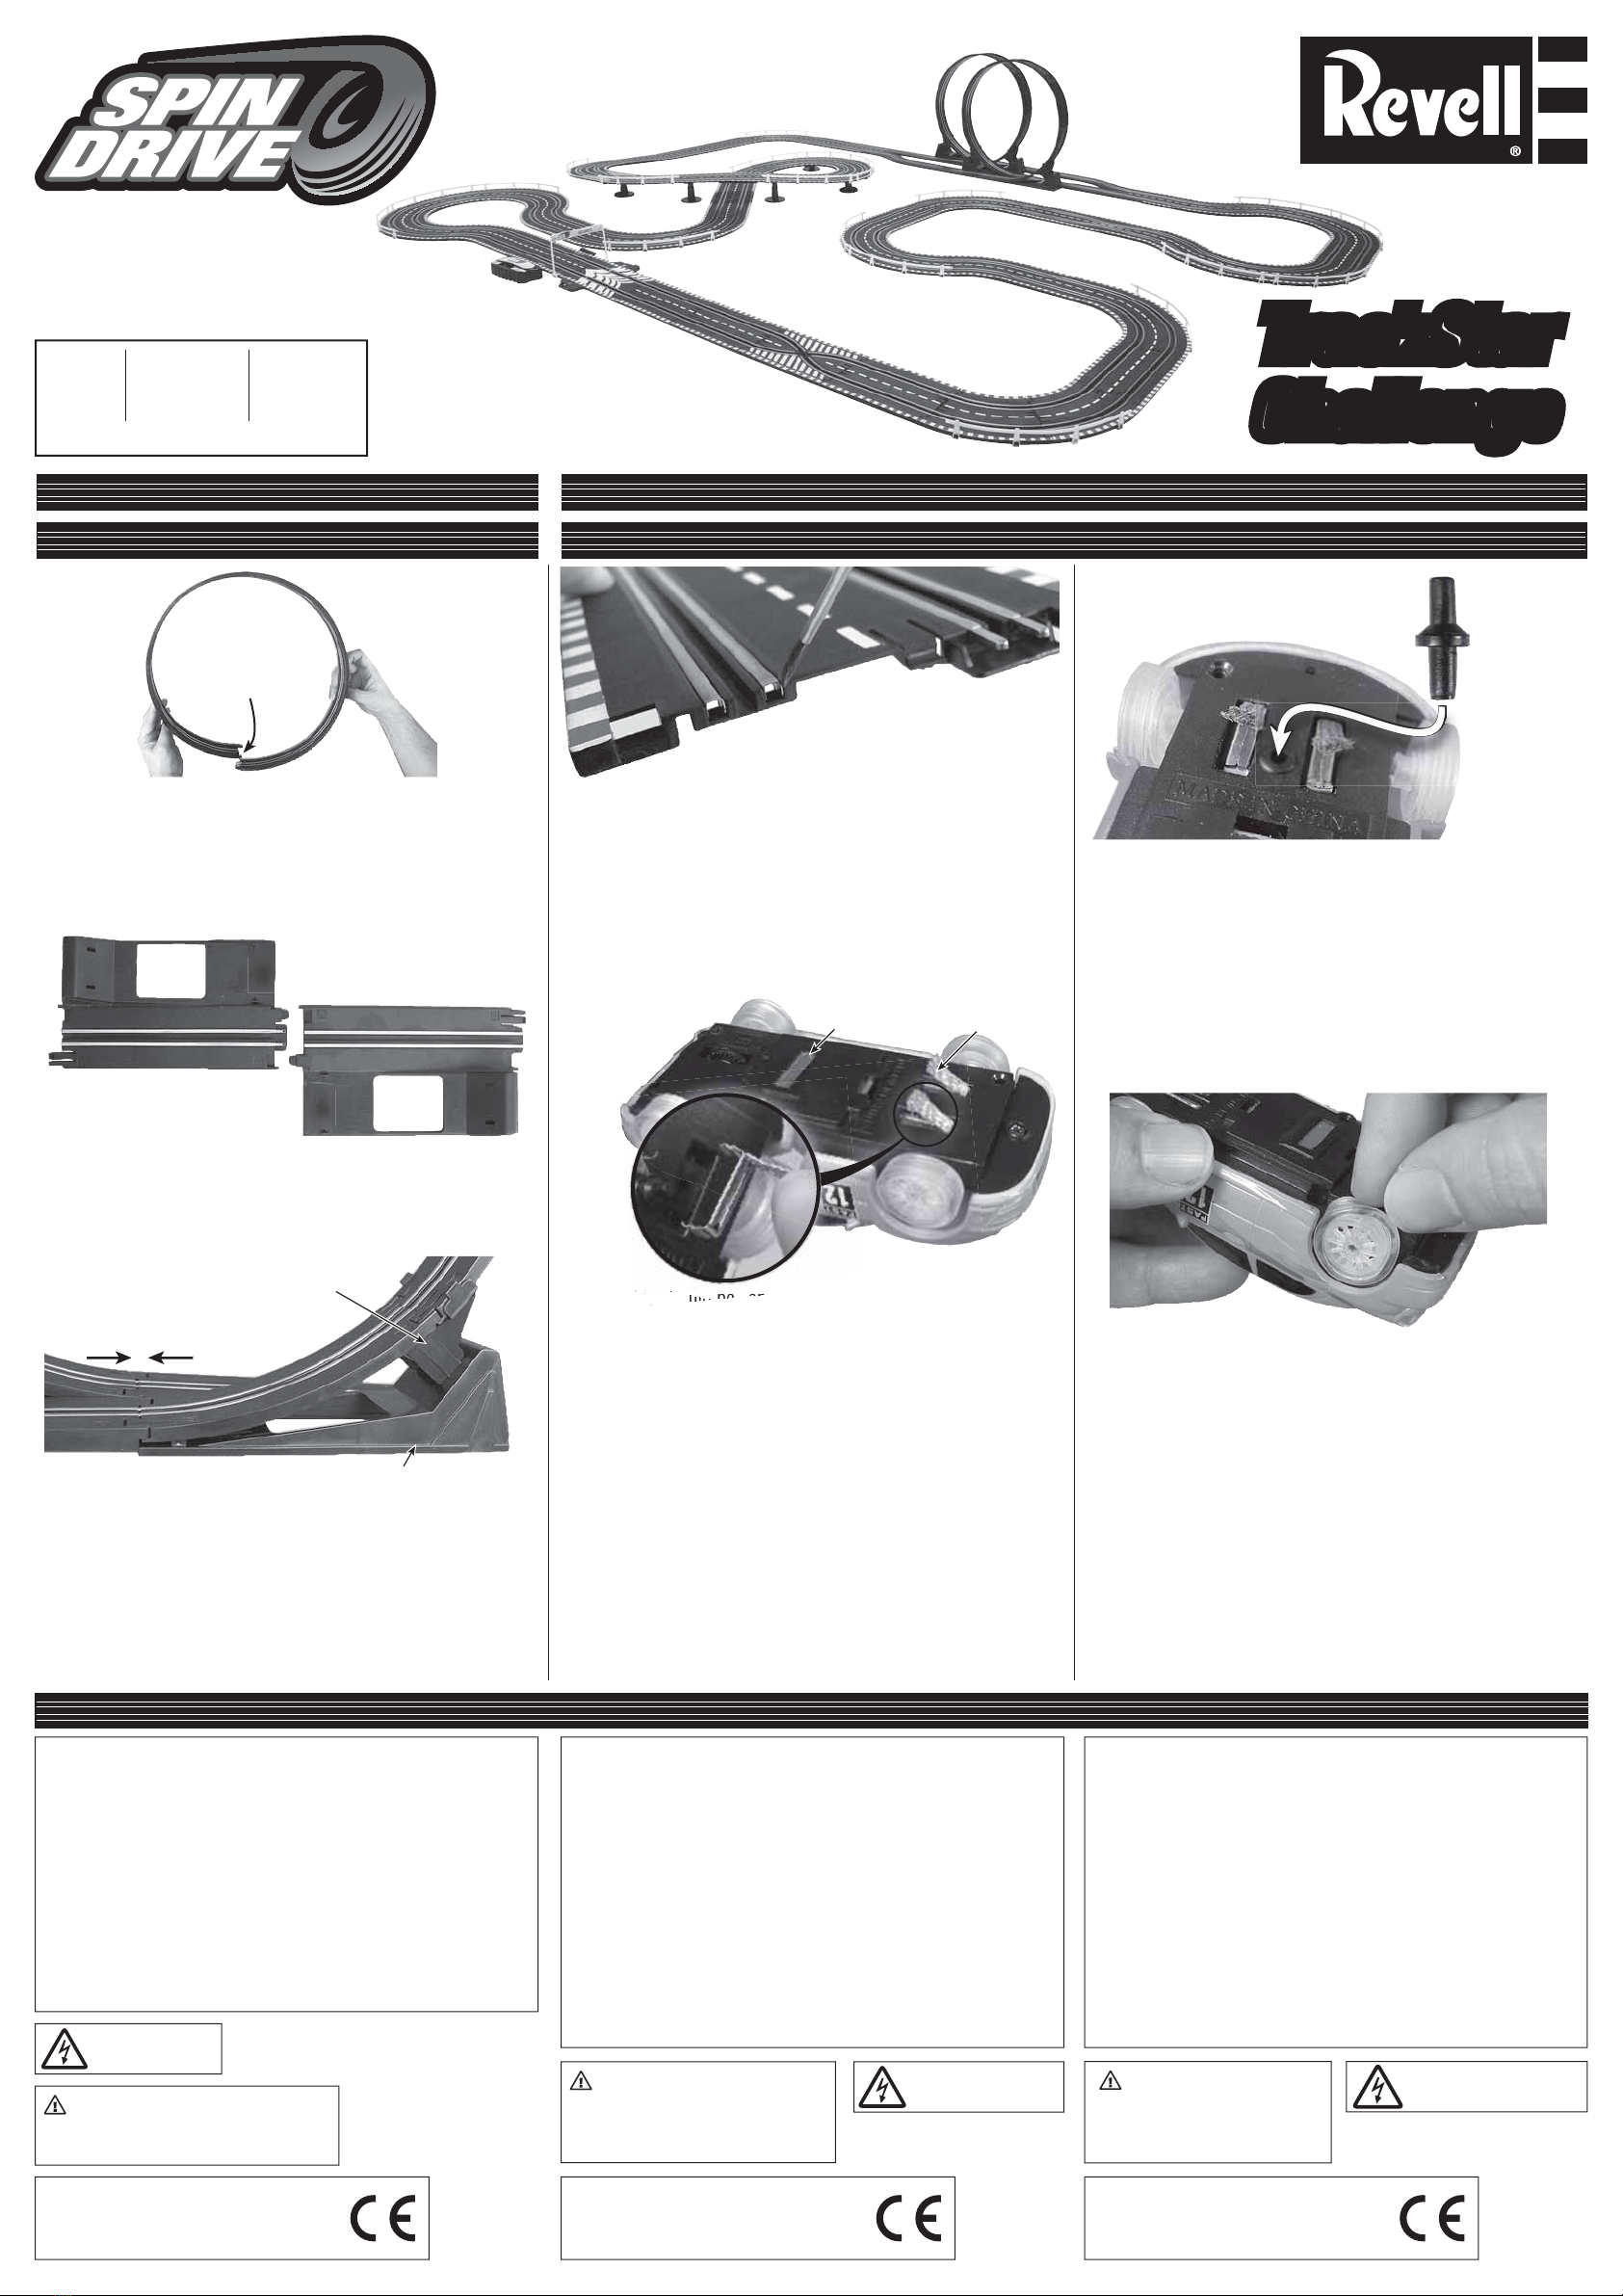
LOOP ASSEMBLY
WARNINGS AVERTISSEMENTS ADVERTENCIAS
ASSEMBLAGE DES BOUCLES ARMADO DEL BUCLE UTILISATION ET ENTRETIEN FUNCIONAMIENTO Y MANTENIMIENTO
RUNNING AND MAINTENANCE
1. Connect eight loop track sections to form a circle.
Raccordez la section de piste à boucles huit pour former un
cercle.
Conecte las partes de la sección de bucle ocho de la pista para
formar un círculo.
1. If better contact is needed, carefully use a small flat blade
screwdriver to slightly bend the rail connector inward.
S’il faut un meilleur contact, utilisez avec soin un petit
tournevis plat pour replier un peu le connecteur de rail vers
l’intérieur.
Si es necesario un mejor contacto, use con cuidado un
destornillador plano pequeño para doblar un poco el
conector del riel hacia adentro.
2. The braids should be kept clean, straight and angle back for
proper contact with the track. Inspect the magnet and remove
any debris.
Les tresses doivent rester propres, droites et inclinées vers
l’arrière pour le contact approprié avec la piste. Inspectez
l’aimant et retirez tous débris.
La malla conductora debe mantenerse limpia, derecha y en
ángulo hacia atrás para lograr un contacto adecuado con la
pista. Inspeccione el imán y elimine todo residuo.
3. To replace the braids (RMXW6122), snap into the bottom of
the chassis.
Pour remplacer les tresses (RMXW6122), enclenchez dans
le bas du châssis.
Para reemplazar la malla conductora (RMXW6122), cálcela
en la parte inferior del chasis.
5. Remove ‘fuzz” that may have wrapped around the axles and be
sure the tires are properly mounted to the rims.
Retirez la « mousse » qui aurait pu s’enrouler autour
des essieux et assurez-vous que les pneus sont montés
correctement sur les jantes.
Quite la “pelusa” que pueda haberse metido en los ejes
y asegúrese de que los neumáticos estén montados
correctamente en las ruedas.
4. To replace a guide pin, use a pair of pliers to remove the
damaged pin. Press the larger end of a new pin into the
chassis.
Pour remplacer une goupille de guidage, utilisez des pinces
pour retirer la goupille endommagée. Enfoncez l’extrémité la
plus large d’une nouvelle goupille dans le châssis.
Para reemplazar un perno guía, use una pinza para quitar el
perno dañado. Introduzca el extremo más grande del perno
nuevo dentro del chasis.
WARNING:
CHOKING HAZARD — Small parts.
Not for children under 3 years of age.
“This product is in compliance with the
essential requirements and other relevant
provisions of Directive 1999/5/EC.”
Safety Precautions:
Warning: Do not modify or alter this unit. Changes or modifications to this
unit not expressly approved by the party responsible for compliance could void
the user’s authority to operate the equipment.
• Keep hands, hair and loose clothing
away from the moving parts.
• Parental guidance is recommended.
•
Keep these instructions for future reference.
• Follow the operating instructions exactly.
Care and Maintenance:
•
Keep the set away from direct heat.
• Do not submerge the set into
water. This could damage the
electronic assemblies.
Note Specifically for Adults:
• Regularly examine all parts of the set for damage. If any is found, do not use
the toy again until the damage has been repaired.
• This set is not intended for children under 8 years old.
AVERTISSEMENT :
DANGER DE SUFFOCATION
— petites pièces. Ne convient pas
pour les enfants de moins de 3 ans.
« Ce produit se conforme aux exigences
essentielles et autres provisions
pertinentes de la Directive 1999/5/EC. »
Précautions de sécurité :
Avertissement : Ne modifiez ni ne changez cet appareil. Les changements
ou les modifications à cet appareil non approuvés expressément par la partie
responsable de la conformité pourraient annuler l’autorité de l’utilisateur de
faire fonctionner l’équipement.
• Gardez les mains, les cheveux et les
vêtements amples loin des pièces mobiles.
• Une surveillance parentale est recommandée.
• Conservez ces instructions à titre de
référence subséquente.
• Suivez avec soin le mode d’emploi.
Entretien et maintenance :
• Gardez l’ensemble loin de
la chaleur directe.
• Ne plongez pas dans l’eau.
Ceci pourrait endommager
les assemblages
électroniques.
Note spécifiquement pour les adultes :
• Examinez régulièrement toutes les pièces de l’ensemble pour tout signe de
dommage. Si vous en trouvez, n’utilisez pas le jouet avant qu’il soit réparé.
• Ce jouet ne convient pas pour les enfants de moins de 8 ans.
ADVERTENCIA:
RIESGO DE ASFIXIA —
piezas pequeñas. No apto para
niños menores de 3 años.
“Este producto cumple con los requisitos
esenciales y otras disposiciones
importantes de la Directiva 1999/5/EC.”
Precauciones de seguridad:
Advertencia: Evite modificar o alterar la unidad. Los cambios o
modificaciones que se le realicen a la unidad, no aprobados expresamente
por la parte responsable del cumplimiento, podrían invalidar la autoridad del
usuario para utilizar el producto.
• Mantenga las manos, cabello y ropa suelta
alejados de las partes en movimiento.
• Se recomienda la orientación de los padres.
•
Guarde estas instrucciones para referencia futura.
• Cumpla exactamente con las instrucciones de
funcionamiento.
Cuidados y mantenimiento:
• Mantenga el juego alejado
del calor directo.
• No sumerja el juego en
agua. Esto podría dañar las
uniones electrónicas.
Nota específica para adultos:
• Examine en forma regular todas las partes del juego para detectar daños. Si
observa algún daño, evite usar el juguete hasta haber reparado el daño.
• Este juego no está diseñado para ser usado por niños menores de 8 años.
1
2
3
4
5
6
7
8
Do not connect
Ne raccordez pas
No conecte
2. Connect loop base “A” to loop base “B”.
Raccordez la base de boucle « A » à la base de boucle «B.»
Conecte la base del bucle “A” a la base del bucle “B”.
A
B
3. Mount both ends of the loop to the bases, securing them
using the loop supports.
Montez les deux extrémités de la boucle aux bases en les
fixant en place avec les supports de boucles.
Monte ambos extremos del bucle a las bases y ajústelos
utilizando los soportes del bucle.
Loop support
Support de boucle
Soporte del bucle
Loop base
Base de boucle
Base del bucle
Magnet
Aimant
Imán
Braid
Tresse
Malla conductora
™
TrackStar
Challenge ™
revell.com/spindrive
Vea toda la línea
de productos
y piezas de
repuesto en:
Regardez toute la
ligne de produits
et les pièces de
rechange à :
See entire
product line
and spare
parts at:


