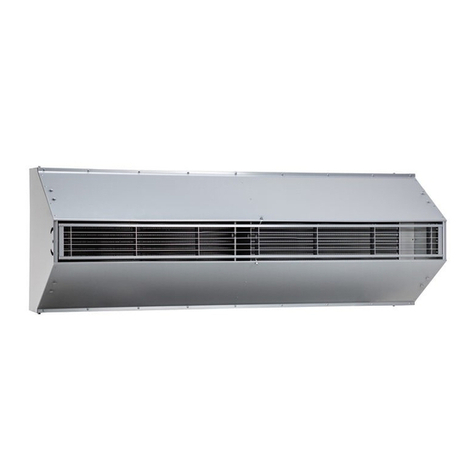
REVENTON AERIS 100E-1P Guide

ELECTRIC HEATED AIR CURTAIN
MODELS:
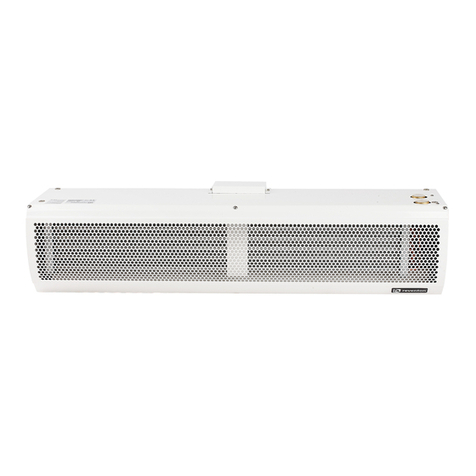
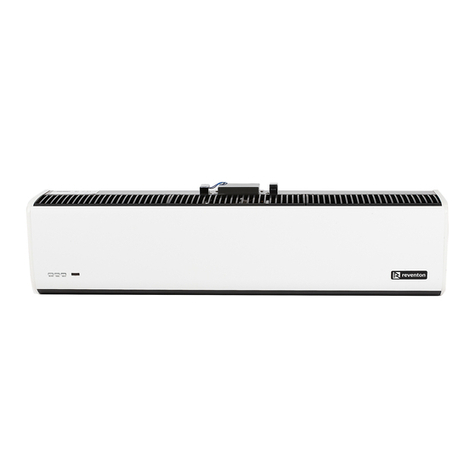
REVENTON GROUP AERIS 100E-1P
REVENTON GROUP AERIS 150E-1P
REVENTON GROUP AERIS 200E-1P
Technical documentation

For heated rooms, set the steering wheel in the opposite direction to the room
with the curtain at an angle of 0 -15 degrees (see figure).
For canteens, kitchens, set the steering wheel towards the room with the curtain
at an angle of 0 -15 degrees (see figure).
2. DEVICE CHARCTERISTICS
2.1 DIMENSIONS
1. INTRODUCTION
1.1. PRECAUTIONS
1.2. TRANSPORT
1.3. PACKAGE CONTENT
1.4. USE
2. DEVICE CHARCTERISTICS
2.1 DIMENSIONS
2.2 TECHNICAL DATA
3. INSTALLATION
3.1. GENERAL PRINCIPLES
3.2. ASSEMBLY „STEP BY STEP”
4. INSTALLATION INSTRUCTIONS
4.1 CONNECTION OF THE DEIVCE TO THE ELECTRICAL SYSTEM
5. PRECAUTIONS AND WARNINGS
6. INSTRUCTION OF USE
6.1 CONTROL
6.2 OVERHEATING PROTECTION
7. CONNECTION SCHEMES
8. TERMS OF WARRANTY
1. INTRODUCTION
Thank you for purchasing Reventon Group air curtain. We would like to
congratulate on good choice. Please read and save these instructions.
1.1 PRECAUTIONS
The buyer and the user of the device should read carefully the following
instructions and proceed to the content recommendations. Proceeding due
to the following instruction guarantees the correct usage and safety. In case
of any doubts please contact the Reventon Group Sp. z o.o. The Supplier reserves
the rights to make changes to the technical documentation without previous
notice. The Supplier is not responsible for the damages which occur due
to improper installation, not keeping the device in repair or using the device out
of line. The installation should be carried out by the professional installers, who
possess the qualifications to install these types of devices. The installers are
responsible for making the installation as instructed in the technical data.
Regulations and safety rules must be followed. During the installation, use,
service and periodical inspections all regulations and safety rules must
be followed. In case of unserviceable please plug out the device and contact with
the authorized person or the Supplier. All safety requirements must be taken into
account during installation, use or inspection.
1.2 TRANSPORT
During the acceptance of goods it is needed to check the device in order
to exclude any damages. During the transport it is needed to use the proper
equipment, it is necessary to carry the device by two people. In case of any
damages please fill in the damage report in presence of the Supplier or the
carrier.
1.3 PACKAGE CONTEN
- air curtain
- operation and maintenance manual and warranty card
- assembly panel
- door sensor
- remote controller
1.4USE
Air curtains are widely installed at the entrances of supermarkets, theaters,
meeting rooms, hotels, offices, storages etc. They can reduce penetration of
insects, outside dust, unconditioned air into a conditioned space by forcing an air
stream over the entire entrance. In winter they prevent uncontrolled heat loss
and in summer they prevent heat from the room (see figures). However, air
curtains should not be used in corrosive environments for aluminum, copper and
steel as well as in highly dusty environments (above 0,3 g/m³).The devices should
also not be installed in rooms where they would be exposed to high humidity or
direct contact with water.
consumption [A]
For air-conditioned rooms, the steering wheel must be set at an angle of 0-15
degrees towards the air-conditioned room (see figure).
SECURITY AGAINST INSECTS
AND ODORS
HEATED ROOM
INSIDE OUTSIDE
A CLIMATED ROOM
ENG
TECHNICAL DATA
BACK
TECHNICAL DATA AERIS 100E-1P
AC100E1P
Product code
AERIS 150E-1P
AC150E1P
AERIS 200E-1P
AC200E1P
Heater power [kW]
Current
Maximum airflow
[m3/h]
Maximum air speed
[m/s]
Power supply [V] / Frequency [Hz]
Maximum
motor power[W]
Rated motor
current [A]
Class of isolation /Protection degree IP [-]
Net weight [kg]
Noise
[dB]
26,1
14,3 20
17,4 29,1 40,9
8,7
43,5 60,9
1200 1900 2800
1100 1700 2500
8,5 8,5 8,5
7,5 7,5 7,5
230/50 230/50 230/50
15,5 20,5 26
57 59 61
55 57 59
E/IP20 E/IP20 E/IP20
III HEATING LEVEL
II HEATING LEVEL
I HEATING LEVEL
III HEATING LEVEL
II HEATING LEVEL
I HEATING LEVEL
6,0
3,3 4,6
4,0 6,7 9,4
2,0
10 14
I STAGE
II STAGE
I STAGE
II STAGE
I STAGE
II STAGE
I STAGE
II STAGE
I STAGE
II STAGE
180 230 350
130 180 300
2.2.TECHNICAL DATA
REVENTON GROUP
AERIS 100E-1P
REVENTON GROUP
AERIS 150E-1P
REVENTON GROUP
AERIS 200E-1P
90 105 195 265
N. W.
(kg)
15,5
20,5
26
INSIDE OUTSIDE
INSIDE OUTSIDE
consumption [A]
0,78 1,00 1,52
0,57 0,78 1,3
WIRE SIZE FOR WIRING
WARNING: forbid to overload operation for a long time!
Power
Heater power [kW]
Main line [mm ]
2
Earth line [m ]
2
SINGLE PHASE ( 230V~, MAIN LINE : L, N)
3 4 5 6 810 14
1.5 2.5 2.5 4.0 6.0 10 10
0.75 1.0 1.0 1.5 2.5 2.5 4.0
3. INSTALLATION
3.1. GENERAL PRINCIPLES
The following figures show the recommended distances between the air curtain
and the building partition:
The width of the curtain should be greater or equal to the width of the door frame.
When the entrance is wider than the unit, it is recommended to install two or more
units in parallel. In this case, provide 10-40 mm gaps between the units.
3.2. ASSEBLY “STEP BY STEP”
The curtain can be assembled on wall or ceiling. If any components are not included
in the kit, you should buy them yourself and make sure they are suitable for this
type of installation.
a) wall mounting
- unscrew the fixing screws to remove the mounting plate from the back of the
main body
- install mounting plate on the wall
4.1. CONNECTION OF THE DEIVCE TO THE ELECTRICAL SYSTEM
- all works concerning electrical installation should be made by the qualified
personnel (who possess required authorizations to install electrical equipment),
based on wiring schematic diagrams. (see 7)
- the electrical installation of the building shall have a residual current device
- check the electrical installation and automation before the first start
5. PRECAUTIONS AND WARNINGS
During operation of the device, the following must be respected:
- all works concerning electrical installation (disassembly, repair etc.) should be
made by the qualified personnel, who possess the qualifications due to the
domestic and local norms, regarding electrical installations
- do not limit or cover the inlet and outlet of the device
- do not install, service the device with wet hands or barefoot
- the device should be kept out of reach of children and animals
-when no need heating, turn off the heat source to use it as an unheated air
curtain
- after the turn off, the elements of device may be warm
- after operating time of the device, please utilize it concerning the local norms
and regulations
- don’t allow water or any liquid to enter the motor
- maintenance and repair work must be carried out by a qualified personnel
familiar with local regulations and standards
- always unplug or disconnect the appliance from the power supply before
installation, servicing or cleaning the unit
- never use petrol, benzene, thinners or any other chemicals for cleaning the unit
- periodic maintenance work should be carried out at least once a year by:
ź cleaning the heater and other elements from dust
ź cleaning of plastic parts with water with the addition of soap
ź cleaning the casing with a soft cloth
- install the main body. Set the main body onto the upper end of the mounting
plate and clamp it as shown
4. INSTALLATION INSTRUCTIONS

- if the device is not used for a longer time disconnect the voltage suppl
- if any abnormality happens, turn off the product immediately and check the
problem
6. INSTRUCTION OF USE
6.1 CONTROL
The air curtain can be controlled by a remote control or a control panel, located
on the housing (buttons are described in the same way), as described below:
a) Press "ON / OFF" to turn the device on. The main receiver gets a signal and
starts working with green light in a cold mode on the second fan speed (II stage).
Press "ON / OFF" button again to turn the device off.
b) Pressing the "COOL" button switches from the second to the first speed (I
stage). When the unit is in cold mode, pressing "COOL" button again will change
speed to high (II stage).
c) To switch for the heating mode press "HEAT" button. The red light up on the
unit and it works in low-power heating mode. Pressing the "HEAT" button again
will cause the device to change its power to the medium (second heating stage),
which will be indicated with two red lights. Similarly, pressing the "HEAT" button
again will cause the device to change its power to high heating mode (it is
indicated by three red lights).
d) After another pressing of the "HEAT" button, the device changes to the cold
mode and the lights turns green.
6.2 OVERHEATING PROTECTION
The air curtain has overheating protection. If the temperature of the heater
exceeds the limit value, the device will switch to cooling mode and it will indicate
with the green light.
7. CONNECTION SCHEMES
LEGENDA:
1. Power
2. Main switch, overcurrent circuit breaker *
3. Water heated air curtain AERIS
4. Door switch
* main switch and overcurrent circuit breaker are not included in the unit

8. TERMS OF WARRANTY
I. Reventon Group Sp. z o.o. [Ltd.] 3B Montazowa Street , 43-300 Bielsko-
Biała,Poland, is the producer of the Reventon Group brand. The warranty
concerns the following devices and it is valid for 2 (two) years:
- electric heated air curtain REVENTON GROUP AERIS 100E-1P
- electric heated air curtain REVENTON GROUP AERIS 150E-1P
- electric heated air curtain REVENTON GROUP AERIS 200E-1P
II. Warranty is valid in the European Union.
III.The terms of warranty are valid from purchasing the device (the date issuing a
document confirming the purchase of the device) but not further than 30 months
from leaving the producer’s warehouse.
IV. The defects revealed during the warranty period will be removed free of
charge in 14 working days. The service will be done by the installation company
due to the terms of the warranty card. The spare parts will be supplied by the
Reventon Group Sp. z o.o. during the warranty period.
V. In the exceptional cases, the manufacturer reserves the right to extend the
time limit for examination of warranty, especially if the defect is not permanent
and its determination requires a longer period of time. Any such extension must
be notified by the manufacturer before the end of the 14th day (working).
VI. Warranty does not cover the parts of the device subject to normal
maintenance and the cases as below:
a) mechanical damage of the product;
b) defects and damages through:
- improper storage or transportation;
- improper use or maintenance not in accordance with the instructions;
- using the device in the improper conditions (too high humidity, too high or too
low temperature, impact of the surrounding, sun etc.);
- unauthorized (by the user or other unauthorized persons) repair, modification
or construction changes;
- connecting additional equipment, which is not recommended by the producer
or inconsistent with the technical documentation;
- improper power supply.
c) elements which wear and tear such as discolor or using.
VII. Any changes in the Warranty Terms, improper use of the product (careless
handling, exposure to liquids, moisture, corrosion), as well as traces of
self-repairing (except for the Reventon Group manufacturer's service),
alterations or attempts to make structural changes to the product, (revealed
during the performance of warranty service), makes warranty not valid.
VIII. To obtain the service it is needed to send to the producer warranty card with
the signature, document confirming the purchase, (copy of the invoice) and
correctly filled the warranty form.
IX. Not following to any of warranty regulations makes the warranty not valid.
X. All correspondence, returns, complains should be send to the following
address: Reventon Group Sp. z o.o. 3B Montazowa Street, 43-300 Bielsko-Biała,
Poland or e-mail:
The producer reserves the rights to make changes to the technical
documentation without previous notice.

Warranty card
Reventon Group [Ltd.] 3B Montazowa Street, 43-300 Bielsko-Biała, Poland
:
:
::
:

Reventon Group [Ltd.] 3B Montazowa Street, 43-300 Bielsko-Biała, Poland, www.reventongroup.eu
This manual suits for next models
2
Table of contents
Other REVENTON Heater manuals

REVENTON
REVENTON AERIS Series Guide

REVENTON
REVENTON WALLER 64 Instruction Manual

REVENTON
REVENTON AERIS 100E-1P Guide

REVENTON
REVENTON HUMMER SERIES Guide

REVENTON
REVENTON AERIS 90EN-3P Guide

REVENTON
REVENTON AERIS 100EN-1P Guide

REVENTON
REVENTON Farmer Series User manual

REVENTON
REVENTON AERIS 100WN-1P Guide

REVENTON
REVENTON Aeris Series Guide

REVENTON
REVENTON AERIS 90EN-3P Guide