Revo RESPTZ37-SERIES User manual

REVO America
700 Freeport Parkway Suite 100
Coppell, TX 75019
1-800-6250-REVO (7386)
Copyright © 2013 REVO America Inc. All rights reserved.
REVO and its logo are trademarks of REVO America Inc.
User Manual
Model RESPTZ37-SERIES
24 VAC @ 60 Hz, 12W NTSC
Publication No. RESPTZ37-10B

REVO America
700 Freeport Parkway Suite 100
Coppell, TX 75019
1-800-6250-REVO (7386)
Copyright © 2013 REVO America Inc. All rights reserved.
REVO and its logo are trademarks of REVO America Inc.
REVO America wants to ensure that your installation experience is a safe and pleasant one. Please
read and adhere to these Safety Instructions.
CAUTION
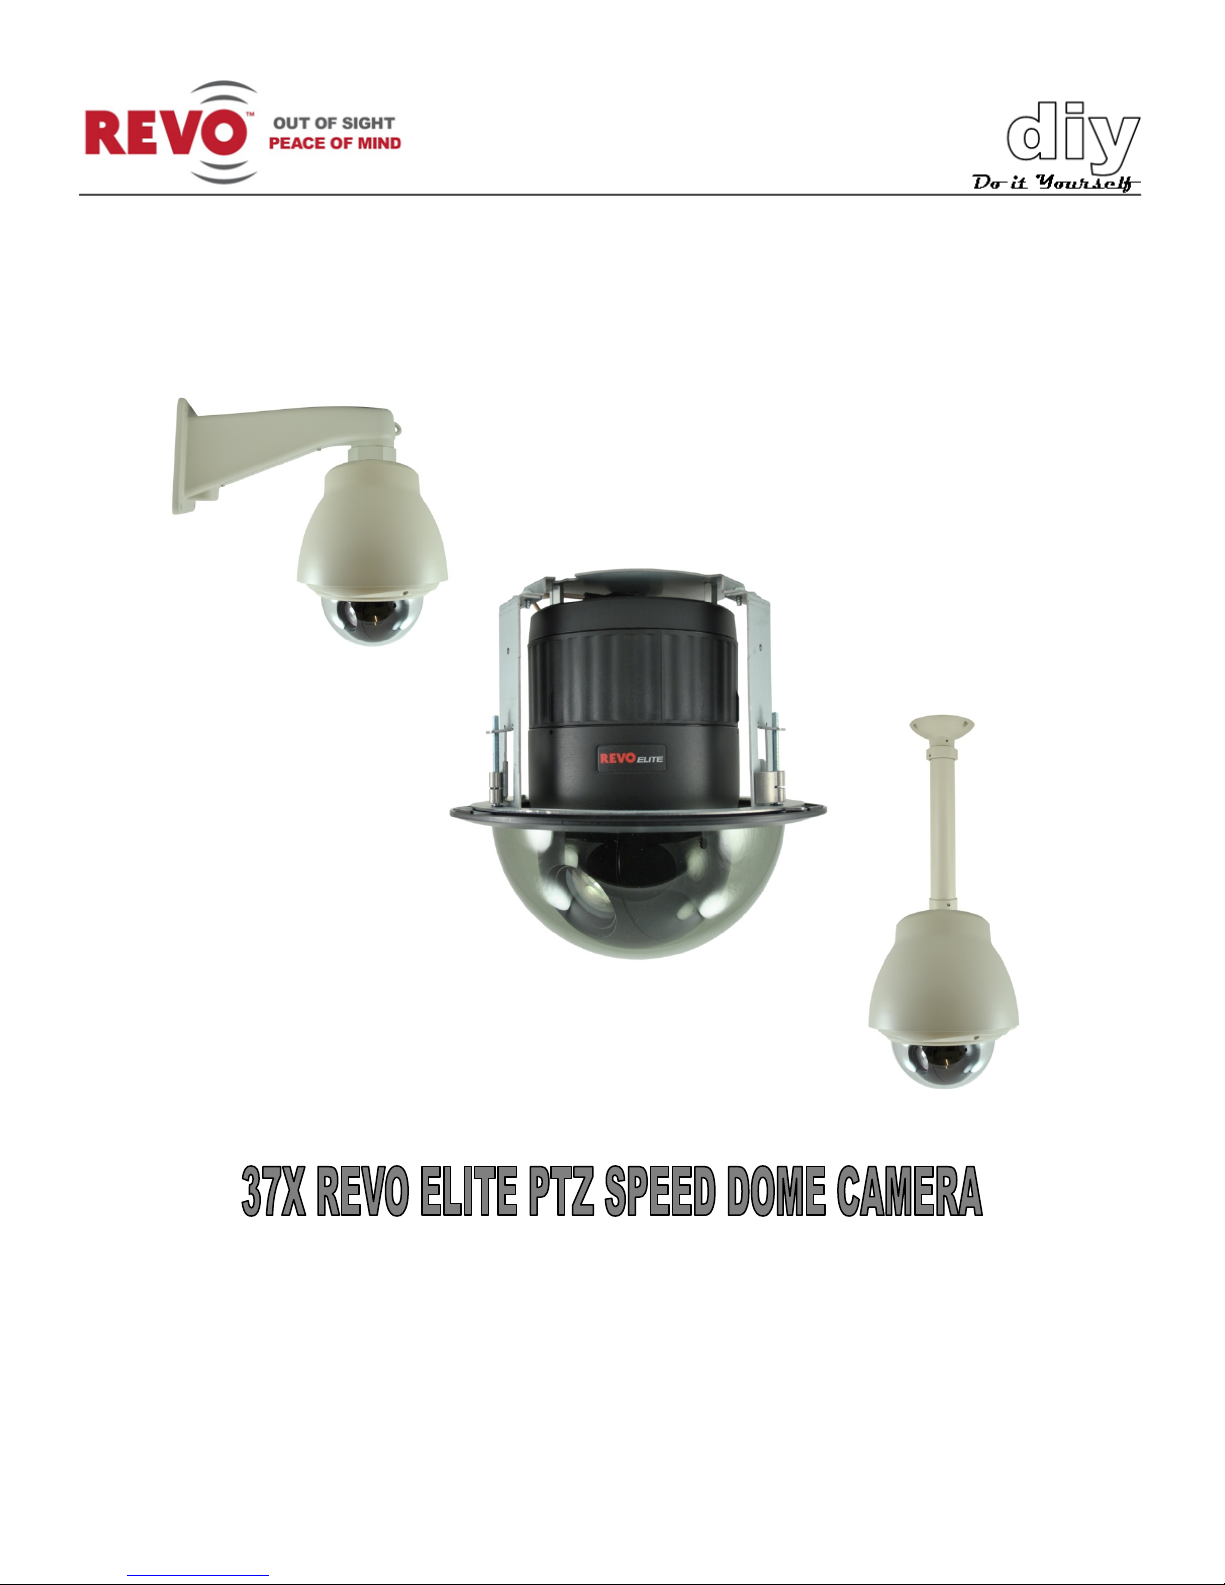
Model RESPTZ37-1 is an indoor camera and not meant for outdoor use. Models
RESPTZ37-1HSC and RESPTZ37-1HSW are provided with weather-proof enclosures and
can be used outdoors.
1. Never perform any installation procedure or open the camera case with power on.
2. Pay attention to the Warnings and Cautions in the instructions. They are there for
your safety and to ensure that the equipment does not get damaged.
3. Do not discard this manual after installation. You may need to reference it in the
future.
4. Use a Certified/Listed Class 2 power supply only.
5. Do not block any ventilation openings. Install in accordance with the
manufacturer’s instructions.
6. Do not install near any heat sources such as radiators, heat registers, stoves, or
other apparatus (including amplifiers) that produce heat.
7. Do not defeat the safety purpose of the polarized or grounding-type plug. A
polarized plug has two blades with one wider than the other. A grounding type
plug has two blades and a third grounding prong. The wide blade or the third
prong are provided for your safety. If the provided plug does not fit into your
outlet, DO NOT MODIFY THE PLUG OR OUTLET. Consult an electrician for
replacement of the obsolete outlet.
8. Protect the power cord from being walked on or pinched particularly at
plugs, convenience receptacles, and the point where they exit from the
apparatus.
9. Only use attachments/accessories specified by the manufacturer.
10.Do not submerge the camera in water or any liquid.
11.Refer all servicing to qualified service personnel. Servicing is required when the
apparatus has been damaged in any way, such as power-supply cord or plug is
damaged, submerged in liquid, does not operate normally, or has been dropped.
Model RESPTZ37-SERIES

REVO America
www.revoamerica.com
RESPTZ37-SERIES
1
FCC Compliance
FCC INFORMATION: This equipment has been tested and found to comply with the limits for a Class A
digital device, pursuant to Part 15 of the FCC rules. These limits are designed to provide reasonable protection
against harmful interference when the equipment is operated in a commercial environment. This equipment
generates, uses, and can radiate radio frequency energy and if not installed and used in accordance with the
instruction manual, may cause harmful interference to radio communications. Improper operation of this
equipment in a residential area is likely to cause harmful interference in which case the user will be required to
correct the interference at his or her own expense.
CAUTION: Changes or modifications not expressly approved by the party responsible for compliance could
void the user's authority to operate the equipment.
This Class A digital apparatus complies with Canadian ICES-003.
Cet appareil numérique de la classe a est conforme à la norme NMB-003 du Canada.
CE Compliance
WARNING: This is a Class A product. In a domestic environment this product may cause radio interference in
which case the user may be required to take adequate measures.
WARNING
The lightning flash within an equilateral triangle is intended to alert the user to the
presence of dangerous voltage that may be of significant magnitude to constitute a risk
of electric shock.
CAUTION
The exclamation point within an equilateral triangle is intended to alert the user to the
presence of important operating or maintenance instructions that should be noted to
avoid damage to the equipment or loss of data.

REVO America
www.revoamerica.com
RESPTZ37-SERIES
2
C
Co
on
nt
te
en
nt
ts
s
Features............................................................................................................................................................................ 3
What’s in the Box ............................................................................................................................................................. 4
Settings ............................................................................................................................................................................. 6
Setting Camera Termination ........................................................................................................................................ 7
Fail-Safe Network ......................................................................................................................................................... 8
Setting Camera Address ............................................................................................................................................... 9
Figure 4. Setting Camera Addresses........................................................................................................................... 10
Setting Camera Protocol, Video Standard, Baud Rate and Parity (Optional)............................................................. 10
Dimensions ..................................................................................................................................................................... 13
Installation...................................................................................................................................................................... 14
Considerations............................................................................................................................................................ 14
Tools Required............................................................................................................................................................ 14
Installing the Camera.................................................................................................................................................. 15
Wiring ......................................................................................................................................................................... 15
Camera Configuration .................................................................................................................................................... 18
Getting Started ........................................................................................................................................................... 18
Understanding the Dome Menu................................................................................................................................. 20
Camera ....................................................................................................................................................................... 21
Dome Setup................................................................................................................................................................ 27
Specifications.................................................................................................................................................................. 38
Troubleshooting ............................................................................................................................................................. 39
Glossary .......................................................................................................................................................................... 41

REVO America
www.revoamerica.com
RESPTZ37-SERIES
3
F
Fe
ea
at
tu
ur
re
es
s
•37X optical zoom PTZ dome camera
•Three models are offered: Indoor Flush Mount, Outdoor Wall Mount
and Outdoor Ceiling Mount
•Superb resolution of 650 TV lines provides high-quality video day
or night
•High-end features such as Presets (240), Tours (8), Auto Scan (17)
and Patterns (8) normally found in cameras costing thousands
more
•Day/Night camera with True Night Shot feature
•Built-in motion detection
•8 Alarm inputs and 4 Alarm outputs
•Easy-to-use menu system allows setup in minutes
•Wide optical range with PTZ provides coverage of large areas with
just one camera
•Variable speeds for PTZ functions: Slow, Normal and Turbo enable
you to customize camera operation
•Titling so you can identify up to 16 camera locations
•IP66 rated for durability, vandal resistance and operation in dusty
or wet environments (Outdoor models)
TIP
Browse the entire manual prior to installing the camera. There is a lot of useful
information and tips that will help you to install your system effectively.

REVO America
www.revoamerica.com
RESPTZ37-SERIES
4
W
Wh
ha
at
t’
’s
s
i
in
n
t
th
he
e
B
Bo
ox
x
The RELPTZ37 Series consists of three models that are preconfigured as follows:
Model RESPTZ37-1 Indoor Flush-Mount Dome Camera
Model RESPTZ37-1HSC Outdoor Ceiling-Mount Dome Camera

REVO America
www.revoamerica.com
RESPTZ37-SERIES
5
Model RESPTZ37-1HSW Outdoor Wall-Mount Dome Camera
Each model is provided with mounting hardware and installation guide. Refer to the following
manuals for installation and mounting instructions.
Model
Manual
RESPTZ37-1 Indoor Flush-Mount Dome Camera
HCS251-HV
RESPTZ37-1HSC Outdoor Ceiling-Mount Dome Camera
RESPTZH-1
RESPTZ37-1HSW Outdoor Wall-Mount Dome Camera

REVO America
www.revoamerica.com
RESPTZ37-SERIES
6
S
Se
et
tt
ti
in
ng
gs
s
Prior to installing the camera, you must set it up for use in the video system. To do this you will
need to access the switches on the bottom of the camera. Remove the camera from the box and
the enclosure. To access the switches, you must remove the bottom cover as shown in Figure 1.
TIP
Use a small paper clip to set the DIP switches to ensure that you set each one correctly.
Figure 1. Removing Bottom Cover
NOTE
Setting DIP switches correctly is very important. If you do not set them correctly, there
will be communication errors.

REVO America
www.revoamerica.com
RESPTZ37-SERIES
7
Figure 2. Switch Layout
Setting Camera Termination
When you set up your video system, you will be connecting the cameras, keyboard controller and
any other devices in a daisy-chain arrangement (as shown in Figure 3). All of the devices are set
up in a line. The last device in the line must be set so that the control device knows it is the last
device. Set this using DIP switch SW1 (Figure 2). If this camera is to be the last device, set SW1
DIP switches 1 and 2 to ON as shown below. If it is not the last device, set the switches to OFF.
SW1
1
2
Terminated
ON
ON
Not
terminated
OFF
OFF

REVO America
www.revoamerica.com
RESPTZ37-SERIES
8
TIP
Set up all of your devices now to ensure that you only have one selected as the last
device. Record the device, which is the last device for future reference.
Fail-Safe Network
The camera may be controlled by both REVO and non-REVO devices such and keyboard
controllers or DVRs. Using these devices, you can set up the camera and all of the functions. The
ideal way to do this is using a REVO keyboard. It provides the easiest way to take full advantage
of the camera’s capabilities. It also provides a fail-safe network by protecting the camera if any of
the following conditions occur:
•When the RS-485 circuit is open (Break)
•When the RS-485 circuit is shorted
•When RS-485 circuit is damaged
When a non-REVO device is used, there also may be some problems with the communication
between the camera and controller device. To compensate for this, set DIP switch SW2 poles 1
and 2 (Figure 2) to ON in the camera closest to the controller device. Typical connections are
shown in Figure 3.
See Setting Camera Protocol and Video Standard for additional instructions on using non-REVO
keyboard controllers or DVRs.
SW2
1
2
ON
PULL-UP
PULL-DOWN
OFF
NONE
NONE

REVO America
www.revoamerica.com
RESPTZ37-SERIES
9
Figure 3. Termination Connections for Various Camera Configurations
Setting Camera Address
Each camera requires a unique camera address so that the control device knows which camera is
at your back door and which camera is monitoring your driveway. Think of the camera address as
a telephone number. In order for the video system to work with multiple cameras, it has to know
which one is which.
Switches S1 through S3 (Figure 2) are used to set the camera address. Apply the settings for
each camera in your video system as shown in the following table. Up to 999 cameras may be set
up.

REVO America
www.revoamerica.com
RESPTZ37-SERIES
10
NOTE
This is an important step. If you do not set the camera addresses correctly, there will be
communication errors.
Figure 4. Setting Camera Addresses
Setting Camera Protocol, Video Standard, Baud Rate and Parity
(Optional)
If you are using a REVO America keyboard controller and using the camera in the United States
or other NTSC standard country, there is no need to change the default settings of switches S4,
S5 and S6 (Figure 2). You can use the default settings.
If you need to make changes, see the setting options that follow. The switches are set as follows:
D
OME
ID
S3
S2
S1
1
0
0
1
2
0
0
2
1
2
3
4
5
6
7
8
9
0
8
1
1
2
3
4
5
6
7
8
9
0
8
1
1
2
3
4
5
6
7
8
9
0
8
1
S3
S2
S1

REVO America
www.revoamerica.com
RESPTZ37-SERIES
11
The following settings are used for the Alarm function enable/disable (S4-1), PAL/NTSC selection
(S4-2), and RS-422/RS-485 selection (S4-4). Set the switches as indicated in the table below.
S/W
On
Off
FUNCTION
D1
S4-1
Enable Disable Alarm
D2
S4-2
PAL
NTSC
NTSC/PAL
D3
S4-3
Default
Reserved
D4
S4-4
RS-422
RS-485
RS-422/RS-485
The following settings are used to set the protocol the camera will use to communicate with the
video controller. If you are using a keyboard controller or DVR other than REVO America, check
the protocol required and set switch S5 as follows:
D5
D6
D7
D12
PROTOCOL
S5-1
S5-2
S5-3
S6-4
Off Off Off Off
F2,REVO TRAX,
Pelco-D,Pelco-P(Default)
Off
Off
On
Off
F2,REVO TRAX
Off
On
Off
Off
Sensormatic RS422
Off
On
On
Off
Pelco-D, Pelco-P
On
Off
Off
Off
Vicon
On
Off
On
Off
Ernitec
On
On
Off
Off
Reserved
On
On
On
Off
F2
Off
Off
Off
On
Philips(Bosch)
Off
Off
On
On
Reserved
Off
On
Off
On
Dynacolor
Off
On
On
On
Reserved
NOTE
Some of the camera features may not be available when using protocols other than the
defaults listed above.

REVO America
www.revoamerica.com
RESPTZ37-SERIES
12
To change the BAUD rate and Parity to match your keyboard controller, set switch S5-4 and S6 as
follows:
D8
D9
D10
BAUD RATE
S5-4
S6-1
S6-2
Off
Off
Off
2400 bps
Off
Off
On
4800 bps
Off
On
Off
9600 bps (Default)
Off
On
On
19200 bps
On
Off
Off
38400 bps
D11
PARITY BIT
S6-3
Off
None
On
Even

REVO America
www.revoamerica.com
RESPTZ37-SERIES
13
D
Di
im
me
en
ns
si
io
on
ns
s
The dimensions shown in Figure 5 are for the base camera unit. To view the dimensions for your
model, refer to the following installation manuals.
Model
Manual
RESPTZ37-1 Indoor Flush-Mount Dome Camera
HCS251-HV
RESPTZ37-1HSC Outdoor Ceiling-Mount Dome Camera
RESPTZH-1
RESPTZ37-1HSW Outdoor Wall-Mount Dome Camera
Figure 5. Dimensions

REVO America
www.revoamerica.com
RESPTZ37-SERIES
14
I
In
ns
st
ta
al
ll
la
at
ti
io
on
n
Considerations
You should carefully consider installation of the camera(s) to ensure a successful and easy
installation. The camera may be used indoors or outdoors (with outdoor housing), but there are
conditions that should be avoided to ensure high-quality video and avoid damage to the cameras.
Please review the following list prior to starting your installation.
•Camera Location – Cameras should be located in places where they will be protected from
direct exposure to the sun, strong light or water immersion. Exposure to any of these will
impair video quality and damage the camera.
•Wiring – The cameras are connected to the video system using coaxial cable. They require
power from a Class 2 power supply and if you choose to connect alarms or sensors, other
wiring. Make sure that you can provide the wiring to the locations that you select, and that
power is available for the power supply. Contact REVO America for all the accessories that
you will need to install the camera.
•Visibility – The cameras should be mounted so there are no obstructions or blind spots.
•Mounting – The camera should be mounted in a sturdy location capable of supporting its
weight (see specifications for your model).
TIP
If this is your first time installing a video system, you may want to connect all of the
cameras and other devices to the DVR prior to installing and mounting the equipment.
This will give you the opportunity to wire the system and ensure you have everything
connected properly before you mount the cameras and run the wiring.
Tools Required
There are no special tools required to install the camera. Standard flat and Philips head screw
drivers, a power drill and power saw may be required to create access for the wiring required for
the camera.

REVO America
www.revoamerica.com
RESPTZ37-SERIES
15
Installing the Camera
Refer to the following manuals to install your camera model.
Model
Manual
RESPTZ37-1 Indoor Flush-Mount Dome Camera
HCS251-HV
RESPTZ37-1HSC Outdoor Ceiling-Mount Dome Camera
RESPTZH-1
RESPTZ37-1HSW Outdoor Wall-Mount Dome Camera
Wiring
WARNING
Never work with power on. You should always disconnect electrical power prior to
installation or removal of any equipment.
A typical system configuration is shown in Figure 6. Figure 7 shows the wiring connections.
Figure 6. Typical System Configuration

REVO America
www.revoamerica.com
RESPTZ37-SERIES
16
Figure 7. Dome Camera Wiring

REVO America
www.revoamerica.com
RESPTZ37-SERIES
17
Video Out (BNC)
Connect the video out (BNC) connector to the monitor or video input on
DVR.
Power In (3-pin)
With power off, connect a certified/listed 24 VAC Class 2 power supply to
the dome camera connector.
RS-485 or RS-422
Keyboard
Controller (2-pin)
The dome camera can be controlled remotely by an external device or
control system, such as a control keyboard, using RS-485 half-duplex, RS-
422 full duplex or simplex serial communication signals. Connect terminals
Tx+, Tx- to Tx+(Rx+) and Tx-(Rx-) of the RS485 control system.
If control system is RS-422, connect Rx+(Tx+), Rx+(Tx-) and Rx+, Rx- of
the dome camera to Rx+, Rx- and Tx+, Tx- of the control device
respectively.
Alarm Inputs and
Outputs (4-pin)
Alarm Input (AL1 thru AL8 and GND): You can use up to 8 external
devices to trigger the dome camera to react to an event, such as a door that
has an alarm on it being opened. Mechanical or electrical switches can be
wired to the AL (Alarm In) and GND (Ground) connectors.
Alarm Output (NC/NO1 thru NC/NO4 and GND): The dome camera can
activate up to 4 external devices such as buzzers or lights upon motion
detection. GND is the common ground.
Refer to the Programming and Operation instructions for more information
on using these functions

REVO America
www.revoamerica.com
RESPTZ37-SERIES
18
C
Ca
am
me
er
ra
a
C
Co
on
nf
fi
ig
gu
ur
ra
at
ti
io
on
n
Now that the system is installed, your next step is to configure the camera for operation. These
instructions will guide you through optimizing the camera for use and setting it up for your
installation. You can customize the camera’s movements and many other functions using the
camera’s menu system. Please note that for most applications, the default settings that your
REVO America camera has will work just fine and should not require any further adjustment.
For the purposes of describing the commands and configurations available on the camera, all
commands and operation of the camera will be initiated using a REVO America keyboard
controller. This is the ideal setup and offers the greatest flexibility and ease of operation. However,
a REVO America DVR may also be used to control the camera, as well as non REVO America
keyboard controllers or DVRs, which may be used providing you set the protocols correctly. See
the Settings section. Refer to the applicable user manual to determine the equivalent command
keys on your device.
Getting Started
Once the system is fully connected, apply power. The DVR, camera and keyboard controller will
begin a boot up routine. This will take a few minutes. Once the system is fully powered up, you
should see the following.
001 AF AE
CAMERA VIDEO
DOMEID:001
ALARM:1W→360.0,090.0
ALARM DISPLAY
VIEW DIRECTION
PAN & TILT ANGLES
PRESET TITLE
AREA TITLE
FOCUS STATUS
EXPOSURE
STATUS
CAMERA TITLE
CAMERA ID
Table of contents
Other Revo Security Camera manuals

Revo
Revo REHXN0412-1 User manual

Revo
Revo ELITE RETRT2812-1 User manual

Revo
Revo RBULRJCAM User manual

Revo
Revo REHSPTZ30-1 User manual

Revo
Revo REHVDPTZ12-1 User manual

Revo
Revo REVDPTZ22-2 User manual

Revo
Revo RCPTS700-1 User manual

Revo
Revo Elite RESPTZ37-1 User manual

Revo
Revo RECBH36-1 User manual

Revo
Revo RECBP600-1 User manual

Revo
Revo REHB0309-1 User manual

Revo
Revo REVDM600-1 User manual

Revo
Revo RECBH0550-1 User manual

Revo
Revo RELPTZ22-1 User manual

Revo
Revo RCHB24-1 User manual

Revo
Revo REHVD0309-1 User manual

Revo
Revo REHVDPTZ12-1 User manual

Revo
Revo RETRT700-1 User manual

Revo
Revo RELPTZ22-3 Owner's manual

Revo
Revo RCBS20-1 User manual