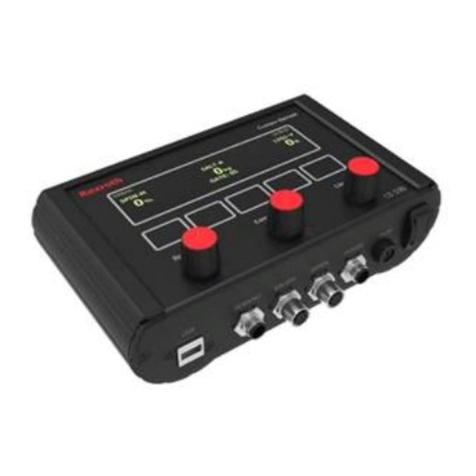
REXROTH CS 550i Use and care manual

CS 550i/150RC
Spreader and Joystick Controller Calibration Manual

2/44
Bosch Rexroth Canada ı May.2018 ı Revision 7.0
1
Operator Screen Layout
4
2
Programming Mode
5
3
Program Screen Layout
6
4
Changing Fields –Data Entry
7
5
Initial Set-up
8
6
Selectable Profile Set-up
9
6.1
Set-up
9
6.2
Selecting a profile
9
7
Ground Speed Calibration
10
8
Valve Nulling –Conveyor/Spinner/Prewet/Norm
11
8.1
Auto Nulling
11
8.2
Manual Nulling
12
9
Gate Calibration
13
10
10.1
10.2
11
Lane Calibration
Half Lane
One Lane
Material Calibration
13
13
14
15
12
Material Catch Test
17
13
Load Parameters
18
14
Advanced Features
20
15
GPS Options and WiFi Data Transfer
21
15.1
GPS-Passive GPS Tracking
21
15.2
AVL-Active Vehicle Locator
22
15.3
Wifi Setup
24
15.4
Wifi Data Transfer Program
27
16
Optional Modes and Operation
28
16.1
Pattern/Chute Mode
28
16.2
Air Gate Mode
29
16.3
Liquid+ Mode
29
16.4
Cross Conveyor
31
16.5
Spinner Reverse Mode
32
16.6
Spinner & Conveyor Reverse mode
32
16.7
Solid reduction for Prewet
33
16.8
Dedicated 3 Boom Anti-ice
34
17
Optional Modes and Operation - 550 Lite
35
17.1
Liquid –1 Boom Anti-icing
35
17.2
Liquid –Dedicated 3 Boom Anti-icing
36
18
Error Codes
36
19
Joystick Calibration
40
19.1
Joystick Solenoid Nulling
40
19.2
Joystick Emergency (Panic Button) –If Equipped
41

3/44
Bosch Rexroth Canada ı May.2018 ı Revision 7.0
Bosch Rexroth Canada Corp. reserves the right to revise this information at any time and for any
reason and reserves the right to make changes at any time, without notice or obligation, to any of the
information contained in this piece of literature. The information shown in this manual features the
latest version of software as of publication; therefore, some features shown will not exist on older
versions of software in use by some customers.
Please check for updates at: www.boschrexroth.ca/compu-spread
20
Joystick Min/Max/Emg Setup
41
21
Advanced Joystick Set-up
42
21.1
Power Float
42
21.2
Mode Names
42
22
CS-150 RC Standalone
43
22.1
Multi Axis Single Stick
44
22.2
Dual Sticks
44
23
Warning
44

4/44
Bosch Rexroth Canada ı May.2018 ı Revision 7.0
1Operator Screen Layout
SPNR
SALT - -
LIQUID1
Spinner Label
Spread Width %
Spinner Setpoint
Spinner Mode
Pause Button
Solid Name
Gate Mode/Solid Rate
Gate Position/Conv Set.
Conveyor Mode
Blast Button
Liquid Name
Liquid Rate
Liquid Setpoint
Liquid Mode
Reverse Button
Trip Summary
Toggle between Total and Spreading Distance (S)
Total Quantity
Total Prewet Volume
Total Anti-icing Volume

5/44
Bosch Rexroth Canada ı May.2018 ı Revision 7.0
2Programming Mode
All symbols on the right of the screen require a tap and hold for >1 second.
Note: A valid PROGRAMMING USB key must be on the USB port. The PROGRAMMING
USB key is for programming (v82 or newer), and the LOG DATA USB key is only for
retrieving data.
Press symbol to enter into programming mode.

6/44
Bosch Rexroth Canada ı May.2018 ı Revision 7.0
3Program Screen Layout
Note: Due to the compact nature of these screens, the use of a selection tool like a stylus is
recommended.

7/44
Bosch Rexroth Canada ı May.2018 ı Revision 7.0
4Changing Fields
Note: Due to the compact nature of these screens, the use of a selection tool like a stylus is
recommended.
When selecting an item without a pull-down selection menu, a keypad is required. This
keypad is used to enter text or numeric values. The example shown is “TRUCK-ID”.

8/44
Bosch Rexroth Canada ı May.2018 ı Revision 7.0
5Initial Set-up
1. Set the units to imperial (LBS/Mile) or metric (Kg/Km).
2. Set the TRUCK ID.
3. Set the REGION NAME.
4. Set the DRIVER ID (optional), 4 driver IDs allowed.
Note: Configuring 4th driver ID to ‘USER” enables operators to enter user defined driver
ID on operator screen.
5. Set the type of Temperature Sensor (optional).
6. Set the Options –see Advanced Features on page 14 (optional).
7. Set the items that the user has access to (optional).
8. Set Blast Timer, 0-timer disabled (optional). This should be set less than Err01 delay.
9. Set Percentage of Temp. compensation when there is a 3 degree change (optional).
10. Set the vehicle speed alarm (optional).
11. Select AVL or GPS tracking (optional).
12. Set WIFI/TIME/STYLUS (if required). Note: Save only applies to changes to
Date/Time/WiFi/Stylus.
The default error configuration values will work well for most applications, no changes
required.

9/44
Bosch Rexroth Canada ı May.2018 ı Revision 7.0
6Selectable Profiles
6.1 Set-up
Different profiles for the truck can be set up and saved for later use. Each profile can
have a unique name such as ‘Sander’ with its own settings and calibration. Warning:
truck must be wired to match different configurations, make sure wired properly before
changing.
1 Set Truck ID to ‘SETUP’
2 Enter a name for the profile in Region
3 Using the green selector arrow, set the 4th Driver ID to ‘USER’
4 Calibrate the system
5 Exit to Operator screen
6 Save the profile to USB
7 Repeat these steps to set up other profiles
8 Change both Truck ID and Region to the desired names that are different from all
the user configured profile names
6.2 Selecting a profile
1 Click on the Driver ID field on the Operator screen, keypad will pop up.
2 Enter the name of the profile needed such as ‘Sander’ or ‘Anti Ice’
3 Press ‘Enter’
4 REBOOT SYSTEM TWO TIMES for changes to take effect.
4th drivrID Set To ‘USER’
Truck ID Set To ‘SETUP’
USER defined PROFILE

10/44
Bosch Rexroth Canada ı May.2018 ı Revision 7.0
7Ground Speed Calibration
1. Select symbol to enter into the ground speed calibration screen.
2. Choose which calibration option best suits your situation.
3. Follow the instructions on the screen.
Driver ID
‘Enter’

11/44
Bosch Rexroth Canada ı May.2018 ı Revision 7.0
4. Press Start when the vehicle speed is steady. Note: Speed is best calibrated between
20-25 MPH for the best accuracy.
5. Once calibration is complete, verify the speed by driving the vehicle through its speed
range and verify if the controller matches the speedometer.
8 Valve Nulling –Conv/Spn/Prewet/Norm
1. Select symbol to enter into the calibration screen.
2. Select the appropriate mode:
Spinner –Auto, PPS, Manual (default), Half Lane, One Lane
Conveyor/Auger –Auto, Open LP, Man-Spd, Manual (default), SQM
Prewet –Off, Fixed, V-Flow (default), Manual, Manual-SPD, Return Oil
Gate –Manual (default), Read Back, Auto
Norm (Anti-icing) –Off (default), 1 Boom, 3 Boom, Manual %
3. Set correct conveyor sensor pulses/rev if Closed loop is selected.
4. Ensure the hopper is empty, and the truck is safe to operate.
5. Start the engine to achieve adequate oil flow.
If the Auto mode is selected for Conveyor, Auto mode for Spinner, V-Flow or Return Oil
mode for Prewet, and 1Boom or 3 Boom is selected for Norm (Anti-icing) it is strongly
recommended to run Auto Null. For manual mode please skip 6.1 and follow 6.2 Manual
Nulling instructions.
8.1 Auto Nulling
1. Press “Auto Null” to start. This procedure will automatically ramp up output to the
selected motor then ramp down again capturing the both “Min” and “Max” speed values

12/44
Bosch Rexroth Canada ı May.2018 ı Revision 7.0
and storing them as a saved calibration. Note: This feature can only be used with
motors with speed or flow feedback (i.e. Conveyor/ Auger, Prewet, Anti-icing, etc.).
2. Please check the “Min” null value to verify it is minimum. (Ex. 1,2,3 RPM)
8.2 Manual Nulling
1. Press “Min” value field to pop up the UP/DN arrows and enter into edit mode.
2. Use up and down arrows to adjust speed so that the motor just begins to turn
3. Press the “Min” value field again to end the edit mode and accept the value
4. Do the same for “Max” except adjust the motor to a safe maximum speed or until the
RRM readout stops to increase.
5. Forward Gain and Blast settings can also be adjusted
6. Repeat this procedure for all the vehicle motors (i.e. Conveyor/Auger, Spinner, Prewet,
Anti-icing, etc.).

13/44
Bosch Rexroth Canada ı May.2018 ı Revision 7.0
9Gate Calibration
1. Select the Gate tab.
2. Select the appropriate mode of gate operation :
Manual - Enter max height, and no further calibration required.
Read back - Press High value field to enter into edit mode
- Move the gate to its max opening
- Press High value field to end mode and save the value
- Repeat the same procedure for Low value
Note: A Gate Position Sensor required for Read back.
Auto - Press High value field to enter into edit mode
- Press Up/Down buttons to move the gate to max opening
- Press High value field to end mode and save the value
- Repeat the same procedure for Low value
Note: A gate cylinder with a position Sensor required.
10 Lane Calibration
Note: The conveyor and spinner motor sizes and flow rates should be chosen as to limit the
number of lanes the system can actually cover before lane calibration takes place.
10.1 Half Lane Calibration
1. Tap on the “valve” symbol and SPN tab to enter into spinner calibration.
2. Select “Half Lane” from the Mode dropdown.
3. Press “Lane Cal” Button.
4. Spinner will begin to output, and arrows will appear to allow you to increase/decrease
the speed. You may also turn the center knob to activate the conveyor.
5. Use the arrows to set the desired speed to spread material to half a lane width.

14/44
Bosch Rexroth Canada ı May.2018 ı Revision 7.0
6. Press “Lane Cal” again to save calibration, and turn off the conveyor if on.
10.2 One Lane Calibration
7. Tap on the “valve” symbol and SPN tab to enter into spinner calibration.
8. Select “One Lane” from the Mode dropdown.
9. Press “Lane Cal” Button.
10. Spinner will begin to output, and arrows will appear to allow you to increase/decrease
the speed. You may also turn the center knob to activate the conveyor.
11. Use the arrows to set the desired speed to spread material to one lane width.
12. Press “Lane Cal” again to save calibration, and turn off the conveyor if on.

15/44
Bosch Rexroth Canada ı May.2018 ı Revision 7.0
11 Material Calibration
Solid Material Calibration
13. Tap on the “valve”symbol and CONV tab to enter into solid calibration.
14. Place an adequate catch container under the spreader discharge chute.
15. Make sure that sufficient material in the hopper and the system is safe to run.
16. Set gate position:
Manual - Change CAL Gate to match actual gate position
Readback - Adjust actual gate position on the truck
Auto - Set to a desired gate position for calibration
17. Press “CALIBRATION” button to proceed.
18. Turn CONV Knob and/or SPN Knob to run.
19. Stop when desired amount is reached.
20. Weigh the material and enter the value.
21. Press “CALIBRATION” Button to complete.
Note: Press “STOP” button to stop the process anytime during calibration.

16/44
Bosch Rexroth Canada ı May.2018 ı Revision 7.0
Liquid Material Calibration (Prewet or Anti-icing)
1. Tap on symbol and PREWET/NORM tab to enter into liquid calibration.
2. Place an adequate catch container under the liquid spray nozzle.
3. Make sure that sufficient liquid in the tank and the system is safe to run.
4. Press “CALIBRATION” button to proceed.
5. Turn PREWET Knob to run.
6. Stop when desired amount is reached.
7. Measure the liquid volume and enter the value.
8. Press “CALIBRATION” Button to complete.

17/44
Bosch Rexroth Canada ı May.2018 ı Revision 7.0
12 Material Catch Test
1. Tap on symbol to enter into the material calibration screen.
2. Place an adequate catch container under the spreader discharge chute.
3. Press “CATCH TEST” button to start, and enter the desired rate, speed and duration
(seconds) using on-screen keypad.
4. Press “CATCH TEST” button to begin material dispensing (hydraulics must be active).
5. When dispensing is stopped, weigh the material and enter the value.
6. Press “CATCH TEST” button again to end.
7. A wt/rev will be calculated and displayed on the bottom right of the screen.
8. Repeat this procedure for all solid materials (use the green left and right arrows to
select material types).
9. Rates can be adjusted by tapping the rate and editing the value with the keypad.
10. These same procedures apply to pre-wet and liquid. Note: Granular spread rate is
defaulted to 2000 lbs/Mile.
Note: The material names can be changed by tapping on the text “SALT - -” and using the
keypad to edit.

18/44
Bosch Rexroth Canada ı May.2018 ı Revision 7.0
13 Load Parameters
The operation requires an USB PROGRAM key. It allows end users to load parameters
from an existing file on the USB stick.
1. Ensure an USB PROGRAM key inserted
2. Tap on USB symbol.
3. Select a file to load from the popup file window.
4. Click on the “Select” or “Cancel” button to select or cancel.
Then the popup file window would close, and red “Load” text shows up on the USB
symbol if a file is selected.
5. Tap on the Door Symbol to exit to the operation mode.
6. Turn the unit off, and on again for the new parameter to take effect.

19/44
Bosch Rexroth Canada ı May.2018 ı Revision 7.0
If a wrong file is selected (550 standard, 550 lite) an error message will pop up.
To check the parameter file loaded by clicking on the ‘gear’ icon when the truck is
stationary.

20/44
Bosch Rexroth Canada ı May.2018 ı Revision 7.0
14 Advanced Features
Tap on symbol to enter into the user calibration screen. This series of drop-down
menus allow the adjustment of special features of the 550 system.
System Reset –Press and hold the Reset button for 5 seconds.
WARNING: All parameters except WiFi/Stylus will be reset to factory defaults.
Temperature Sensors –Roadwatch, Surface Patrol, High Sierra
System Options –Normal, Pattern, Air Gate, Liquid+, Cross Conv, Spinner Reverse
,Conveyor Reverse
User Options –MATERIAL and or GATE (operators allowed to adjust
without a programming key).
Blast Timer –Blast turns off automatically when time out
Parameter file name loaded previously
This manual suits for next models
1
Table of contents
Other REXROTH Controllers manuals

REXROTH
REXROTH CS 520 Instruction sheet

REXROTH
REXROTH CS 550/150 Use and care manual

REXROTH
REXROTH EcoDrive 03 User manual

REXROTH
REXROTH VT-HACD-DPQ Series Instruction manual

REXROTH
REXROTH IndraDrive Fc FCS01 User manual

REXROTH
REXROTH IndraDrive M Technical manual

REXROTH
REXROTH IndraDrive C Series Technical manual

REXROTH
REXROTH HCS03 User manual

REXROTH
REXROTH VT-HACD-3-2 Series User manual
REXROTH
REXROTH IndraControl L25 Series Technical manual