Rf-t KAMOUFLAGE P User manual

www.rft.be
en
Rf-Technologies nv Lange Ambachtstraat 40 9860 Oosterzele Belgium Tel +32 9 362 31 71 Fax +32 9 362 33 07 [email protected]
C
la
p
ets cou
p
e-
f
eu et
Volets de désenfuma
g
e D.A.S.
Organisme Certi
f
icateur
AFNOR Certi
f
ication - www.marque-n
f
.co
m
V14-G 04/2017
KAMOUFLAGE P
Aesthetic smoke evacuation shutter for ceiling mounting.

2Table of content
Table of content
Declaration of performance 3
Product presentation KAMOUFLAGE P 4
Range and dimensions KAMOUFLAGE 1V P 4
Evolution - kits 5
Options - at the time of order 5
Storage and handling 6
Installation 6
Operation: manual opening 6
Operation: manual closing 6
Electrical connection 7, 15
Position in the shaft 8
Installation in horizontal shaft PROMATECT L500 with KAP mounting frame 9
Installation in horizontal shaft GEOFLAM (LIGHT) / GEOTEC with KAP mounting frame 10
Installation in horizontal shaft TECNIVER with KAP mounting frame 11
Installation in horizontal shaft GLASROC F V500 with KAP mounting frame 12
Installation in horizontal shaft DESENFIRE (HD) with KAP mounting frame 13
Finishing 14
Operation and mechanisms 15
Electrical connection 15
Weights 16
Selection graphs 17
Selection data 18
Sample order 19
Approvals and certificates 20
Explanation of the abbreviations and pictograms
Wn = nominal width
Hn = nominal height
Sn = free air passage
E = integrity
I = thermal insulation
S = smoke leakage
60/120 = fire resistance time
Pa = pascal
o -> i = meets the criteria from the outside
(o) to the inside (i)
i <-> o = fire side not important
AA = automatic activation
multi = multiple
1500 = pressure level 3 (1500Pa)
ved = vertical duct
hod = horizontal duct
V = volt
W = watt
V AC = Volt alternating current
V DC = Volt direct current
E.ALIM = power supply magnet
E.TELE = power supply motor
Auto = automatic
Tele = remote controlled
Pnom = nominal capacity
Pmax = maximum capacity
DAS MOD = modular product
OP = option (delivered with the product)
KIT = kit (delivered separately for repair or
upgrade)
PG = connection flange to the duct
GKB (type A) / GKF (type F): "GKB" stands
for standard plasterboards (type A accor-
ding to EN 520) while "GKF" plasterboards
offer a higher fire resistance for a similar
plate thickness (type F according to EN
520)
Cal-Sil = calcium silicate
ζ [-] = pressure loss coefficient
Q = air flow
∆P = static pressure drop
v = air speed in the duct
Lwa = A-weighted sound power level
ME = motorised
H = habitat
aesthetic solution optimal acoustic performance
optimal free air passage and minimal pressure loss
-
superior air tightness (tested at 1500 Pa)
intermediate dimensions on request
Janus 2012
winner of the French "Janus de l'Industrie" award 2012

3
Declaration of performance
F-12/2016CE_DoP_Rf-t_V14_EN
DECLARATION OF PERFORMANCE
Declarationofperformance
CE_DoP_Rf-t_V14_EN
F-12/2016
1. Unique identication code of the product-type: KAMOUFLAGE P
2. Intended use/es: Smoke evacuation shutter to be used in smoke control systems, in multi-compartment applications at re temperatures, or in single-compartment applications.
3. Manufacturer: Rf-Technologies NV, Lange Ambachtstraat 40, B-9860 Oosterzele
4. System/s of AVCP: System 1
5. Harmonised standard / European Assessment Document; notied body / European
Technical Assessment, Technical Assessment Body, notied body; certicate of
constancy of performance:
EN 12101-8:2011, Efectis with identication number 1812; 1812_CPR_1043
6. Declared performance according to EN 12101-8:2011 (re resistance according to EN 1366-10, classication according to EN 13501-4)
Essential characteristics Performance
Range Product Wall type Wall Installation Classication
350x385 mm ≤ Kamouage
P 1V ≤ 700x775 mm;
550x1075 mm
Kamouage 60 P Shaft Promatect L500 ≥ 30mm 1 EI 60 (hod i no) S 1500 AA multi
Geoam ≥ 30mm 1 EI 60 (hod i no) S 1500 AA multi
Geotec ≥ 30mm 1 EI 60 (hod i no) S 1500 AA multi
Tecniver ≥ 35mm 1 EI 60 (hod i no) S 1500 AA multi
Glasroc F V500 ≥ 35mm 1 EI 60 (hod i no) S 1500 AA multi
Kamouage 120 P Shaft Promatect L500 ≥ 50mm 1 EI 120 (hod i no) S 1500 AA multi
Geoam ≥ 45mm 1 EI 120 (hod i no) S 1500 AA multi
Geoam Light ≥ 35mm 1 EI 120 (hod i no) S 1500 AA multi
Geotec ≥ 45mm 1 EI 120 (hod i no) S 1500 AA multi
Tecniver ≥ 50mm 1 EI 120 (hod i no) S 1500 AA multi
Glasroc F V500 ≥ 50mm 1 EI 120 (hod i no) S 1500 AA multi
Desenre HD ≥ 35mm 1 EI 120 (hod i no) S 1500 AA multi
Desenre ≥ 45mm 1 EI 120 (hod i no) S 1500 AA multi
1 Type of installation: shaft-mounted 0/90°/180°/270°
Nominal activation conditions/sensitivity: Pass - automatic activation
Response delay (response time): closure time Pass - automatic activation
Operational reliability: cycling 300 cycles (no load)
Durability of response delay: Pass
Durability of operational reliability: Pass
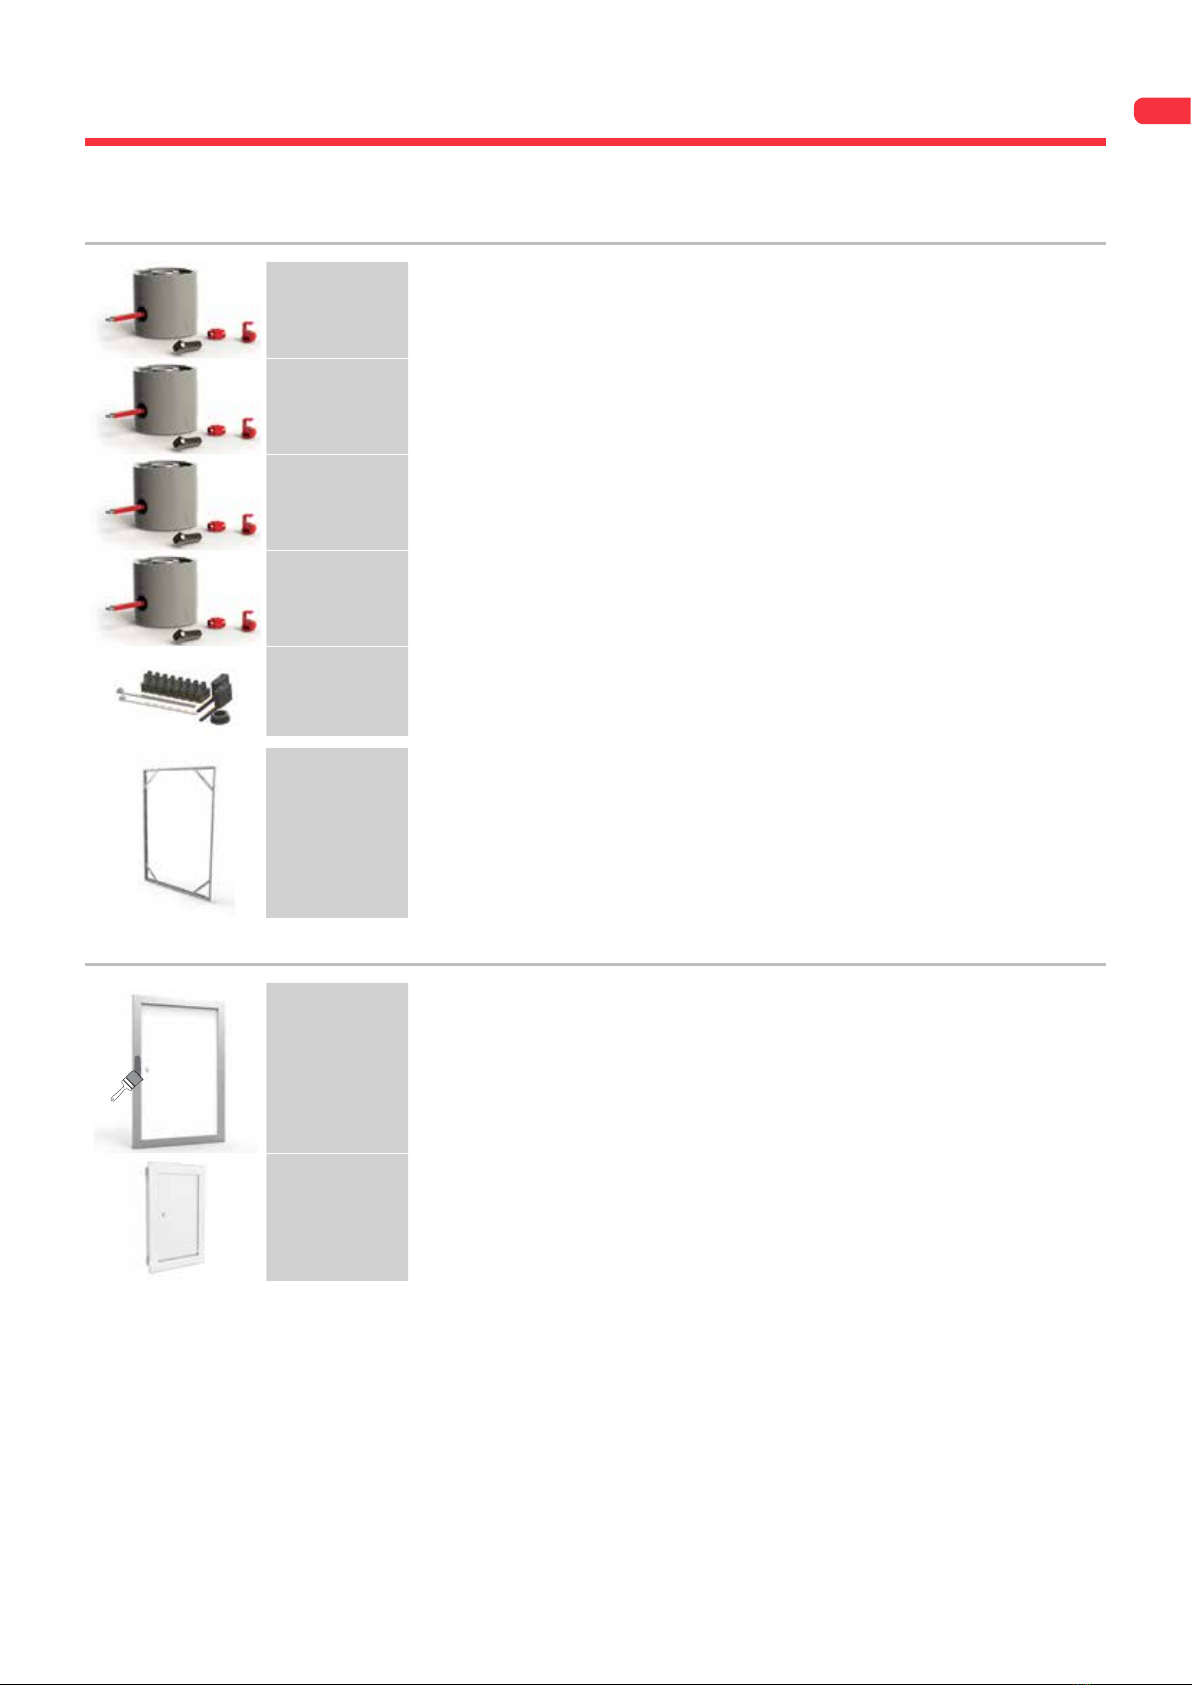
Approved accessories
Acrylic paint on the leaf and synthetic paint
on the frame on the side not exposed to re;
Glued wall paper on the side not exposed to
re; ATOUT RAL 9010; KAP mounting frame
High operational temperature (HOT 400/30): NPD (no performance determined)
Harmonised standard
EN 12101-8:2011
The performance of the product identied above is in conformity with the set of declared performance/s.This declaration of
performance is issued, in accordance with Regulation (EU) No 305/2011, under the sole responsibility of the manufacturer identi-
ed above.
Signed for and on behalf of the manufacturer by:
Frank Verlinden, Product Manager
Oosterzele, 12/2016

4Product presentation KAMOUFLAGE P
Product presentation KAMOUFLAGE P
Aesthetic smoke evacuation shutter suitable for ceiling mounting into the bottom of smoke shafts.
Smoke evacuation shutters and dampers are suitable for use in ventilating protected lobbies, venting to shafts either naturally or
mechanically. They open to evacuate smoke in emergency situations whilst maintaining fire resistant integrity in standby position.
5aesthetic solution
5modern look: either select the ready-to-install product with
white laquered finish, or cover with paint or wallpaper
5superior air tightness (tested at 1500 Pa)
5thermal and acoustic insulation
5optimal free air passage and minimal pressure loss
5frame available with primer
∎tested according to EN 1366-10
∎compliant with EN 12101-8
∎approved for installation in calcium-silicate, ‘Staff’, Tecniver and
Glasroc shafts
∎maintenance-free
∎for indoor use
∎winner of the French “Janus de l’Industrie” award 2012
∎intermediate dimensions on request
-Janus 2012
1. 1 shutter (1V)
2. frame in anodised aluminium / with primer (PRIM) / white
laquered (ATOUT RAL9010)
3. lock + key
4. connection compartement
5. blocking mechanism + automatic locking at 90°
6. product identification
7. gas spring (ceiling version)
4
7
6
3
1
5
2
Range and dimensions KAMOUFLAGE 1V P
1. Refractory material
2. Sealing mounting frame
3. KAP mounting frame (mandatory option)
4. Nominal dimensions shutter Wn x Hn
5. Built-in dimensions with KAP mounting frame (Wn+20) x (Hn+20)mm
6. Overall (outside) dimensions of the shutter (Wn+54) x (Hn+54)mm
2
1
3
92mm
≥
105mm
10mm
4
5
6
Wn+ 52mm
≥ ≤
(Wn x Hn)
mm 350x385 600x1045

5
Evolution - kits
Evolution - kits
KITS VD24-VA Natural magnet 24 V DC
KITS VD48-VA Natural magnet 48 V DC
KITS VM24-VA Electromagnet 24 V DC (not applicable for ME model)
KITS VM48-VA Electromagnet 48 V DC (not applicable for ME model)
KITS FDC-VA End and begin of range switch
KAP Mounting frame (delivered separately)
Options - at the time of order
PRIM Frame available with primer
ATOUT RAL9010 Frame painted white and shutter covered with white metallic sheet (RAL 9010 mat)

6Storage and handling
Storage and handling
As this product is a safety element, it should be stored and handled with care.
Avoid:
• any kind of impact or damage
• contact with water
• deformation of the casing
It is recommended:
• to unload in a dry area
• not to flip or roll the product to move it
• not to use the damper as a scaffold, working table, etc.
• not to store smaller dampers inside larger ones
Installation
General points
∎The installation must comply with the installation manual delivered with the product and the classification report.
∎The installation of the shaft must comply with the classification report delivered by the manufacturer.
∎Axis orientation: see the declaration of performance.
∎Avoid obstruction of adjoining ducts.
∎Verify if the blade can move freely.
∎Rf-t smoke dampers may be applied to ducts that have been tested according to EN 1366-8 and EN 1366-9 as appropriate, con-
structed from similar materials with a fire resistance, thickness and density equal or superior to these of the tested materials.
Caution: when fitting, the product should be handled with care and remain protected from any sealing products.
Caution: before putting the installation into operation, clean off all the dust and dirt.
Caution: bear in mind the blade's clearance inside the smoke evacuation duct.
Operation: manual opening
1
2
1. Unlocking 1V
Remove the finishing cap from the shutter. To do this, use the
hook with key ring that is delivered with the product. You may
attach this tool to the key through its handy key ring.
20°
20°
2. Insert the key in the lock. Turn the key 20° anti-clockwise: the
shutter opens. Remove the key from the lock.
Operation: manual closing
1 2

7
Installation
1
2
1. Resetting 1V
Remove the finishing cap from the shutter. To do this, use the
hook with key ring that is delivered with the product. You may
attach this tool to the key through its handy key ring.
35°
2. Insert the key in the lock. Turn the key 35° clockwise, the key
gets blocked in the lock.
3. Press on the blocking devices.
Close the shutter by pulling at the key.
Turn the key 15° counter clock wise, the key unblocks from the
lock. Withdraw the key.
Electrical connection
1. You can thead the cable for the power supply through the 2
corners of the shutter, on the hinges' side.
2. Drill a hole in the refractory material at the chosen corner(s).
The galvanised part at the inside of the shutter is already
indented.
Caution: after passing and fixing the cables, it is necessary
to seal the drilled hole in the refractory around the electrical
supply with fire resistant adhesive sealant (BCM f.e.).
1 2
3
1 2

8Installation
3. Pierce an opening in the connection box. Affix the grommet
delivered with the product.
1
2
2
3
4
4. Lead the cables through the opening. Use the protective
sleeve (1), the fixation clips (2) and the plastic cable clamp (3) to
attach the cables to the frame. Lead the cables to the connecti-
on box through the grommet (4) and connect according to the
electrical connection diagram.
Comply with the installation rules according to article 6.1 of NF
S 61-932.
Position in the shaft
≥105
Kamouflage P KAP
1. The shutter is affixed to the smoke evacuation shaft through
a sleeve. That sleeve can be indifferently installed: in the shaft,
in the axis of the shaft or outside the shaft (or shaft extension).
≥105
Kamouflage P KAP
Kamouflage P KAP
≥105
3 4
1 2
3

9
Installation
Installation in horizontal shaft PROMATECT L500 with KAP mounting frame
The product was tested and approved in:
Product Range Wall type Classication
Kamouage 60 P 350x385 mm ≤ Kamouage P 1V ≤ 700x775 mm;
550x1075 mm
Shaft Promatect L500 ≥ 30mm EI 60 (hod i no) S 1500 AA multi
Kamouage 120 P Shaft Promatect L500 ≥ 50mm EI 120 (hod i no) S 1500 AA multi
1. Make an opening with dimensions (W+A) x (H+A) mm. A = 2
x thickness sleeve (e) + 20 mm.
Fit a sleeve of the same type and thickness of the duct (thick-
ness e) of 105 mm deep in the opening.
Assemble the sleeve with staples and affix the assembled
sleeve to the shaft wall with staples.
Coat the edges of the opening with adhesive plaster type
Promacol S.
Screw the KAP mounting frame with chipboard screw (6 x e)
mm to the sleeve. On each fitting, 2 sealing lugs are provided,
which must be opened out when sealing. Sea the mounting
framel with Promacol S taking care not to misshape it. The
finished opening must be the same size as the mounting frame
(W+10) x (H+10) mm.
2. Unscrew the 4 cross beams of the KAP mounting frame and
fold the 8 plates in the frame.
e
e
A = 2 x e + 20 mm
KAMOUFLAGE
KAP
(W+A) x (H+A) mm
3. Position and open the shutter in the mounting frame. If VM
magnet: remove the key from the lock to open the shutter.
Don’t use the bolts delivered with the mounting frame, but use
the ones delivered with the shutter (M6x50).
Caution: make sure that the screws don’t exceed the sleeve’s
thickness!
Connect the mechanism according to the wiring diagram.
Check the mobility of the shutter.
1 2
3

10 Installation
Installation in horizontal shaft GEOFLAM (LIGHT) / GEOTEC with KAP mounting frame
The product was tested and approved in:
Product Range Wall type Classication
Kamouage 60 P
350x385 mm ≤ Kamouage P
1V ≤ 700x775 mm; 550x1075
mm
Shaft Geoam ≥ 30mm EI 60 (hod i no) S 1500 AA multi
Kamouage 120 P Shaft Geoam ≥ 45mm EI 120 (hod i no) S 1500 AA multi
Kamouage 60 P Shaft Geotec ≥ 30mm EI 60 (hod i no) S 1500 AA multi
Kamouage 120 P Shaft Geoam Light ≥ 35mm EI 120 (hod i no) S 1500 AA multi
Kamouage 120 P Shaft Geotec ≥ 45mm EI 120 (hod i no) S 1500 AA multi
1. Make an opening with dimensions (W+A) x (H+A) mm. A = 2
x thickness sleeve (e) + 20 mm.
Coat the edges of the opening with adhesive plaster type PLA-
COL (in case of Geoflam) or GEOCOL (S) (in case of Geotec).
Fit a sleeve of the same type and thickness of the duct (thick-
ness e) of 105 mm deep in the opening.
In case of Geotec you can also assemble the sleeve with glue
and screws D5 x (2 x e) mm and affix the assembled sleeve to
the shaft wall with glue and screws D5 x (2 x e) mm every 100
mm.
Seal the joints between uprights and cross pieces and between
the lining and the wall with vegetable fibre caulking and plas-
ter or with GEOCOL (S) (in case of Geotec).
Before sealing the mounting frame, open the 2 sealing lugs
provided on each fitting. Caulk the KAP mounting frame to the
duct with vegetable fibre or (in case of Geotec) you can also
coat the opening with Geocol (S) and fasten the KAP mounting
frame with screws of D5 x e mm in steps of 100 mm. Take care
not to misshape the frame. The finished opening must be the
same size as the mounting frame (W+10) x (H+10) mm.
2. Unscrew the 4 cross beams of the KAP mounting frame and
fold the 8 plates in the frame.
e
e
A = 2 x e + 20 mm
KAMOUFLAGE
KAP
(W+A) x (H+A) mm
3. Position and open the shutter in the mounting frame. If VM
magnet: remove the key from the lock to open the shutter.
Don’t use the bolts delivered with the mounting frame, but use
the ones delivered with the shutter (M6x50).
Caution: make sure that the screws don’t exceed the sleeve’s
thickness!
Connect the mechanism according to the wiring diagram.
Check the mobility of the shutter.
1 2
3

11
Installation
Installation in horizontal shaft TECNIVER with KAP mounting frame
The product was tested and approved in:
Product Range Wall type Classication
Kamouage 60 P 350x385 mm ≤ Kamouage P 1V
≤ 700x775 mm; 550x1075 mm
Shaft Tecniver ≥ 35mm EI 60 (hod i no) S 1500 AA multi
Kamouage 120 P Shaft Tecniver ≥ 50mm EI 120 (hod i no) S 1500 AA multi
1. Make an opening with dimensions (W+A) x (H+A) mm. A = 2
x thickness sleeve (e) + 20 mm.
Put glue CF GLUE on the edges of the opening and the uprights
and cross pieces.
Fit a sleeve of the same type and thickness of the duct (thick-
ness e) of 105 mm deep in the opening.
Put glue type CF GLUE on the uprights and cross pieces and
between the lining and the wall. Screw the sleeve using chip-
board screws Ø5 x 70mm at 150 mm intervals.
Before sealing the mounting frame, open the 2 sealing lugs
provided on each fitting. First coat the opening with glue CF
GLUE. Glue the KAP mounting frame to the lining taking care
not to misshape it. The finished opening must be the same size
as the mounting frame (W+10) x (H+10) mm.
2. Unscrew the 4 cross beams of the KAP mounting frame and
fold the 8 plates in the frame.
e
e
A = 2 x e + 20 mm
KAMOUFLAGE
KAP
(W+A) x (H+A) mm
3. Position and open the shutter in the mounting frame. If VM
magnet: remove the key from the lock to open the shutter.
Don’t use the bolts delivered with the mounting frame, but use
the ones delivered with the shutter (M6x50).
Caution: make sure that the screws don’t exceed the sleeve’s
thickness!
Connect the mechanism according to the wiring diagram.
Check the mobility of the shutter.
1 2
3

12 Installation
Installation in horizontal shaft GLASROC F V500 with KAP mounting frame
The product was tested and approved in:
Product Range Wall type Classication
Kamouage 60 P 350x385 mm ≤ Kamouage P 1V
≤ 700x775 mm; 550x1075 mm
Shaft Glasroc F V500 ≥ 35mm EI 60 (hod i no) S 1500 AA multi
Kamouage 120 P Shaft Glasroc F V500 ≥ 50mm EI 120 (hod i no) S 1500 AA multi
1. Make an opening with dimensions (W+A) x (H+A) mm. A = 2
x thickness sleeve (e) + 20 mm.
Put glue GLASROC F V500 on the edges of the opening and the
uprights and cross pieces.
Fit a sleeve of the same type and thickness of the duct (thick-
ness e) of 105 mm deep in the opening.
Put glue type GLASROC F V500 on the uprights and cross pieces
and between the lining and the wall. Screw the sleeve using
chipboard screws Ø5 x 70 mm at 150 mm intervals.
Before sealing the mounting frame, open the 2 sealing lugs
provided on each fitting. First coat the opening with glue
GLASROC F V500. Glue the KAP mounting frame to the lining
taking care not to misshape it. The finished opening must be
the same size as the mounting frame (W+10) x (H+10) mm.
2. Unscrew the 4 cross beams of the KAP mounting frame and
fold the 8 plates in the frame.
e
e
A = 2 x e + 20 mm
KAMOUFLAGE
KAP
(W+A) x (H+A) mm
3. Position and open the shutter in the mounting frame. If VM
magnet: remove the key from the lock to open the shutter.
Don’t use the bolts delivered with the mounting frame, but use
the ones delivered with the shutter (M6x50).
Caution: make sure that the screws don’t exceed the sleeve’s
thickness!
Connect the mechanism according to the wiring diagram.
Check the mobility of the shutter.
1 2
3

13
Installation
Installation in horizontal shaft DESENFIRE (HD) with KAP mounting frame
The product was tested and approved in:
Product Range Wall type Classication
Kamouage 120 P 350x385 mm ≤ Kamouage P
1V ≤ 700x775 mm; 550x1075
mm
Shaft Desenre HD ≥ 35mm EI 120 (hod i no) S 1500 AA multi
Kamouage 120 P Shaft Desenre ≥ 45mm EI 120 (hod i no) S 1500 AA multi
1. Make an opening with dimensions (W+A) x (H+A) mm. A = 2
x thickness sleeve (e) + 20 mm.
Coat the edges of the opening with adhesive plaster, type
FACILIS.
Fit a sleeve of the same type and thickness of the duct (thick-
ness e) of 105 mm deep in the opening.
Seal the joints between uprights and cross pieces and bet-
ween the lining and the wall with vegetable fibre caulking and
plaster.
Before sealing the mounting frame, open the 2 sealing lugs
provided on each fitting. Caulk the KAP mounting frame to the
duct with vegetable fibre and taking care not to misshape it.
The finished opening must be the same size as the mounting
frame (W+10) x (H+10) mm.
2. Unscrew the 4 cross beams of the KAP mounting frame and
fold the 8 plates in the frame.
e
e
A = 2 x e + 20 mm
KAMOUFLAGE
KAP
(W+A) x (H+A) mm
3. Position and open the shutter in the mounting frame. If VM
magnet: remove the key from the lock to open the shutter.
Don’t use the bolts delivered with the mounting frame, but use
the ones delivered with the shutter (M6x50).
Caution: make sure that the screws don’t exceed the sleeve’s
thickness!
Connect the mechanism according to the wiring diagram.
Check the mobility of the shutter.
1 2
3

14 Installation
Finishing
1. The upper face of the shutter consists of a sheet of plaster-
board, which you can decorate to match the wall in which the
shutter is installed (paint or wallpaper).
Covering plate of plasterboard: fill the holes of the screws with
a suitable filler. Let it dry and sand. Apply a primer paint suita-
ble for plasterboard.
Profile of anodised aluminium: apply a primer suitable for me-
tal. With the option PRIM, the frame is already prepared with a
primer, ready to be painted.
Caution : don't fill / cover the joint between the covering plate
and the aluminium profile in order to guarantee that the shut-
ter can open.
Maintenance
∎No specific maintenance required.
∎Schedule at least two running checks each year.
∎Remove dust and all other particles before start-up.
∎Follow the local maintenance regulations (i.e. BS9999 Annex V; NF S 61-933) and EN13306.
1

15
Operation and mechanisms
Operation: general points
∎See under 'Installation'. View also the video on our website: www.rft.be (product: Kamouflage, menu: Installation).
Caution : please note dampers must be fully open before starting supply and/or extract fans.
VA MEC Remote controlled unlocking by a magnet.
Remote controlled unlocking by an electric impulse (VD) or by interruption (VM) of the magnet's power supply.
Options - at the time of order
VD24 Natural magnet 24 V DC
VD48 Natural magnet 48 V DC
VM24 Electromagnet 24 V DC
VM48 Electromagnet 48 V DC
FDCU Unipolar beginning and end of range switch (incl.)
FDCB Bipolar beginning and end of range switch
Unlocking
∎manual unlocking: with the key
∎automatic unlocking: n/a
∎remote unlocking: by electrical impulse (VD) or interruption (VM) of current to the magnet.
Resetting
∎manual resetting: with the key
Electrical connection
VA MEC
FCU
121110
DCB
NONFC
15 161413
FCB
NONFC
987
56
DCU
NONFCNONFC
1
-
+
2
24 V DC
48 V DC
MEC Nominal voltage
motor
Nominal voltage
magnet
Power consumption
(stand-by)
Power consumption
(operating) standard switches Protection class
VA MEC N/A 24/48 V DC VM: 1,5W / VD: - VM: - / VD: 3,5W 1mA...6A, DC 5V...AC 250V IP 42

16 Weights
Weights
KAMOUFLAGE 1V P
Hn\Wn [mm] 350 400 450 500 550 600 650 700
385 kg 10,77 11,03 11,29 11,95 12,60 13,49 14,37
415 kg 11,47 12,09 12,70 13,31 13,93 14,54 15,15
445 kg 10,90 11,67 12,44 13,20 13,97 14,74 19,03 19,80
475 kg 11,22 12,02 12,81 13,61 14,40 15,19 19,51 20,31
505 kg 11,55 12,37 13,19 14,01 14,83 15,65 20,00 20,82
535 kg 12,27 13,20 14,13 15,06 15,99 20,45 21,38 22,31
565 kg 12,59 13,54 14,49 15,45 16,40 20,88 21,83 22,79
595 kg 13,03 13,99 14,94 15,90 16,86 21,34 22,30 23,26
625 kg 13,64 14,46 15,28 16,03 17,24 21,76 22,75 23,73
655 kg 13,93 14,77 15,61 16,37 21,16 22,18 23,20 24,20
685 kg 14,22 15,08 15,95 16,70 21,55 22,60 23,65 24,67
715 kg 14,11 15,19 16,28 17,04 21,93 23,02 24,10 26,34
745 kg 14,39 15,50 16,62 17,37 22,32 23,44 24,56 26,82
775 kg 14,68 15,81 16,95 21,24 22,71 23,86 25,01 27,31
805 kg 14,96 16,12 17,29 21,57 23,09 24,27 25,46
835 kg 15,25 16,43 17,62 21,91 23,48 24,69 25,91
865 kg 15,53 16,74 17,96 22,24 23,87 25,11 26,36
895 kg 17,64 18,65 19,66 23,94 24,25 25,53 26,81
925 kg 18,02 19,07 23,65 24,41 24,64 25,95
955 kg 18,38 19,46 24,06 24,83 25,03 26,37
985 kg 18,80 19,89 24,51 25,28 25,41 26,79
1015 kg 19,22 20,33 24,97 25,74 25,80 27,21
1045 kg 19,65 20,77 25,43 26,19 26,19 27,62
1075 kg 20,06 21,19 25,86 26,62 29,24

17
Selection graphs
ATOUT RAL9010
Hn\Wn [mm] 350 400 450 500 550 600 650
385 kg 0,4 0,4 0,5 0,5 0,6 0,7 0,7
415 kg 0,4 0,5 0,5 0,6 0,7 0,7 0,8
445 kg 0,4 0,5 0,6 0,6 0,7 0,8 0,9 0,9
475 kg 0,5 0,5 0,6 0,7 0,8 0,9 0,9 1,0
505 kg 0,5 0,6 0,7 0,7 0,8 0,9 1,0 1,1
535 kg 0,5 0,6 0,7 0,8 0,9 1,0 1,1 1,2
565 kg 0,6 0,7 0,8 0,8 0,9 1,0 1,1 1,2
595 kg 0,6 0,7 0,8 0,9 1,0 1,1 1,2 1,3
625 kg 0,6 0,7 0,8 1,0 1,1 1,2 1,3 1,4
655 kg 0,7 0,8 0,9 1,0 1,1 1,2 1,3 1,5
685 kg 0,7 0,8 0,9 1,1 1,2 1,3 1,4 1,5
715 kg 0,7 0,9 1,0 1,1 1,2 1,4 1,5 1,6
745 kg 0,8 0,9 1,0 1,2 1,3 1,4 1,6
775 kg 0,8 0,9 1,1 1,2 1,3 1,5 1,6
805 kg 0,8 1,0 1,1 1,3 1,4 1,5 1,7
835 kg 0,9 1,0 1,2 1,3 1,5 1,6 1,8
865 kg 0,9 1,0 1,2 1,4 1,5 1,7
895 kg 0,9 1,1 1,2 1,4 1,6 1,7
925 kg 1,0 1,1 1,3 1,5 1,6 1,8
955 kg 1,0 1,2 1,3 1,5 1,7 1,9
985 kg 1,0 1,2 1,4 1,6 1,7 1,9
1015 kg 1,1 1,2 1,4 1,6 1,8
1045 kg 1,1 1,3 1,5 1,7 1,9
1075 kg 1,1 1,3 1,5 1,7 1,9

18 Selection data
Selection graphs
Kamouage 1V
v [m/s]
p[Pa]
300 350 400 450 500 550 600650 700
385
415
445
475
505
535
565
595
625
655
685
715
745
775
805
835
865
895
925
955
985
1015
1045
1075
2001 2 3 4 5 6 7 10 20 30 40 60 80 100 160
3
2
4 65 7 8 9 10 11 12
Wn[mm]
Hn[mm]
KAMOUFLAGE 1V P
∆p = 0,6 x v² x ζ
Hn\Wn [mm] 350 400 450 500 550 600 650
385 ζ [-] 3,603 2,960 2,518 2,196 1,950 1,757 1,600
415 ζ [-] 3,237 2,663 2,267 1,978 1,758 1,585 1,444
445 ζ [-] 2,940 2,422 2,064 1,802 1,602 1,445 1,317 1,212
475 ζ [-] 2,696 2,222 1,895 1,656 1,473 1,329 1,212 1,115
505 ζ [-] 2,491 2,055 1,754 1,533 1,364 1,231 1,123 1,033
535 ζ [-] 2,316 1,913 1,633 1,428 1,271 1,147 1,047 0,963
565 ζ [-] 2,166 1,790 1,529 1,337 1,191 1,075 0,981 0,903
595 ζ [-] 2,035 1,683 1,438 1,258 1,121 1,012 0,923 0,850
625 ζ [-] 1,920 1,588 1,358 1,189 1,059 0,956 0,873 0,804
655 ζ [-] 1,818 1,505 1,287 1,127 1,004 0,907 0,828 0,762
685 ζ [-] 1,728 1,430 1,223 1,071 0,955 0,862 0,787 0,725
715 ζ [-] 1,646 1,363 1,166 1,022 0,911 0,823 0,751 0,692
745 ζ [-] 1,572 1,303 1,115 0,977 0,871 0,787 0,718 0,662
775 ζ [-] 1,506 1,248 1,068 0,936 0,834 0,754 0,689 0,634
805 ζ [-] 1,445 1,198 1,025 0,899 0,801 0,724 0,661
835 ζ [-] 1,389 1,152 0,986 0,864 0,771 0,697 0,636
865 ζ [-] 1,338 1,109 0,950 0,833 0,743 0,671 0,613
895 ζ [-] 1,290 1,070 0,917 0,804 0,717 0,648 0,592
925 ζ [-] 1,246 1,034 0,886 0,777 0,693 0,626
955 ζ [-] 1,206 1,001 0,857 0,752 0,671 0,606
985 ζ [-] 1,168 0,969 0,831 0,728 0,650 0,588
1015 ζ [-] 1,132 0,940 0,806 0,707 0,630 0,570
1045 ζ [-] 1,099 0,913 0,782 0,686 0,612 0,554
1075 ζ [-] 1,068 0,887 0,760 0,667 0,595

19
Sample order
Selection data
KAMOUFLAGE 1V P - free air passage
Hn\Wn [mm] 350 400 450 500 550 600 650
385 Sn [m²] 0,1160 0,1340 0,1520 0,1700 0,1880 0,2060 0,2240
415 Sn [m²] 0,1260 0,1450 0,1650 0,1840 0,2040 0,2230 0,2430
445 Sn [m²] 0,1360 0,1570 0,1780 0,1990 0,2200 0,2410 0,2610 0,2820
475 Sn [m²] 0,1450 0,1680 0,1900 0,2130 0,2350 0,2580 0,2800 0,3030
505 Sn [m²] 0,1550 0,1790 0,2030 0,2270 0,2510 0,2750 0,2990 0,3230
535 Sn [m²] 0,1650 0,1900 0,2160 0,2410 0,2670 0,2920 0,3180 0,3430
565 Sn [m²] 0,1750 0,2020 0,2290 0,2550 0,2820 0,3090 0,3360 0,3630
595 Sn [m²] 0,1840 0,2130 0,2410 0,2700 0,2980 0,3270 0,3550 0,3840
625 Sn [m²] 0,1940 0,2240 0,2540 0,2840 0,3140 0,3440 0,3740 0,4040
655 Sn [m²] 0,2040 0,2350 0,2670 0,2980 0,3300 0,3610 0,3920 0,4240
685 Sn [m²] 0,2140 0,2460 0,2790 0,3120 0,3450 0,3780 0,4110 0,4440
715 Sn [m²] 0,2230 0,2580 0,2920 0,3270 0,3610 0,3950 0,4300 0,4640
745 Sn [m²] 0,2330 0,2690 0,3050 0,3410 0,3770 0,4130 0,4490 0,4850
775 Sn [m²] 0,2430 0,2800 0,3180 0,3550 0,3920 0,4300 0,4670 0,5050
805 Sn [m²] 0,2520 0,2910 0,3300 0,3690 0,4080 0,4470 0,4860
835 Sn [m²] 0,2620 0,3030 0,3430 0,3830 0,4240 0,4640 0,5050
865 Sn [m²] 0,2720 0,3140 0,3560 0,3980 0,4400 0,4820 0,5240
895 Sn [m²] 0,2820 0,3250 0,3680 0,4120 0,4550 0,4990 0,5420
925 Sn [m²] 0,2910 0,3360 0,3810 0,4260 0,4710 0,5160
955 Sn [m²] 0,3010 0,3470 0,3940 0,4400 0,4870 0,5330
985 Sn [m²] 0,3110 0,3590 0,4070 0,4550 0,5030 0,5500
1015 Sn [m²] 0,3200 0,3700 0,4190 0,4690 0,5180 0,5680
1045 Sn [m²] 0,3300 0,3810 0,4320 0,4830 0,5340 0,5850
1075 Sn [m²] 0,3400 0,3920 0,4450 0,4970 0,5500
Sample order
KAMOUFLAGE P 1V 120 400 685 VD24 FDCB ATOUT RAL 9010
52 3 4 61 7 8
1. product
2. 1 shutter (1V)
3. fire resistance of 60 or 120 minutes
4. width
5. height
6. option: type magnet and voltage
7. option: bipolar end of range switch (FDCU included)
8. option: frame painted white, shutter covered with white metallic sheet

20 Approvals and certicates
Approvals and certicates
All our products are submitted to a number of tests by official test institutes. Reports of these tests form the basis for the approvals of
the products.
1812_CPR_1043
C
la
p
ets cou
p
e-
f
eu et
Volets de désenfuma
g
e D.A.S.
Organisme Certi
f
icateur
AFNOR Certi
f
ication - www.marque-n
f
.co
m
05.23
The NF-label guarantees: conformity with the standard NF S 61-937 Parts 1 and 10: “Systèmes de Sécurité Incendie Dispositifs
Actionnés de Sécurité”; conformity with the national decree of March 22, 2004, changed on 14 March 2011 for the classification of
fire resistance; the values of the characteristics mentioned in this document. Organisme Certificateur: AFNOR Certification, 11 Rue
Francis de Pressensé, F93571 La Plaine Saint-Denis Cedex; Website: http://www.afnor.org http://www.marque-nf.com; Phone: +33
If the product is manipulated in any other way than described in this manual, Rf-Technologies will decline any responsibility and the guarantee will expire!
Other manuals for KAMOUFLAGE P
1
Table of contents
Other Rf-t Safety Equipment manuals
Popular Safety Equipment manuals by other brands

Falltech
Falltech 7324 User instruction manual

TEUFELBERGER
TEUFELBERGER hipSTAR FLEX 12,7mm Manufacturer's information and instructions for use

Finsterwalder
Finsterwalder Paralock 3 instruction manual

Petzl
Petzl CHEST'AIR TECHNICAL NOTICE

Camp Safety
Camp Safety GIANT manual

E2S
E2S GNExCP6A-BG instruction manual