RGBlink VSP 268 User manual

VSP 268 Quick Start
User define resolution
EDID Management
Cascade splicing
Seamless switching with Fade
Picture in Picture
Two LED Sender installed
Audio Video Sync
Test Pattern Generator
Wide range Optional input modules

Address:S601-607, S504 Weiye Building Torch Hi-Tech Industrial Development Zone Xiamen, Fujian Province, P.R.C
Tel: 00865925771197 Fax: 00865925788216
1
CONTENT
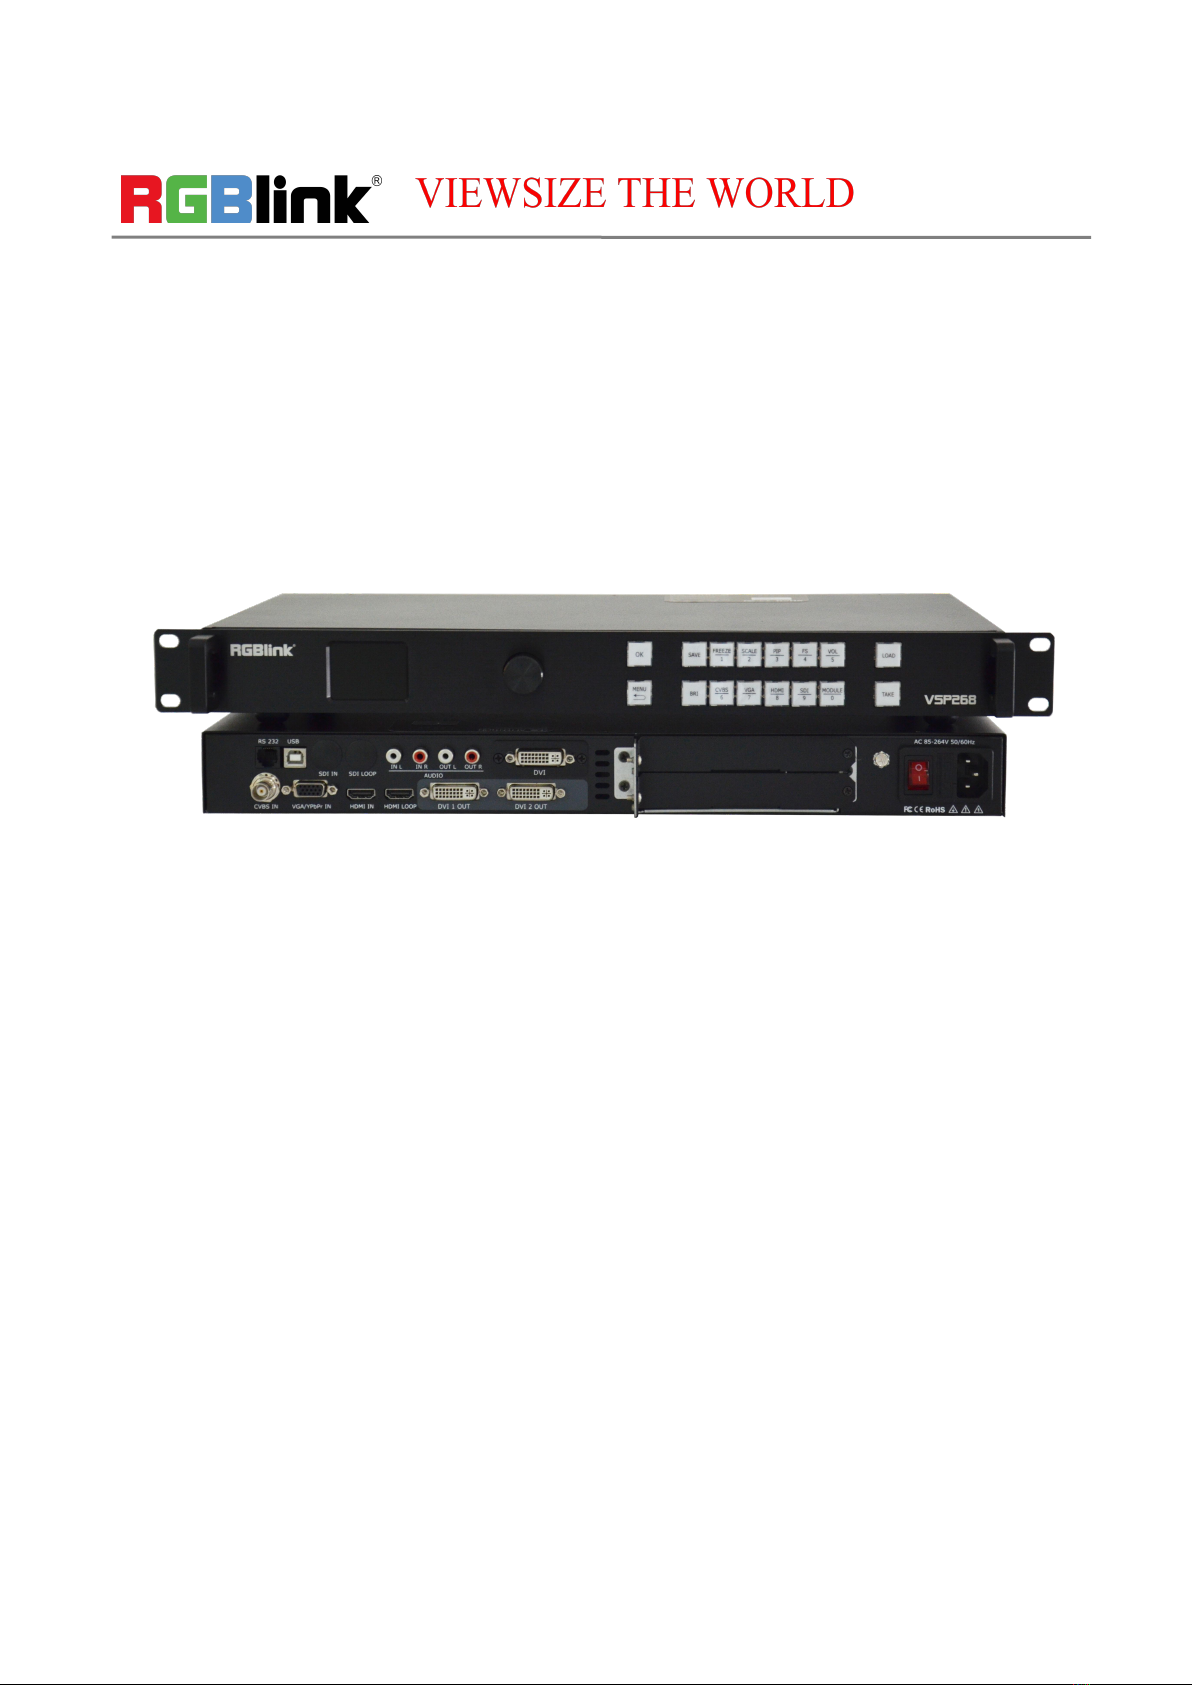
Product Introduction...................................................................................................................................................2
Packing Configuration................................................................................................................................................. 3
Hardware Info..............................................................................................................................................................4
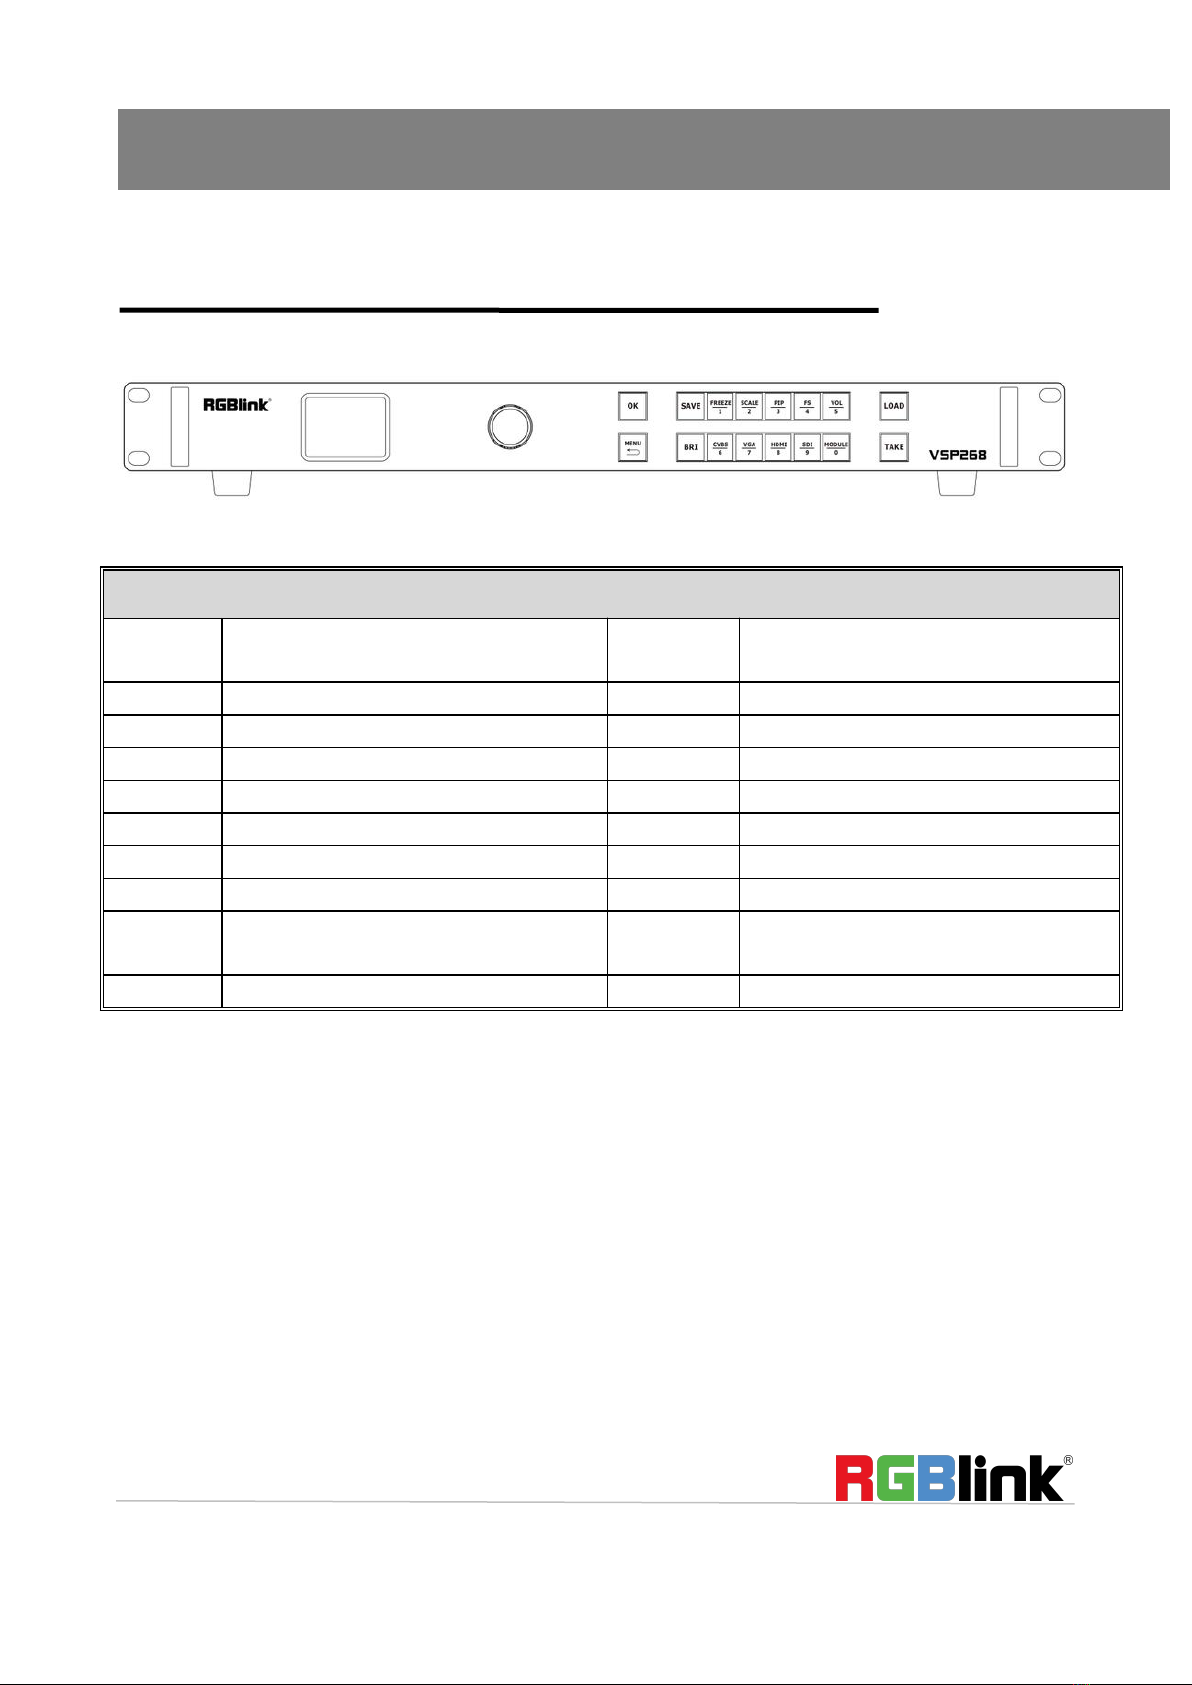
Front Panel Overview..........................................................................................................................................4
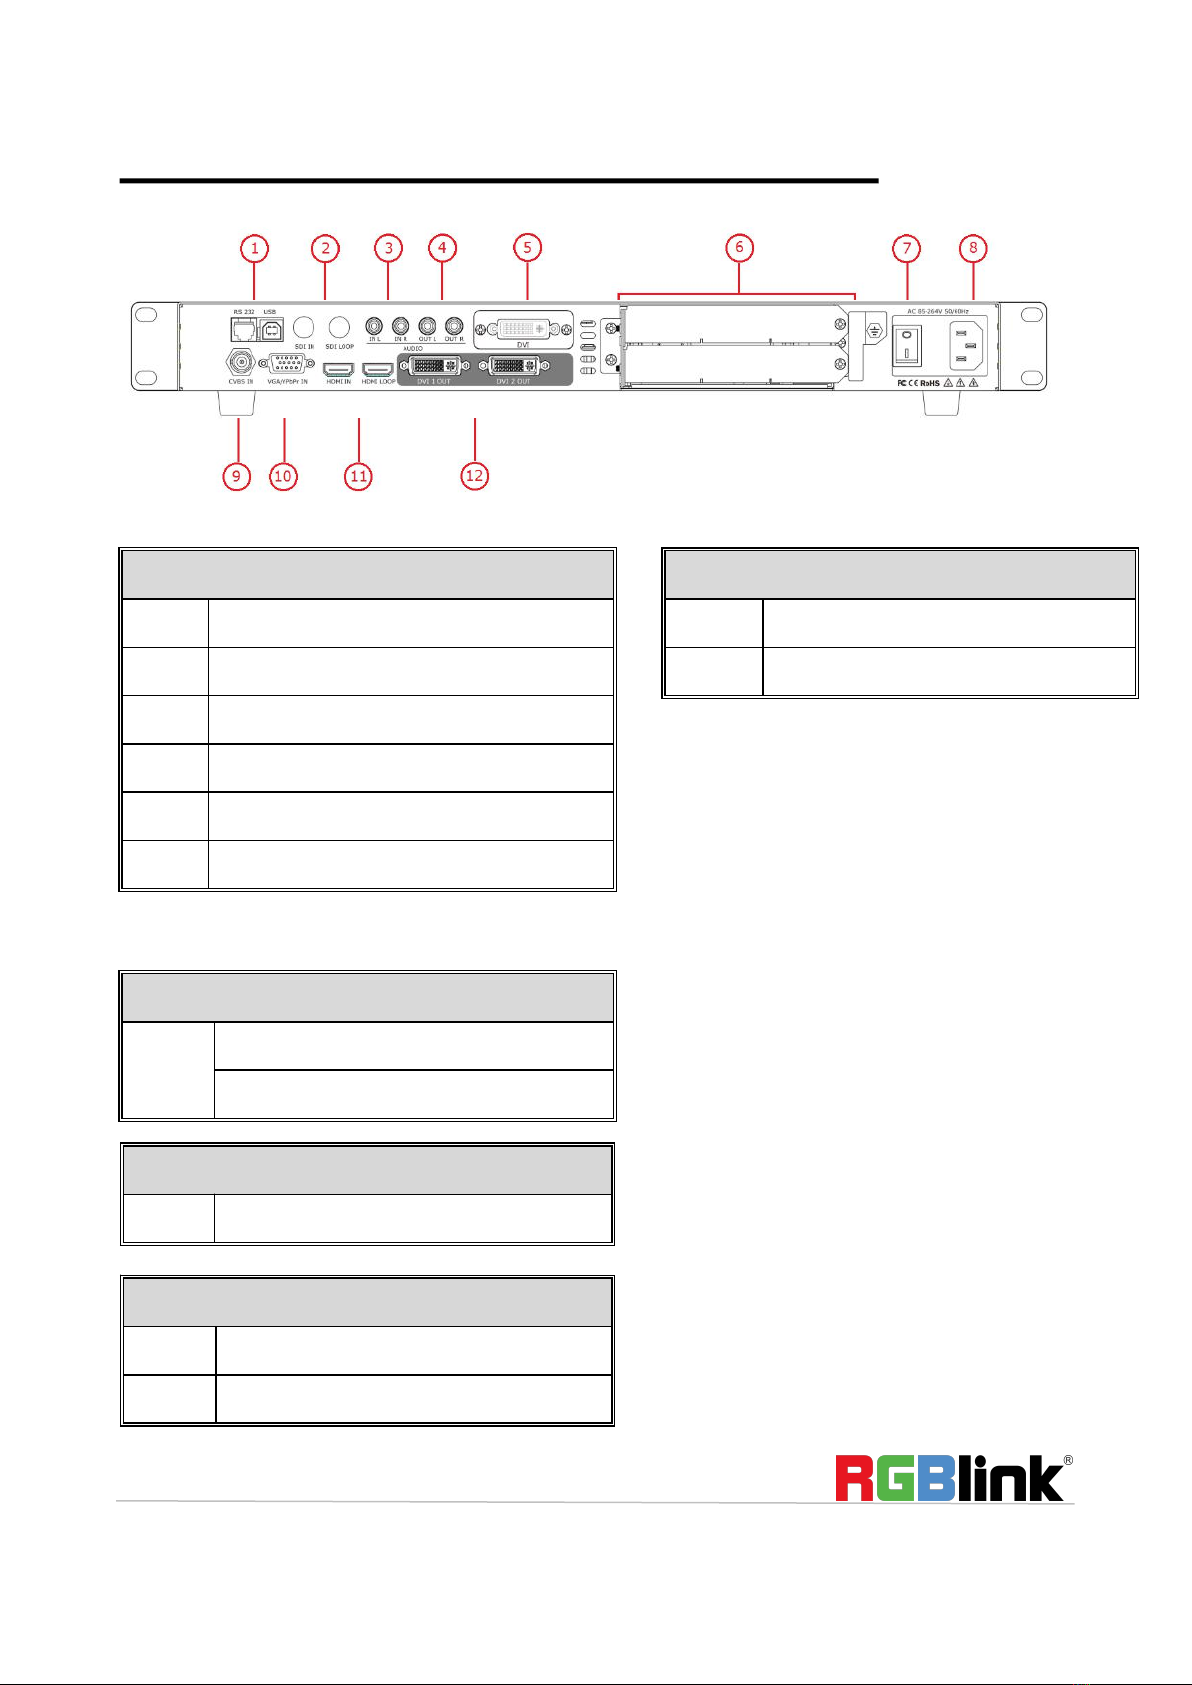
Back Panel Overview........................................................................................................................................... 5
Menu Structure................................................................................................................................................... 6
Product Operations..................................................................................................................................................... 7
Contents.............................................................................................................................................................. 7
Single Picture Switching.............................................................................................................................. 8
Picture in Picture Settings........................................................................................................................... 8
Split Settings................................................................................................................................................9
Select and custom output resolution....................................................................................................... 10
Screen Parameter Setting......................................................................................................................... 10
Input Size Setting & Adjust........................................................................................................................11
VGA Input Auto Adjust.............................................................................................................................. 11
VGA Key Definitation.................................................................................................................................12
Image Scaling Setting................................................................................................................................ 12
Image Freeze............................................................................................................................................. 13
Text Overlay...............................................................................................................................................13
Transition Setting...................................................................................................................................... 14
AUDIO........................................................................................................................................................14
IMAGE SET UP........................................................................................................................................... 15
BLACK OUT................................................................................................................................................ 15
SAVE...........................................................................................................................................................16
LOAD SAVED SETTINGS............................................................................................................................. 16
Contact Information.................................................................................................................................................. 17

Address:S601-607, S504 Weiye Building Torch Hi-Tech Industrial Development Zone Xiamen, Fujian Province, P.R.C
Tel: 00865925771197 Fax: 00865925788216
2
Product Introduction
VSP 268 is an audio and video synchronous switching and hign definition digital input video processor ,
which standard configuration supports CVBS, VGA, HDMI (DVI compatible) input signals and supports a set of
audio input and output to realize audio and video synchronization switching, supports one 3G-SDI input and one
optional input module , supports up to 2 3G-SDI inputs .VSP 268 supports local front panel operation , with
built-in broadcast-level motion adaptive deinterlacing technology, color true reduction technology and dynamic
range adjustment technology, true seamless switching, anti-aliasing and other functions that provides users with
high-quality video display.
System Connection
RGBlink offers solutions to
demanding technical problems.
Any application questions, or
required further information,
please contact with our
customer Support Engineers.
VSP 268 System Connection Diagram

Address:S601-607, S504 Weiye Building Torch Hi-Tech Industrial Development Zone Xiamen, Fujian Province, P.R.C
Tel: 00865925771197 Fax: 00865925788216
3
Packing Configuration
Note:
AC Power Cable supplied as standard according to destination market.
AC Power Cord
USB Cable
DVI to HDMI
Cable

Address:S601-607, S504 Weiye Building Torch Hi-Tech Industrial Development Zone Xiamen, Fujian Province, P.R.C
Tel: 00865925771197 Fax: 00865925788216
4
Hardware Info
Front Panel Overview
FRONT PANEL
OLED
PANEL
Show operation menu items
Menu
Menu and back button
Knob
Confirm and adjust OLED menu
Brightness
Brightness adjustment custom button
OK
Confirm button
CVBS
CVBS signal source button
Save
Save button
VGA
VGA and YPbPr signal source button
Freeze
Screen freeze button
HDMI
HDMI signal source button
SCALE
Scale button
SDI
SDI signal source button
PIP
Single and double picture switch button
MODULE
DVI input signal source button
FS
Screen parameter setting button
TAKE
Effect mode switch button
VOL
Volume control button
0~9
Number Button ,use for scale and custom
resolution setting
LOAD
Load button

Address:S601-607, S504 Weiye Building Torch Hi-Tech Industrial Development Zone Xiamen, Fujian Province, P.R.C
Tel: 00865925771197 Fax: 00865925788216
5
Back Panel Overview
INPUT INTERFACE
2
None
3
Audion Input Interface
5
DVI Input module
9
CVBS Input BNC port
10
VGA/YP input DB15 port
11
HDMI input HDMI-A port and Loop out
OUTPUT INTERFACE
4
Audion output port
12
DVI Output DVI-I Port
CONTROL INTERFACE
1
USB Port USB-A
RS232 interface
OTHER INTERFACE
6
Sending card installation slot
POWER CONTROL
7
Power Switch
8
Power input AC 85-264V 50/60HZ,IEC-3

Address:S601-607, S504 Weiye Building Torch Hi-Tech Industrial Development Zone Xiamen, Fujian Province, P.R.C
Tel: 00865925771197 Fax: 00865925788216
6
Menu Structure

Address:S601-607, S504 Weiye Building Torch Hi-Tech Industrial Development Zone Xiamen, Fujian Province, P.R.C
Tel: 00865925771197 Fax: 00865925788216
7
Product Operations
Contents
Single Picture Switching
Picture in Picture Settings
Split Settings
Select and custom output resolution
Screen Parameter Setting
Input Size Setting & Adjust
VGA Input Auto Adjust
VGA Key Definitation
Image Scaling Setting
Image Freeze
Text Overlay
Transition Setting
AUDIO
IMAGE SET UP
BLACK OUT
SAVE
LOAD SAVED SETTINGS

Address:S601-607, S504 Weiye Building Torch Hi-Tech Industrial Development Zone Xiamen, Fujian Province, P.R.C
Tel: 00865925771197 Fax: 00865925788216
8
Single Picture Switching
When powered on, the system default input is HDMI. If other input source is wanted, for example VGA, just
push VGA button. VGA signal will be switched to the output in hard transition, where there will be black screen
or frozen picture. If seamless transition is required, activate seamless transition first. Push [TAKE] button for at
least 3 seconds to activate seamless transition function. Push VGA button to select VGA signal, then push [TAKE]
button, VGA signal will be transited to the screen in seamless cut or other transition effect. [TAKE] button is
defaulted with 1 second fade transition effect. If you want to change the duration of the transition effect, push
[MENU] button, select <Transition> and change the time of duration.
When use [TAKE] button to switch signals, on the LCD display users will be able to see the format and
resolution of the signal to be switched before switching. This will guarantee a safe and accurate operation.
Picture in Picture Settings
Activate PIP:
Push [PIP] button, button light on, PIP activated. Otherwise, PIP settings not available. On the LCD display it
will show the menu for setting PIP.
PIP layout setting:
Select one layout from the 7 layouts built in, push the knob to confirm. 3 examples of PIP layouts as below:
L+T L+R (PBP) T+B
Swap image settings:

Address:S601-607, S504 Weiye Building Torch Hi-Tech Industrial Development Zone Xiamen, Fujian Province, P.R.C
Tel: 00865925771197 Fax: 00865925788216
9
Select “ON” or “OFF”, to enable the swap of the two images of PIP.
Alpha settings:
The alpha parameter of image B can be set from 0 to 16.
Select setting:
To select “IMAGE A” or “IMAGE B” for settings.
Split Settings
Multiple VSP 268 can be cascaded for seamless splitting. When split, we suggest use distributor to distribute the
signal to the multiple VSP 268. Users may also use the on board HDMI LOOP for cascade splitting.
Follow below operations of cascade split to access quick splitting:
Push [MENU] button, rotate the knob, select <SPLIT> to split evenly or unevenly.
Menu as below:
ENABLE/DISABLE: ON or OFF split function, system default as OFF, turn it ON to enable split settings.
H TOTAL: to set the total horizontal pixels of the LED screen
V TOTAL: to set the total vertical pixels of the LED screen
H POS: select it and press the number buttons to input the starting horizontal position.
V POS: select it and press the number buttons to input the starting vertical position.
H SIZE: to set the horizontal size of the part responsible.
V SIZE: to set the vertical size of the part responsible.
RESET: When done wrong, use RESET to remove the settings.
For even split, simply set the H SIZE and V SIZE of each VSP 268 to be same. Then set the H POS and V POS
of each VSP 268 accordingly. For uneven split, we have to set the H SIZE and V SIZE of each VSP 268
individually.
After settings, we can save it to finish the split setting.

Address:S601-607, S504 Weiye Building Torch Hi-Tech Industrial Development Zone Xiamen, Fujian Province, P.R.C
Tel: 00865925771197 Fax: 00865925788216
10
Select and custom output resolution
Select the output resolution:
Push [MENU] button to enter menu, select <OUTPUT>, push the knob to enter. Rotate the knob and select
<OUTPUT FORMAT>, push the knob to enter. Rotate the knob and select <STANDARD>, push the knob to
enter. Rotate the knob to select the desired resolution.
Custom output resolution:
Push [MENU] button to enter menu, select <OUTPUT>, push the knob to enter. Rotate the knob and select
<OUTPUT FORMAT>, push the knob to enter. Rotate the knob and select <CUSTOMIZE>, push the knob to
enter;
Firstly set the custom width resolution, input the value by pushing the number buttons, push the knob to confirm.
Secondly set the custom height resolution, input the value by pushing the number buttons, push the knob to
confirm.
Lastly set the custom frame rate, input the value by pushing the number buttons, push the knob to confirm.
After setting the values, the device will start to configure accordingly, taking 5~10 seconds to complete.
Screen Parameter Setting
The screen parameter setting is for the size of LED display applying for the single image model for example, the
LED display resolution is 1408 x 832 pixel pitch, first, we select a resolution that close to 1408 x 832 or a higher
resolution to make sure the image will be showed in the LED, so, we select the 1440 x 900 which is the most
close to the LED resolution.
Touch [MENU] button, LCD shows the main menu, rotate the knob, select<Output> and rotate the knob to
confirm, touch the knob, select < Screen Parameter>, press the knob to confirm, enter the screen parameter menu,
you will see the size setup of LED display as follows:
H Size: Use the knob and number key to set up parameter 1408;
V Size: Use the knob and number key to set up parameter 832;
H Position: initial parameter is 0, no setting without image movement;

Address:S601-607, S504 Weiye Building Torch Hi-Tech Industrial Development Zone Xiamen, Fujian Province, P.R.C
Tel: 00865925771197 Fax: 00865925788216
11
V Position: initial parameter is 0, no setting without image movement;
Mode: Select <Screen Parameter Size > or <FS Size>;
Reset Device: Reset to default if the operation is not appropriate.
Note: User can set the screen parameter via <Full Screen > button. Press the key in first time, the key lights up
and it shows <Screen Parameter Size >, Press again, the key lights off and it shows <Full Screen Size>.
Input Size Setting & Adjust
User can adjust and set the input image based on requirement in order to realize the best effect.
Touch [MENU] button, LCD displays the main menu, rotate the knob, select <Input>, touch the knob and
confirm, rotate the knob, select <Sizing Adjust>, touch the knob and confirm, user can use knob and number key
to set as follows:
H Size: Set the width of image for scaling;
V Size: Set the height of image for scaling;
H Position: Set the image horizontal position;
V Position: Set the image verticall position;
Reset: Reset to default if the operation is not appropriate;
Top Crop: Crop the top part of image;
Buttom Crop: Crop the buttom part of image;
Left Crop: Crop the left part of image;
Right Crop: Crop the right part of image;
Crop Reset: Reset to default if the operation is not appropriate.
VGA Input Auto Adjust
Since VGA signal is off-standard, it will cause image offset or not in full screen when input VGA video, user
should adjust the VGA video as follows:
1. Touch [MENU], LCD shows the menu, rotate the knob, select <Input>, touch the knob and confirm.

Address:S601-607, S504 Weiye Building Torch Hi-Tech Industrial Development Zone Xiamen, Fujian Province, P.R.C
Tel: 00865925771197 Fax: 00865925788216
12
2. Rotate the knob, select <VGA Adjust> touch the knob and confirm.
3. Rotate the knob, select <Auto Adjust>, touch the knob and confirm.
When the <Auto Adjust> is selected, it will adjust the horizontal and vertical postion, clock and aspect
automatically to realize image is full screen.
Note: User can adjust for couples of times if it is not successed at a time, the system will save the parameters
automatically when the setting is done.
VGA Key Definitation
VGA is compatiable with YPbPr format which input can be customized to either of them:
1. Touch [MENU], LCD shows the menu, rotate the knob, select <Input>, touch the knob and confirm;
2. Rotate the knob, select <VGA Key Definitation>, touch the knob, select <VGA” or <YPbPr>, re-rotate the
knob and confirm;
3. If YPbPr is selected, user need to connect the VGA to YPbPr converter externally to input the signal.
Image Scaling Setting
Output image scaling shortcut key: Touch <Scaling> button, enter the menu, user can use knob or number key to
set as follows:
H Size: Set the image width;
V Size: Set the image height;
H Position: Set the image horizontal position;
V Position: Set the image Vertical position;
Reset: Reset to default if the operation is not appropriate.

Address:S601-607, S504 Weiye Building Torch Hi-Tech Industrial Development Zone Xiamen, Fujian Province, P.R.C
Tel: 00865925771197 Fax: 00865925788216
13
Image Freeze
Touch < Freeze> button in front panel of VSP 268, the LCD shows <Image Freeze> and the light is on, the
output image is freezed, Re-touch <Freeze> button, the light is off, the freeze feature is cancelled and video
image restored, the LCD shows <Video Image>.
Text Overlay
The OSD feature is to add subtitle in the output image which is widely used in live broadcast, concert, live talk
show and ad.
First, before setting OSD, user should confirm the subtitle input channel, for example, VGA is the input channel
for subtitle, make sure to add the OSD in designated channel like DVI in advance, the setting is as follows:
1. Touch VGA button to check the input signal, the LCD shows the VGA signal in normal;.
2. Re-touch DVI buton to check the input signal, the LCD shows the DVI signal in normal;
3. Open PIP, make sure VGA is the sub-image, DVI is the main image, if it is on the contrary. select “Swap
Window” under the PIP menu to swap the image;
4. Select “B image” from the “Selection” under <PIP> menu, touch “Scaling” button to set the size and position,
move the VGA image to the designated position;
When the VGA image postion and size setting is done, make sure the VGA image is over DVI and keeps in
normal, if VGA input shows black lines, user can use “Crop” feature under the “Input” menu to adjust the black
lines;
5. Touch [Menu], rotate the knob, select <Output> and rotate knob to confirm;
Rotate the knob, select <Text Overlay>, touch the knob to confirm, enter the text overlay menu, rotate the knob,
select <Text Overlay>, touch the knob to confirm, rotate the knob, select “On”, touch the knob and open the DSK
feature;
Rotate the knob, select <Pre-set Mode>, touch knob and enter to the menu, select VGA subtitle input way, for
example, VGA subtitle is white on black, select “White on black 1” or “Black on White 2”(Note:the DSK is only
for single color subtitle);
6. Touch [Save[ button to save all the settings, user can load the setting next time instead of re-set.

Address:S601-607, S504 Weiye Building Torch Hi-Tech Industrial Development Zone Xiamen, Fujian Province, P.R.C
Tel: 00865925771197 Fax: 00865925788216
14
Transition Setting
Touch [Menu[ and enter to the menu, rotate the knob, select <Effect Switch> and enter to the menu, now, it is the
effect setting and user can set the switch effect mode as follows:
MODE: The transition modes includs cut, fade in and fade out, POP L+T, PUSH L+T, POP R+T, PUSH R+T,
POP L+B, PUSH L+B, POP R+B, PUSH R+B, POP CENT, PUSH CENT, POP LEFT, PUSH LEFT, POP
RIGHT, PUSH RIGHT, POP TOP, PUSH TOP, POP BOTTOM and PUSH BOTTOM.
DURATION: Rotate the knob to set the switching duration, touch the knob to select the switching duration with
range from 0 to 1 second.
ALPHA: It is for setting the transparancy of the image display with the range from 0 to 16.
DEINTERLACE: User can select “On” or “Off”.
Turn on the deinterlace, the input signal will be deinterlaced and the switch effect will not be affected.
Turn off the Deinterlace, the input signal will not be deinterlaced.
IMAGE ENHANCE: It is for sharpnesss of edge of image, color restore and image scale, user can choose “On”
or “Off”.
TALE: Select “On” or “Off”, or press <Switch> button 3s to open the switch feature, the signal will switch to
the output.
AUDIO
Press [AUDIO] for audio set up.
MUTE: ON or OFF.
VOLUME: 0-100.
AUDIO IN: To select audio source from [IMAGE A] or [IMAGE B].
HDMI:When use HDMI input, can select [INTERNAL] or [EXTERNAL] audio source.

Address:S601-607, S504 Weiye Building Torch Hi-Tech Industrial Development Zone Xiamen, Fujian Province, P.R.C
Tel: 00865925771197 Fax: 00865925788216
15
IMAGE SET UP
Push [BRI] button for image set up. Brightness, contrast, saturation, sharpness, red,green, blue are allowed to
change independently.
BRIGHTNESS:0-100.
CONTRAST:0-100.
SATURATION:0-100.
SHARPNESS:0-100.
RED:0-100
GREEN:0-100
BLUE:0-100
RESET:Reset all parameters to default.
BLACK OUT
Black out descriptions:
Black signal realizes one-key-touch to a black screen.
VSP 268 provides black effect processing for output with cut black effect. Operation is as below:
1.Push [MENU] button, turn the knob, select [OUTPUT], push the knob, select [DISPLAY
MODE], select [MODE], select [BLACK OUT], effect is as below:

Address:S601-607, S504 Weiye Building Torch Hi-Tech Industrial Development Zone Xiamen, Fujian Province, P.R.C
Tel: 00865925771197 Fax: 00865925788216
16
SAVE
Push the [SAVE/1] button, the button light is on, and enable the SAVE function. The number button 1, 2, 3,
4, 5, 6, 7, 8, 9, 0 means SAVE1-10, push any button on to save. For example, push number button 2 and
save to SAVE 5, the OLED panel will show as follows after saving. If the button blinks, means there is
already a save here.
If you would like to save in the flashing button, your previous save will be overwritten. For example, if button 1
blinks, push button 1 again, the screen will show as below:
Push knob to confirm, push[MENU] to cancel; if confirm, screen will show as SAVE FINISHED;
if cancel, screen will go back to menu.
LOAD SAVED SETTINGS
Push [LOAD] to recall saved banks. The number button 1, 2, 3, 4, 5, 6, 7, 8, 9, 0 means SAVE1-10, if the
button is on, means there’s saved data to recall, if the button flashes, means this bank is currently using, if
the button is off, mean no data saved here.
LCD screen is as below:
Push the button with light to recall save; press [MENU] to cancel load, when the light is off, means
LOAD has been cancelled.
LOAD FROM
>SAVE1 FINISHED!
KEY ON FOR ALL SAVES
FLASH IS CURRENT SET
Save to
>SAVE5 FINISHED!
KEY ON FOR EMPTY
Save 1 used,overwrite
YES<OK>,NO<MENU>

Address:S601-607, S504 Weiye Building Torch Hi-Tech Industrial Development Zone Xiamen, Fujian Province, P.R.C
Tel: 00865925771197 Fax: 00865925788216
17
Contact Information
Warranty:
All video products are designed and tested to the highest quality standard and backed by full 3
years parts and labor warranty. Warranties are effective upon delivery date to customer and are
non-transferable. RGBlink warranties are only valid to the original purchase/owner. Warranty
related repairs include parts and labor, but do not include faults resulting from user negligence,
special modification, lighting strikes, abuse(drop/crush), and/or other unusual damages.
The customer shall pay shipping charges when unit is returned for repair.
Headquarter: S601~607, S504 Weiye Building Torch Hi-Tech Industrial Development Zone
Xiamen, Fujian Province, P.R.C
● Tel: +86-592-5771197
● Fax: +86-592-5788216
● Customer Hotline: 4008-592-315
● Web:
~ http://www.rgblink.com
~ http://www.rgblink.cn
● E-mail: support@rgblink.com
Table of contents
Other RGBlink Media Converter manuals

RGBlink
RGBlink VSP268S User manual

RGBlink
RGBlink M2 User manual

RGBlink
RGBlink MSP 316H User manual

RGBlink
RGBlink M1 User manual

RGBlink
RGBlink MSP 221 User manual

RGBlink
RGBlink MSP 210H User manual

RGBlink
RGBlink UMS4 plus User manual

RGBlink
RGBlink GX4 User manual

RGBlink
RGBlink Q16 User manual

RGBlink
RGBlink FLEXpro 8 User manual

RGBlink
RGBlink D4 User manual

RGBlink
RGBlink FLEX 8 User manual

RGBlink
RGBlink venus x2 User manual

RGBlink
RGBlink TAO 1pro User manual

RGBlink
RGBlink Q2 Series User manual

RGBlink
RGBlink TAO 1pro-S User manual

RGBlink
RGBlink VENUS X1 User manual

RGBlink
RGBlink D8 User manual

RGBlink
RGBlink VENUS X7 User manual

RGBlink
RGBlink X3p User manual