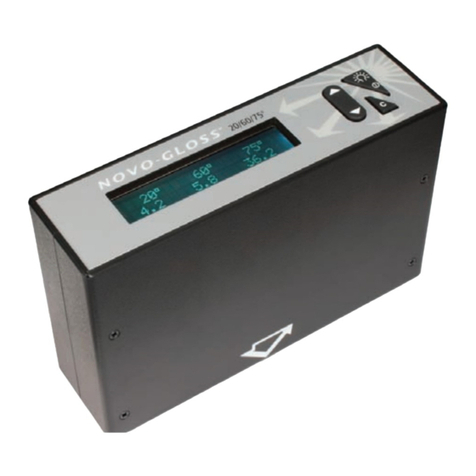
Rhopoint NOVO-GLOSS User manual


Contents
1 INTRODUCTION 5
2 GETTING STARTED 6
2.1 Battery Charging 6
2.2 Instrument Front Control Panel 6
3 OPERATION 8
3.1 Power Up 8
3.2 Taking Readings 8
3.3 Delete Data 10
3.4 Calibration 10
3.5 Calibration on Zero 11
3.6 Calibration on Tile 11
3.7 Statistics 12
3.8 Output Data 13
3.9 Calibration Reset 13
3.10 Disable Statistics 13
3.10.1 Single Reading Output 14
4 PRINTER OR COMPUTER SETTINGS 14
4.1 NOVO-SOFT 14
4.2 Configuration of Computer 14
4.3 Configuration of Printer 14
5 CHANGE LANGUAGES 15
6 SOFTWARE VERSION 16
7 TROUBLE SHOOTING & SIMPLE REPAIRS 16
7.1 Diagnosis 16
7.2 Case Removal and Refitting 16
7.3 Lamp Replacement 18
7.4 PCB Replacement 19
7.5 Battery Performance Test 19
8 NOVO-SOFT VERSION 1.5
8.1 Introduction 21
8.1.1 About NOVO-SOFT 21
8.1.2 Installation 21
8.1.3 Sample Data 21
8.2 Configuration 21
8.2.1 Communications Connections 21
8.2.2 Software 21
8.2.3 Configuration Window 22

8.3 System Window 22
8.3.1 General 22
8.3.2 Down Loading Data 23
8.3.3 Flushing 23
8.4 File Management 24
8.5 Results Window 24
8.5.1 General 24
8.5.2 Deleting Results 25
8.5.3 Tagging & Untagging 25
8.5.4 Exporting 26
8.6 Statistics Window 26
8.6.1 General 26
8.6.2 Comment 26
8.6.3 Statistics 27
8.7 Graph Window 27
8.7.1 General 28
8.7.2 2D Graphs 28
8.7.3 3D Graphs 28
8.7.4 Report Printing 29
8.7.5 Exporting Graphics 29
8.8 Statistical Graphs Window 30
8.8.1 General 30
8.8.2 Histogram 30
8.8.3 Normal Distribution 31
9 OPTIMIZING MEASUREMENTS 32
9.1 General Measurement Tips 32
9.2 Gloss and Haze Measurement Only 32
9.3 Reflectance Measurement Only 33
9.4 Care of Calibration Standards 33
Fourth Edition (December 1996)
Revised July 2000
Statistical NOVO-GLOSS
Statistical NOVO-SHADE
NOVO-HAZE
Software version 2.00 up
Due to the similarity in operation of Statistical NOVO-GLOSS,
Statistical NOVO-SHADE and NOVO-HAZE instruments, this manual
describes in parallel the operation of all three.
Changes are periodically made to the information herein, these changes will
be incorporated in any future editions of this publication.
Any reproduction in whole or in part without permission is a breach of
copyright.

Instructions 5
RHOPOINT Statistical NOVO-GLOSS
Statistical NOVO-SHADE and NOVO-HAZE
1 INTRODUCTION
Congratulations on purchasing a Rhopointoptical instrument -
the Statistical NOVO-GLOSS; Statistical NOVO-SHADE and
NOVO-HAZE represent the most technically advanced portable
instruments of their type in the world. Features include:
•Machined aluminum optical block - ensures the integrity of the
±0.1°angular tolerance specified by international measuring
standards (e.g. ISO 2813 for gloss)
•Auto-stabilisation circuit - this unique feature, patented by
Rhopoint, allows continuous readings to be made, and also
compensates for filament sag in the lamps when reading with
the instrument sideways or upside-down
•(Statistical NOVO-GLOSS/NOVO-HAZE only) Auto-ranging
(0.0 to 1999 gloss units at 20°) - Makes possible measurement
on surfaces even with ultra-high gloss, such as polished metal
•Memory for 200 readings per angle
•Full statistics showing Minimum, Maximum, Mean, Standard
Deviation and Coefficient of Variation of stored values
•RS232C Output with Windows based PC software or printer
available
•Capability to operate in any one of six languages (English,
Français, Deutsch, Italiano, Español or Nederlands)
Your instrument is supplied in a lightweight carry case, the
contents of which are as follows:
1. Statistical NOVO-GLOSS/NOVO-SHADE/NOVO-HAZE unit
2. Statistical NOVO-GLOSS/NOVO-HAZE: Black glass (high
gloss) and foam (zero) calibration standards in wooden box
OR
Statistical NOVO-SHADE: White pad (high reflectance) and black
glass (zero) calibration standards in wooden box
3. NOVO-SOFT 3¼” floppy diskette
4. Serial RS232 PC interface cable
5. Guarantee card - fill in and return for free extended warranty
6. Operating instructions
7. Battery charger
8. Spare lamp (s)
9. Cleaning cloth
RhopointStatistical instruments are both accurate and user
friendly, allowing Statistical Process Control of gloss, haze or
reflectance to be conducted quickly and easily at any location.
We recommend that the whole of this manual is read before
commencing measurements. These instructions should be read
with the instrument conveniently to hand, and assume that the unit
is working in English with the Statistical functions enabled.

6Instructions
RHOPOINT Statistical NOVO-GLOSS
Statistical NOVO-SHADE and NOVO-HAZE
2 GETTING STARTED
2.1 Battery Charging
The battery charger for your Statistical instrument plugs into the
aperture marked DC. It is important to connect the charger to the
instrument before switching on the mains. The unit is initially
supplied without power, and will take 16 hours to fully charge. It is
possible to operate the instrument whilst it is on charge, but
readings will fluctuate depending on environnmental conditions
and obviously charging time will increase. To maximise the
lifetime of the batteries, the instrument should be operated until the
low battery warning is observed in the LCD.
2.2 Instrument Front Control Panel
The control panel of your instrument will vary according to which
model you have, as will the operating instructions.
The figure 2.2.1 shows the front panel for a single or dual angle
glossmeter, which is controlled by six buttons. Figure 2.2.2 shows
the control panel for a triple angle glossmeter, which is controlled
by nine buttons.
Delete
Reset NOVO-GLOSS
Cal
Set cal
Stats
2nd Cal
Output
On Statistical Glossmeter Read
Angle
Fig. 2.2.1. Control panel of single and dual angle glossmeters
Delete
Reset NOVO-GLOSS
Set cal
Cal
Stats
2nd Output
Cal
On Statistical Glossmeter Angle
Read
Fig. 2.2.2. Control panel of triple angle glossmeter
Figure 2.2.3 shows the front panel of a reflectometer, which is also
operated by six buttons, and is similar to a single/dual angle
glossmeter. Figure 2.2.4 shows the front panel for a hazemeter,
again operated by six buttons, and based directly on the
single/dual angle glossmeter.

Instructions 7
RHOPOINT Statistical NOVO-GLOSS
Statistical NOVO-SHADE and NOVO-HAZE
Delete
Reset NOVO-SHADE Cal
Set cal
Stats
2nd Cal
Output
On Statistical Reflectometer Read
Fig. 2.2.3. Control panel of reflectometer
Delete
Reset NOVO-HAZE Cal
Set cal
Stats
2nd Cal
Output
On Hazemeter Read
Mode
Fig. 2.2.4. Control panel of hazemeter
As can be seen, some buttons have two functions, the primary
function is shown in normal text, the secondary function is shown
in reverse text. The second function is operated by first pressing
the 2nd function button, and then the appropriate dual function
button, similar to a pocket calculator. For example, to activate the
Reset function you would press the Stats/2nd button, followed by
the Delete/Reset button. This would be written in the text in this
manual as 2nd/RESET. To activate the DELETE function you
would only press the Delete/Reset button, which would be written
in this manual as DELETE.
Statistical NOVO-GLOSSand Statistical NOVO-SHADE both
utilise the same software and electronics, and the only difference
is the angles at which the instrument optics are set. For this
reason the words NOVO-GLOSS appear in the instrument display
on powering up (section 3.1) for both NOVO-GLOSSand
NOVO-SHADE instruments.
NOVO-HAZE is also a statistical instrument, but does not bear the
statistical title as, unlike NOVO-GLOSSand NOVO-SHADE, it
does not have a non-statistical counterpart. NOVO-HAZE is a
glossmeter with special software which automatically calculates
haze index (H) according to ASTM D4039, which gives the
definition of gloss at 60°(G60) minus gloss at 20°(G20), i.e.
H G G
=
−
60 20
As well as functioning as a hazemeter, NOVO-HAZE can also be
used directly as a dual angle glossmeter, and is sometimes
referred to as such elsewhere in this manual.

8Instructions
RHOPOINT Statistical NOVO-GLOSS
Statistical NOVO-SHADE and NOVO-HAZE
3 OPERATION
These instructions should be read in conjunction with the reference
card or the unit conveniently to hand, and assume that the unit is
working in English.
3.1 Power Up
Hold and release the red ON button. The instrument will power up
with a display showing the instrument type, and manufacturer, e.g.:
NOVO-GLOSS
R h o p o i n t I n s t r u m e n t a t i o n
There is a short delay of 5-6 s whilst the instrument boots. When
the instrument is ready to operate the display will change to a
format similar to that below:
Current
operating
angle
Last
value
read
Number of
stored
readings
Coefficient
of variation
of stored
values
ANGLE VALUE STORE CV
60°0.0 0 0.000
The unit will automatically power down approximately 2 minutes
after the last button is pressed. If, however, you wish to power
down instantly, press and release the second function button, then
hold down the ON button. The instrument will shut down after
about two seconds.
The current operating angle is that at which measurements will be
taken, and may be 20°, 45°, 60°, 75°or 85°for statistical
NOVO-GLOSS, 45°/0°for statistical NOVO-SHADE, or 20°, 60°
or HAZE for NOVO-HAZE. The angle is fixed on reflectometers
and single angle glossmeters, but may be successively changed
on dual angle glossmeters by pressing 2nd/ANGLE, on
hazemeters by pressing 2nd/MODE, or on triple angle glossmeters
by pressing ANGLE. The value read and number of stored
readings are explained in section 3.2, and a definition for
coefficient of variation is given in section 3.5.
3.2 Taking Readings
Glossmeters, reflectometers and hazemeters work by shining a
beam of light on to a surface, and measuring how much is
reflected. Readings are taken over the area covered by the
aperture on the base of the instrument. When the instrument is
stood on a surface the aperture is hidden, but can be pinpointed by
the intersection of the arrows marked at the bottom of the
instrument case on the front with those on the side.

Instructions 9
RHOPOINT Statistical NOVO-GLOSS
Statistical NOVO-SHADE and NOVO-HAZE
To take a reading press the green READ button. The unit will now
start to take a reading. Whilst the button is held the unit will
continually update the current reading. When the button is
released the value shown in the display at that moment will
entered into memory, and the number of stored readings will
increase by one. It is recommended that the button is held until a
stable reading is observed. All gloss readings are given in Gloss
Units (GU), as defined by the relevant national or international
standards (e.g. ISO 2813, TAPPI T480, etc.). Reflectance
readings are given in Reflectance Units (%), also defined by
appropriate standards (e.g. ISO 2814). Haze index according to
ASTM D4039 has no specified units. The sequence of events on
the display during a reading is as follows:
Initial Display ANGLE VALUE STORE CV
60°28.2 9 0.058
Read PressedANGLE VALUE STORE CV
60°9 0.058
Read Held ANGLE VALUE STORE CV
60°32.9 9 0.058
Read Released
ANGLE VALUE STORE CV
60°32.9 10 0.073
Holding down the green READ button will continually monitor the
gloss/reflectance level. If the unit is simultaneously moved across
a sample (i.e. at the Read Held stage), the operator will quickly be
able to ascertain the appearance variation of the surface under
investigation. This enables anomalous areas to be identified
easily without the need to take numerous individual readings, and
is a feature unique to RhopointStatistical instruments. However,
please note that NOVO-HAZE instruments must not be moved
when making measurements in haze mode. This is because the
two readings taken to calculate haze must be made in the same
spot. As these readings are taken consecutively, rather than
simultaneously, moving the instrument before the result is
displayed will cause the measurements to be taken in different
places, and the reading will be meaningless.
When the green READ button is released, the value currently
displayed is stored, and all the Statistical information is updated
automatically.

10 Instructions
RHOPOINT Statistical NOVO-GLOSS
Statistical NOVO-SHADE and NOVO-HAZE
3.3 Deleting Data
In the event of an anomalous or accidental reading (usually
causing the coefficient of variation to become unexpectedly high)
the last value stored can be deleted. This is achieved by pushing
the grey DELETE button at the back left of the control panel. The
unit will automatically recalculate all the statistical information of
the remaining data, and the previous reading will be displayed.
Repeatedly pressing the DELETE button will progressively remove
data from memory in reverse order to that in which it was stored.
The sequence of events on the display is as follows:
Initial Display ANGLE VALUE STORE CV
60°32.9 10 0.073
Delete Pressed/Released
ANGLE VALUE STORE CV
60°28.2 9 0.058
To delete ALL of the readings stored in memory, for the displayed
angle only, in a single operation, the reset function is used:
Initial Display ANGLE VALUE STORE CV
60°32.9 10 0.073
2nd Pressed SECOND FUNCTION ENABLED
Delete Pressed ARE YOU SURE?
PRESS YELLOW BUTTON
Stats/2nd Pressed
ANGLE VALUE STORE CV
60°0 0 0
Pushing any button other than STATS/2nd at the final stage will
cancel the operation and result in no data being deleted.
3.4 Calibration
Instrument calibration should be checked regularly, adjusting if
necessary. Before commencing, check that the standard tile is
clean, in good condition, and has a valid calibration certificate.
Position the instrument on the tile and take a reading. Compare
the value displayed with the value assigned to the tile for the

Instructions 11
RHOPOINT Statistical NOVO-GLOSS
Statistical NOVO-SHADE and NOVO-HAZE
matching measurement angle. If the values differ by more than
±0.5 (GU) it will be necessary to adjust the calibration.
3.5 Calibration on Zero
The glossmeter has two methods of zeroing the system. One is by
adjusting the Pot internally. The second method uses a sequence
of button presses to Zero the instrument. The way that this is
achieved is by placing the tile foam side down, pressing the Read
button and then pressing the Set Cal button. The instrument will
indicate that it is now Zero.
Please note that if you reset the calibration of the instrument, you
will need to Re-Zero the instrument again before adjusting the
Calibration.
This procedure should be done before tile calibration (Section 3.6
Cal on tile).
3.6 Calibration on Tile
This should be done with the instrument in place on the tile.
Holding the CAL ↑button will incrementally increase the value,
whilst the CAL ↓button will decrease it. Releasing the button will
set calibration at the displayed value, e.g. if instrument reads too
high:
Initial Display ANGLE VALUE STORE CV
60°93.2 10 0.590
Cal
↓
Held . . .ANGLE VALUE STORE CV
60°93.1 CAL DOWN
. . . Cal
↓
HeldANGLE VALUE STORE CV
60°92.1 CAL DOWN
Cal
↓
Released
ANGLE VALUE STORE CV
60°92.1
Once the calibration has been adjusted to the appropriate level it
can be checked by pressing the READ button again. The
calibration value is stored in memory when the unit powers down,
so there is no need to re-calibrate each time the instrument is
switched on. The calibration configuration of RhopointStatistical
instruments allows use of any standard.
NOVO-HAZE instruments cannot be calibrated in haze mode.
Instead you must cycle through the gloss measuring modes using
the 2nd/MODE button, and calibrate at both 20°gloss AND 60°
gloss before returning to HAZE mode to take measurements. If

12 Instructions
RHOPOINT Statistical NOVO-GLOSS
Statistical NOVO-SHADE and NOVO-HAZE
you wish to later make gloss measurements, re-calibration is not
necessary.
3.7 Statistics
Holding down the yellow STATS button for about 1 second will
divert the instrument into statistics mode.
In statistics mode the display shows the angle of operation and the
minimum (MIN), maximum (MAX) and mean (MEAN) values of the
data currently stored. Dual and triple angle glossmeters have
separate sets of data and statistics for each angle. If the STATS
button is continually held down, or held again whilst in statistics
mode, the display scrolls to the left so that the angle and minimum
are no longer shown, and the standard deviation of the stored data
appears at the right of the display. Releasing the STATS button
scrolls the text back to the right again, reverting to the normal
statistics display.
Initial Display ANGLE VALUE STORE CV
60°26.1 9 0.058
Stats Held . . .ANGLE MIN MAX MEAN
60°26.1 31.0 28.38
. . . Stats Held MAX MEAN SD
31.0 28.38 1.634
Stats Released
ANGLE MIN MAX MEAN
60°26.1 31.0 28.38
Statistics mode may be exited by pressing the STATS button once
(activating the 2nd function), and then a second time.
Alternatively, pressing any of the function keys, such as READ or
OUTPUT, will exit statistics mode and perform that function. If the
instrument powers down whilst in statistics mode it will
automatically return to normal mode on powering up again.
Statistics are defined below. For this purpose the individual
readings are defined as values x1, x2, ... xn, and xiis any data point:
•Statistical sample population, n- the current number of stored
readings (STORE), on which the statistical analysis is based.
•Maximum (MAX) - the highest reading.
•Minimum (MIN) - the lowest reading.

Instructions 13
RHOPOINT Statistical NOVO-GLOSS
Statistical NOVO-SHADE and NOVO-HAZE
•Mean (MEAN),
x
- The sum of all readings divided by the total
number, xx
ni
i
i n
==
=
∑
1
•Standard deviation (SD), s- Square root of the sum of squared
deviations from the mean, sx x
n
i
i
i n
=−
−
=
=
∑
2212
11( )
•Coefficient of variation (CV), c- Standard deviation divided by
the mean, a measure of data scatter, cs
xn
xx x
n
i
i
i
i n
= = −
−
=
=
∑
2212
11( )
3.8 Output Data
Pressing the grey OUTPUT button (on triple angle glossmeters), or
2nd/OUTPUT (on hazemeters, reflectometers and dual or single
angle glossmeters) will send all the data in memory for the current
measurement angle only to the RS 232C output port, to which
either a PC running NOVO-SOFT or a serial printer may be
connected. Each data point is briefly displayed as it is output,
even if no interface hardware is connected. This is useful if you
wish to quickly scan through all the data currently in memory. The
display will revert to normal mode on completion.
3.9 Calibration Reset
Pressing the grey SET CAL button (on triple angle glossmeters), or
2nd/SET CAL (on hazemeters, reflectometers and dual or single
angle glossmeters) restores the calibration value to an internally
preset optimum, for ALL angles. This function is primarily intended
for calibrating on a tile immediately after bulb replacement. It is
also useful when calibrating an instrument which reads a value
largely differing to that assigned to a calibration tile. This also
clears the zero offset. (Section 3.5 Cal on zero).
3.10 Disable Statistics
Sometimes you may wish to make readings without adding to those
already stored in memory. This can be done by disabling
statistics. With the instrument switched off, hold down the Cal↓
button, then hold down the On button to power up. After about 1
second the instrument display will be filled with a message which
flashes between ‘PRESS YELLOW BUTTON’ and ‘ARE YOU
SURE?’. Pressing the yellow button will send the instrument into
non-stats mode, pressing any other button will send it into the
normal operating mode.

14 Instructions
RHOPOINT Statistical NOVO-GLOSS
Statistical NOVO-SHADE and NOVO-HAZE
Cal
↓
/On Held Inst. Non Stats Mode
`PRESS YELLOW BUTTON`
Stats PressedANGLE VALUE
60°0.0
In non-stats mode, readings are not stored, and so no statistical
functions are available.
To escape from non-stats mode and return to normal operating
mode, carry out the same procedure when powering up, but
instead of pressing the yellow button to confirm, press one of the
other buttons. Any statistics previously stored will still be held in
memory, and will once again be available.
3.10.1Single Reading Output
In non stats mode the last measurement can be transmitted down
the serial port by pressing the output button.
PRINTER OR COMPUTER SETTINGS
4.1 NOVO-SOFT
Interfacing your RhopointStatistical instrument with a PC is
simple when using NOVO-SOFT, a Windows based software
package specially written by Rhopointfor handling gloss and
reflectance data. Version 1.3 is available from your instrument
supplier, and full instructions are given in section 9.
When running, NOVO-SOFT will automatically collect data from
your instrument via a serial port, and can collect up to 999
readings. Data may be plotted, in order of measurement, in either
a standard 2D, or eye-catching and easy to analyse 3D form.
Statistical graphs in the form of a histogram or normal distribution
are also possible. Full numerical statistical analysis can be made
on the entire sample population, with the option to either delete
data, or only work with a selected portion. Data files may be
stored on a hard drive, allowing permanent records to be kept, and
hard copies may also be produced. There is also a report
producing facility which allows graphs, experimental notes and
statistical analyses to be printed. Data can also be exported to
other packages, such as Lotus or Excel. Future versions of the
software are planned which will include batching facilities, and
simultaneous analysis.
4.2 Configuration of Computer

Instructions 15
RHOPOINT Statistical NOVO-GLOSS
Statistical NOVO-SHADE and NOVO-HAZE
Instead of using NOVO-SOFT you may wish to interface your
instrument with a PC using an alternative method. The instrument
outputs data serially at 4800 baud, 8 data bits, 1 stop bit and no
parity. Using the RS232 lead supplied it is possible to download
data into a MS DOS based computer having set up the computer
using the following command:
Mode Com2:48,n,8,1
If you are using a communication port other than Com2, then you
will need to amend this command accordingly. It is now possible to
download data directly into any appropriate software.
4.3 Configuration of Printer
Your instrument is also capable of directly driving a serial printer,
such as that available from Rhopoint. Please note that your
printer must have line feeds enabled with carriage returns,
otherwise all data will be printed in the same place and be illegible
(see printer hand book). If the OUTPUT function is engaged, all
data stored in memory will be printed. Alternatively, it is possible
to print measurements as they are taken.
5 CHANGE LANGUAGES
Your instrument is configured to operate in one of six languages -
English, Français, Deutsch, Italiano, Español or Nederlands.
Usually it is set to the language most relevant to the country of
supply, but it can be changed to another, if preferred.
To prevent accidental change, the language is set by means of
internal dip switches. To change language, follow the instructions
below:
1. Ensure the mains lead is disconnected from the supply.
2. Remove the four crosshead screws from the bottom of the
case.
3. Slide the bottom of the case off.
4. Locate the bank of four dip switches located by the mounting
pillar at the front right corner of the central PCB.
5. Use a blunt instrument, such as a pen, to push the numbered
dip switches to the required positions, as indicated in the table
below. ‘Up’ is away from you, ‘down’ is towards you.
Language Switch 1 Switch 2 Switch 3 Switch 4
English down down down down
Français, down down down up
Español down down up down
Deutsch, down down up up
Italiano down up down down
Nederlands down up down up

16 Instructions
RHOPOINT Statistical NOVO-GLOSS
Statistical NOVO-SHADE and NOVO-HAZE
6. Once the required language is selected, replace the instrument
case and retaining screws.
The instrument will now operate in the new language. To change
the language again, repeat the steps above.
6 SOFTWARE VERSION
The software version of your instrument is displayed for a few
seconds before power down. Instruments from 1997 onwards are
running EEPROM version 2.00 and up.

Instructions 17
RHOPOINT Statistical NOVO-GLOSS
Statistical NOVO-SHADE and NOVO-HAZE
7 TROUBLE SHOOTING & SIMPLE REPAIRS
The RhopointStatistical instruments are designed to be field
serviceable, and much of the maintenance can be performed
without returning the instrument to your supplier. If you require
assistance in self-servicing, please either contact your supplier, or
Rhopointdirect, stating the following:
1. Instrument type
2. Serial number
3. Exact nature of fault
7.1 Diagnosis
The most common problems are shown below:
SYMPTOM POSSIBLE
CAUSE ACTION REQUIRED
LCD display
blank NiCad battery flat either recharge instrument or
operate using mains adapter
faulty charger if possible check output of
charger using a voltmeter
blown internal
fuse replace square black fuse
located at rear of lower PCB,
just over one third distance
from left (see section 8.4 for
PCB removal)
fault on PCB remove the PCB’s to identify
which appears defective, and
replace (section 8.4)
erratic,
rapidly
fluctuating
readings
blown lamp replace lamp (section 8.3)
reads low or
zero set cal function
not operated follow instructions for
calibration reset (section 3.7)
dirt/dust on optics clean with compressed air or
soft cloth
7.2 Case removal and refitting
1. Ensure the mains lead is disconnected from the supply.
2. Remove the four crosshead screws from the bottom of the
case.
3. Slide the bottom of the case off.
4. Refitting is reverse of removal.

18 Instructions
RHOPOINT Statistical NOVO-GLOSS
Statistical NOVO-SHADE and NOVO-HAZE
7.3 Lamp replacement
1. Remove instrument case (section 8.2).
2. Identify the blown bulb, which will have a broken filament, and
may also be blackened. Remove the two retaining screws
(fig. 8.3.1), so that it may be released.
Fig. 8.3.1. Bulb retaining screws.
3. Fit the new bulb, aligning it so that the filament is perpendicular
to the angle at which the beam will be directed (fig.8.3.2).
Fig. 8.3.2. Perpendicular filament alignment.
4. Replace and tighten the two retaining screws.
5. With the case still off, power on the unit and push
2nd/SET CAL (section 3.8).
6. Place the instrument on a calibration tile and hold down the
green READ button. Use a small screwdriver to adjust the
internal calibration screw(s), located at the left hand end of the
bottom PCB (fig. 8.3.3). The appropriate screw is determined
using the table below. Please note that R49 is not found on
dual angle glossmeters, and neither R49 nor R50 is found on
single angle glossmeters or reflectometers.
Single angle Dual angle Triple angle
20/45/60/75/85°20°60°20°60°75/85°
R49 •
R50 • •
R51 • • •

Instructions 19
RHOPOINT Statistical NOVO-GLOSS
Statistical NOVO-SHADE and NOVO-HAZE
Fig. 8.3.3. Location of Calibration screws on bottom PCB.
7. When the correct value is reached, do not adjust the screw any
further, and release the green READ button.
8. On dual and triple angle instruments, move through the angles,
using the ANGLE button, to check calibration for each,
adjusting if necessary.
9. Refit case.
7.4 PCB replacement
1. Remove instrument case (section 8.2).
2. Remove the three screws in the corners of the top PCB, which
holds the LCD.
3. Hold the top PCB at the far left end (battery pack facing you)
with one hand, and grip the middle board beneath where you
are holding with the other. Ease off the top PCB by pulling
straight up and gently rocking back and forth.
4. Remove the three crosshead screws from the central PCB (two
are located at right of board, between switches; one is located
in the centre of the board, a third of the way from the left). Both
the central and bottom PCB will now be loose.
5. Separate the central PCB from the bottom PCB by easing apart
the connection at the front left of the boards.
6. Faulty boards are usually identified by burned tracks or
components, and should be replaced with a new one, available
from your supplier. Blown fuses may be replaced by
de-soldering the faulty part, and soldering in the new one.
7. Refitting of boards is reverse of removal, but be sure that the
fibre washers are correctly replaced.
7.5 Battery Performance Test.
A battery performance test can be carried out in order to either
test or restore the battery capacity. Also, the procedure below
will show you how to discharge the battery before
transportation.
1. To see if the battery is functioning properly, it must be
discharged first and then recharged for 16 consecutive hours.

20 Instructions
RHOPOINT Statistical NOVO-GLOSS
Statistical NOVO-SHADE and NOVO-HAZE
2. Once charged, it must be left running for the observation of
number of samples taken.
3. To start this sequence, on a Single or Dual Novo-Gloss, press
Delete/Reset & Stats/2nd Function buttons simultaneously
with the Angle/Read button.
4. To start this sequence, on a Triple Novo-Gloss, press
Delete/Reset & Stats/2nd Function buttons simultaneously
with the Angle button
5. Observe the screen on the instrument. The display will show
the total number of samples after every 25 samples. With a fully
charged battery, the instrument should take in the excess of
2000 samples after which the battery will be discharged. The
instrument will automatically power down once it detects that
the battery is low.
6. Once the battery has discharged, it has to be recharged again
for 16 hours. The number of samples the instrument took the
previous time can be viewed by repeating step 3, but only this
time holding the buttons down for few seconds. The the display
will show the number of samples.
You may wish to repeat the above procedure in order to either
test or restore the battery capacity.
Please discharge the equipment before transportation using
the above sequence.
This manual suits for next models
2
Table of contents
Other Rhopoint Measuring Instrument manuals

Rhopoint
Rhopoint NOVO-SHADE DUO User manual

Rhopoint
Rhopoint Novo-Shade Duo+ User manual

Rhopoint
Rhopoint NOVO-GLOSS IQ User manual
Rhopoint
Rhopoint Novo-Gloss 20/60/75 User manual
Rhopoint
Rhopoint NOVO-GLOSS 60 User manual

Rhopoint
Rhopoint IQ 20/60 User manual

Rhopoint
Rhopoint Optimap3 PSD User manual

Rhopoint
Rhopoint NOVO-GLOSS Flex 60 User manual

Rhopoint
Rhopoint ID User manual
Rhopoint
Rhopoint Optimap PSD User manual