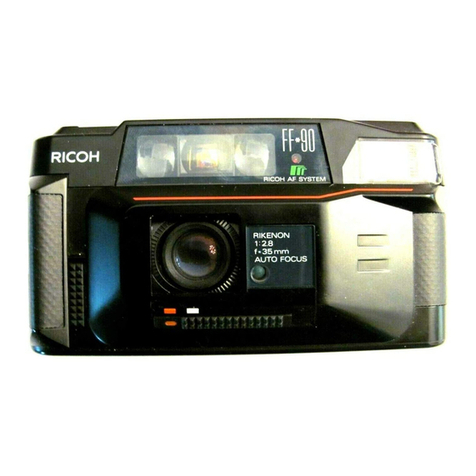
Ricoh 35 User manual

CP
RICOH
CO„
LTD.
5
,
4-chCroC,
Giniu
r
CtiuO-fc^
Tokyo,
Japan
EUROPE
OFFICE
3
Delft)
estreat
27
Rotterdam,
Holland
RICOH
INDUSTRIES,
U.S.A.,
INC
432,
Park
Avenue
South,
New
York
16,
N,Y„
U-S.A,
Famed
In
Japan
I
01025
KfiS
®
—

PRINCIPAL
PARTS
@)
Neck
simp
holder
®
Exposure
meter
®
Rangefinder
window
(U
Film
counter
<1>
Shuiter
release
®
Cable
relent
socket
©
Exposure
indicator
window
©
Exposure
indicator
needte
©
Accessory
shoe
Oji"
1
Cordless
Hash
tmiijid
(ifi
Rewind
knob
@
Bright
frame
ran^e/view
finder
(!#
fdghting
window
®
Distance
scale
(ji>
Depill
of
field
scnle
Cup
Diaphragm
scale
©
I
Ji.ipluiifnli
soiling
riryj
43$
Film
speed
sotting
lever
(3$
Shutter
speed
scale
@
Shutter
^peed
selling
rinj'

2!)
Film
advance
lever
*
@
Rcwinii
release
btiUun
&
F
ceasing
lever
@
Tripod
auekci
@
Rack
liildi
Flash
connector
@
MX
E>iKlirojniatiion
ami
Belfrhrer
(\
i
setiing
lever
a
Film
fjpccd
s^esile
9
F
bidet
eyepiece
•»
Rewind
spindle
slot
$])
Take-up
spool
^
Take-up
spool
clip
$$
Sprocket
4jj
Film
pressure
plate
§
Film
cartridge
positioning
spring
LOADING
THE
CAMERA
Avoid
dirttt
itjnJrghf.
Uap
33rmn
film;
in
td
r
It
jd
^
20
Or
30
expAjuros
],
Full
Out
RACK
LATCH
and
tip^n
the
back
of
die
camera.
(!)
E.
Turn
the
REWIND
KNOB
count-
er-dockwise
;
(ben
(Ik*
knob
pops
up.
(
2
)
Full
the
knob
all
die
way
out-
Insert
the
film
cartridge,
(
3
j
3*
l*uah
in
the
REWIND
KNOB
turning
ii
to
[lie
dbectLOn
uf
the
arrow
mi
tlltK
the
knob
Ik
set
rU
its
Original
position.
d)

j|.
Insert
tlit
film
end
into
the
TAKE'
UP
SPOOL
CLIP,
{5)
5,
Hold
down
tilt
cnrlririigc
Mid
turn
the
FILM
ADVANCE
LEVER.
Make
sure
■
lie
film
|*rfoniiions
are
correctly
cm
lo
the
SPRC
K.-K
l‘-
E
teeth,
(li?
Close
(he
hack
cover.
C\
Advance
film
and
release
shutter.
Repeat
it
until
EXPOSURE
COUNTER
is
on
'T
<
8
)
Make
sure
the
REWIND
KNt.)R
roiiiies
ns
you
advance
(lie
film,
SETTING
FILM
SPEED
Mow
the
FILM
SPEED
SETTING
LEVER
until
the
index
numlicr
of
the
film
you
ure
using
matchers
with
the
black
line
on
(lie
window,
(yj
Rlsn'k
dots
between
the
film
speed
numbers
indicate
the
film
speeds
eis
shown
on
the
next
ASA
DIN
i2
!
r-r—i
p
20
32
40
6
d
80
ft
1
>0
ISO
£50
3£D
500
540
\0
1
•
*
i
—c
l
j
1
25
*
«
•
*
i
-1
'
i
*
<
i8
1
latt
1
v
•
t
4
*
1
ZW
1
1
400
1
•
t
•
|
«
i
**
1
Mr
i
800
1
•
30
15
13
14
/G
|
7
/
9
£D
2
1
1
J
-T
Z
23
ZS
36
^
?
?

SETTING
THE
SHUTTER
SPEED
AND
THE
DIAPHRAGM
OPENING
Shelter
speed
determines
the
length
of
exposure.
Shutter
speed
scales
«ro
mtlkul-
ed
as
I
lor
3
second)
2
far
^
second,
for
1/125
second
and
so
on.
At
"'h"
1
.,
ihu
shutter
retrains
open
as
long
tus
die
shutter
release
5s
depressed.
The
diaphragm
controls
(lie
amcmnl
of
light
passing
through
the
lens.
The
dhf
phmgtti
scales
indicate
the
sec
of
the
din
plirsigm
opening,
awl
range
from
the
S1BH.II-
c:sL
owning.
Id,
to
[lie
ffluxillMJIfn.
2
r
LI
*
In
ardor
to
pat
a
correct
exposure,
shut-
ter
-speed
and
diaphragm
opening
must
L«
|lrdparV
set,
3,
KotJile
SHUTTER
SPEED
SETTING
IiINtj
[o
mulch
the
desired
shutter
speed
to
the
red
jniint.
(lOj
2.
Looking
at
the
EXPOSURE
JNDICA
1
OK
WINDOW
on
the
lop
of
the
cam-
era,
rotate
DIAPHRAGM
SETTING
IGNt.j
ko
that
tlie
needle
in
the
window
is
matched
to
the
pointer.
{11}
Yoli
?a\\
also
sel
I
lie
desired
diaphragm
opening
fijut.
In
<UU
case
rotate
the
DIA¬
PHRAGM
SETTING
RING
to
match
llu:
while
dot
to
the
desired
rlmphragm
st'Eile
i
then
align
the
exposure
indicator
neeedle
and
ilie
pointer
hy
minting
ilie
SHUTTER
SPEED
SETTING
RING
(
1
2
}

X
Ef
you
ffntrHit
ffkrtlt'h
the
iWfilllc
to
ihe
l>nitiler,
change
the
Suiter
speed
or
tlin-
phragm
opening
sol
:
■
t
first
I.
Ami
do
adjustment
again.
■
L
J
„<jeilt,
i
iik
through
lln.
-
viowfimlor
ytni
4.110
also
check
if
ik
exposurt
&
wmi
or
not
;usL
before
you
slinol.
If
needle
and
pointer
in
ihe
viewfinder
do
not
align,
roinie
the
DIAPHRAGM
SETT¬
ING
RING
bo
that
the
needle
»
strictly
maldifd
to
1
he
pointer,
[lUj
10
■
n
focusing
lirjghl
frame
in
(he
v-owfinder
shows
ihc
area
of
(lie
picture,
fI4j
This
frame
automatically
corrects
pamllax
and
iiny
subject
Al
any
distance
will
be
lake'll
in
ihe
film
;is
far
as
it
is
within
llic
frame.
Looking
through
die
viewfinder,
move
Ike
HOUSING
LEVER
so
that
die
dou¬
ble
image
in
the
center
square
conies
in
one,
when
ilia
subject
in
in
focus,
flSa,
15|j)
i

DEPTH
OF
FI
HD
t
Hie
depth
of
field
is-
the
distance
between
the
nearest
urnck
farthest
points
of
sharp
fo¬
cus
in
the
pU
t
u
re
voll
take.
Ismtdl
Uper-
In
res
increase
the
depth
of
field.
As
an
ex¬
ample,
with
the
diaphragm
set
ell
5.6
and
(lie
distance
scale
at
1.5
meters
(J
ff.3
h
every¬
thing
from
1.3
meters
(4.3
ft.J
to
14
meters
[5,2
ft,}
will
be
in
focus,
However,
when
the
diaphragm
is
closed
flown
U>
16,
every-
tiling
from
1,1
meters
{3,6
ft.}
to
2
meters
(6.0
ft,]
will
he
in
sharp
foCUS
al
the
Biffle
d
istaisec
seltiug.
ft6j
In
taking
si
pOif-ft
t
the
blurring
of
the
background
by
using
a
wkle
opening
will
make
the
person
slant!
nut.
On
the
other
hand,
when
taking
el
group
picture
where
people
are
standing
in
rows
a
small
opening
becomes
noeessfiry
to
ensure
that
(he
focus
is
sharp
on
every
subject.
12
UNIVERSAL
FOCUSING
'1
For
snap
shooting,
set
the
distance
settle
ring
at
5
meters
[16.5
fi.)
and
die
diaphragm
scale
at
H,
Then
everything
Wwceji
$
nctWrs
(15
ft,)
and
over
20
meters
(i5
ft.}
will
he
in
iWus
and
you
used
not
adjust
focusing
for
each
allot.
(18,i
USING
THE
SELF-TIMER
After
or
Wore
winding
the
film,
set
the
SELF
TIMER
S1TTTINC
1
*EV
ER
at
"V
r
a51)
and
pre.-is
down
(lie
shutter
;
clews,
then
die
self
■
t
in
er
starts
Lo
make
lO-sCcond
delay
shot
lo
permit
the
photographer
to
get
in
the
picture.
When
you
do
not
use
(lie
sdf-
tin-cr
any
longer,
do
not
forget,
lo
return
the
I
ever
at
”X
F
’,
otherwise
you
will
truss
next
instant
el
lance
,
13

UNLOADING
THE
CAMERA
When
the
final
ocpdaurc
1
ihfl
bttn
made,
ihe
fi]j"n
must
lie
rewound
into
lliti
■
cartridtft.-
before
the.
rarr.em
is
opened
and
film
re¬
moved.
1.
Push
in
(lie
REWIND
RELEASE
BUT¬
TON.
(21)
2,
Turn
the
REWIND
KNOB
slightly
count-
er-dotkwise
and
let
it
pop
up,
ihcn
turn
it
to
(lie
direction
of
(lie
arrow
|2L
Continue
Eli
ruling
until
you
feel
el
less'
ening
of
ibe
tension,
indicating
that
die
film
Iirs
been
released
from
ilie
take-up
spool.
3,
Open
the
liack
of
the
camera.
Putt
out
tlie
REWIND
KNOB
and
(lie
cartridge
cilli
lx:
ftmovud
easily
from
(lie
camera.
<32l
I
14
kj

FLASH
PHOTOGRAPHY
I,
MiiMlil
I
he
llarll-gun
»ii
the
im-sstry
shut:
and
mrmeci
die
cord
u»
the
FLASI
L-
CONNECTCR.
When
you
use
the;
RICOH
BC-G05D
flash
unit,
you
need
not
U^e
oonnEclinj^
cord
since:
the
Ricoh
35L
is
equipped
with
the
direct
contact
on
the
accessory
shoe.
2f
Set
the
"MT
SYNCHRONIZATION
LEVER
at
''X"
when
you
use
the
electronic
flash
unit
Eirtd
set
at
“W*
with
the
flush
unit.
IM-J.t
3.
Correct
shutter
speed
must
be
selected
in
combination
of
die
flash
hulh
used
mid
synch
roiiizn
lion
lever
setting
as
shown
by
the
lahle.
(35)
■
I.
Focus
die
subject
and
measure
the
dis¬
tance
hy
the
distance
scale,
C34)
.5.
Read
the
instructions
of
die
flash
bylb
you
use
and.
obtain
Lis
Guide
Number
coiTCHjjojulin^
with
the
fthan
speed
miff
the
shutter
speed
you
are
using,
5.
Divide
the
guide
number
hy
the
distance
scale
figure.
Thus
obtained
number
is
die
correct
aperture.
Set
this
aperture
on
the
rainCnL.
Advance
die
film
and
relense
die
shutler.
Id
*
Class
F
B
t
1—
1/150
Unsuitable
Class
M
All
speeds,
STRUBO
All
speeds
Will
not
synch.
NOTE
;
When
using
self-timer
(lever
set
elL
"V"),
SyiidinmiiAlion
is
same
as
H
'X"
setting.

ACCESSORIES
1
Use
the
accessories
for
the
better
use
of
your
Ricoh
35
L
Ricoh
Flash
Units
Ricoh
BC
(slf.SU
Flash
Unit
Suitable
fnr
any
kind
of
flush
bulb
Ricoh
Lons
Hood
(Screw-in)
Excludes
u
rutcainihle
sklc-I
ijjl
il
from
the
Ifi-
eta
funs.
Auxiliary
Lens
Auxiliary
TnlpH*tfl
Wide
Ahgle
Leniet
and
Viewfintler
By
simply
n|
i
neb
i
x*g
the
R
ICE)H
At
JX
1
LIARY
LENSES
u>
your
RICQTI
E,
you
an
enjoy
the
striking
effiH’ls
of
Iclophuln
Jind
wide
n
iij^le
photography.
Ricoh
Filters
Ricoh
Fillers
mu
1
mtispertsiLhk-
tti
fjood
l
ul'Ui
res.
T
2
Filter
Absorhs
ul
ira
violet
anti
some
blue
ntyn
and
(jiirkflis
a
Inina
sky
|o
set
off
while
rloiuL
UV
Fitter
Absorbs
ultraviolet
rays.
Landscape
appears
clear
in
illc
print
taken
on
a
luizy
day,
Cun
1m:
used
for
protection
Ei.jp
lifts!
of
the
lens
moisture,
dust
sitwl
nccklentaL
scratches.
Skylight
Filter
Absorbs
ultraviolet
rays,
without
chan^mn
color
balance.
Renders
clear
distant
l:«id-
scajK:
pictures
and
adds
warmth
to
enlor
pie-
cures
inkni
in
the
open
shrub
or
on
overcrutt
clays.

.1
-if
J.
I
MAINTENANCE
Camera
is
u
precision
machine
which
re-
qLLIfes
careful
usuKf
Liml
lYiHmlcnance.
1.
Always
Steep
the
lens
dean.
finish
lightly
with
ii
lens
hrusli
and
wipe
fingerprints
nr
dir
Is
off
wllh
sofl
duirnis,
cot
Lori
orgAUie,
If
possibly
apply
Etlcohoi,
When
you
have
user!
the
camera
by
the
seaside
or
in
wet
weather„
never
fail
to
ckviii
ihe
ciltncni
llsortnighly
Ijn’fare
you
replace
it
in
live
wish,
3.
Whenever
you
rlo
ivoL
Luke
photognLpli*
place
lens
cap
over
the
lens
jMirl
to
pro¬
tect
the
lens.
5
r
Never
leave
(he
CEiinera
Ivy
any
magnetic
equipment.
Ci.
Keep
a
note
of
the
camera
body
and
Lens
serial
numbers,
1\
‘

RICOH’S
NATIONWIDE
SERVICE
SqppUrU
4
1#„
C'chome,
Minnmi
Ichi
jo
■
tli&l
it„
Sii]]|j(ii'u
Tel,
6-0381
Sendai
f
GckkfoOj
Sendhii
Tel
2-6358
ISHgatu
:
103,6-bandlo,
Higadli-horLtkiri;
Nigalti
Tel,
3-2336
Tckya
:
5,
4-t'lmnif:
h
Giirai,
Chuo-ku,
Tokyo
TeL
535-fill
Kanofiowd
i
l-"53
>
SLiiinko,
Kjiw.'isJLlii
Tel.
3-7796
Shjivaka
i
HiK<isliink:isvo-ch<]-,
Si/noLi
Td.
2-2724
Nagoya
(
&3„
Nkih.1
kuwafnA-chup
Njikn-ku,
TeL
34-5253
Osaka
i
32,
2-cliome,
bfiniunikyutnrO’clia,
1
lij^lii'kii,
Osnkn.
Te|.
771-7230
Hiroshima
E
24j
ShimuyfirugL-dics
Hirodiimii
Tel
4-4950
Fukuoka
i
210
l
Pukuoku
TeL
3-8731
Other manuals for 35
1
Table of contents
Other Ricoh Digital Camera manuals

Ricoh
Ricoh WG-5 GPS Guide

Ricoh
Ricoh Pentax K-3 III Use and care manual

Ricoh
Ricoh GR Digital II Use and care manual

Ricoh
Ricoh WG-30W User manual

Ricoh
Ricoh Caplio R40 User manual

Ricoh
Ricoh GR DIGITAL M User manual

Ricoh
Ricoh CX1 User manual

Ricoh
Ricoh CX1 Assembly instructions

Ricoh
Ricoh WG-50 Guide

Ricoh
Ricoh CX6 User manual

Ricoh
Ricoh RDC-7 User manual

Ricoh
Ricoh GR DIGITAL M User manual

Ricoh
Ricoh THETA User manual

Ricoh
Ricoh RDC-I700 User manual
Ricoh
Ricoh RDC-5300 User manual

Ricoh
Ricoh CX5 User manual

Ricoh
Ricoh Aficio 120 User manual

Ricoh
Ricoh Pentax K-S1 User manual

Ricoh
Ricoh Pentax 645Z User manual

Ricoh
Ricoh WG-80 User manual