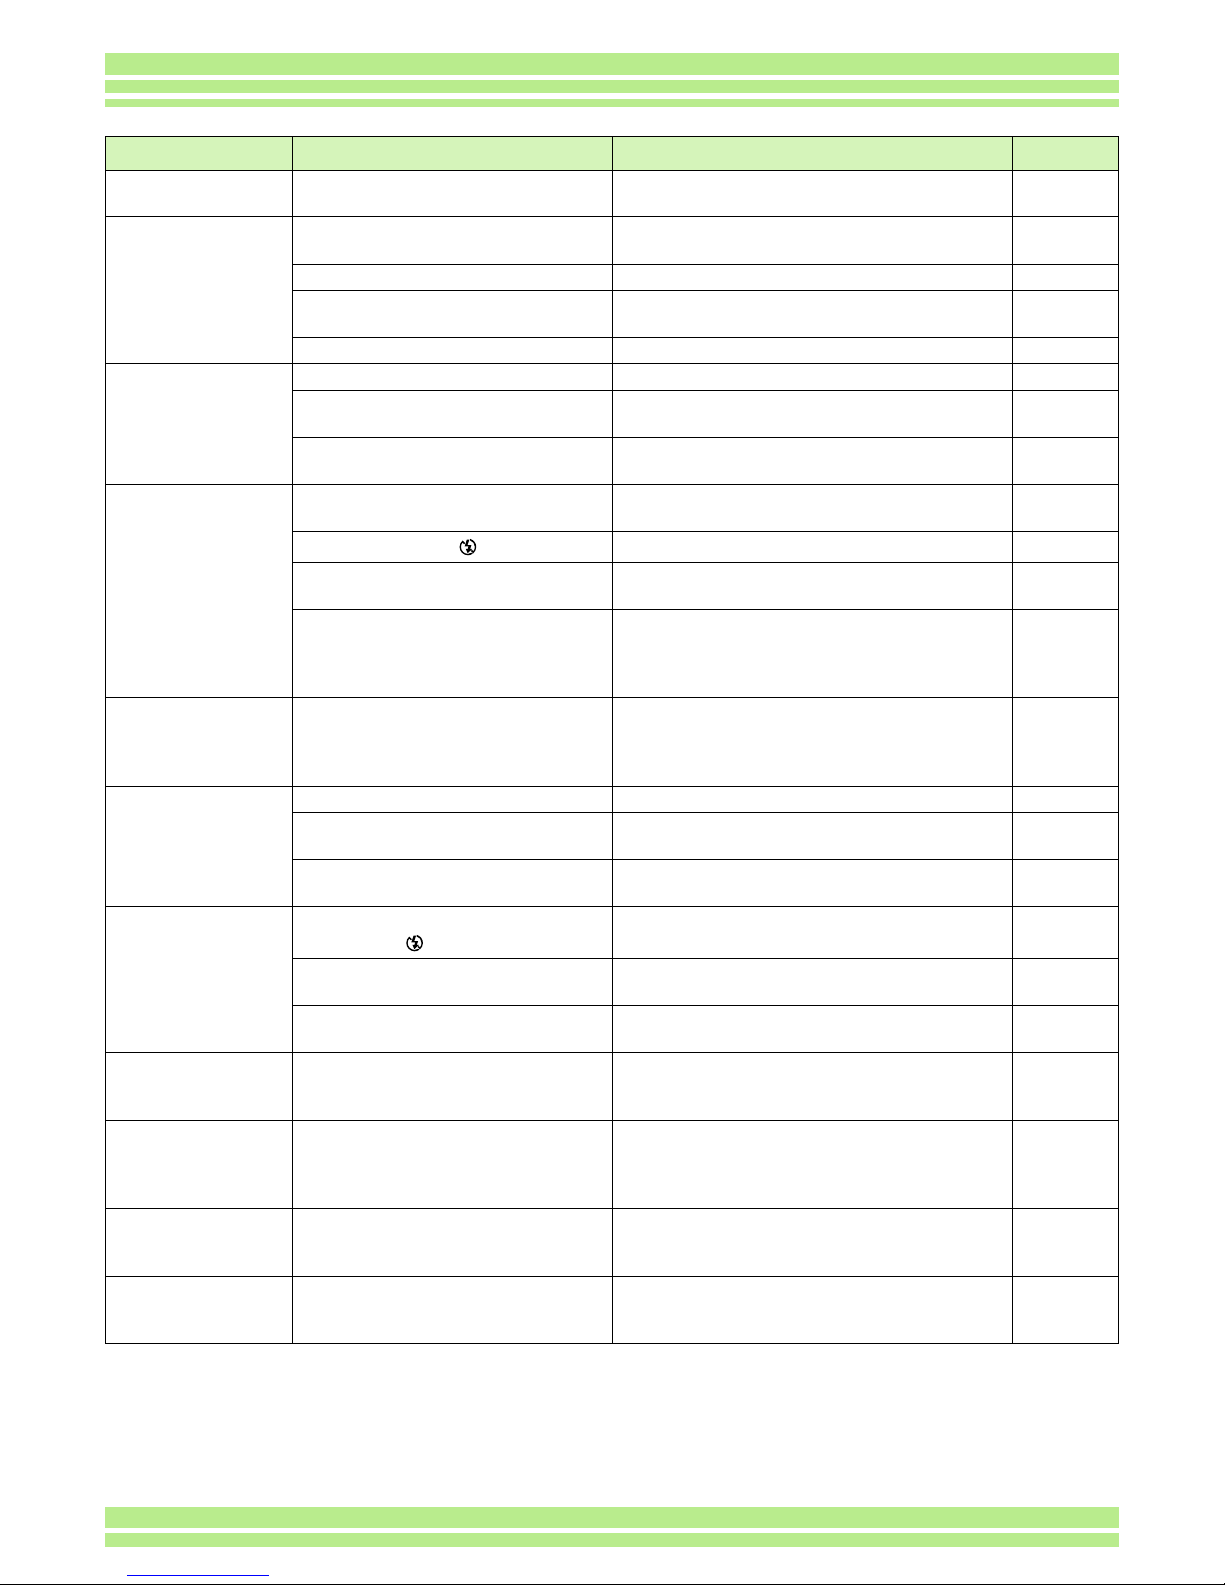
Ricoh Caplio G3 User manual

Appendices

155
Appendices
A. Specifications
Camera
TGeneral
Video Signal Format : NTSC, PAL
Power Source Voltage : AA Dry Alkaline Batteries (1.5 V) × 2
: Rechargeable Battery (3.7 V) × 1
: External Part (AC Adaptor); 3.8 V
External Dimensions :
123.9mm (W) × 56 mm (H) × 36.4 mm (D) (excluding projecting parts)
Weight : Caplio G3; Approx. 170 g (excluding battery/SD Memory Card/Handstrap)
Caplio G3 Model M; Approx. 160 g (excluding battery/SD Memory Card/
Handstrap)
Operating Temperature Range : 0oC to 40oC
Operating Humidity Range : 85% or less
Storage Temperature Range : -20oC to 60oC
TCamera Parts
Image Pickup Used : Total 3.34 million pixels (effective pixels 3.24 million)
Lens : Zoom Lens F2.6 to 4.7
• Focal Length : F:5.5 to 16.5 mm (35 mm equivalent, 35 to 105 mm)
• Minimum shooting range : Approx. 1 cm (0.4”) (at Wide / Macro Mode)
• Macro Shooting Distance : 1 to 60 cm (wide-angle)
• Digital Zoom : 3.4 times
Monitor Display Parts
• Screen Size : 1.6"
• Type : Translucent Amorphous Silicon TFT LCD
• Pixel Count : Approx. 80,000
White Balance : AUTO/Fixed (Daylight, Overcast, Tungsten light, Fluorescent light, One Push)
Exposure Adjustment
•
Light Metering Sensitive Distribution
: Multi Light Metering (256 segments),
Center-weighted Light Metering, Spot Metering
• Exposure Compensation : Manual Exposure Compensation +/-2.0EV (1/3EV Steps)
• Metering Method : TTL-CCD Metering Method
• Flash AE : Yes (In Daylight Synchro : On)
• Shutter : Still Images; 8, 4, 2, 1 to 1/2000 second, Movie; 1/30 to 1/2000 sec
• I SO Sensitivity : In AUTO, ISO 125, ISO 200, ISO 400, ISO 800
Distance Control
• AF Method : Normal Shooting: External Passive / CCD method;
Macro: CCD method
• AF Measurement Range : Normal: approx. 30 cm (11.7”) – infinity
Macro: approx. 1 – 60 cm (0.4” to 24”) (at Wide)
Internal Flash
• Method : Flashmatic
• Shooting Distance : Wide: approx. 0.2 –4.5 m ;
Tele: approx. 0.15 – 2.5 m (1.8 – 6.1 ft.)
• Operating Modes : Flash Off/Forced flash/Auto/Slow synchro/Red-eye reduction

156
Appendices
TImage Data Record/Replay Part
Pixels
• Still Images : 2048 × 1536, 1280 × 960, 640 × 480
• Text : 2048 × 1536, 1280 × 960
• Movies : 320 × 240, 160 × 120
File Formats
• Still Images : Compressed; JPEG (Exif2.2)
• Tex : TIFF (MMR Method ITU-T.6)
• Movies : AVI (Open DML Motion JPEG Format Compliant)
• Sounds : WAV (Exit Ver.2.2 Éþ law)
Camera File System Standard
:DCF⁄DCF, is an abbreviation for "Design rule for Camera File system",
standardized by JEITA.
Compression Format : JPEG Baseline Format Compliant (Still, Movie)
Image Size
• 2048 X 1536 N: approx. 568KB/Screen, F: approx. 1.12MB/ Screen
• 1280 X 960 N: approx. 307KB/Screen, F: approx. 614KB/ Screen
• 640 X 480 N: approx. 72KB/ Screen
TI/O Terminals
DC In : 3.8 V (AC Adaptor)
Video Out : 1.0 Vp-p (75 Ohms)
TDate Maintain Time : Approx. 2 weeks
TType of Memory Card that can Record,Playback
Memory Type : SD Memory Card, Multi-Media Card

157
Appendices
B. Optional Accessories
The Caplio G3 can be used with the items (sold separately) listed below.
C. SD Memory Card Recording Capacities
The following table shows the approximate number of images that can be recorded onto an SD Memory Card at various
image size and picture quality settings.
Item Model Remarks
AC Adaptor AC-4a For when you want to supply power directly from a wall outlet.
PC Card Adaptor FM-SD53 For when you want to load an SD Memory Card directly into your
computer's PC Card Slot.
Rechargeable Battery DB-43 or DB-40 Available for this camera.
Battery Charger BJ-2 This is a special high-speed (rechargeable) battery charger.
Mode Picture Quality Image Size 8 MB 32 MB 64 MB
Still Image F 2048 × 1536 4 19 40
N 2048 × 1536 8 37 77
F 1280 × 960 8 37 75
N 1280 × 960 14 67 138
N 640 × 480 43 189 387
Text 2048 × 1536 14 67 138
1280 × 960 43 189 387
Movie 320 × 240 18 Seconds 90 Seconds 180 Seconds
160 × 120 65 Seconds 320 Seconds 650 Seconds

158
Appendices
D. Using Your Camera Abroad
E. Cautions on Use
zFiring the flash consecutively may heat the firing unit. Do not fire it consecutively more than necessary.
zDo not fire the flash near eyes, or view the sun or other strong light directly through the viewfinder. It could cause visual
impairment (particularly for infants).
zDo not fire the flash near the driver of a vehicle to avoid causing accidents.
zThe batteries may become hot after extended use. Touching the batteries immediately after use could result in burns to
your fingers.
zBefore connecting the (optional) AC adaptor, make sure the camera is off.
zIf the LCD monitor or panel is exposed to sunlight, they may become washed out and images may become hard to
view.
zThe LCD monitor and panel may contain some pixels that do not remain lit up continually in part or at all. Also, the
brightness may become uneven because of the characteristics of LCDs. These are not failures.
zDo not force the side cover.
zDo not lift the camera by the side cover.
zWhile you are carrying the camera, be careful not to hit it against other objects.
zIn cold climates, if the camera has water droplets adhering to its surface, they may freeze. Using the camera with water
droplets frozen may cause it to fail. So, do not leave the camera as it is, with ice adhering to the camera.
zIn an environment where the temperature changes suddenly, condensation may occur in the camera, resulting in
troubles such as fogging of the glass surface or malfunctions of the camera. If this occurs, place the camera in a bag to
slow the temperature change as much as possible. Take it out of the bag after the temperature difference from the
atmosphere has decreased to a fairly small amount.
The AC Adaptor (Model AC-4a)
• Can be used in regions with a current of 120V, 50Hz/60Hz.
• If you are going to travel to a country that uses a different shaped wall outlet/plug, please
consult your travel agent on a plug adaptor suitable for wall outlets in your country of
destination.
The Warranty
• This product is for domestic use. The warranty is only valid domestically.
• In the unlikely event that a failure or breakdown should occur while abroad, please be aware
there is no after-sales service or compensation for repairs.
Using Playback on Television in other Regions
• Playback is possible on televisions (or monitors) equipped with a video input terminal. Please
use the video cable provided.
• This camera is compatible with both NTSC and PAL television formats. Switch the video
format on the camera to match the television environment in the region.
• When you go overseas, set your camera to the local video format.
Conditions in which condensation may easily occur
• When the camera is moved to an environment where the temperature differs greatly.
• In humid places
• In a room immediately after being heated, or when the camera is exposed directly to cooled air from an air-
conditioner or another similar appliance

159
Appendices
F. Care and Storage
Care
zPlease note that if fingerprints, dirt, etc. get onto the lens, picture quality will suffer.
zWhen dust or dirt does get on the lens, do not touch it directly with your fingers, and either use a blower (available in
stores) to blow it off, or a soft cloth to gently dust it off.
zIf the camera has gotten dirty, take the following steps: Make sure the battery/card cover and terminal cover are
securely closed. Then, clean the camera in tap water in a vessel such as a bucket. Remove sand and salt from the
camera. Finally, wipe water off its surface using a soft cloth.
zAfter use at the beach or around chemicals, wipe it off particularly carefully.
zIn the unlikely event that your camera fails to work properly, please consult your Ricoh Repair Center.
zThere are high voltage circuits in this camera. As this is dangerous, do not dismantle this camera under any
circumstances.
zDo not get volatile substances, such as thinner, benzene, or pesticides on your camera. This may cause a change in
quality, paint to peel, etc.
zAs the surface of the LCD Monitor is easily scratched, do not rub hard objects against it.
zPlease clean the surface of the LCD Monitor with solvents available on the market specially for cleaning LCD display
surfaces. Gently wipe with a soft cloth dampened with a little cleaner.
Storage
zPlease avoid storing your camera in the following kinds of places, as breakdown may result.
• In high heat and humidity, or where there is severe change in temperature or humidity
• Places with a lot of dust, dirt or sand
• Places with severe vibration
• In places of direct contact with vinyl products, rubber or chemicals, such as insect repellent, etc.
• Places with strong magnetic fields (monitors, next to strong magnets, etc.)
zIf you are using a battery or batteries, remove them if you are not going to use the camera for a long period of time.
Replacing the rubber packing
zTo maintain the waterproof ability, replace the rubber packing every two years, regardless of whether it has gotten
dirty. If you use the camera frequently in a wet, sandy, or dusty environment, we recommend replacing the packing
every year.
The replacement will be performed by the Ricoh Repair Center on a chargeable basis.
Precautions regarding care of your camera
1. Be sure to turn the power off.
2. Remove the batteries or AC Adaptor before caring for your camera.

160
Appendices
G. Troubleshooting
Refer to the symptoms and measures listed below before submiting the camera for repairs. If the
problem persists, contact your nearest Ricoh Service Center.
Power Supply
Shooting
Symptom Cause Measure Page
The power does not
come on. Batteries are not loaded. Or they are
exhausted. Load the batteries correctly. Recharge or use
the AC Adaptor. p.9
p.10
p.11
The AC Adaptor is not connected
correctly. Reconnect it properly. p.11
Because the camera overheated the
power was automatically turned off. Wait until the temperature of the camera
returns to normal. Do not attempt to cool the
camera suddenly.
—
The power cuts out
during use. The camera was left unattended and
not used, so Auto Power-Off shut it
off.
Turn the power back on. p.13
p.100
Batteries are running low. If you are using alkaline batteries, replace
them.
If you are using a rechargeable battery,
recharge it or use the AC adaptor.
p.9
p.10
p.11
The power does not
go off. Camera malfunction. Reload batteries.
If using the AC Adaptor, reconnect it. p.9
p.10
p.11
Cannot recharge the
batteries. Battery life. Replace the batteries with a new set. p.10
Batteries run out
quickly. They are being used in extreme high
or low temperatures. ——
Many shots are being taken in dark
places inside, requiring flash. ——
Symptom Cause Measure Page
Even if I press the
button, the camera
does not shoot.
Batteries are not loaded. Or they are
exhausted. If using alkaline batteries, replace the batteries
with a new set.
If using rechargeable batteries, recharge or
use the AC Adaptor.
p.9
p.10
p.11
The power is not on. Or the camera
is not in Shooting Mode.
Turn the power on and turn the Mode Dial to
Shooting Mode.
p.13
p.33
The shutter button is not pressed all
the way. Press the shutter button all the way. p.33
The SD Memory Card is not
formatted.
Format the card. p.97
The SD Memory Card does not have
any free space.
Load a new card, or delete unwanted files. p.15
p.85
End of SD Memory Card life. Load a new SD Memory Card. p.15
The flash is recharging. Wait until the flash lamp stops blinking. p.47
The SD Memory Card is "locked". Release the "Lock (write-protection)". p.15
The SD Memory Card's contact
surfaces are dirty. Wipe off with a soft, dry cloth. —

161
Appendices
I cannot check shot
images.
The image confirmation time is too
short.
Lengthen the image confirmation time. p.103
Images do not
appear on the LCD
Monitor.
The power is not on. Or the LCD
Monitor is dark. Turn the power on. Or adjust the brightness of
the LCD Monitor. p.13
p.104
The video cable is connected. Disconnect the video cable. p.83
The screen display status is in
[SYNCHRO-MONITOR MODE]. Press the Display button and switch display. p.21
It is set to [Power-Save]. Set [Power-Save] to off. p.99
Although it is set to
Auto Focus, it does
not focus.
The lens is dirty. Wipe clean with a soft, dry cloth. —
The subject is not in the center of the
shooting range.
Shoot with Focus Lock. p.35
It is a hard-to-focus subject. Shoot with Focus Lock or Manual Focus. p.35
p.58
The flash does not
fire. Or the flash
cannot recharge.
The Shooting Mode is set to R
(Multi-Shot) or 3(Movie).
Switch the Shooting Mode to 5(Still Image). p.47
The flash is set to (Flash Off). Set to Flash Off with the Fbutton. p.47
The White Balance is set to
something other than Auto mode.
Set the White Balance to Auto mode. p.52
Batteries are running low. If using alkaline batteries, replace with a new
set.
If using rechargeable batteries, recharge or
use the AC Adaptor.
p.9
p.10
p.11
Even though the
flash fired, the
picture is dark.
The distance to the subject is greater
than 2.5 meters in Telephoto or
greater than 4.5 meters in Wide-
angle.
Get closer to your subject and shoot. p.47
The image is too
bright. You are too close to the subject. Set to Flash Off with the Fbutton. p.47
It is over-exposed. Use exposure compensation. Cancel
Exposure Time.
p.50
p.66
The brightness of the LCD Monitor is
odd. Adjust the brightness of the LCD Monitor. p.104
The image is too
dark.
The shot was taken in a dark place
while set to (Flash Off).
Release the Flash Off with the Fbutton. p.47
It is under-exposed. Use exposure compensation. Set to Exposure
Time.
p.50
p.66
The brightness of the LCD Monitor is
odd. Adjust the brightness of the LCD Monitor. p.104
The image lacks
natural color.
The picture was shot in conditions
that are hard for Auto White Balance
to adjust to.
Add a white object to the composition. Or use
Auto Balance in a setting other than Flash
shooting or Auto Mode.
p.52
The date, or
recording
information does not
appear.
The screen display function is set to
No Display.
Press the Ebutton and switch
display.
p.21
The brightness of
the LCD Monitor
changes during AF.
You are using it in a dark place or
when Auto Focus range and
surrounding brightness are different.
This is normal. —
There is a vertical
smear on the image. This is a phenomenon that occurs
when a bright subject is shot. It is
called the smear phenomenon.
This is normal. —
Symptom Cause Measure Page

162
Appendices
Playback/Deleting
Symptom Cause Measure Page
Cannot Playback. Or
the Playback screen
does not come out.
It is not set to 6(Playback). Turn the Mode Dial to 6(Playback Mode). p.77
The VIDEO cable was not connected
properly.
Reconnect it properly. p.83
The contents of SD
Memory Card cannot
be replayed, or the
replay screen does
not appear.
An SD Memory Card is not loaded.
Or an SD Memory Card with no
stored images is loaded.
Load a card with stored images. p.15
You played back an SD Memory Card
that was not formatted by this device.
Load a card that was formatted and stored on
by this device.
p.97
You played back an SD Memory Card
that was not recorded normally.
Load a normally recorded card. p.15
The SD Memory Card's contact
surfaces are dirty.
Wipe with a soft, dry cloth. —
There is something wrong with the
SD Memory Card.
Play another card and if there is nothing wrong
with it, the camera is OK. There may be
something wrong with the card, so do not use
it.
—
An image
disappeared.
Batteries are running low. If using alkaline batteries, replace with a new
set.
If using rechargeable batteries, recharge or use
the AC Adaptor.
p.9
p.10
p.11
The camera was left unattended and
not used, so Auto Power-Off shut it
off.
Turn the power back on. p.13
Files cannot be
deleted.
The file has been set to protect. Release the protection. p.88
The SD Memory Card is "locked". Release the "Lock (write-protection)". p.15
Cannot format an SD
Memory Card.
The SD Memory Card is "locked". Release the "Lock (write-protection)". p.15

163
Appendices
Other Problems
Symptom Cause Measure Page
Cannot load the SD
Memory Card.
The card is facing the wrong way. Load correctly. p.15
Even when the
camera's buttons are
pressed, it does not
operate.
Batteries are running low. If using alkaline batteries, replace with a new
set.
If using rechargeable batteries, recharge or use
the AC Adaptor.
p.9
p.10
p.11
Camera Malfunction. Turn the power off once, turn it back on and
switch to 5(Still Image).
p.8
p.13
Reset the camera. p.9
p.10
p.11
The date is wrong. The correct date/time are not set. Set the correct date/time. p.14
The date set has
disappeared.
The batteries were removed. If the batteries are removed for about two
weeks, the date setting will be lost. Make the
settings again.
p.14
Auto Power-Off does
not work.
Auto Power-Off is set to OFF. Set the time for Auto Power-Off. p.100
The beep does not
sound.
The camera is set to silent. Set the beep to ON. p.101
Images do not
appear on the TV.
The video format is set wrong. Set to correct format. p.106
The cable is not connected. Reconnect the cable properly. p.83
The TV in/out switch is incorrectly set. Check that the TV in/out switch is set correctly. —

164
Appendices
About connecting to your computer/software
Symptom Cause Measure
Cannot download
images
Connect your camera via
the USB hub to your
computer.
1. Your camera may not be recognized correctly if you connect to the
USB Port of your computer via a USB hub. Connect it directly to the
USB port of your computer.
Cannot download
images
(Only for Windows98/
98SE/Me)
The COM Port setting is
wrong. 1. Connect your camera to the computer with the USB cable. Open
[System] from inside the [Control Panel], then open the [Device
Manager] in the [System Properties] dialog box.
2. Click the [+] on the left side of [Port COM/LPT] to open, specify
[Ricoh Camera Port] and click [Properties].
3. Click the [Port Select] tab.
4. Select a COM Number not being used from [PortName].The port
currently allocated for your camera is indicated by a "*".
Immediately after installing the USB driver, COM 7 should be
selected, so select a number above COM8.
Cannot download
images
(For all Windows
OS's)
The computer is not
recognizing the camera
correctly.
1. Connect your camera to the computer with the USB cable. Click
[Start] on the Windows task bar.
2. Select [Settings], open [System] from inside the [Control Panel],
then open the [Device Manager] in the [System Properties] dialog
box.
If using the Windows2000/XP, click the [Hardware] tab then click the [Device
Manager] button.
3. Click the [+] on the left side of [Other Devices] and make sure there
is not a [Caplio G3 ] below it. If there is, click the [Delete(E:)] button
to delete it.
Select [Caplio Software] from [Add/Remove Applications] of the
[Control Panel], click the [Add/Remove] button and then install the
software.
4. Turn off your camera and computer.
5. Turn your computer back on and reinstall the software from the CD-
ROM. (At this time, do not connect the camera.)
Next, connect the camera to the computer with the USB cable.
When the computer recognizes the camera, the [New Hardware]
screen launches and your camera is registered by the computer.
Cannot download
images
(For Windows98/
98SE/Me)
The computer is not
recognizing the camera
correctly.
1. Connect your camera and computer with the USB cable. Click
[Start] on the Windows task bar.
2. Select [Settings], open [System] from inside the [Control Panel],
then open the [Device Manager] in the [System Properties] dialog
box.
3. Click the [+] on the left side of [Port COM/LPT] to open, and click
whether or not there is an Unknown Device symbol (!) indicated for
[Ricoh Camera Port]. Alternately, check if there is an Unknown
Device symbol (!) indicated for [RICOH USB Virtual COM] under
[Universal Serial Controller]. If there is, click the [Delete(E:)] button
to delete it.
4. Select [Caplio Software] from [Add/Remove Programs] of the
[Control Panel], click the [Add/Remove] button and then install the
software.
5. Turn off your camera and computer.
6. Turn your computer back on and reinstall the software from the CD-
ROM. (At this time, do not connect your camera.)
Next, connect the camera to the computer with the USB cable.
When the computer recognizes the camera, the [New Hardware]
screen launches and your camera is registered by the computer.

165
Appendices
Cannot download
images
(For Windows 2000)
The computer is not
recognizing the camera
correctly.
1. Connect your camera to the computer with the USB cable.
2. Click [Start] on the Windows task bar.
3. Select Settings, open [System] from inside the [Control Panel], then
open the [Device Manager] in the [System Properties] dialog box.
4. Click the [+] on the left side of [Port (COM and LPT)] to open, and
check if there is an Unknown Device symbol ( ! ) indicated for
[Ricoh Camera Port(COMxx)].
If there is, click the [Delete(U:)] button to delete it.
5. Select [Caplio Software] from [Add/Remove Applications] of the
[Control Panel], click the [Add/Remove] button and then install the
software.
6. Turn off your camera and computer.
7. Turn your computer back on and reinstall the software from the CD-
ROM. (At this time, do not connect your camera.)
8. Next, connect the camera to the computer with the USB cable.
When the computer recognizes the camera, the [New Hardware]
screen launches and your camera is registered by the computer.
Cannot download
images
(For Windows XP)
The computer is not
recognizing the camera
correctly.
1. Connect your camera to the computer with the USB cable.
2. Click [Start] on the Windows task bar.
3. In Windows XP, if you open the [Control Panel] and click on [Switch
to Classic Display] in the control panel, the [System] icon is
displayed.
4. Click the [System] icon, select the [Hardware] tab and click [Device
Manager].
5. If there is, right-click the unknown device mark to display the menu
and select [Driver Update]. Once the [Start the Update Hardware
Wizard] screen appears, check the box next to [Install from a list or
specific location (Advanced)] and click the [Next] button. Check the
box next to [Search for the best driver in these locations.] - [Include
this location in the search] and select C:/Program Files/Caplio
Software/WIA driver. Then click the [Next] button. The driver is now
installed properly and recognizes the camera correctly.
Even if you check
[Do not save same
images when
saving], in the
RICOH Gate La
Optional Settings, the
same images end up
being downloaded to
your computer.
The camera's clock is
incorrectly set, or the
camera's clock information
has been reset.
In order for the [Do not save same images when saving] function to
work properly, the camera's clock needs to be set correctly. Set the
camera's clock information correctly.
For how to set the camera's clock information, see p.14.
Files downloaded
from the camera
were deleted by the
computer. You tried
to download the
same files from your
camera again, but
they could not be
downloaded.
In the RICOH Gate La
Optional Settings, if you
insert a check in [Do not
save same images when
saving], files already
downloaded to your
computer cannot be
download again.
In the RICOH Gate La Optional Settings, uncheck [Do not save same
images when saving].
Symptom Cause Measure

166
Appendices
H. Error Messages
If an error message is displayed on the LCD Monitor, follow the steps below.
Error Message Countermeasure Page
INSERT CARD A card is not loaded. Insert a card. p.15
SET DATE The date is not set. Set the date. p.14
FILE NUMBER OVER LIMIT The file number limit has been exceeded. Please use another
card, or delete unwanted files.
p.15
p.85
UNMATCHED FILE A file that cannot be played back was selected. —
INSUFFICCIENT MEMORY. CONTINUE? Because there is not sufficient capacity on the card, all the files
cannot be copied. Use another card.
p.92
PROTECTED You are trying to delete a protected file. p.88
WRITE-PROTECTED The card is "Locked (write-protection)". Unlock the card. p.15
PRINT SETTINGS CANNOT BE SET FOR
THIS FILE.
This file (movies and other) cannot be selected for printing. —
INSUFFICIENT MEMORY Files cannot be stored. Make sure there is enough free space,
or delete files.
p.85
The image print number limit has been exceeded. Select an
image and set the number to 0.
p.93
FORMAT INTERNAL MEMORY It is necessary to format internal memory. p.98
FORMAT CARD The card is not formatted. Format the card. p.97
CARD ERROR Please reformat. If, after doing so, the error message still
appears, the card may be faulty. Do not use the card.
p.97
WRITE TO CARD Writing file to memory. Wait until writing finishes. —
NO FILE There are no files that can be played back. —
CANNOT RECORD The Number of remaining shots is 0. Switch to another card or
internal memory.
p.15
If the countermeasures above do not remedy the problem, please contact the Ricoh Service Center, or the
store where you purchased your camera.

167
Appendices
I. About the Warranty and Servicing
1. This product is backed by a limited warranty. During the warranty period mentioned in the Warranty supplied with your
camera, any defective parts will be repaired free of charge. In the event of a camera malfunction, contact the dealer
from which you purchased the camera or your nearest Ricoh service office. Please note that you will be not be
reimbursed for the cost of bringing the camera to the Ricoh service office.
2. This warranty does not cover any damage resulting from:
1. failure to follow the instructions in the instruction manual;
2. repair, modification or overhaul not conducted by an authorized service center listed in the instruction manual;
3. fire or natural disaster;
4. improper storage, such as exposing the camera to high temperatures, humidity, or mothballs; storing it with a
leaking battery; storing the camera in a dirty condition so that it becomes moldy; or otherwise insufficiently caring for
the camera;
5. Submergence; exposure to floods or spilled alcohol or other beverages; allowing sand or mud to enter the camera;
exposure to physical shocks; or dropping the camera.
3. After the warranty period has passed, you will be liable for all repair fees, including those incurred at an authorized
service center.
4. You will be liable for all repair fees, even within the warranty period, if the warranty card is not attached or if the
distributor's name or the purchase date have been changed or are not indicated on the card.
5. Expenses for overhaul and thorough inspection by special request of the customer will be charged to the customer,
whether or not they are incurred during the warranty period.
6. This warranty only applies to the camera and not to the accessories, such as the case and strap, nor does it apply to
the battery and other consumables provided.
7. Any consequential damages arising from failure of the camera, such as expenses incurred in taking pictures or loss of
expected profit, will not be reimbursed whether they occur during the warranty period or not.
8. The above provisions refer to repairs offered free of charge, and do not limit your legal rights. The intention of the
above provisions is also described in the warranty card provided with this camera.
9. Parts essential to the servicing of the camera (that is, components required to maintain the functions and quality of the
camera) will be available for a period of five years after the camera is discontinued.
10. Please note that if the camera is seriously damaged by flooding, submergence, infiltration of sand or mud, violent
shocks or dropping, it may not be repairable, and restoration to its original condition may be impossible.
Declaration of Conformity
“The Product complies with the requirements of the EMC Directive 89/336/EEC.”
• Before sending the camera in for repair, check the battery and read the instruction manual again to ensure
proper operation.
• Some repairs require a significant amount of time to be completed.
• When sending the camera to a service center, please include a note which describes the defective part and
the problem as precisely as possible.
• Remove all accessories not related to the problem before sending the camera to the service center.
• Before taking any important pictures (such as at weddings, on trips abroad, etc.), test the camera to check
operation and ensure proper functioning. We recommend that you keep this manual and spare battery on
hand.
• This warranty does not apply to data stored on an SD Memory Card or in internal memory.

168
Appendices
INFORMATION TO THE USER
USA FCC Part15 Class B
The equipment has been tested and found to comply with the limits for a Class B digital device, pursuant to part 15 of
the FCC Rules. These limits are designed to provide reasonable protection against harmful interference in a
residential installation. This equipment generates, uses, and can radiate radio frequency energy and if not installed
and used in accordance with the instructions, may cause harmful interference to radio communications. However,
there is no guarantee that interference will not occur in a particular installation. In this equipment does cause harmful
interference to radio or television reception, which can be determined by turning the equipment off and on, the user is
encouraged to try to correct the interference by one or more of the following measures:
– Reorient or relocate the receiving antenna.
– Increase the separation between the equipment and receiver.
– Connect the equipment to outlet on a circuit different from that to which the receiver is connected.
– Consult the dealer or an experienced radio/TV technician for help. (FCC 15.105B)
Changes or modifications not expressly approved by the party responsible for compliance could void the user’s
authority to operate the equipment. (FCC 15.21)
Properly shielded and grounded cables and connectors must be used for connection to a host computer in order to
comply with FCC emission limits. (FCC 15.27)
An AC adapter with a ferrite core must be used for RF interference suppression.
COMPLIANCE INFORMATION STATEMENT
Product Name: DIGITAL CAMERA
Model Number: Caplio G3/Caplio G3 Model M
This device complies with Part 15 of the FCC Rules.
Operation is subject to the following two conditions:
(1) This device may not cause harmful interference, and
(2) This device must accept any interference received, including
interference that may cause undesired operation.
RICOH CORPORATION
5 Dedrick Place, West Caldwell NJ, 07006 Tel.: 1-800-225-1899
Note to Users in Canada
Note: This Class B digital apparatus complies with Canadian ICES-003
Remarque Concernant les Utilisateurs au Canada
Avertissement: Cet appareil numerique de la classe B est conforme a la norme NMB-003 du Canada
IMPORTANT SAFETY INSTRUCTIONS-SAVE THESE INSTRUCTIONS DANGER-TO REDUCE THE RISK OF FIRE
OR ELECTRIC SHOCK, CAREFULLY FOLLOW THESE INSTRUCTIONS.

169
Appendices
Telephone Support Numbers in Europe
UK (from within the UK) 02073 656 580
(from outside of the UK) +44 2073 656 580
Deutschland (innerhalb Deutschlands) 06331 268 438
(außerhalb Deutschlands) +49 6331 268 438
France (à partir de la France) 0800 91 4897
(en dehors de la France) +33 800 91 4897
Italia (dall’Italia) 02 696 33 451
(dall’estro) +39 02 696 33 451
España (desde España) 91 406 9148
(desde fuera de España) +34 91 406 9148

170
Appendices
Ricoh Service Offices
Ricoh Company, Ltd.
3-2-3, Shin-yokohama
Kohoku-ku, Yokohama-shi 222-8530
Japan
http://www.ricoh.co.jp/r_dc
Ricoh Factory Service Center
250 North 54th Street
Chandler, AZ 85226
http://www.ricohzone.com/
RICOH EUROPE B.V. (PMMC EUROPE)
Oberrather Straße 6
D-40472 Düsseldolf
Germany
http://www.ricohpmmc.com
RICOH UK LTD. (PMMC UK)
Ricoh House
1 Plane Tree Crescent
Feltham, Middlesex TW13 7HG
England
RICOH FRANCE S.A. (PMMC FRANCE)
383, Avenue du Général de Gaulle –
BP 307-931-13 Clamart Cédex,
France
RICOH ESPANA, S.A. (PMMC SPAIN)
Av. Litoral Mar, 12-14,
08005 Barcelona,
Spain
RICOH EUROPE B.V. (PMMC BENELUX)
Koolhovenlaan 35,
1119 NB Schiphol-Rijk,
The Netherlands
RICOH HONG KONG LIMITED
Personal Multimedia Products Center
21/F., Tai Yau Building, 181 Johnston Road,
Wan Chai, Hong Kong
Ricoh Australia Pty. Ltd.
8 Rodborough Road
Frenchs Forrest, N.S.W. 2086
Australia
http://www.ricoh.com.au
Other manuals for Caplio G3
2
This manual suits for next models
1
Table of contents
Other Ricoh Digital Camera manuals

Ricoh
Ricoh RDC-6000 User manual

Ricoh
Ricoh RDC-I700 User manual

Ricoh
Ricoh WG-60 User manual

Ricoh
Ricoh Caplio GX100 User manual

Ricoh
Ricoh RDC-4200 Assembly instructions

Ricoh
Ricoh R06010 Guide

Ricoh
Ricoh 126C-FLEX TLS User manual

Ricoh
Ricoh CX1 User manual

Ricoh
Ricoh CX3 User manual

Ricoh
Ricoh WG-4 User manual

Ricoh
Ricoh PENTAX K-3 User manual

Ricoh
Ricoh G800 User manual

Ricoh
Ricoh R4 User manual

Ricoh
Ricoh Caplio RR330 User manual

Ricoh
Ricoh RDC-6000 User manual

Ricoh
Ricoh Caplio R5 User manual

Ricoh
Ricoh Capio GX User manual

Ricoh
Ricoh WG-30 User manual

Ricoh
Ricoh 35 User manual

Ricoh
Ricoh Caplio GX100 User manual