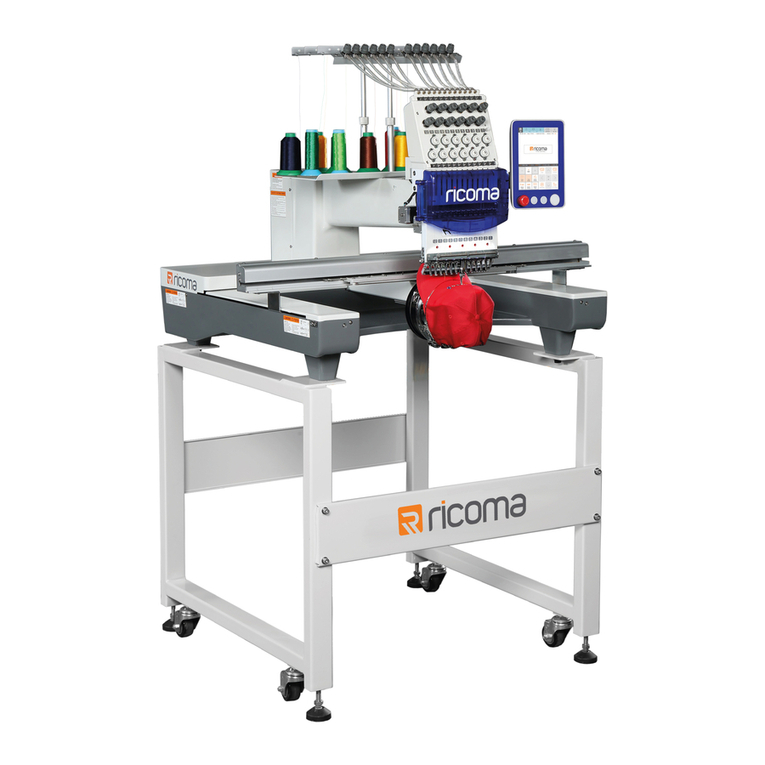
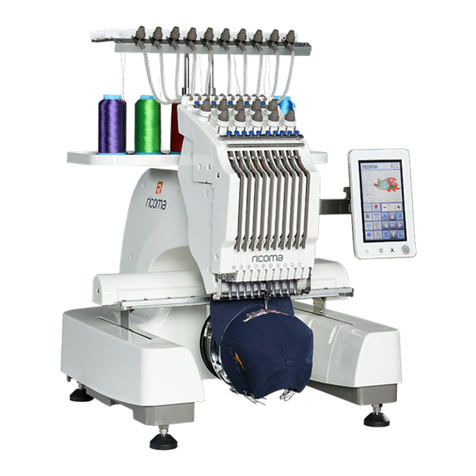
Ricoma EM-1010 User manual

E
M
-
1
0
1
0
Operation Manual

EM Series Home Embroidery Machine Operation Manual
Contents
IMPORTANT..........................................................................................................................................04
INTRODUCTION...................................................................................................................................04
SAFETY NOTES.....................................................................................................................................04
Danger-To prevent electric shock ............................................................................................................04
Warning-To prevent burn, fire, electric shock or personal injury.............................................................04
1.Before applying with lubrication oil or conducting other maintenance and adjustment operation specified herein,
please pull out power plug from socket.......................................................................................................04
2.Stop operating the machine in case power lines or plugs are damaged. The machine also cannot function
normally if it was damaged during a fall or was splashed with water. Please deliver the machine to the nearest
authorized agent or technical service center, and the professional would check it and conduct electrical or
mechanical adjustment accordingly........................................................................................................04
3.Keep work area clean..........................................................................................................................05
4.Precautions during embroidery............................................................................................................05
5.Do not play the machine as a toy...........................................................................................................05
6.Precautions for prolonging machine life ...............................................................................................05
7.Precautions for repair or adjustment.....................................................................................................05
LICENSEAGREEMENT........................................................................................................................06
WARNING LABEL.................................................................................................................................06
CHAPTER I MACHINE STRUCTURE AND FUNCTIONS.....................................................................07
1.Ten-needle embroidery machine........................................................................................................07
2.Other functions.................................................................................................................................07
LCD that can be easily read and used ...................................................................................................07
USB port as standard fittings...............................................................................................................07
Move needle bar at any time or thread the selected needle bar ................................................................08
Safety device.....................................................................................................................................08
Functions available .................................................................................................................................08
Multiple built-in patterns .......................................................................................................................08
CHAPTER II MACHINE PART NAME AND CORRESPONDING FUNCTIONS ....................................09
Front view...............................................................................................................................................09
Right/rear view .......................................................................................................................................09
Operation panel ......................................................................................................................................10
CHAPTER III ACCESSORIES ...............................................................................................................11
CHAPTER IV OPTIONALACCESSORIES ............................................................................................11
CHAPTER V MACHINE INSTALLATION.............................................................................................11
Precautions for installation and transportation.......................................................................................11
Installation position................................................................................................................................12
Machine installation ...............................................................................................................................13
Keep machine stable by regulating four anchors.......................................................................................13
CHAPTER VI OPERATION PRECAUTIONS.........................................................................................17
1.Precautions for power supply................................................................................................................17
2.Precautions for needle..........................................................................................................................17
3.Precautions for cop latch......................................................................................................................17
CHAPTER VII BASIC STEPS.................................................................................................................18
BOBBIN INSTALLATION ......................................................................................................................18
01


EM Series Home Embroidery Machine Operation Manual
2
Removal of bobbin case ...........................................................................................................................1 8
1.Open bobbin case................................................................................................................................18
2.If thread hook is not forward, pull it forward .........................................................................................18
3.Grab bobbin case bolt, and take out bobbin case ....................................................................................19
4.Add oil for machine ............................................................................................................................19
5.After adding engine oil, insert bobbin case into bobbin and screw on ......................................................19
Bobbin installation..................................................................................................................................19
1.Put bobbin into bobbin case..................................................................................................................19
2.Lead thread through thread trough and tension regulating clip................................................................19
3.Take thread out from opening of tension regulating clip about 50mm (2 in.).............................................19
Bobbin case installation...........................................................................................................................20
1.Insert bobbin case in bobbin.................................................................................................................20
2.Completely insert bobbin case until clamped in place.............................................................................20
3.Screw on bobbin case ..........................................................................................................................20
II. START-UP..........................................................................................................................................20
1.Insert power cable into machine ...........................................................................................................20
2.Insert power plug into power socket .....................................................................................................20
3.Turn main power switch in the rear of machine to “I”.............................................................................20
4.When machine is turned on, needle bar rack would automatically move to the position of 5# needle bar
(namely initial position).........................................................................................................................21
To prevent injury, keep hands and other objects away from needle bar rack.............................................21
OPERATING INTERFACE DESCRIPTION............................................................................................21
III. INPUT PATTERN..............................................................................................................................22
1.Insert storage medium (to USB port on the side of operation head) Enter pattern selection interface by
touching , as shown below...................................................................................................................22
2.Select storage medium catalogue by touching ...................................................................................22
3.Select pattern by touching , would display behind the pattern selected .................................................22
4.To facilitate embroidery or manage pattern, copy the pattern selected to machine memory by touching ..22
5.Check if the file copied to machine is correct by touching ...................................................................22
Then the pattern input is completed.........................................................................................................22
IV. SELECT EMBROIDERY PATTERN..................................................................................................23
1.View the pattern selected by touching ..............................................................................................23
2.Select machine memory by touching , and touch to select pattern, confirm it by clicking on , after
picture jumping, the following figure would show ....................................................................................23
V. SELECT EMBROIDERY FRAME.......................................................................................................24
1.Enter pattern card setting interface by touching .................................................................................24
2.Enter embroidery frame dimension selection screen by touching ........................................................24
3.Select embroidery frame D by touching , and click on OK for confirmation ..........................................24
VI. PUT CLOTH IN EMBROIDERY FRAME..........................................................................................25
1.Loosen screws on the outer frame .........................................................................................................25
2.Put cloth on external frame with its right-side upward............................................................................25
3.Put internal frame into external frame...................................................................................................25
4. Tighten screw slightly, Pull cloth edge out.....................................................................................25
5.Tighten screws and confirm if cloth is tight ...........................................................................................25
VII. INSTALL EMBROIDERY FRAME ON THE MACHINE..................................................................26
1.Embroidery frame installation..............................................................................................................26
2.Loosen two screws on embroidery frame stand......................................................................................26
3.Move left arm until obvious stagnation during sliding toward right side ..................................................26
4.Grab embroidery frame horizontally, align left and right side simultaneously with the embroidery frame stand clamp,
move toward the machine, and keep the hole of embroidery frame on the location pin of frame stand..27
EM Series Home Embroidery Machine Operation Manual
3
VIII. CHECK EMBROIDERYAREA......................................................................................................27
IX. BOTTOM THREADING....................................................................................................................27
1.Pull out thread from bobbin, and lead thread respectively through the thread guide hole , raise
tension regulating clip to press thread beneath, as shown below.............................................................28
2.Lead threader through thread guide ,clamp thread with the clip on threader and pull thread out to ensure
smooth threading...................................................................................................................................28
3.Install both ends of thread guide onto machine, and install respectively on and..........................28
4.Raise clip to press thread and complete threading according to the guide line on machine case ...........28
5.When thread is led through thread distribution plate as shown below, ensure thread bypass thread distribution
plate from right to the left, then through position in above figure, pull thread downward and then through thread
guide hole as shown below...................................................................................................................29
6.Lead thread through needle bar guide groove at the position in the following figure,then through needle hole
and downward through presser foot hole, pull thread upward and through thread clamper/cutter, as shown below,
pull downward by force to cut thread by the cutter inside...........................................................................29
X. START EMBROIDERY
1.To start machine, press down Start/Stop at the bottom right of machine....................................................29
2.After the first color is embroidered, embroidery machine would automatic stop working and the thread is cut
off, needle bar case will automatically move to the position of 2nd color and start embroidery.....................30
3.It will continue until the last color embroidery is completed, and then embroidery machine will automatically
stop.......................................................................................................................................................30
XI. CHECK THREAD TENSION.............................................................................................................30
1.Correct thread tension..........................................................................................................................30
XII. TAKE OFF EMBROIDERY FRAMEAND CLOTH ..........................................................................31
1.Grab the left and right side of embroidery frame stand arm, raise frame stand slightly and pull out embroidery
frame toward oneself..............................................................................................................................31
2.Removal of cloth .................................................................................................................................31
XIII. SHUTDOWN
1.Set main power switch at “O”...............................................................................................................31
2.Pull out power cable from power socket ................................................................................................31
3.Pull out power cable from machine, if necessary.....................................................................................31
VIII. QUICK REFERENCE GUIDE FOR INTERFACE..........................................................................32
1.Main interface.....................................................................................................................................32
2.Design selection and management interface...........................................................................................33
3.Needle bar color setting interface..........................................................................................................33
4.Design setting interface .......................................................................................................................34
5.Comprehensive setting interface...........................................................................................................34
IX. OTHER BASIC STEPS......................................................................................................................35
1.Needle replacement .............................................................................................................................35
2.Easy replacement of thread cone...........................................................................................................35

EM Series Home Embroidery Machine Operation Manual
4
©Copyright 2012 RiCOMA (SHENZHEN) CO., LTD. All right reserved.
Add: Baochangli Industry Park, Jinlong Road 3,Baolong Community, Longgang District,Shenzhen, PRC
Tel: +86-755-2585 7772 Fax: +86-755-2585 7773
IMPORTANT:
READ BEFORE DOWNLOADING, COPYING, INSTALLING OR USING.
By downloading, copying, installing or using the software you agree to this license. If you do not agree to
this license, do not download, install, copy or use the software.
Intel License Agreement for Open Source Computer Vision Library
Copyright © 2000, Intel Corporation, all rights reserved. Third party copyrights are property of their respective
owners.
Redistribution and use in source and binary forms, with or without modification, are permitted provided that the
following conditions are met:
•Redistribution’s of source code must retain the above copyright notice, this list of conditions and the following
disclaimer.
•Redistribution’s in binary form must reproduce the above copyright notice, this list of conditions and the following
disclaimer in the documentation and/or other materials provided with the distribution.
•The name of Intel Corporation may not be used to endorse or promote products derived from this software without
specific prior written permission.
This software is provided by the copyright holders and contributors “as is”and any express or implied warranties,
including, but not limited to, the implied warranties of merchantability and fitness for a particular purpose are
disclaimed. In no event shall Intel or contributors be liable for any direct, indirect, incidental, special, exemplary,
or consequential damages (including, but not limited to, procurement of substitute goods or services; loss of use,
data, or profits; or business interruption) however caused and on any theory of liability, whether in contract, strict
liability, or tort (including negligence or otherwise) arising in any way out of the use of this software, even if
advised of the possibility of such damage.
All information provided related to future Intel products and plans is preliminary and subject to change at any
time, without notice.
Introduction
Thanks for selecting the embroidery machine and before use, please read carefully “Safety Notes”
and the instructions for correct operation. The operating instruction after reading shall be properly
kept for future reference.
Safety notes
Please read safety notes before using the machine.
Danger- To prevent electric shock
Make sure to pull power plug from socket before cleaning the machine after use, or maintaining the machine as
specified herein, or when the machine is left unattended.
Warning- To prevent burn, fire, electric shock or personal injury
1.Before applying with lubrication oil or conducting other maintenance and adjustment operation specified herein,
please pull power plug from socket.
•To pull out power plug, turn main switch to “O”, and pull power plug out from socket. Do not pull power lines.
•Be sure power plug is directly inserted in power socket. Do not connect power supply directly to power board.
•If power supply is cut off, be sure the machine’s power plug is pulled out
2.Stop operating the machine in case power lines or plugs are damaged. The machine also cannot function normally
if it was damaged during a fall or was splashed with water. Please deliver the machine to the nearest authorized agent
or technical service center, and the professional would check it and conduct electrical or mechanical adjustment
accordingly.
•To avoid electric shocking or fire, do not use damaged power plug or loosened power socket, and be sure to
completely and reliably insert power plug in socket.
•In case of any abnormal condition during machine storage or use, such as bad smell,heat, color change or
deformation, stop using machine immediately and unplug the machine.

EM Series Home Embroidery Machine Operation Manual
5
•Handle the machine from its bottom, since handling with machine from other positions may cause damage to
machine or cause the machine falling off, even personal injury.
•Handle machine with care, or otherwise your back or knees may be injured.
•Do not touch operating panel, wire pole or movable parts while handling machine, or otherwise you may be injured.
3. Keep work area clean
•Do not block any ventilation opening while operating the machine, be sure the ventilation opening is free from
accumulated fluff, dust or cloth.
•Do not connect power supply to power board, and please insert power plug directly in power socket.
•Keep foreign object away from machine opening, and keep your fingers away from movable parts, such as the
guide rail, or otherwise personal injury may be caused.
•Never operate the machine in the place with spray or the places storing oxygen.
•Do not operate the machine nearby heat source or iron, or otherwise the fire or electric shocking may be caused
by heating machine, ignited power lines or clothes.
•Do not operate the machine nearby open fire, or otherwise the moving embroidery frame may give rise to ignited
clothing being sewed.
•Do not position the machine on rough surface such as the unstable or incline table,or otherwise the machine may
fall off and cause personal injury.
•Do not touch the machine or any machine part when installing or removing embroidery frame or other accessory
fittings, or maintaining the machine.
4.Precautions during embroidery
•Pay special attention to machine needle, and do not use curved or damaged needle.
•Do not touch any movable part, and take special care nearby machine needle.
•During machine operation, keep your fingers away from needle bar box and any movable part nearby the box,
or otherwise the personal injury may be caused.
•Before any adjustment (such as needle replacement) nearby needle, turn main switch to “O”to shut down machine.
•To prevent needle breakage, do not use damaged or incorrect needle plate.
5.Do not play the machine as a toy
•Take special care of child operating the machine or when a child is nearby.
•In the absence of custody, the embroidery machine shall not apply to child or the disabled.
•Take care of the child and stop them playing with the machine.
•The accompanying scissors or seam ripper shall be used for specified purpose and when opening is made by
seam ripper, keep your hands or fingers away from the cutting direction, or otherwise the falling seam ripper
would cause injury.
•Keep child away from the package plastic bag accompanied and do not leave it unattended. Prevent child from
playing with plastic bag, or otherwise choking hazard would be caused.
•Never operate the machine outdoor.
6.Precautions for prolonging machine life
•Do not store the machine in a place with direct sunshine or high humidity. Do not use or store the machine close
to a heater, iron, halogen lamp or other high-temperature object.
•Neutral soap or detergent may only be used for machine cleaning. Do not use the benzene, diluent and washing
power that may damage machine.
•To ensure correct installation, please refer to the operating instruction when replacing or installing any module,
needle or other parts.
7.Precautions for repair or adjustment
•To preventfire, electricshock or
personal
injury, never try to
disassemble,repair
or changethe
machine’s function
in any way.
Damaged illumination
lamp shall be
replaced
by
authorized dealer.
•In case of machine failure or necessary adjustment, please refer to the Trouble Removal Table in the operating
instruction, check and adjust the machine and if failed to solve the problem, please consult with local authorized
RiCOMAdealer.
For detailed product information or upgrade, please visit our websites:
www.ricoma.us
www.ricoma.cn

EM Series Home Embroidery Machine Operation Manual
6
Take care of the operating instructions
Domestic Embroidery Machine
The equipment is not applicable for the disabled, the person (including the children) with poor sense or mentally
handicapped, with insufficient experience and knowledge, unless otherwise under supervision or guidance. Take
care of the child and prevent them from playing with equipment.
License agreement
RiCOMA
patented product data, software and document
(collectively
the “Content”) is provided together with the
machine. The use of the contents shall mean acceptance of clauses herein. RiCOMA shall reserve the right to the
contents accompanied and the copies related and in accordance with clauses herein, you (“User”) are authorized
with the right relating to contents (not sale).
”User” is authorized with the following rights:
•To complete embroidery on embroidery machine in accordance with the “Contents”.
•Use the “Contents” on the embroidery machine owned or used by users, but the “Contents” shall not be used for
more than one embroidery machine simultaneously, unless otherwise specified. User shall:
•Not use more than one copy of the Contents, not copy, revise, release, sub-release, sell, sub-lease or issue the
Contents to others in any way, or release, lease, issue permit, lease, sell, transfer or designate medium card or
Contents.
•Not decompile, decompose or reverse engineer the Contents in any way, or help others engage in such activity.
•Not change, translate, revise or use “Contents” or any part hereof for business, operation or industry purpose.
•Not sell or distribute, in any way, the embroidery made by the Contents with specific copyright statement under
third party (such as “©DISNEY”) other than original version RiCOMA.
RiCOMA reserves all the rights not specifically awarded to User.
Any content herein shall not constitute RiCOMA’s waiver of the rights awarded by law, and this agreement shall
be governed by US laws.
Warning label
1.The machine is provided with the following warning
labels, please observe precautions specified on the labels.
2.Add three drops
of oil
daily
on
rotary hook before
use.

EM Series Home Embroidery Machine Operation Manual
7
Chapter I Machine structure and functions
1.Ten-needle embroidery machine
The machine is designed with 10 needles, each specifically for embroidery thread of different color. By setting color
and automatic color change for each needle bar, user may embroider the design of various colors. The device that
enables needle moving upward or downward is called needle bar in needle bar box. Needle bars are named as follows
from right to left: 1# needle bar, 2# needle bar, 3# needle bar, 4# needle bar, 5# needle bar, 6# needle bar, 7# needle
bar, 8# needle bar, 9# needle bar, and 10# needle bar.
1: 1# needle bar
2:Needle bar frame
3:1# needle
2.Other functions
LCD that can be easily read and used
The machine, which is equipped with ultra-size colored
LCD, enables preview of embroidery color. Besides, user
may easily operate the machine by
t
o
u
c
h
i
n
g
b
u
t
t
o
n
s on
the touch panel.
Manually designate need bar easily with manual
thread color list, and user may designate needle
bar according to thread color number by creating
Menu on the basis of thread color and needle bar.
Remark
It is unnecessary to embroider according to the
needle bar number sequence.
Not all of ten needle bars are for simultaneous embroidery.
User may
move
only one
needle
to
embroidery position.
Needle bar frame would move laterally
according
to
embroidery sequence,
and the needle bar with
required
color and thread color would move
to
current embroidery
position.
P
r
e
s
s
e
r
f
o
o
t
w
o
u
l
d
b
e
a
u
t
o
m
a
t
i
c
a
l
l
y
l
o
w
e
r
e
d
w
h
e
n
machine is
operating.
During
embroidery,
the thread
will be automatically cut after one thread color embroidery
on
cloth
is
finished, and automatically move
to
the
needle
position for
embroidery.
USB port as standard Configuration
User may transmit embroidery designs from computer
to embroidery machines by connecting the Ethernet
network cable.
If the
distance between machine
and
computer
is longer
than network cable, user may temporarily save embroidery
designs
in
computer
in
USB media and then transfer
them
to the embroidery
machine.
USB
Network interface,
connecting with computer

EM Series Home Embroidery Machine Operation Manual
8
Move needle bar at any time or thread the selected needle bar
When the design is selected, edited or embroidered, user may randomly thread any needle bar or move needle bar
to current embroidery position.
Safety device
The
machine
is
equipped
with a locking featureto prevent
personal
injury causedby
accidental operation.
Machine
can be started only when it is
unlocked. Start/Stop
buttoncolor would change to show user if the
machine
is locked.
Functions available
Maximum embroidery area: 310mm X 210mm. If the cap frame is selected, user may embroider design on caps.
Multiple accessories
are
available.
The
machine
is
accompanied
with 4
embroidery frames
and one cap drivesystem.
Multiple built-in designs
The machine comes with 5 pre-installed fonts.

EM Series Home Embroidery Machine Operation Manual
9
Chapter II Machine part name and corresponding functions
The name and functions of embroidery machine parts are provided below. Before using embroidery machine, please
read carefully instructions to know embroidery machine parts.
Front view
No.
Name
Functional description
1
Threading mechanism
Guide top thread, adjust thread tension and detect thread breakage
2
Needle bar frame
Needle bar frame moves horizontally and move needle to embroidery
position
3
Guide rail
Install embroidery frame onto guide rail and when machine is powered
on or starts embroidery, guide rail would move forward,backward, in the
left or right.
4
Lower threading mechanism
Guide top thread
5
Hook case cover
Open hook case cover and insert bobbin case into hook.
6
Thread guide trough A
7
Thread guide trough B
8
Thread guide trough C
9
Thread base
Accommodate 10 thread cones
10
Operation panel
For machine operation
11
Foot cup
User may regulate machine height and stability by adjusting the screw
on anchor
12
Upper thread pressing
piece
13
Tension knob
Regulate the tension of top thread
14
Lower thread pressing
piece

EM Series Home Embroidery Machine Operation Manual
10
No.
Name
Functional description
1
Speaker
It provides sound prompt when embroidery
operation is over or thread breaks.
2
Dot key
Shaft would turn to 100° position
3
Thread-trimming
key
Manually trim thread button
4
Start/stop key
Red light on: ready
Green light on: normal operation
Red
light flashing: thread breakage
orno
bottom
thread
5
LCD touch screen
Machine operation and display
Right/rear view
No.
Name
Functional description
1
USB port
Able to input or output embroidery design vis USB by directly
inserting USB media into USB port
2
Network port
Support embroidery design transmission after multiple units are
connected with computer
3
Power switch
Able to turn off/on the machine by controlling main power source
4
Power socket
Insert power plug into power socket, the power switch is internally
provided with fuse.
5
Hand Wheel
The needle may move upward and downward after
the
knob
is rotated.
Please rotate hand wheel
in clockwise.
Operation panel

EM Series Home Embroidery Machine Operation Manual
11
Chapter IIIAccessories
The following accessories are provided. Please only use the accessories specifically designed for the machine.
After unpacking, please find the following accessories. If anything is missing or damaged, please contact your
RiCOMA dealer.
1
2
3
4
5
6
7
8
9
Name
Accessory
box
Cap
driver
Cap
hooper
Tubular
frame
70X50
Tubular
frame
110X110
Tubular
frame
190X140
Tubular
frame
210X310
Thread
base
Tubular
frame
support
QTY
1PC
1PC
1PC
1PC
1PC
1PC
1PC
1PC
1PC
Chapter IV Optional accessories
The following optional parts do not serve as standard configuration, and additional purchase shall be made if necessary.
Name
Table and stand
Model
ST-10
Chapter V Machine installation
Machine installation procedures are described below. If the machine is not correctly installed, shaking or noise
could occur and design patterns cannot be correctly embroidered.
Precautions for installation and transportation
Operating environment temperature shall be 5°C (40°F) to 40°C (104°F), and machine operating in extremely cold or
hot environment would cause issues.
To prevent machine malfunction, do not operate machine under direct sunlight.
Install machine in a balanced and level state by keeping four regulating anchors completely on working table or platform.
To prevent fire caused by overheating or any damage caused to the machine, do not place any object beneath the machine
to block ventilation opening of the machine.
The machine weighs about 45kg, and the transportation or installation of the embroidery machine shall be performed
by two people.
Ensure two people raise the machine from the groove (1) in the bottom of machine, to prevent personal injury.
Potential machine damage could be caused by raising the machine from other positions.
To prevent machine malfunction, please shut down the machine and unplug power lines in case of lightning.
Before installation, do not insert power lines, or potential personal injury could be caused by accidentally pressing on the
Start/Stop button.
To prevent lubricating oil or grease from falling into eyes or spraying onto the skin, please wear protective glasses and
gloves while adding lubricating oil.
Do not swallow lubricating oil or grease, and keep children away from lubricating oil or grease.
Be carefulofbodypartswheninstalling orremovingtheembroidery frame or other accessories orduring machine maintenance.

EM Series Home Embroidery Machine Operation Manual
12
Installation position
Please install machine at a place compliant with the following requirements:
•Machine shall be positioned at least 50mm (2 inches) away from wall.
•Sufficient space shall be reserved around the machine.
•Do not place any object within the movement range of embroidery frame.
•Install the machine near a power outlet.
•Flat and stable table such as the desk or types of support shall be used.
•Select a table that can support the machine weight ,which is about 45kg.
•Sufficient space shall be reserved around ventilation hole behind and below the machine.
To prevent malfunction or damage, do not install the machine under the following conditions.
Liquid such as water
Direct sunlight
Dusty
Unstable surface
Insufficient space
Close to objects within
movement range of
embroidery frame
Ultra-high or low temperature. Operating
environment temperature shall be 5° (40°F)
to 40°C (104°F).
Notes:
For safety purpose: the machine weighs about 45kg, do not install the machine on an unstable working
table or platform.

EM Series Home Embroidery Machine Operation Manual
13
Machine installation
During installation, keep the machine stable by adjusting four anchors.
1.Ensure all protection films on the machine and all packing materials have been removed.
2.Leave sufficient space for machine installation.
3.Keep machine stable by adjusting the four anchors.
Adjust the screw on the anchor with a wrench.
1.Lock nut
2.Adjusting nut
Note: Extend or shorten anchor with adjusting nut.
User may extend or shorten anchor by respectively
rotating adjusting screw left or right.
3.After adjusting anchor to required length, tighten
the locking nut with spanner.
Press corners of embroidery machine to ensure it has
been steadily positioned.
4.Adjustment of the position of operation panel
To facilitate operation, adjust the direction and angle of operation panel.
1. Manual screw
Loosen two manual screws to keep operation head forward.
After control panel is adjusted to a position for easy operation, tighten two manual screws.
5.Adjust the direction of control panel
Loosen manual screw, adjust control panel to a position for easy operation, and tighten manual screw.
1:Manual screw
Adjust the angle of operation panel Loosen 2 manual
screws in the rear of control panel, adjust to an angle
for easy check, and then tighten manual screw.

EM Series Home Embroidery Machine Operation Manual
14
6.Assemble thread rack & base
1.Take the thread base and combine them in
place according to the arrow shown below.
1:Thread base
1: Manual screw
2.Tighten thread base with four M4x8 screws.
M4x8 screws
3.Select thread base reinforcing plate #2, connect
the plate with thread base with 8 M4x8 screws and
tighten screws.
1.M4x8 screw
2.Thread base reinforcing plate
3.Thread base
4.Select 10 bobbin columns 2 and install them on
the following positions.
1.Thread base
2.Cone nail

EM Series Home Embroidery Machine Operation Manual
15
5.Take 10 cone mats #2 and put them on thread nails.
1.Thread base
2.Cone mat
6.Take and put 10 cone mats on thread nails at the
central position properly.
1.Thread base
2.Cone sleeve
7.Loosen two screws 2 on thread rack guide tube with
Allen wrench, pull out thread rack guide tube upward
to separate it from machine, and unscrew locking nut
1 from guide tube (unscrew two locking nuts from
guide tube).
1.Locking nut on guide tube
2.Screw on guide tube
8.Install thread rack module on thread base, and
lock it with guide tube nut 3.
1.Thread rack module and guide tube
2.Thread base
3.Nut on guide tube
9.Install assembled thread rack and thread base module on two positioning dowels on the machine, and
tighten nut 2 with hex wrench.
1.Thread base 2.Positioning dowel 3.Screw

EM Series Home Embroidery Machine Operation Manual
16
7.Install embroidery frame stand
Align the hole of embroidery frame stand with the dowel on connecting plate.
1.Embroidery frame stand
2.Embroidery frame connecting plate
Lock embroidery frame connecting plate with embroidery frame with two M4x8 screws.
1.M4x8 screw
2.Embroidery frame stand
Preparation before embroidery is finished.

EM Series Home Embroidery Machine Operation Manual
17
Chapter VI Operation precautions
Notes for correct machine operation are described below.
1.Precautions for power supply
Please observe the following precautions for power supply.
1.AC 90~240V for the machine, and other power sources may give rise to fire, electric shock or machine damage.
2.Be sure power plugs are securely inserted into embroidery machine's power socket.
3.Do not insert power plug into poor power socket.
4.In case of the following circumstances, shut down embroidery machine and pull out power lines, or otherwise it
may cause fire, electric shock or machine damage.
•When machine is left unattended;
•After use of machine;
•Power failure occurs during machine operation;
•Machine is not correctly operated, such as thread loosening or poor
1.Only the accompanied power cords are permitted for the machine.
2.To prevent fire or electric shock, do not insert lengthening wires or multiple-plug adaptor that have been used by
other electric equipment into the machine.
3.To prevent electric shock, do not insert or pull out power wires with wet hands.
4.Before pulling out power wires, shut down machine firstly, grab plug, and since pulling wires may cause damage
or fire or electric shocking.
5.Do not cut, damage, reform, bend, pull, twist or bind power wires. In addition, do not place heavy object on wires
or make it heat, or otherwise it may cause wire damage, fire or electric shocking. If power wires or plugs are damaged,
stop using machine and deliver the machine to authorized dealer for repair.
6.To prevent fire, please pull out power wires if machine is not in use for a long time.
7.When embroidery machine is left unattended, shut down main power switch, or pull put plug from socket.
8.To repair embroidery machine or disassemble the case, cut off power supply by pulling out power plug.
2.Precautions for needle
Curved needle would be hazardous, since the needle would break during machine operation. Place the flat side of
needle onto a plane to check if distance between needle and plane is even and in case of any bending or needle point
breakage, please replace with a new one.
The needle 9#, 11# and 14# is recommended for the machine.
3.Precautions for cop latch
Please observe the following precautions for cop latch.
1.Use the bobbin that has been correctly wound, or otherwise the needle may be broken or the thread tension
may be incorrect.
2.To wind the core, only bobbin winder shall be used.
3.Cotton bobbin thread shall be used.

EM Series Home Embroidery Machine Operation Manual
18
Chapter VII Basic steps
Basic embroidery steps
are
described below. Before embroidery machine operation, please confirm
the
following steps.
Step
Operation
Reference page
1
Bobbin installation
Refer to page 28
2
Turning on
Refer to page 30
3
Input design
Refer to page 32
4
Select embroidery design
Refer to page 33
5
Select embroidery frame
Refer to page 33
6
Put cloth in embroidery frame
Refer to page 34
7
Install
embroidery
frame on the machine
Refer to page 35
8
Check embroidery area
Refer to page 36
9
Threading top thread
Refer to page 37
10
Start embroidery
Refer to page 40
11
Check thread tension
Refer to page 40
12
Remove embroidery frame and cloth
Refer to page 41
13
Turning off
Refer to page 41
Bobbin installation
Notes: Bobbin
case is
installed
on the hookwhilethe
machine
is
purchased. Please
insertthe
bobbin
for embroidery.
•The
machine
would not indicate
remaining quantity
of bobbinthread. Before starting
embroidery,
pleasebe sure
sufficient
bobbinthread for
embroidery
design.
•Clean bobbincase while
replacing
the bobbin.
•Open needle plate and clean rotaryhook weekly.
Removal of bobbin case
1.Open bobbin case 2.If thread hook is not forward, pull it forward
1. Thread hook
To facilitate the use of bobbin, pull thread hook forward.
Note: Do not drag thread hook by force since it may only
be rotated to a certain extent.
Other manuals for EM-1010
2
Table of contents
Other Ricoma Sewing Machine manuals

Ricoma
Ricoma RCM 1501 PT User manual

Ricoma
Ricoma TCS1501 User manual

Ricoma
Ricoma SWD Series User manual

Ricoma
Ricoma EM-1010 User manual

Ricoma
Ricoma EM-1010 User manual

Ricoma
Ricoma CHT2 User manual

Ricoma
Ricoma RCM-1201PT User manual

Ricoma
Ricoma RCM-1201TC-7S User manual

Ricoma
Ricoma MT-1502 User manual

Ricoma
Ricoma 8S User manual
Popular Sewing Machine manuals by other brands

Brother
Brother Dream Quilter 15 Service manual

Pfaff
Pfaff 900/56 Service manual

Singer
Singer 20U-105C Instruction manual and parts list

Baby Lock
Baby Lock Tiara BLTR16 Instruction and reference guide

Janome
Janome Continental M7 Professional Instruction book

Singer
Singer 6958001 Service manual and parts list