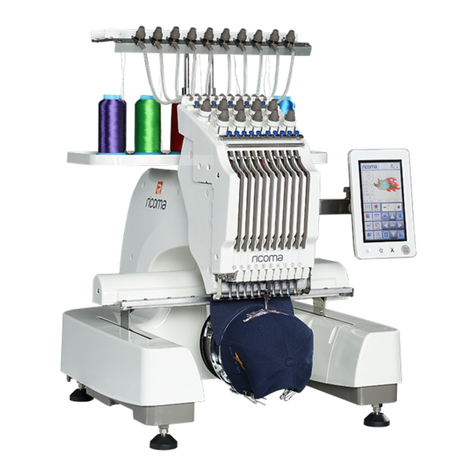
Ricoma EM-1010 User manual

Address: str. Teatralnaya 2 / 202A,
Dnipro, UKRAINE
Website: www.Overlock.com.ua
Phone: 0800 210 034
Mail: [email protected]

© 2016 Ricoma® All rights reserved.
Ricoma® and Ricoma® logo are registered trademarks of Ricoma® (SHENZHEN) CO., LTD.
Products mentioned herein are for identification purposes only and may be registered trademarks or
trademarks of their respective companies. All other brand names, trademarks or registered trademarks are
the property of their respective owners.

Introduction .................................................................................................................................................. 8
Intel® license agreement .............................................................................................................................. 9
Compliance & wattage.................................................................................................................................. 9
Customer service & support & training ...................................................................................................... 10
Read all instructions prior to operating .............................................................................................. 11
Important safeguards and warnings ................................................................................................... 12
Tool box & spare parts................................................................................................................................ 15
Embroidery machine assembly...................................................................................................................16
Embroidery machine stand assembly (optional) .................................................................................... 16
Thread rack assembly .............................................................................................................................19
Thread stand assembly ........................................................................................................................... 20
Unpacking your embroidery machine.....................................................................................................23
Adjust & secure your embroidery machine ............................................................................................ 24
Embroidery machine & embroidery hoops overview................................................................................. 25
Front view ............................................................................................................................................... 25
Rear view................................................................................................................................................. 26
Flat frame support .................................................................................................................................. 27
Embroidery hoop specifications .............................................................................................................28
Touch screen...........................................................................................................................................29
Bobbin overview ......................................................................................................................................... 31
Placing the bobbin into the bobbin case ................................................................................................32
Placing the bobbin case into the rotary hook.........................................................................................33
Bobbin removal....................................................................................................................................... 34
Bobbin fiber choices................................................................................................................................35
Cotton ................................................................................................................................................. 35
Nylon................................................................................................................................................... 35
Continuous filament polyester ...........................................................................................................35
Spun polyester .................................................................................................................................... 36
Magna glide......................................................................................................................................... 36
Thread overview .........................................................................................................................................37
Threading the embroidery machine/top threading................................................................................37

Threading a needle ................................................................................................................................. 42
Changing the spool .................................................................................................................................43
Knot tying................................................................................................................................................ 44
Trimming................................................................................................................................................. 44
Thread fiber choices................................................................................................................................ 45
Rayon thread....................................................................................................................................... 45
Polyester thread.................................................................................................................................. 45
Metallic thread....................................................................................................................................46
Cotton thread...................................................................................................................................... 46
Thread consumption............................................................................................................................... 46
Backing........................................................................................................................................................ 47
Cut-away ................................................................................................................................................. 47
Tear-away................................................................................................................................................48
Specialty backing..................................................................................................................................... 48
Topping ................................................................................................................................................... 48
Foam ....................................................................................................................................................... 48
Poly mesh backing...................................................................................................................................49
Fusible backing........................................................................................................................................ 49
Backing & needle recommendations.......................................................................................................... 50
Canvas ..................................................................................................................................................... 50
Canton fleece ..........................................................................................................................................50
Coated or waterproof ............................................................................................................................. 50
Corduroy .................................................................................................................................................50
Cotton sheeting....................................................................................................................................... 50
Denim...................................................................................................................................................... 50
Dress shirt (woven) ................................................................................................................................. 50
Golf shirt ................................................................................................................................................. 50
Headwear................................................................................................................................................ 50
Leather and vinyl..................................................................................................................................... 50
Lingerie or silk ......................................................................................................................................... 51
Lycra or spandex ..................................................................................................................................... 51
Nylon windbreaker..................................................................................................................................51
Satin jacket.............................................................................................................................................. 51


Sweater knit ............................................................................................................................................51
Sweatshirt ............................................................................................................................................... 51
T-shirt...................................................................................................................................................... 51
Terry cloth............................................................................................................................................... 51
Before getting started................................................................................................................................. 52
Getting started............................................................................................................................................ 53
Turning on............................................................................................................................................... 53
Turning off............................................................................................................................................... 53
Control panel overview............................................................................................................................... 54
Home page..............................................................................................................................................55
Logo selection page ................................................................................................................................57
Color sequence page............................................................................................................................... 57
Design setting page.................................................................................................................................58
Comprehensive menu settings page....................................................................................................... 59
Control panel functions .............................................................................................................................. 60
Start/Stop................................................................................................................................................ 60
To start................................................................................................................................................ 60
To stop ................................................................................................................................................60
Importing/uploading a design................................................................................................................. 61
Selecting a design.................................................................................................................................... 62
Selecting an embroidery hoop................................................................................................................62
Selecting the color sequence ..................................................................................................................63
Color change mode ................................................................................................................................. 64
Needle switch display icon...................................................................................................................... 64
Embroidery design trace......................................................................................................................... 65
Using float mode..................................................................................................................................... 65
Frame out................................................................................................................................................ 66
Low speed ...............................................................................................................................................67
Trimming................................................................................................................................................. 67
Embroidery status................................................................................................................................... 68
Tracing the embroidery area .................................................................................................................. 68
Deleting a design..................................................................................................................................... 69
Adding a font........................................................................................................................................... 69

How to abort a job .................................................................................................................................. 70
How to adjust speed ............................................................................................................................... 70
How to bring the frame out .................................................................................................................... 71
Embroidery hoop & flat frame support ...................................................................................................... 72
Flat frame support installation ...............................................................................................................73
Installing embroidery hoop & adjusting flat frame support................................................................... 74
Framing fabric ......................................................................................................................................... 75
Removing the embroidery hoop............................................................................................................. 77
Removing the flat frame support............................................................................................................ 77
Caps overview .............................................................................................................................................78
Cap driver installation............................................................................................................................. 78
Cap station installation ........................................................................................................................... 79
Cap embroidery hoop ............................................................................................................................. 79
Cap installation .......................................................................................................................................80
Cap embroidery hoop removal...............................................................................................................80
Cap driver removal.................................................................................................................................. 80
Tension........................................................................................................................................................81
Check thread tension .............................................................................................................................. 81
Tension knobs .........................................................................................................................................82
Adjusting thread tension.....................................................................................................................82
Bobbin tension........................................................................................................................................ 83
Needles .......................................................................................................................................................84
Anatomy of a needle...............................................................................................................................84
Needle lifetime........................................................................................................................................84
When to change a needle .......................................................................................................................84
Selecting a needle ................................................................................................................................... 85
Blade size ................................................................................................................................................ 85
Needle finishes........................................................................................................................................ 86
Needle & thread matrix .......................................................................................................................... 86
Point types ..............................................................................................................................................87
Acute round point............................................................................................................................... 87
Slender sharp point.............................................................................................................................87
Normal sharp point ............................................................................................................................. 87

Light ballpoint .....................................................................................................................................87
Medium ballpoint................................................................................................................................87
Needle replacement ...............................................................................................................................88
Completing a flat design (start to finish) .................................................................................................... 89
Prepare................................................................................................................................................ 89
Embroider ...........................................................................................................................................89
Completing a caps design (start to finish)...................................................................................................90
Prepare................................................................................................................................................ 90
Embroider ...........................................................................................................................................90
Maintenance & care....................................................................................................................................91
Rotary hook............................................................................................................................................. 91
Machine head ......................................................................................................................................... 91
Level arms ...............................................................................................................................................91
Head rail.................................................................................................................................................. 92
Bobbin case maintenance....................................................................................................................... 92
Troubleshooting..........................................................................................................................................93
Thread break........................................................................................................................................... 93
Reasons ...............................................................................................................................................93
Prevention........................................................................................................................................... 94
Needle break...........................................................................................................................................94
Bobbin tension........................................................................................................................................ 94
Timing overview......................................................................................................................................95
Adjusting the timing of a needle and hook.........................................................................................95
Error messages............................................................................................................................................ 96
Thread break (“T-break”).................................................................................................................... 96
Needle break....................................................................................................................................... 96
Main axis not at 100 degrees..............................................................................................................97
Quick reference guide/checklist .................................................................................................................98

Page 8
Ricoma® embroidery machine EM1010 –Operations manual
© Ricoma® All rights reserved
Customer satisfaction
Thank you for purchasing the 10-needle home embroidery machine with the 7-inch
HD LCD touch-screen panel. We appreciate your business, value your feedback, and
want to ensure your experience with us is a memorable one –every time. Our
customer satisfaction team is ready to help you with every question you might have
and provide you with the best service you deserve as our valued customer.
Quality products
Our engineers are constantly using the latest technologies and innovative ideas to improve and set new
standards in our industry. We handcraft our products at our state-of-the-art manufacturing plant. Our
professional staff operates efficiently to develop the best designs and durable embroidery machines
with integrated software applications. With the established strict and comprehensive quality inspections
that start by the purchasing of raw materials, followed by the assembly and finished products, and ends
with the packaging and shipping from our home office in Miami, Florida. With these quality standards,
Ricoma is proud of and recognized for its quality products.
Commitment to service
Our customers are the core of our business, and you are our #1 priority when it comes to providing the
most comprehensive one-on-one and onsite training, customer service, latest software upgrades and
replacement supplies. We are here to help you grow your business and establish a long-term relationship
with you.

Page 9
Ricoma® embroidery machine EM1010 –Operations manual
© Ricoma® All rights reserved
For open source computer vision library
IMPORTANT: READ BEFORE DOWNLOADING, COPYING, INSTALLING OR USING.
By downloading, copying, installing or using the software, you agree to this license. If you do not agree to
this license, do not download, install, copy or use the software.
Intel® license agreement for open source computer vision library
Copyright © 2000, Intel Corporation, all rights reserved. Third party copyrights are the property of their respective
owners.
Redistribution and use in source and binary forms, with or without modification, are permitted if the
following conditions are met:
Redistribution of source code must retain the above copyright notice, this list of conditions and the
following disclaimer.
Redistribution in binary form must reproduce the above copyright notice, this list of conditions and the
following disclaimer in the documentation and/or other materials provided with the distribution.
The name of Intel® Corporation may not be used to endorse or promote products derived from this
software without specific prior written permission.
This software is provided by the copyright holders and contributors “as-is” and any express or implied
warranties, including, but not limited to, the implied warranties of merchantability and fitness for a
particular purpose are disclaimed.
In no event shall Intel® or contributors be liable for any direct, indirect, incidental, special, exemplary, or
consequential damages (including, but not limited to, procurement of substitute goods or services; loss of
use, data, or profits; or business interruption) however caused and on any theory of liability, whether in
contract, strict liability, or tort (including negligence or otherwise) arising in any way out of the use of this
software, even if advised of the possibility of such damage.
All information provided related to future Intel® products and plans is preliminary and subject to change at
any time, without notice.
Than
ISO Compliant
110V/60Hz or 220V/50Hz available

Page 10
Ricoma® embroidery machine EM1010 –Operations manual
© Ricoma® All rights reserved
At Ricoma®, we are dedicated to providing the best customer service, support and training. Our trained and
certified technical staff is ready to help you. Whether you are a beginner or veteran embroiderer, our professional
instructors have years of experience in the industry and can help you understand and operate your embroidery
machine at your own pace and schedule.
If you should have any questions regarding your embroidery machine or training, please contact your local
Ricoma® dealer to schedule an appointment.
Please contact your local Ricoma© dealer first.
To locate your local dealer, contact customer service.
For customers located in North America, Central America, South America and the Caribbean, please
visit Ricoma.us.
Our customer service & training department is located at the home office in Miami, FL (U.S.A.).
Telephone: 305-418-4421 (Monday through Friday; 9 a.m. to 5:30 p.m. EST)
Toll-free number: 1-888-292-6282 (Monday through Friday; 9 a.m. to 5:30 p.m. EST)
Email: [email protected]
Fax: 305-418-5036 or 305-418-4463
For customers located in Asia, Europe, Africa, the Middle East and Oceania, please contact your local distributor
first or visit Ricoma.cn.
Our customer service department is located in Shenzhen, China.
Telephone: +86-755-2585 7772 (Monday through Friday, 8 a.m. to 5:30 p.m., China time)
Email: [email protected]
Fax: +86-755-2585 7773

Page 11
Ricoma® embroidery machine EM1010 –Operations manual
© Ricoma® All rights reserved
This manual is a comprehensive step-by-step user instruction guide on how to use the 10-needle
home embroidery machine with the 7-inch HD LCD touch-screen panel.
Make sure to read, understand and follow all these instructions.
To address any questions relating to ordering parts, operating the 10-needle home embroidery
machine with the 7-inch HD LCD touch-screen panel, troubleshooting, maintenance or service,
please contact your local dealer.

Page 12
Ricoma® embroidery machine EM1010 –Operations manual
© Ricoma® All rights reserved
When using embroidery machines, the following safety precautions MUST be
followed to reduce the risk of fire, electric shock, and/or injury.
This embroidery machine is only for indoor household use. Do NOT use outdoors.
Do NOT use embroidery machine for other than its intended use.
This embroidery machine is NOT intended to be used by persons (including children) with reduced physical,
sensory, or mental capabilities, or lack of experience and knowledge unless they are supervised while using the
embroidery machine and given instruction on how to use the embroidery machine by the person responsible
for their safety. The person who is giving instruction MUST have read and understand how to use this
embroidery machine and assumes total responsibility for the safety of the person they are supervising.
Children must NOT use this embroidery machine.
Children should be supervised to ensure that they do NOT play with packing materials, plastic bags and/or the
embroidery machine.
Close supervision is necessary when the embroidery machine is used near children.
To protect against electrical shock, do NOTimmerse cord plug or embroidery machine in water or other liquids.
Turn off and unplug the embroidery machine from the electrical outlet when NOT in use and before cleaning.
To unplug the embroidery machine, grab the power plug and pull it outwards from the electrical outlet. Do NOT
pull the power cord.
Make sure the embroidery machine is turned off before inserting and/or removing parts.
It is recommended to regularly inspect the embroidery machine. Do NOT operate the embroidery machine with
a damaged cord, plug, needles, bobbins, etc., or after the embroidery machine malfunctions or has been
damaged in any manner.
Do NOT use accessory attachments that are NOT recommended by the embroidery machine manufacturer,
since it may cause injuries and malfunctions of the embroidery machine.
Do NOT touch needles or sharp embroidery machine parts when installing or removing embroidery frames,
accessory fittings or while providing maintenance to the embroidery machine.
Do NOT over extend power cord or let it touch hot surfaces.
Do NOT place embroidery machine on or near hot gas, an electric burner, an oven, a gas or electric cooktop, an
open flame, an iron, or steam embroidery machine.
To turn off the embroidery machine press the “Stop” button, turn off the power switch at the rear of the
embroidery machine and then unplug the power cord from electrical outlet. See the Turning off section for
more information.
When using the embroidery machine, provide adequate air space above and around the sides of the machine
for circulation. Do not block any ventilation opening while the embroidery machine is being used and make
sure the ventilation opening is free from the accumulation fluff, dust and NOT covered by a cloth.
For extra protection, when operating the embroidery machine, use safety glasses and closed toe shoes to
prevent injuries.
To replace the needles, use tweezers or pliers to grab the needle. Do NOT use your fingers.
Do NOT leave the embroidery machine unattended while in use, and press “Stop” in the case of an emergency.
See the Turning off section for more information.
The embroidery machine is provided with the following warning label:
Exercise the important safeguards and warnings associated with the label.
Improper use of this embroidery machine may result in temporary,
permanent or fatal injuries.
To prevent injuries, keep hands, body parts and other objects away from
needle bar rack, guide rail, etc.
Keep the machine away from heat sources.

Page 13
Ricoma® embroidery machine EM1010 –Operations manual
© Ricoma® All rights reserved
The embroidery machine weighs about 95 pounds and should be carried between two
people. Only lift the embroidery machine from its base and use caution to prevent back,
knees and/or other types of injuries or damage to the embroidery machine.
Do NOT lift or grab embroidery machine by the touch-screen or any of the removable
parts.
The embroidery machine’s power cord MUST be plugged into a UPS power supply to protect it from a power
surge, power outage and to provide enough time for embroidery job to be completed in case of a power
outage.
If there is a power outage and the embroidery machine is NOT plugged into a UPS power supply, it will turn off.
If it is plugged into a UPS power supply, once the job is completed, turn off the embroidery machine and unplug
it from the UPS power supply.
If there is a power outage, turn off the embroidery machine and unplug it from the electrical outlet.
Do NOT operate the embroidery machine if it is covered by or touching flammable materials, including towels,
curtains, draperies, walls or anything similar.
Do NOT store any flammable liquids near the embroidery machine.
Do NOT operate the embroidery machine in a place where sprays are used or oxygen is stored.
Do not store the embroidery machine in a place with direct sunshine or high humidity. Do not use or store the
embroidery machine close to a heater, iron, halogen lamp or another high-temperature object.
Do NOT place any item on top of the embroidery machine while in operation.
Do NOT store any materials or items other than the manufacturer’s recommended accessories on top or
beneath the embroidery machine when NOT in use.
Do NOT use any materials that are not recommended for the embroidery machine such as paper, cardboard,
plastic, foam and other such materials or their likes.
Use extreme caution MUST be used when moving the embroidery machine to prevent any injuries. It is
recommended that the embroidery machine NOT be moved while it is being used or plugged into the electrical
outlet.
To prevent needle breakage, do not use damaged needles or an incorrect needle plate.
Keep foreign objects away from embroidery machine openings to avoid personal injuries.
When using scissors or seam rippers, keep hands and fingers away from the cutting direction to avoid injuries
and only use them for their specified purpose.
Do NOT use the embroidery machine on an unstable surface. Place the embroidery machine on a stable,
leveled, and durable surface or use the EM-1010 embroidery machine stand.
Do NOT use the EM-1010 embroidery machine stand to store anything else but the embroidery machine and
its accessories.
If the embroidery machine falls to the floor, it has been splashed with or soaked in water or other liquids do
NOT use it –contact your local dealer to schedule an appointment with a qualified technician to service the
embroidery machine. Contact your local Ricoma® dealer.
Do NOT use the embroidery machine if it begins to heat up, color changes or deformation occurs, stop using
the embroidery machine immediately, turn it off, and unplug it from the electrical outlet. Then contact your
local Ricoma® dealer.
Never wear loose articles of clothing that can be caught by the needles or any part of the embroidery machine
while it is being used.
The end user MUST never attempt to repair or modify the embroidery machine in any way and MUST contact
their local Ricoma® dealer or customer service at 1-888-292-6282 to schedule repairs with a factory certified
technician. Working on the Ricoma® embroidery machine by the end user may result in voiding of the
warranty.
Ricoma®, its owners, partners, officers, employees, affiliates, manufacturers, factories, importers, promoters,
parent companies and anyone else who does business with them are NOT responsible or liable for anyone

Page 14
Ricoma® embroidery machine EM1010 –Operations manual
© Ricoma® All rights reserved
misusing the EM-1010 embroidery machine, modifying the original embroidery machine in anyway, servicing it
with unauthorized personnel, not following or ignoring instructions, or using the embroidery machine for
anything else other than its intended use.
Three-prong plug: The EM-1010 embroidery machine has a 3-prong plug. To reduce the risk of electric shock,
this plug is intended to fit into the outlet only one way. If the plug does not fully fit into the outlet, contact a
qualified electrician. Do not attempt to modify the plug in any way. Do NOT use an extension cord with this
embroidery machine.
Tamper-resistant screw: This appliance is equipped with a tamper-resistant screw to prevent removal of the
outer cover. To reduce the risk of fire or electric shock, DO NOT attempt to remove the outer cover. There are
no user-serviceable parts inside. Authorized service personnel should ONLY do the repair.
Power cord: To prevent damage, electric shock or fire hazard, do NOT operate the embroidery machine with a
damaged power cord or if power plug is not completely inserted into the electrical outlet. If the power cord is
damaged, please contact your local Ricoma® dealer or customer service at 1-888-292-6282.

Page 15
Ricoma® embroidery machine EM1010 –Operations manual
© Ricoma® All rights reserved
Cushion
5
Needle clamp
2
Needle bar spring-DT
3
Position block spring
1
Press foot spring-DT
3
Press foot-EM
2
Take-up lever positioning block
2
Take-up lever set
2
Needle-DBxK5 75/11
10
USB-4G
1
Brush
1
M4X12 sank cross head screw
5
Needle clamp screw
3
Round head screw 4 by 8
10
Round head screw 4 by12
3
Scissors
1
Rotate cap flat screw driver TU101-1.5 mm
1
Adjustable screw driver 4 by 107 mm
1
Adjustable screw driver 6 by 173 mm
1
Screw driver –z shape
1
7 Shape wrench –6 set inches
1
Pliers –5"/125 mm
1
Oil can –40 grams
1
Needle bar –DT [210]
2
Thread post
2
Thread disc pad
2
Thread disc sponge pad
2
Threading pipe set-270
2
Threading steel –¢1.4 mm by 400 mm
1
Spare parts box-D type
1
Multi-functional open wrench
1

Page 16
Ricoma® embroidery machine EM1010 –Operations manual
© Ricoma® All rights reserved
Design patterns will embroider incorrectly if the embroidery machine is not set up properly.
Tools & Parts:
8 screws
8 washers
8 lock washers
8 hex head nuts
2 Allen wrenches
4 casters
4 level pegs
2 table legs
2connection plates
1 table
MODEL: ST-10
Casters
Level pegs
Allen
wrench
Lock washers
Washers
Hex head nuts
Screws
Figure 1
Figure 2

Page 17
Ricoma® embroidery machine EM1010 –Operations manual
© Ricoma® All rights reserved
1. Lay each table leg, as shown in Figure 3, on a flat surface.
2. Take a connecting plate and begin by attaching it to one of the legs.
3. Take a screw from the toolkit.
4. Place a lock washer over the screw and then a washer.
See Figure 6 for more details.
5. Locate one (1) of the twelve (12) screw holes on the connecting plate.
6. Insert the hex head nut on the outer side of the screw hole and insert the screw through the inner side of
the screwhole, as shown in Figure 6.
7. Repeat steps three (3) through five (5) on the remaining eleven (11) screw holes.
8. Once you have attached all twelve (12) screws, use an Allen wrench to tighten all twelve (12) of the
screws.
a. Insert one Allen wrench into the screw end and hold the Allen wrench steady.
b. At the same time, insert the second Allen wrench into the hex head nut end and begin to turn the
Allen wrench clockwise.
9. Repeat step eight (8) for the
remaining eleven (11) screws.
Hex head nut
Screw
Washer
Hex head nut
Lock washer
Figure 3
Figure 4
Figure 5
Figure 6

Page 18
Ricoma® embroidery machine EM1010 –Operations manual
© Ricoma® All rights reserved
10. Screw in the caster onto the end of each table leg. See Figure 7.
11. Attach the level peg and add the plastic protection to the protruding screw piece onto all four legs.
See Figure 7.
12. Turn the stand around and place the table on top of the connecting plates. See Figure 8.
Level peg
Caster
Table location (not shown)
Connecting plate
Add plastic
protection
here.
Figure 7
Figure 8
Plastic protection
Level peg
Caster

Page 19
Ricoma® embroidery machine EM1010 –Operations manual
© Ricoma® All rights reserved
Tools & Parts:
2 thread rack plates (TRP)
8 4 by 8 screws
1 reinforcing plate
1. Take TRP-1 and TRP-2 and bring them together. See Figure 10.
No. 1 –Thread rack plates
2. Ensure that the tongues and grooves of each TRP meet and the plates connect. Then, add screws to hold
the TRPs together. See Figure 11.
No. 1 –Screw locations
3. Place the reinforcement plates
onto their location on the thread rack plates. See Figure 12.
4. Screw the reinforcement plate to the back of the already-
connected TRPs. See Figure 13.
No. 1 –Screw locations
No. 2 –Reinforcement plate
No. 3 –Thread rack plates
TRP - 1
TRP - 2
Thread rack
Reinforcement Plates
Figure 9
Figure 10
Figure 11
Figure 12
Figure 13

Page 20
Ricoma® embroidery machine EM1010 –Operations manual
© Ricoma® All rights reserved
Tools & Parts:
1 –2.5 mm Allen wrench
10 thread pins
10 cushions
10 plastic thread reels
1. Locate the screws on the lock nuts at the bottom of the thread stand columns.
2. Loosen the screws on the lock nuts at the bottom of the thread stand columns.
3. Lift and remove the thread stand, then set it aside.
4. Remove the lock nuts from the thread stand columns. See Figure 15.
No. 1 –Screws
No. 2 –Lock nut
5. Reposition the thread stand onto the thread rack.
If you need instructions on how to assemble the thread rack, see the Thread rack assembly section.
6. Turn the thread rack around, add the lock nuts previously removed, and tighten them. See Figure 16.
No. 1 –Thread stand column
No. 2 –Thread rack
No. 3 –Lock nut location
Thread stand
Thread rack
Figure 14
Figure 15
Figure 16
Other manuals for EM-1010
2
Table of contents
Other Ricoma Sewing Machine manuals

Ricoma
Ricoma RCM-1201TC-7S User manual

Ricoma
Ricoma EM-1010 User manual

Ricoma
Ricoma RCM-1201PT User manual

Ricoma
Ricoma EM-1010 User manual

Ricoma
Ricoma TCS1501 User manual

Ricoma
Ricoma RCM 1501 PT User manual

Ricoma
Ricoma 8S User manual

Ricoma
Ricoma CHT2 User manual

Ricoma
Ricoma SWD Series User manual

Ricoma
Ricoma MT-1502 User manual