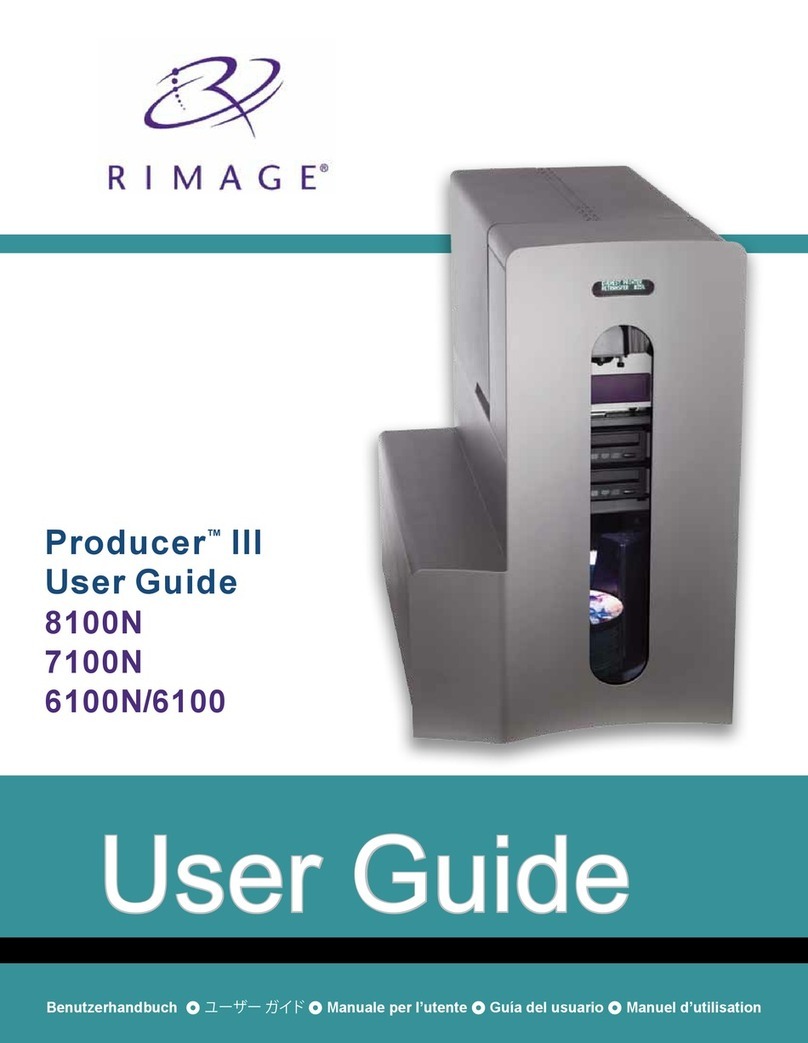
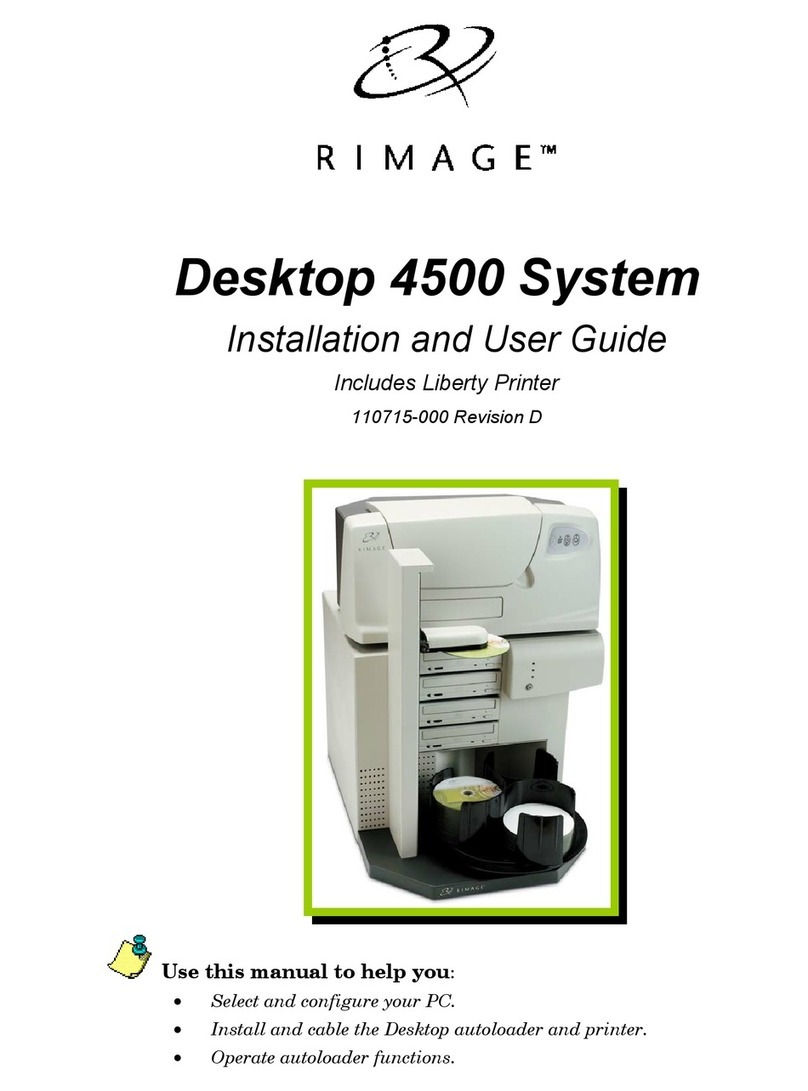
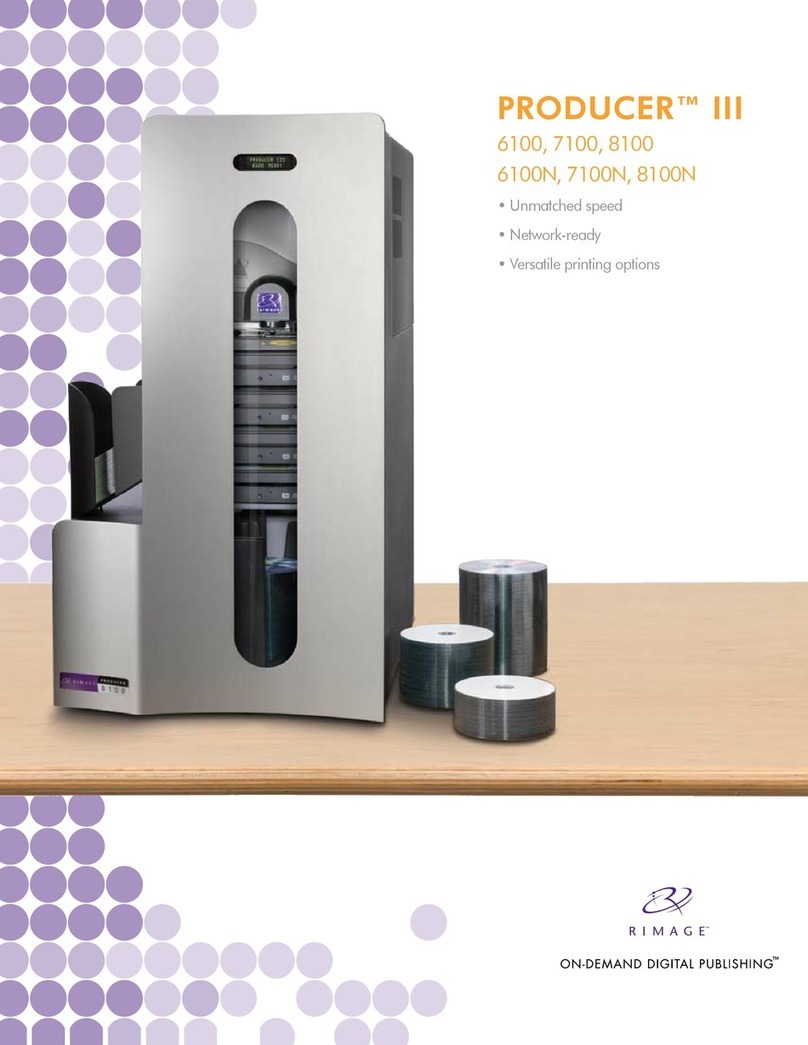
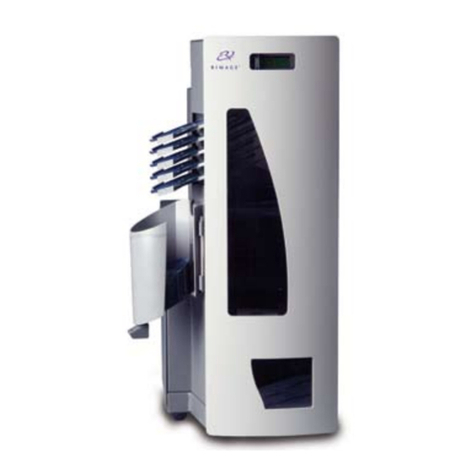
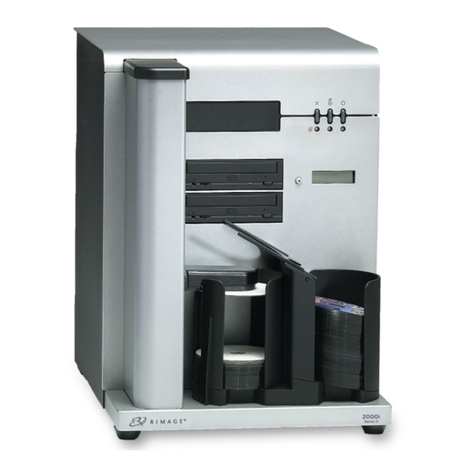
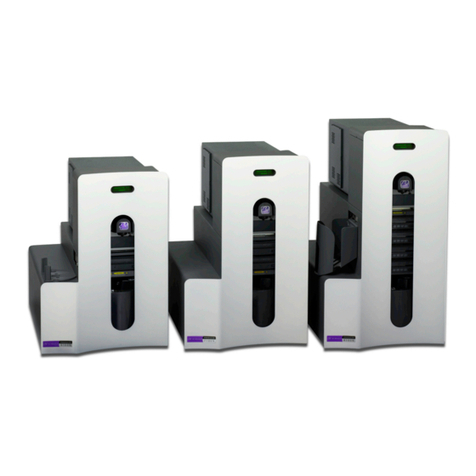
Rimage AutoPrinter User manual

Rimage AutoPrinter™
User Guide

For more information visit rimage.com/support
110656_N
Rimage Corporaon reserves the right to make improvements to the equipment and soware described in this document at any me without any
prior noce. Rimage Corporaon reserves the right to revise this publicaon and to make changes from me to me in the content hereof without
obligaon of Rimage Corporaon to nofy any person or organizaon of such revisions or changes.
This document may contain links to web sites that were current at the me of publicaon, but may have moved or become inacve since. This
document may contain links to sites on the Internet that are owned and operated by third pares. Rimage Corporaon is not responsible for the
content of any such third-party site.
© 2012, Rimage Corporaon
Rimage®is a registered trademark of the Rimage Corporaon. Professional™ and Everest™ are trademarks of the Rimage Corporaon. Dell™ is
trademark of Dell Computer Corporaon. FireWire™ is a trademark of Apple Computer, Inc. Windows® is a registered trademark of Microso
Corporaon.
All other trademarks and registered trademarks are the property of their respecve owners.
The most recent version of this document can be found at www.rimage.com/support.
Corporate Headquarters:
Rimage Corporaon
7725 Washington Avenue South
Minneapolis, MN 55439
USA
800-553-8312 (toll free US)
Service: +1 952-946-0004 (Asia/Pacic,
Mexico/Lan America)
Fax: +1 952-944-6956
European Headquarters:
Rimage Europe GmbH
Albert-Einstein-Str. 26
63128 Dietzenbach
Germany
Tel: +49 6074-8521-14
Fax: +49 6074-8521-100
Asia/Pacic Headquarters:
Rimage Japan Co., Ltd.
2F., WIND Bldg.
7-4-8 Roppongi Minato-ku,
Tokyo 106-0032 JAPAN
Tel: +81-3-5771-7181
Fax: +81-3-5771-7185

Contents
110656_N For more information visit rimage.com/support
Introducon .................................................................................... 1
About this User Guide .............................................................................................. 1
About your Product ................................................................................................. 1
Unpacking and Setup Instrucons ........................................................................... 1
Important Informaon .................................................................... 2
Support Informaon ................................................................................................ 2
Learn More Online ................................................................................................... 2
Technical Support and Product Updates .................................................................. 2
Opcal Disc Recording Soware Disclaimer ............................................................ 2
Safety and Compliance Informaon ........................................................................ 3
Safety Precauons .............................................................................................................. 3
Compliance Informaon ..................................................................................................... 4
Idenfy the Parts of the AutoPrinter................................................ 5
Front View ................................................................................................................ 5
Back View ................................................................................................................. 6
Operator Panel ......................................................................................................... 7
Operate the AutoPrinter.................................................................. 8
Install the Carousel .................................................................................................. 8
Power On and O the AutoPrinter .......................................................................... 8
Load and Unload Discs ............................................................................................. 9
Load the Discs ..................................................................................................................... 9
Unload the Discs ................................................................................................................. 9
Reset the AutoPrinter ......................................................................................................... 9
Set Prinng Preferences ........................................................................................... 9
Maintain the AutoPrinter .............................................................. 10
Install the Ribbons ................................................................................................. 10
Cleaning Method and Schedule ............................................................................. 10

1
For more information visit rimage.com/support
110656_N
Introduction
This manual provides the informaon needed to operate and idenfy the
parts of the AutoEverest and AutoPrism III AutoPrinter. To set up your
AutoPrinter and install the CD Designer™ Soware Suite, refer to the set up
and installaon guide included with your product.
For technical informaon, refer to the Rimage AutoPrism IIITM
and AutoEverestTM AutoPrinter Specicaons document found at
www.rimage.com/support. From the Support page select Printers > Product
Name > User Manuals tab.
Important! Your Rimage AutoPrinter™ system may not look exactly like the
model featured in this user guide.
About this User Guide
• While we try to maintain all versions of our manuals and
documentaons, please note that the English version found on our web
site always contains the most up-to-date informaon.
• Unless otherwise indicated, all Windows navigaon statements are
Windows 7 paths. Other Windows operang system navigaon may
dier slightly.
• These notes and symbols are used throughout the manual to help clarify
informaon:
Tip: A Tip suggests alternave methods that may not be obvious and helps
you understand the benets and capabilies of the product.
Important!
• An Important note provides informaon essenal to the compleon of a
task.
• Important supplemental informaon.
• You can disregard informaon in a Tip and sll complete a task, but do
not disregard an Important note.
nCauon: A Cauon indicates that failure to observe this guideline could
result in loss or damage to the equipment, product, soware, or data.
nWarning! A Warning indicates that failure to follow this guideline
could result in bodily injury to personnel operang or maintaining the
equipment.
About your Product
The Rimage AutoPrinter is available with either the Everest printer or the
Prism III printer. For specic informaon about your printer, refer to the
Everest or Prism printer user guide that shipped with your product.
Tip: The term ‘AutoPrinter’ is used throughout this user guide to refer to
both the AutoEverest and the AutoPrism. The terms ‘AutoEverest’ and
‘AutoPrism’ are used only to refer to either product specically.
Unpacking and Setup Instrucons
Unpacking and installaon instrucons are included with the Rimage
AutoPrinter. Refer to the setup and installaon guide included with your
Rimage AutoPrinter.

2
For more information visit rimage.com/support
110656_N
Important Information
This secon provides support contact informaon, and cauons and
warnings, for the Rimage AutoPrinter.
Technical Specicaons for this product can be found at
www.rimage.com/support. From the Support page select Printers > Product
Name > User Manuals tab.
Support Contact Informaon
US, Canada, Lan America
Rimage Corporaon
7725 Washington Avenue South
Minneapolis, MN 55439
USA
An: Rimage Services
Email: [email protected]
Telephone:
North America: 800-553-8312
Mexico/Lan America: 952-944-8144
Fax: 952-944-7808
Europe
Rimage Europe GmbH
Albert-Einstein-Str. 26
63128 Dietzenbach
Germany
Email: [email protected]
Telephone: +49 6074-8521-14
Fax: +49 6074-8521-100
Asia/Pacic
Rimage Japan Co., Ltd.
2F., WIND Bldg.
7-4-8 Roppongi Minato-ku,
Tokyo 106-0032 JAPAN
Email: [email protected]
Telephone: +81-3-5771-7181
Fax: +81-3-5771-7185
Contact Rimage Services
Website: www.rimage.com/support
Knowledge Base: hp://rimage.custhelp.com
Log in and select the Ask a Queson tab
When you contact Rimage
Services, please provide:
• System serial number and soware
version
• Funconal and technical
descripon of the problem
• Exact error message received
Copy this informaon from your Rimage product
for future reference.
Note: Make sure you update the Serial Number
here anyme you receive a replacement system.
Serial Number:
Product Name:
Date of Purchase:
Learn More Online
At www.rimage.com/support, you can experience Rimage’s world-class
Support and Services.
From the Support home page:
1. Select your product series.
2. Select your product.
3. Learn more on the product page.
From your product page you can access:
• Informaon about the latest soware
and rmware updates
• Product specicaons
• The latest documents
• Current rmware and driver downloads
Technical Support and Product Updates
Rimage oers a variety of service and support opons for the Prism III
printer including Exchange Services. Please contact your Rimage Value
Added Reseller or Rimage for addional informaon and pricing.
Important! Make sure you register your autoloader so you are eligible for
parts and labor covered for 1 year and priority phone support. Registraon
is available at hp://www.rimage.com/support/warranty-registraon.
Opcal Disc Recording Soware Disclaimer
This Product, Soware, or Documentaon may be designed to assist you
in reproducing material in which you own the copyright or have obtained
permission to copy from the copyright owner. Unless you own the copyright
or have permission to copy from the copyright owner, you may be violang
copyright law and be subject to payment of damages and other remedies. If
you are uncertain about your rights, you should contact your legal advisor. If
you are neither in possession of the copyright nor have authorizaon from
the owner of the copyright, unauthorized copying of copyrighted material
on an opcal disc or any other media violates naonal and internaonal
legislaon and can result in severe penales.

3
Important Information
For more information visit rimage.com/support
110656_N
Safety and Compliance Informaon
This manual and the indicaons on the product allow proper and safe
operaon. The indicaon marks below help protect you and other persons
from injury, and equipment from damage.
Safety Precauons
This manual and the indicaons on the product allow proper and safe
operaon. The indicaon marks below help protect you and other persons
from injury, and equipment from damage.
nWarnings!
• Use of controls or adjustments or performance of procedures other than
those specied herein may result in hazardous radiant exposure.
• Do not disassemble or use tools on a Rimage printer. All service procedures
should be performed by a Rimage-authorized technician, or sent in for
Rimage-authorized repair.
• Do not service a Rimage printer with the power cord plugged in the AC
outlet.
• The interior of a Rimage printer contains sharp edges.
• Do not use a Rimage printer if it is overheang or an abnormal smell is
detected. This may result in a re and an electric shock. In case of heang
or abnormal smell, immediately disconnect the cable from the outlet.
Contact your Rimage-authorized dealer for repairs.
• The front bezel of the Rimage Everest™ printer can be opened by hand. Do
not insert your ngers.
• Do not touch the heat roller in a Rimage Everest printer.
nCauons:
• All equipment with AC line voltage, or low DC voltages, such as switches,
power supplies, fuses, fans, non-stepper motors, must be replaced with
Rimage-approved components to maintain the safety approval issued by
UL.
• Use only the supplied AC power cord. For more informaon or to order a
new power cord, contact Rimage Customer Service.
• This product is designed for an oce environment.
• Allow sucient free space for opening the printer tray. Do not touch the
printer tray while it is moving.
• If the side cover on the Rimage Everest printer is opened while power
is supplied, the printer will stop. Do not reach into the printer while it is
operang. Do not aempt to bypass the door interlock.
• The Rimage Everest printer has no power switch. Power is disconnected
completely by unplugging the cable. Rimage recommends installing the
printer in a posion that allows immediate disconnecon of the power
cable. Always hold the plug when disconnecng the cable from the outlet.
• The Rimage Everest printer has a voltage slide switch on the back of the
unit. Before use, make sure that it is set to the correct voltage. Please do
not use any voltage other than 110VAC or 220VAC. This could result in a re
and an electric shock.

4
Important Information
For more information visit rimage.com/support
110656_N
Compliance Informaon
Product AutoPrinter
Model RAS25
Noce for USA NOTE: This equipment has been tested and found to comply with the limits for a Class A digital device, pursuant to part 15 of
the FCC Rules. These limits are designed to provide reasonable protecon against harmful interference when this equipment
is operated in a commercial environment. This equipment generates, uses and can radiate radio frequency energy and, if
not installed and used in accordance with the instrucon manual, may cause harmful interference to radio communicaons.
Operaon of this equipment in a residenal area is likely to cause harmful interference, in which case the user will be
required to correct the interference at his own expense.
This product complies with UL 60950-1, 2nd edion.
Noce for Canada This Class A digital apparatus complies with Canadian ICES-003 Issue 4:2004. Cet appareil numerigue de la classe A est
conforme a la norme NMB-003 du Canade.
This product complies with CAN/CSA-C22.2 No. 60950-1-07, 2nd edion.
Noce for Europe This product is in conformity with the EMC Direcve (89/336/EEC) and the Low-Voltage Direcve (73/23/EEC) through
compliance with the following European standards:
IEC 60950:1999, 3rd edion, EN 55022:1998 + A1:2000 + A2:2003, EN 55024:1998 + A1:2001 + A2:2003, EN 61000-3-2:2000
+ A2:2005, EN 61000-3-3:1995 + A1:2001.
The CE mark has been axed in accordance with the CE Marking Direcve 93/68/EEC.
Noce for Japan This is a Class A product based on the standard of the Voluntary Control Council for Interference by Informaon Technology
Equipment (VCCI). If this equipment is used in a domesc environment, radio interference may occur, in which case, the user
may be required to take correcve acon.
Translaon:
この装置は、情報処理装置等電波障害自主規制協議会(VCCI)の基準に基づくクラス
A 情報技術装置です。この装置を家庭環境で使用すると電波妨害を引き起こすことがありま
す。この場合には使用者が適切な対策を講ずるよう要求されることがあります。
Noce for Australia This product complies with AS/NZS CISPR 22: 2006.

5
For more information visit rimage.com/support
110656_N
Identify the Parts of the AutoPrinter
This secon idenes the dierent parts of the AutoPrinter. For detailed informaon about the parts of the Everest or Prism printer, refer the printer user guide
that shipped with your product.
Carousel
Li Arm
Everest
Printer
Prism
Printer
Printer
Operator
Buon
Control
Panel
Operator
Panel
Front View
AutoEverest AutoPrism
Operator
Panel
Printer
Operator
Buon
Control
Panel
Carousel
Acve
Li Arm

6
For more information visit rimage.com/support
110656_N
Important! The serial cable is used only for updang the rmware. Do not connect the serial cable to the AutoPrinter during normal operaon.
Identify the Parts of the AutoPrinter
Back View
AutoEverest AutoPrism
USB
Cable
Control
Cable
Power
Cord
Power
Cord
AutoPrinter
Power
Switch
AutoPrinter
Power
Switch
Serial
Cable
Port
Serial
Cable
Port
USB
Cable
Control
Cable

7
Identify the Parts of the AutoPrinter
For more information visit rimage.com/support
2001809_A
Operator Panel
The operator panel is located on the front of the
AutoPrinter. It includes an operator buon and four
indicator lights. (One light is on the operator buon.)
The control panel allows you to monitor and control the
printer.
The table below idenes the name and funcon of all
parts of the control panel.
Operator Panel Indicators
Image Name Funconality
Carousel
indicator
light
The Carousel indicator light blinks when the AutoPrinter
resumes operaon aer being paused.
Acve
indicator
light
The Acve indicator light illuminates when the control
center (PC) is communicang with the AutoPrinter. The
light blinks one me per second when the system is paused
and four mes per second when the system is waing for
you to reset the bins. Refer to the Reset the AutoPrinter
secon for more informaon.
Power
indicator
light
The Power indicator light illuminates when the AutoPrinter
is powered on.
Operator
Buon
Each me you press the operator buon, the carousel
rotates to the next bin.
Fault
indicator
light
The Fault indicator light is located on the operator buon
and illuminates if an error is detected.

8
For more information visit rimage.com/support
110656_N
This secon provides the informaon needed to operate your Rimage
AutoPrinter.
Install the Carousel
Important! To prevent errors, install the carousel before operang the
soware or powering on the AutoPrinter.
1. Slide the carousel into the AutoPrinter so that the sha slides into the
opening of the bearing guide. Refer to the Front View secon on page 5
for proper carousel placement.
2. Lower the carousel so that the top support bearing drops into the
bearing guide.
3. If necessary, rotate the carousel to seat the carousel securely.
Operate the AutoPrinter
Power On and O the AutoPrinter
Important! The carousel must be installed before you power on the system.
Refer to the Install the Carousel secon.
Tips:
• The Prism printer has a separate power switch. The Prism power
switch must be in the On posion in order for the printer to power
on at the same me as the AutoPrinter.
• The Everest printer does not have a power switch. The Everest
printer powers on when the AutoPrinter powers on. The Everest
printer takes 1 to 2 minutes to complete inializaon
• Press the power switch on the rear of the AutoPrinter to the On
posion.
The AutoPrinter powers on.
• Press the power switch to the O posion.
The AutoPrinter powers o.
Sha
Bearing Guide Top Support Bearing
Power Switch

9
For more information visit rimage.com/support
2001809_A
Load and Unload Discs
You can load up to 100 discs per carousel bin. You may load discs in the bins
before installing the carousel.
When the carousel is installed in the AutoPrinter, discs can be installed one
bin at a me by using the following procedure
Tip: Use carousel bins 1, 2, and 3 to load blank discs. Bin 4 is used only for
outpung completed discs.
Load the Discs
Important! When you rotate the carousel to load discs, the AutoPrinter
pauses. Aer loading discs in the carousel, you must prompt the AutoPrinter
to resume operaon. Refer to step 4.
1. Press the operator buon to rotate the carousel and place a bin 1, 2,
and 3 in posion to load discs. The AutoPrinter pauses, allowing you to
load discs. The acve indicator light blinks.
2. Place blank discs in the bin.
Important! Place the discs into the bin with the recording side facing down
Tip: Hold the discs by the outer edge so you do not put ngerprints on
either the top or the boom surface of the discs. Fingerprints on the top
of a disc can aect prinng quality. Rimage recommends wearing lint free
gloves.
3. Repeat steps 1–2 unl the bins 1, 2, and 3 are lled.
4. Press and hold the operator buon for two blinks of the carousel
indicator light. The AutoPrinter resumes operaon, using the input/
output bin combinaon that was in place when the AutoPrinter was
paused.
5. If necessary, reset the AutoPrinter. Refer to the Reset the AutoPrinter
secon.
Unload the Discs
Important! When you rotate the carousel to unload discs, the AutoPrinter
pauses. Aer unloading discs from the carousel, you must prompt the
AutoPrinter to resume operaon. Refer to step 4
1. Press the operator buon to rotate the carousel and place a bin in a
posion to unload discs. The AutoPrinter pauses, allowing you to unload
discs. The acve indicator light blinks.
2. Remove the discs from the bin.
3. Repeat steps 1–2 unl the desired bins are empty.
4. Press and hold the operator buon for two blinks of the carousel
indicator light. The AutoPrinter resumes operaon, using the input/
output bin combinaon that was in place when the AutoPrinter was
paused.
5. If necessary, reset the AutoPrinter. Refer to the Reset the AutoPrinter
secon.
Reset the AutoPrinter
By default, the AutoPrinter is set to use bins 1, 2, and 3 as the input bins,
and bin 4 as the output bin.
Tip: The AutoPrinter begins to picks discs from bin 3. When bin 3 is empty,
the AutoPrinter picks discs from bin 2. When bin 2 is empty, the AutoPrinter
picks discs from bin 1. The AutoPrinter connues to pick discs in this
conguraon unl all discs have been printed, or the bin conguraon is
changed.
If the default bin conguraon is changed and the AutoPrinter needs to be
reset, the acve indicator light will blink 4 mes per second. To reset the
AutoPrinter, press and hold the operator buon for 3 blinks of the carousel
indicator light.
Tip: The AutoPrinter can be reset to the default bin conguraon at any
me.
Set Prinng Preferences
Prinng preferences allow you to set up your AutoPrinter to produce the
best possible labels on your discs. Refer to your Everest or Prism printer user
guide for specic prinng preferences instrucons.
Operate the AutoPrinter

10
For more information visit rimage.com/support
110656_N
Use the informaon in this secon to keep your AutoPrinter in opmal
operang condion.
Install the Ribbons
Tips:
• Before installing ribbons in the Everest or Prism printer, stop any
operaons.
• To change ribbons in a Prism printer, refer to the Rimage Prism III
Printer User Guide.
• To change ribbons in an Everest printer, refer to the Rimage Everest
Printer User Guide.
Cleaning Method and Schedule
Maintain the AutoPrinter
Task Frequency
Clean the AutoPrinter
Remove dust from the AutoPrinter
and the surrounding work area
Once a week

Rimage AutoPrinter™
Benutzerhandbuch

Weitere Informationen finden Sie unter rimage.com/support
110656_N
Rimage Corporaon behält sich das Recht vor, jederzeit und ohne vorherige Ankündigung die in diesem Dokument beschriebenen Geräte und
die Soware zu verbessern. Rimage Corporaon behält sich das Recht vor, diese Veröentlichung zu überarbeiten und von Zeit zu Zeit inhaltliche
Änderungen vorzunehmen, ohne Verpichtung seitens Rimage Corporaon, Personen oder Unternehmen über solche Überarbeitungen oder
Änderungen in Kenntnis zu setzen.
Dieses Dokument enthält möglicherweise Links zu Websites, die zur Zeit der Veröentlichung aktuell waren, jedoch inzwischen verschoben oder
inakv wurden. Dieses Dokument enthält möglicherweise Links zu Websites, die das Eigentum von Drianbietern sind und von diesen verwaltet
werden. Rimage Corporaon ist für den Inhalt von Drianbieter-Sites nicht verantwortlich.
© 2012, Rimage Corporaon
Rimage®ist eine eingetragenes Warenzeichen des Unternehmens Rimage Corporaon. Professional™ und Everest™ sind Warenzeichen des
Unternehmens Rimage Corporaon. Dell™ ist ein Warenzeichen des Unternehmens Dell Computer Corporaon. FireWire™ ist eine Marke von Apple
Computer, Inc. Windows® ist eine eingetragenes Warenzeichen des Unternehmens Microso Corporaon.
Alle anderen Marken und eingetragenen Marken sind das Eigentum ihrer jeweiligen Eigentümer.
Die aktuelle Version des Dokuments nden Sie unter www.rimage.com/support.
Hauptsitz:
Rimage Corporaon
7725 Washington Avenue South
Minneapolis, MN 55439
USA
800-553-8312 (gebührenfrei in USA)
Service: +1 952-946-0004 (Asien/Pazik,
Mexiko/Lateinamerika)
Fax: +1 952-944-6956
Hauptsitz für Asien/Pazik:
Rimage Japan Co., Ltd.
2F., WIND Bldg.
7-4-8 Roppongi Minato-ku,
Tokio 106-0032 JAPAN
Tel: +81-3-5771-7181
Fax: +81-3-5771-7185
Europäischer Hauptsitz:
Rimage Europe GmbH
Albert-Einstein-Str. 26
63128 Dietzenbach
Deutschland
Tel: +49 6074-8521-14
Fax: +49 6074-8521-100

Inhalt
110656_N Weitere Informationen finden Sie unter rimage.com/support
Einleitung........................................................................................ 1
Über dieses Benutzerhandbuch ............................................................................... 1
Über das Produkt ..................................................................................................... 1
Anleitung zum Auspacken und Einrichten ............................................................... 1
Wichge Informaon ...................................................................... 2
Support-Kontaknformaonen ................................................................................ 2
Weitere Online-Informaonen ................................................................................ 2
Technischer Support und Produkt-Updates ............................................................. 2
Haungsausschluss: Aufzeichnungssoware für opsche Discs ............................. 2
Informaonen zu Sicherheit und Standards ............................................................ 3
Sicherheitsmaßnahmen...................................................................................................... 3
Informaonen zu Standards ............................................................................................... 4
Ansicht und Bedienelemente AutoPrinter ....................................... 5
Vorderansicht ........................................................................................................... 5
Rückansicht .............................................................................................................. 6
Bediener-Display ...................................................................................................... 7
Bedienen des AutoPrinter................................................................ 8
Einbauen des Karussells ........................................................................................... 8
An - und Ausschalten des AutoPrinter ..................................................................... 8
Einlegen und Herausnehmen von Discs ................................................................... 9
Einlegen von Discs .............................................................................................................. 9
Herausnehmen von Discs ................................................................................................... 9
Rücksetzen des AutoPrinter ............................................................................................... 9
Festlegen der Druckeinstellungen ............................................................................ 9
Wartung des AutoPrinter............................................................... 10
Legen Sie die Bänder ein ........................................................................................ 10
Reinigungsmethode und Plan ................................................................................ 10

1
Weitere Informationen finden Sie unter rimage.com/support
110656_N
Einleitung
Dieses Handbuch enthält Informaonen zum Benutzen des AutoEverest und
AutoPrism III AutoPrinter, sowie zum Idenzieren der Komponenten. Zur
Einrichtung und Installaon des AutoPrinter und die CD Designer™ Soware
Suite siehe die im Lieferumfang Ihres Produkts enthaltene Einrichtungs- und
Installaonsanleitung.
Technische Informaonen nden Sie im Dokument Rimage AutoPrism IIITM und
AutoEverestTM AutoPrinter Spezikaonen unter www.rimage.com/support. Auf
der Support Seite wählen Sie Printers (Drucker) > Product Name (Produktname)
> User Manuals (Benutzerhandbücher) Reiter.
Wichg! Ihr Rimage AutoPrinter™ System sieht möglicherweise etwas anders
aus, als das in diesem Benutzerhandbuch beschriebene Modell.
Über dieses Benutzerhandbuch
• Wir sind darum bemüht, alle Versionen unserer Benutzerhandbücher sowie
sämtliche Dokumentaon auf dem neuesten Stand zu halten. Beachten
Sie, dass die auf unserer Website erhältliche englische Version stets die
aktuellsten Informaonen enthält.
• Sofern nicht anders angegeben, beziehen sich alle Anweisungen
zur Navigaon in Windows auf Windows 7. Bei anderen Windows-
Betriebssystemen kann die Navigaon geringfügig abweichen.
• Diese Hinweise und Symbole werden im gesamten Handbuch zur
Erläuterung der entsprechenden Informaonen eingesetzt:
Tipp: Es werden alternave Vorgehensweisen vorgeschlagen, die sich nicht auf
den ersten Blick erschließen. Tipps tragen dazu bei, dass Sie die Vorteile und
Möglichkeiten, die das Produkt bietet, besser verstehen.
Wichg!
• Ein wichger Hinweis enthält Informaonen, die zur Durchführung eines
Verfahrens oder einer Aufgabe unbedingt erforderlich sind.
• Wichge ergänzende Informaonen.
• Sie können Informaonen in einem Tipp außer Acht lassen und eine
Aufgabe immer noch abschließen, aber die Informaonen in einem
wichgen Hinweis sollten Sie stets beachten.
nVorsicht: So gekennzeichnete Hinweise weisen darauf hin, dass bei
Nichtbeachtung dieser Richtlinie das Gerät, das Produkt oder die Soware
beschädigt werden oder Daten verloren gehen können.
nWarnung! Eine Warnung weist auf Situaonen hin, in denen Personen, die
ein Gerät bedienen oder warten, verletzt werden können.
Über das Produkt
Der Rimage AutoPrinter kann mit dem Everest-Drucker oder mit dem Prism
III-Drucker geliefert werden. Weitere spezische Informaonen über Ihrem
Drucker entnehmen Sie dem im Lieferumfang des Druckers enthaltenen
Benutzerhandbuch des Everest oder Prisma-Druckers.
Tipp: Der Begri „AutoPrinter“ bezeichnet durchgängig in diesem
Benutzerhandbuch den AutoEverest und den AutoPrism. Die Begrie
‘AutoEverest’ und ‘AutoPrism’ werden nur benutzt um sich auf beiden Produkte
zu beziehen.
Anleitung zum Auspacken und Einrichten
Anleitungen zum Auspacken und Einrichten sind im Lieferumfang des Rimage
AutoPrinter enthalten. Beziehen Sie sich auf das im Lieferumfang erhaltenen
Installaons- und Einrichtungshandbuch mit Ihrem Rimage AutoPrinter.

2
Weitere Informationen finden Sie unter rimage.com/support
110656_N
Wichtige Information
In diesem Abschni nden Sie Kontaknformaonen für Support-Anfragen
sowie Vorsichtsmaßnahmen und Warnhinweise für das Rimage AutoPrinter.
Technische Spezikaonen zu diesem Produkt nden Sie unter
www.rimage.com/support. Auf der Support Seite wählen Sie Printers (Drucker)
> Product Name (Produktname) > User Manuals (Benutzerhandbücher) Reiter.
Support-Kontaknformaonen
USA, Kanada, Lateinamerika
Rimage Corporaon
7725 Washington Avenue South
Minneapolis, MN 55439
USA
An: Rimage Services
E-Mail: [email protected]
Telefon:
Nordamerika: 800-553-8312
Mexiko/Lateinamerika: 952-944-8144
Fax: 952-944-7808
Europa
Rimage Europe GmbH
Albert-Einstein-Str. 26
63128 Dietzenbach
Deutschland
E-Mail: [email protected]
Telefon: +49 6074-8521-14
Fax: +49 6074-8521-100
Asien/Pazik
Rimage Japan Co., Ltd.
2F., WIND Bldg.
7-4-8 Roppongi Minato-ku,
Tokio 106-0032 JAPAN
E-Mail: [email protected]o.jp
Telefon: +81-3-5771-7181
Fax: +81-3-5771-7185
Kontaktdaten von Rimage Services:
Webseite: www.rimage.com/support
Wissensdatenbank hp://rimage.custhelp.com
Melden Sie sich an und wählen Sie die Registerkarte Ask a Queson(Frage stellen)
Wenn Sie sich an Rimage
Services wenden, halten Sie bie
folgende Informaonen bereit:
• Seriennummer des Systems und
Sowareversion
• Funkonelle und technische
Beschreibung des Problems
• Genauer Wortlaut der
angezeigten Fehlermeldung
Noeren Sie sich diese Informaonen Ihres
Rimage-Produkts zur späteren Verwendung.
Bemerkung: Tragen Sie hier immer, wenn Sie ein
neues System erhalten, die neue Seriennummer ein.
Seriennummer:
Produktname:
Kaufdatum:
Weitere Online-Informaonen
Informieren Sie sich unter www.rimage.com/support, über den erstklassigen
Support und Kundendienst von Rimage.
Auf der Support-Homepage:
1. Wählen Sie die Produktserie aus.
2. Wählen Sie das Produkt aus.
3. Lesen Sie die Angaben auf der
Produktseite.
Auf der Produktseite stehen folgende
Informaonen zur Verfügung:
• Informaonen über die neuesten Soware-
und Firmware-Updates
• Produktspezikaonen
• Aktuelle Dokumente
• Downloads der aktuellen Firmware und Treiber
Technischer Support und Produkt-Updates
Rimage bietet eine Reihe verschiedener Service- und Support-Oponen für
den Prism III Drucker an, einschließlich Austausch-Services. Wenden Sie sich an
Rimage oder an Ihren Rimage-Wiederverkäufer, um mehr über den erhältlichen
Support und die entsprechenden Preise zu erfahren.
Wichg! Registrieren Sie die Roboter-Staon, um für ein Jahr Garane für
Ersatzteile und Arbeitsstunden sowie telefonischen
Prioritätssupport zu erhalten. Die Registrierung können Sie unter
hp://www.rimage.com/support/warranty-registraon vornehmen.
Haungsausschluss: Aufzeichnungssoware
für opsche Discs
Dieses Produkt, diese Soware oder diese Dokumentaon wurde konzipiert, um
Ihnen bei der Reprodukon von Material zu helfen, für das Sie das Copyright
besitzen oder die Kopiererlaubnis vom Copyright-Eigentümer erhalten haben.
Wenn Sie das Copyright nicht besitzen oder nicht die Kopiererlaubnis vom
Copyright-Eigentümer erhalten haben, verstoßen Sie möglicherweise gegen
Urheberrechtsgesetze und können zu Schadensersatzleistungen oder zur
Zahlung sonsger Schäden angewiesen werden. Wenn Sie Ihre Rechte nicht
kennen, wenden Sie sich an Ihren Rechtsberater. Wenn Sie weder das Eigentum
am Copyright noch die Erlaubnis vom Copyright-Eigentümer haben, verstößt das
Kopieren urheberrechtlich geschützter Inhalte auf opschen Discs oder anderen
Medien gegen naonale und internaonale Gesetze und kann strafrechtlich
verfolgt werden.

3
Wichtige Information
Weitere Informationen finden Sie unter rimage.com/support
110656_N
nVorsicht:
• Damit die Sicherheitszulassung von UL aufrechterhalten werden kann, sind
sämtliche Gerätekomponenten, für die WS-Netzspannung oder niedrige
GS-Spannung verwendet wird (z. B. Schalter, Netzgeräte, Sicherungen,
Lüungen oder Motoren, bei denen es sich nicht um Schrimotoren
handelt), durch von Rimage zugelassene Komponenten zu ersetzen.
• Verwenden Sie ausschließlich das im Lieferumfang enthaltene AC-
Netzkabel. Sollten Sie weitere Fragen haben oder ein neues Stromkabel
bestellen wollen, wenden Sie sich bie an den Kundendienst von Rimage.
• Dieses Produkt wurde für den Einsatz in Büros konzipiert.
• Achten Sie auf ausreichenden Platz zum Önen der Schublade des Druckers.
Berühren Sie nicht die sich bewegende Schublade.
• Wenn die Seitenabdeckung geönet wird, solange der Rimage Everest
Drucker mit Strom versorgt ist, wird der laufende Druckvorgang
abgebrochen. Fassen Sie während des Betriebs nicht in den Drucker.
Versuchen Sie nicht, die Türsperre zu umgehen.
• Der Rimage Everest-Drucker hat keinen Netzschalter. Das Gerät wird durch
Ziehen des Netzsteckers vom Netz getrennt. Rimage empehlt, den Drucker
so aufzustellen, dass der Netzstecker sofort gezogen werden kann. Fassen
Sie das Netzkabel immer am Stecker an, wenn Sie es aus der Steckdose
ziehen.
• Der Rimage Everest Drucker hat einen Versorgungsspannungswahlschalter
auf der Rückseite der Druckereinheit. Versichern Sie sich, dass der Drucker
auf die richge Spannung eingestellt ist, bevor Sie ihn in Betrieb nehmen.
Schließen Sie das Gerät nur an 110 oder 220 V~ an. Andernfalls besteht die
Gefahr eines Brandes oder eines elektrischen Schlags.
Informaonen zu Sicherheit und Standards
Dieses Handbuch und die Angaben zum Produkt ermöglichen einen
ordnungsgemäßen und sicheren Betrieb. Die folgenden Hinweiszeichen helfen
Ihnen, sich selbst und andere Personen vor Verletzungen zu schützen und
Schäden am Gerät zu vermeiden.
Sicherheitsmaßnahmen
Dieses Handbuch und die Angaben zum Produkt ermöglichen einen
ordnungsgemäßen und sicheren Betrieb. Die folgenden Hinweiszeichen helfen
Ihnen, sich selbst und andere Personen vor Verletzungen zu schützen und
Schäden am Gerät zu vermeiden.
nWarnung!
• Wenn Sie Steuerelemente auf eine nicht in diesem Dokument beschriebene
Art und Weise verwenden oder Anpassungen bzw. sonsge Tägkeiten nicht
gemäß diesem Handbuch ausführen, könnten Sie schädlicher Strahlung
ausgesetzt werden.
• Zerlegen Sie den Rimage-Drucker nicht und setzen Sie keine Werkzeuge
daran ein. Alle Reparaturarbeiten müssen von einem von Rimage
autorisierten Techniker durchgeführt werden. Alternav können Sie das
Gerät zur Reparatur an Rimage schicken.
• Führen Sie keine Arbeiten am Rimage-Drucker durch, wenn dieser am Netz
angeschlossen ist.
• Im Inneren des Rimage-Druckers benden sich scharfe Kanten.
• Verwenden Sie den Rimage-Drucker nicht, wenn er überhitzt ist oder
unnormale Gerüche abgibt. Andernfalls besteht die Gefahr eines
Brandes oder eines elektrischen Schlags. Ziehen Sie bei Überhitzung oder
unnormalen Gerüchen sofort das Netzkabel aus der Steckdose. Wenden Sie
sich zur Reparatur an einen von Rimage autorisierten Händler.
• Die Blende an der Vorderseite des Rimage Everest™ Druckers kann von
Hand abgenommen werden. Stecken Sie nicht Ihre Finger hinein.
• Berühren Sie nicht die heiße Druckwalze im Rimage Everest Drucker.

4
Wichtige Information
Weitere Informationen finden Sie unter rimage.com/support
110656_N
Informaonen zu Standards
Produkt AutoPrinter
Modell RAS25
Hinweis für USA BEMERKUNG: Dieses Gerät wurde getestet und entspricht den Grenzwerten für ein digitales Gerät der Klasse A gemäß Teil 15
der FCC-Besmmungen. Diese Grenzwerte dienen dem angemessenen Schutz vor schädlichen Störungen beim Einsatz des Geräts
in Gewerbegebieten. Dieses Gerät erzeugt, verwendet und strahlt Funkfrequenzenergie aus und kann, falls nicht gemäß den
Anweisungen aufgestellt, installiert und verwendet, schädliche Störungen bei Funkkommunikaonen verursachen. Beim Betrieb
dieses Geräts in Wohngebieten besteht die Wahrscheinlichkeit des Auretens schädlicher Störungen. In diesem Fall muss der
Benutzer diese Störungen auf eigene Kosten beseigen.
Dieses Produkt entspricht UL 60950-1, 2. Ausgabe.
Hinweis für Kanada Dieses digitale Gerät der Klasse A entspricht der kanadischen Vorgabe ICES-003, Ausgabe 4:2004. Cet appareil numerigue de la
classe A est conforme a la norme NMB-003 du Canade.
Dieses Produkt entspricht CAN/CSA-C22.2 No. 60950-1-07, 2. Ausgabe.
Hinweis für Europa Dieses Produkt entspricht der EMV-Richtlinie (89/336/EWG) und der Niederspannungsrichtlinie (73/23/EWG), da folgende
europäische Normen eingehalten werden: EN 60950:2000, EN 55022:1998 + A1: 2000 und A2: 2003, EN 55024:1998 und A1: 2001
und A2: 2003, EN 61000-3-2:2000, EN 61000-3-3:1995 und A1: 2001.
IEC 60950:1999, 3. Ausgabe, EN 55022:1998 + A1:2000 + A2:2003, EN 55024:1998 + A1:2001 + A2:2003, EN 61000-3-2:2000 +
A2:2005, EN 61000-3-3:1995 + A1:2001.
Das CE-Kennzeichen wurde in Übereinsmmung mit der Richtlinie für die CE-Kennzeichnung 93/68/EWG angebracht.
Hinweis für Japan Dieses Produkt der Klasse A entspricht dem Standard des Voluntary Control Council for Interference by Informaon Technology
Equipment (VCCI). Wenn dieses Gerät in einer häuslichen Umgebung verwendet wird, können Funkstörungen aureten. In diesem
Fall muss der Benutzer u. U. Korrekturen vornehmen.
Übersetzung:
この装置は、情報処理装置等電波障害自主規制協議会(VCCI)の基準に基づくクラス
A 情報技術装置です。この装置を家庭環境で使用すると電波妨害を引き起こすことがありま
す。この場合には使用者が適切な対策を講ずるよう要求されることがあります。
Hinweis für Australien Dieses Produkt entspricht AS/NZS CISPR22:2006.
Other manuals for AutoPrinter
1
Table of contents
Languages:
Other Rimage Computer Hardware manuals
Popular Computer Hardware manuals by other brands

QSC
QSC RAVE 520az Hardware manual

Texas Instruments
Texas Instruments TMP119 user guide

INNOSILICON
INNOSILICON A4+ LTCMaster user manual

Sony
Sony PCWA-C700 - Wireless Lan Dual Pc Card troubleshooting guide

StarTech.com
StarTech.com PCIX1PEX4 installation guide

IEI Technology
IEI Technology MPCIE-USB3 Quick installation guide

Ikegami
Ikegami IK-8046 Installation & operating manual

ST
ST STEVAL-ISF001V1 user manual

Silicon Systems
Silicon Systems Silicon Drive SSD-P08G(I)-3521 datasheet

Renesas
Renesas DA16200 PMOD user manual

EAW
EAW MX8600 Jumpstart Manual

Cypress Semiconductor
Cypress Semiconductor CY7C1410AV18 Specification sheet