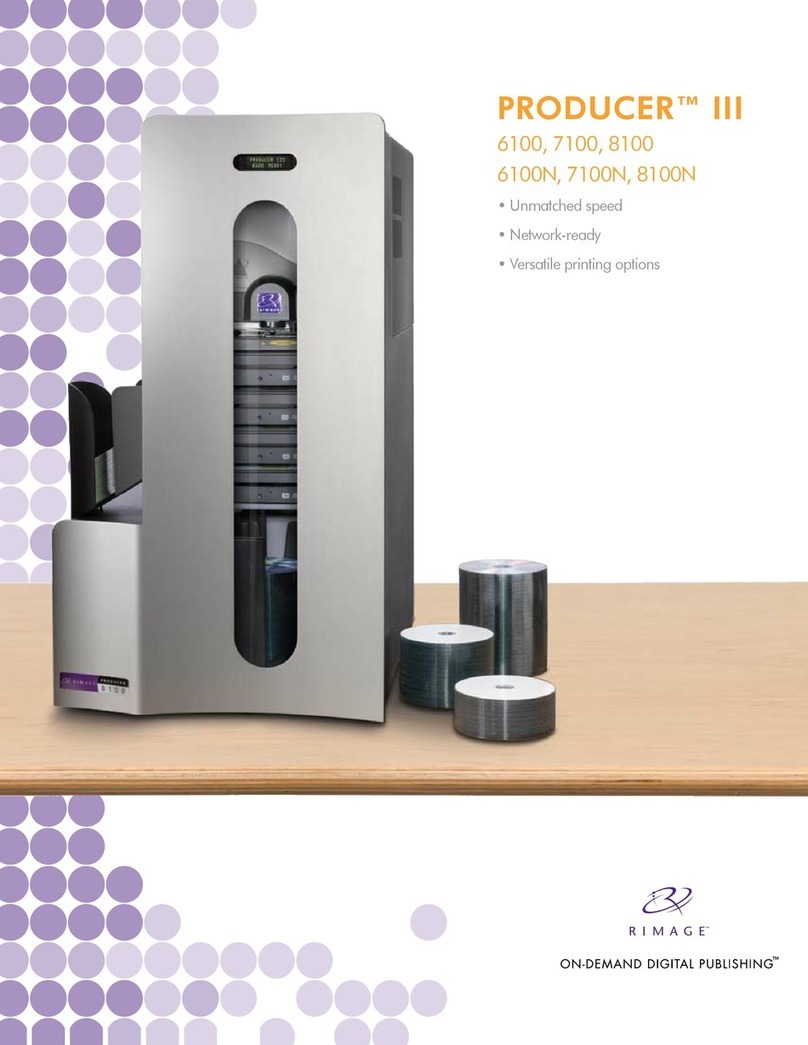
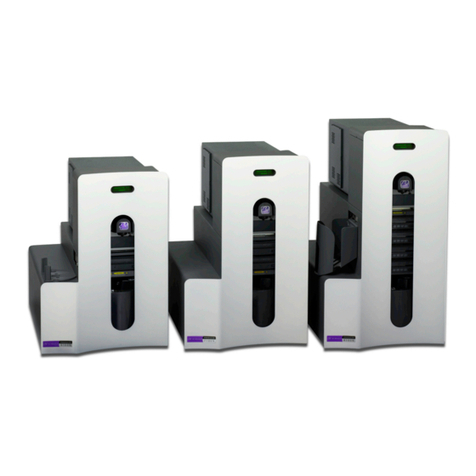
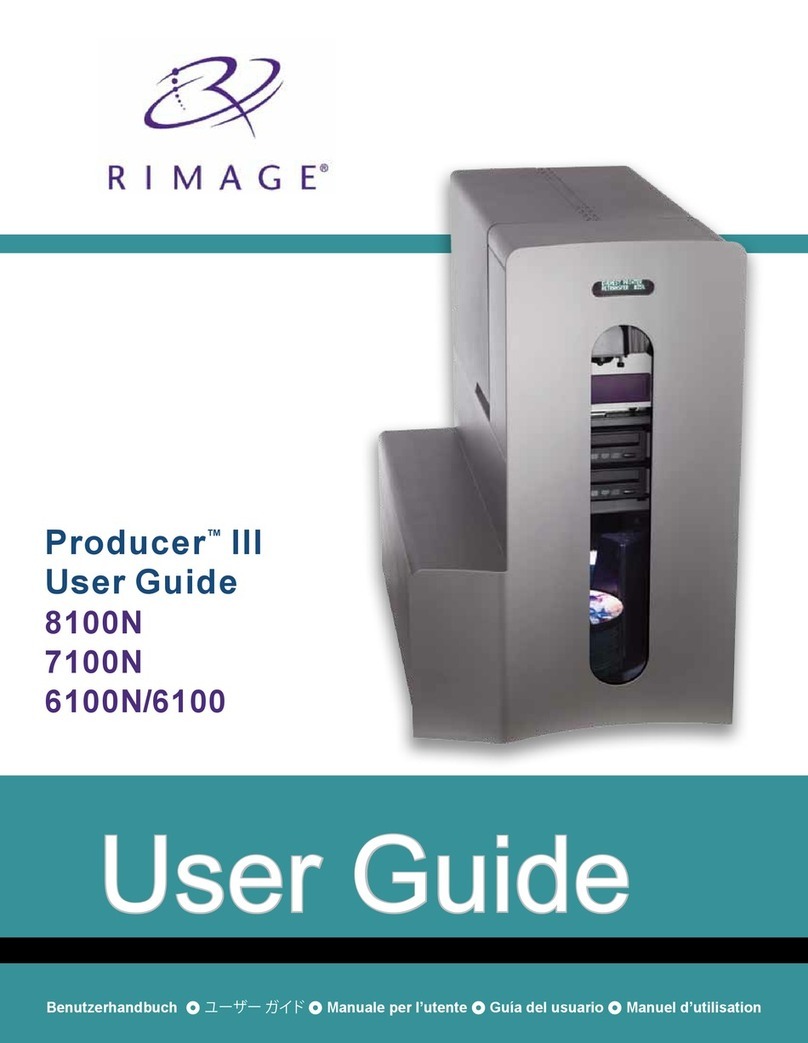
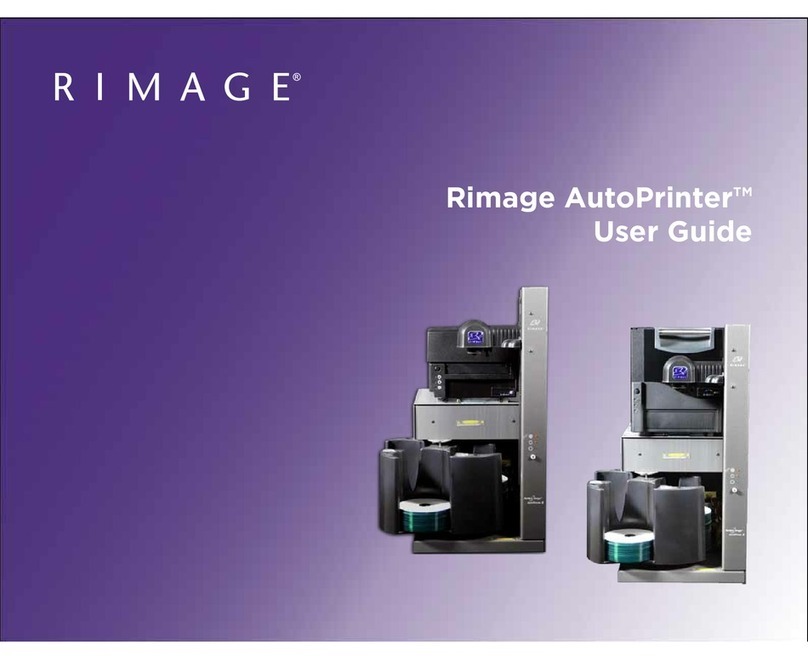
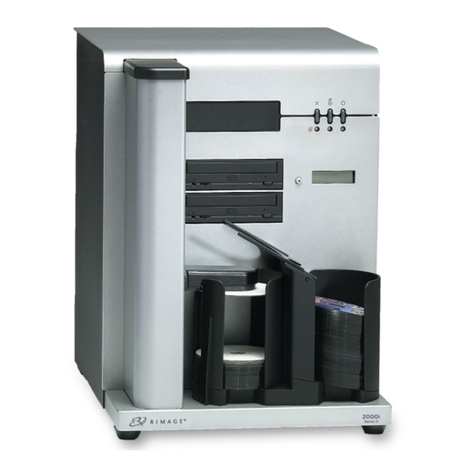
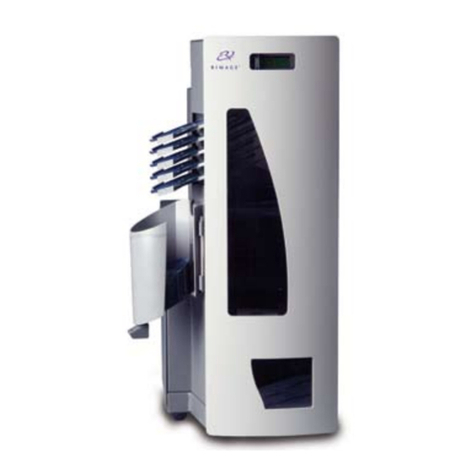
Rimage Producer III series User manual

Rimage Producer™ III and
Producer™ IIIN User Guide
This manual provides the information needed to operate, identify the parts of, and congure the printing preferences for the Rimage
Producer III. To set up and install your Rimage Producer III,refer to the Setup and Installation Guide included with your product.

Corporate Headquarters:
Rimage Corporation
7725 Washington Avenue South
Minneapolis, MN 55439 USA
800-553-8312 (toll free US)
Service: +1 952-946-0004 (International)
Fax: +1 952-944-6956
European Headquarters:
Rimage Europe GmbH
Albert-Einstein-Str. 26
63128 Dietzenbach Germany
Tel: +49-(0) 6074-8521-0
Fax: +49-(0) 6074-8521-100
Rimage Corporation reserves the right to make
improvements to the equipment and software described in
this document at any time without any prior notice. Rimage
Corporation reserves the right to revise this publication and
to make changes from time to time in the content hereof
without obligation of Rimage Corporation to notify any
person or organization of such revisions or changes.
This document may contain links to web sites that were
current at the time of publication, but may have moved or
become inactive since. This document may contain links
to sites on the Internet that are owned and operated by
third parties. Rimage Corporation is not responsible for the
content of any such third-party site.
©2009, Rimage Corporation
Rimage® is a registered trademark of the Rimage
Corporation. Rimage Producer™, Everest™ and
PrismPlus!™ are trademarks of the Rimage Corporation.
Dell® is registered trademark of Dell Computer Corporation.
FireWire® is a registered trademark of Apple Computer,
Inc. Windows® is a registered trademark of Microsoft
Corporation.
All other trademarks and registered trademarks are the
property of their respective owners.
2000538_D
English

2000538_D
i
Contents
Introduction..............................................................................................................................................................1
About this User Guide................................................................................................................................................................ 1
About Your Product.................................................................................................................................................................... 1
Important Information .............................................................................................................................................3
Support Information ................................................................................................................................................................... 3
Learn More Online ..................................................................................................................................................................... 3
Technical Support ...................................................................................................................................................................... 3
Optical Disc Recording Software Disclaimer ............................................................................................................................. 4
Safety and Compliance Information........................................................................................................................................... 4
Safety Precautions ......................................................................................................................................................................................... 4
Compliance Information ................................................................................................................................................................................. 5
Producer III and Producer IIIN Specications............................................................................................................................ 6
Additional 6100 Specications................................................................................................................................................... 7
Identify the Parts of the Producer III......................................................................................................................9
Front View.................................................................................................................................................................................. 9
Back View ................................................................................................................................................................................ 10
Parts Information...................................................................................................................................................................... 11
Status Light ...................................................................................................................................................................................................11
Operator Panel ..............................................................................................................................................................................................11
Operator Button.............................................................................................................................................................................................11
Disc Dispenser ..............................................................................................................................................................................................11
Beeper...........................................................................................................................................................................................................11
Operate the Producer III........................................................................................................................................13
Power On the Producer III ....................................................................................................................................................... 13
Power Off the Producer III ....................................................................................................................................................... 13
Pause the Producer III ............................................................................................................................................................. 13
Install the Carousel .................................................................................................................................................................. 14
Remove the Carousel .............................................................................................................................................................. 14
Load the Discs ......................................................................................................................................................................... 15
Unload the Discs...................................................................................................................................................................... 15
Set Your Printing Preferences.................................................................................................................................................. 15
Maintain the Producer III.......................................................................................................................................17
Overview .................................................................................................................................................................................. 17
Cautionary Information............................................................................................................................................................. 17
Preventative Maintenance Schedule ....................................................................................................................................... 17
Diagnostic Tests....................................................................................................................................................................... 18
Access and Select Diagnostic Tests............................................................................................................................................................. 18
Access Diagnostic Mode .......................................................................................................................................................................... 18
Select a Diagnostic Test ........................................................................................................................................................................... 18
Exit Diagnostic Mode.................................................................................................................................................................................... 18
Diagnostic Test 1 – Carousel Diagnostic Test .............................................................................................................................................. 19
Check the Position of the Carousel .......................................................................................................................................................... 19
Check the Alignment of the Lift Arm to the Carousel................................................................................................................................ 19
Diagnostic Test 3 – Calibrate Diagnostic Test .............................................................................................................................................. 20
Calibrate the Lift Arm................................................................................................................................................................................ 20
Calibrate the Carousel.............................................................................................................................................................................. 20
Align the Printer ....................................................................................................................................................................... 22
Operate Gemini Utilities........................................................................................................................................25
Start Gemini Utilities ................................................................................................................................................................ 25
Change the Autoloader Display Name..................................................................................................................................... 25
Enable the Beeper ................................................................................................................................................................... 25
English

12000538_D
Introduction
Introduction
This manual provides the information needed to operate, identify the parts of, and congure the printing preferences for the
Rimage® Producer™ III and Producer™ IIIN. These products are part of the Rimage Producer III series of products and
include the 6100, 6100N, 7100, 7100N, 8100, and 8100N autoloaders. The terms ‘Producer III’ and ‘autoloader’ are used
throughout this document to refer to these products.
To set up and install your Producer III, refer to the setup and installation guide included with your product.
About this User Guide
• While we try to maintain all versions of our manuals and documentations, please note that the English version found on
our website always contains the most up-to-date information.
• Unless otherwise indicated, all Windows navigation statements are Windows XP paths. Windows Vista, Windows 2000
and Windows Server 2003 navigation may differ slightly.
• These symbols are used throughout the manual to help clarify information:
Note: A Note provides supplemental information or information that may apply only in special cases. For example,
memory limitations, equipment congurations, or details that apply to specic versions of a program would be
included in a Note.
Tip: A Tip provides techniques and procedures to help with your specic needs. A Tip suggests alternative methods
that may not be obvious and helps you understand the benets and capabilities of the product.
-Important! An Important note provides information essential to the completion of a task. You can disregard
information in a Note or Tip and still complete a task, but do not disregard an Important note.
nCaution: A Caution indicates that failure to observe this guideline could result in loss or damage to the equipment,
product, software, or data.
,Warning! A Warning indicates that failure to follow this guideline could result in bodily injury to personnel operating or
maintaining the equipment.
About Your Product
The Producer III is available with either the Everest™ III or 600 printer, or the PrismPlus!™ printer. For information about your
printer, refer to the setup and installation guide or user guide that shipped with your printer.
The Producer 6100N, 7100N, and 8100N autoloaders have an embedded control center (PC). The embedded PC is a
network-ready device that receives orders from other networked computers. You can also operate the Producer 6100N,
7100N, and 8100N locally by attaching a monitor, keyboard, and mouse.
The Producer 7100 and 8100 autoloaders are shipped with an external PC that is used as the external control center. In most
instances, the Producer 6100 autoloader is not shipped with an external PC. You must provide a PC to be used as the external
control center for the Producer 6100. Refer to the Additional 6100 Specications section on page 8 for the minimum and
optimum PC requirements for the Producer 6100.
English

32000538_D
Important Information
This section provides support contact information, cautions and warnings, and product specications for the Rimage
Producer III.
Support Information
US, Asia/Pacic, Mexico/Latin America Europe
Rimage Corporation
7725 Washington Avenue South
Minneapolis, MN 55439
USA
Attn: Rimage Services
Rimage Europe GmbH
Albert-Einstein-Str. 26
63128 Dietzenbach Germany
Contact Rimage Support:
Website: www.rimage.com/support
KnowledgeBase: http://rimage.custhelp.com
Login and select the Ask a Question tab.
Phone:
North America: 800-553-8312
Asia/Pacic, Mexico/Latin America: 952-946-0004
Fax: 952-946-6956
Contact Rimage Support Europe:
Website: www.rimage.de
Email: [email protected]
Phone:+49-(0) 1805-7462-43
Fax: +49-(0) 6074-8521-100
When you contact Rimage Services, please provide:
• System serial number and software version
• Functional and technical description of the problem
• Exact error message received
My Rimage Product Information:
Copy this information from your Rimage Product for future reference.
Note: Make sure you update the Serial Number here
anytime you receive a replacement autoloader.
Serial Number:
Product Name:
Date of Purchase:
Learn More Online
At www.rimage.com/support, you can experience Rimage’s world-class Support and Services.
From the Support home page:
1. Select your product series.
2. Select your product.
3. Learn more on the product page.
From your product page you can access:
• Information about the latest software and rmware
updates
• Current rmware and driver downloads
• The latest documents
• Product specications
Technical Support
Support for the Rimage Producer III is available through your authorized reseller.
-Important! Make sure that you register your Producer III so Rimage can notify you of upgrades as they become available.
Registration for products using Rimage software versions 8.2 or higher is now managed through the Rimage website at
www.rimage.com/support/warranty-registration.
English

4 2000538_D
Rimage Producer™ III and Producer™ IIIN User Guide
Optical Disc Recording Software Disclaimer
This Product, Software, or Documentation may be designed to assist you in reproducing material in which you own the
copyright or have obtained permission to copy from the copyright owner. Unless you own the copyright or have permission to
copy from the copyright owner, you may be violating copyright law and be subject to payment of damages and other remedies.
If you are uncertain about your rights, you should contact your legal advisor. If you are neither in possession of the copyright
nor have authorization from the owner of the copyright, unauthorized copying of copyrighted material on an optical disc or on
any other media violates national and international legislation and can result in severe penalties.
Safety and Compliance Information
This manual and the indications on the product allow proper and safe operation. The indication marks below help protect you
and other persons from injury, and equipment from damage.
,Warning! According to ANSI (American National Standards Institute) standards, a warning is used to indicate situations
that could result in bodily injury to personnel operating or maintaining the equipment.
nCaution: Indicates that failure to observe this guideline could result in loss or damage to the equipment, product,
software, or data.
Safety Precautions
To ensure safety, read these precautions and familiarize yourself with their meaning before using the equipment.
,Warnings!
• The laser beam used by the CD/DVD Recorder is a
Class 1 laser. Do not attempt to open the recorder.
An authorized technician should perform all service
procedures.
• The laser beam used by the bar code scanner is
a Class 2 laser and can be harmful to the eyes.
Do not attempt to open the scanner. An authorized
technician should perform all service procedures.
• Use of controls or adjustments or performance of
procedures other than those specied herein may
result in hazardous radiant exposure.
• Never use any optical instrument in conjunction with
this unit. To do so will greatly increase the hazard to
your eyes.
nCautions:
• For continued protection against risk of re, replace
the fuse only with the same type and rating. An
authorized technician should perform all service
procedures.
• Use only the supplied AC power cord, or use
a safety agency approved power cord. For
applications outside North America, refer to the
nearest Rimage ofce for assistance in selecting a
locally approved power cord.
• This product is designed for an ofce environment.
• The Producer 6100N, 7100N and 8100N contain
a lithium battery. There is a risk of explosion if the
battery is replaced by an incorrect battery. Dispose
of the old battery according to the manufacturer’s
instructions included with the battery packaging.
English

52000538_D
Important Information
Compliance Information
Product Producer III (PIII) Model Producer IIIN (PIIIN) Model
Producer 6100 RAS24 Producer 6100N RAS24E
Producer 7100 RAS19 Producer 7100N RAS19E
Producer 8100 RAS18 Producer 8100N RAS18E
Notice for USA NOTE: This equipment has been tested and found to comply with the limits for a Class A digital
device, pursuant to part 15 of the FCC Rules. These limits are designed to provide reasonable
protection against harmful interference when this equipment is operated in a commercial
environment. This equipment generates, uses and can radiate radio frequency energy and, if not
installed and used in accordance with the instruction manual, may cause harmful interference
to radio communications. Operation of this equipment in a residential area is likely to cause
harmful interference, in which case the user will be required to correct the interference at his own
expense.
This product complies with UL 60950-1, 1st edition.
Notice for Canada This Class A digital apparatus complies with Canadian ICES-003 Issue 4:2004. Cet appareil
numerigue de la classe A est conforme a la norme NMB-003 du Canade.
This product complies with CAN/CSA-C22.2 No. 60950-1-03 1st edition.
Notice for Europe This product is in conformity with the EMC Directive (89/336/EEC) and the Low-Voltage Directive
(73/23/EEC) through compliance with the following European standards: EN 55022: 1998 + A1:
2000 Class B Limit; EN 55024: 1998; EN 61000-3-2:2000; EN 61000-3-3:1995 + A1: 2001; EN
60950: 2000. The CE mark has been afxed in accordance with the CE Marking Directive 93/68/
EEC.
Notice for Japan This is a Class A product based on the standard of the Voluntary Control Council for Interference
by Information Technology Equipment (VCCI). If this equipment is used in a domestic
environment, radio interference may occur, in which case, the user may be required to take
corrective action.
Translation:
この装置は、情報処理装置等電波障害自主規制協議会(VCCI)の基準に基づくクラス
A 情報技術装置です。この装置を家庭環境で使用すると電波妨害を引き起こすことがありま
す。この場合には使用者が適切な対策を講ずるよう要求されることがあります。
Notice for Australia This product complies with AS/NZS CISPR22:2004.
Notice for Korea
(6100 0nly)
It is certied that foregoing equipment has been certicated under the Framework Act on
Telecommunications and Radio Waves Act.
위 기기는 전기통신기본법, 전파법 에 따라 인증되었음을 증명 합니다.
English

6 2000538_D
Rimage Producer™ III and Producer™ IIIN User Guide
Producer III and Producer IIIN Specications
Notes:
• The most up-to-date technical specications for the Producer III and IIIN are located at www.rimage.com/support.
From the Support menu select: Producer Series > Product Name > User Manuals tab.
• For printer specications, refer to your printer user guide or www.rimage.com/support.
Producer III Producer IIIN
6100 7100 8100 6100N 7100N 8100N
Standard
system
Producer 6100, 7100, or 8100, Everest or Prism
printer, Rimage Producer Software Suite (PSS),
and external PC (7100 and 8100 only).
Producer 6100N, 7100N, or 8100N, Everest or
Prism printer, and Rimage Producer Software
Suite (PSS).
Number of
recorders 124124
Physical size
Height*
Width
Depth**
Weight
Weight
with Everest
Weight
with Prism
23.25 in
(58.7 cm)
25.25 in
(64.1 cm)
28.75 in
(72.7 cm)
23.25 in
(58.7 cm)
25.25 in
(64.1 cm)
28.75 in
(72.7 cm)
16.25 in
(41.3 cm)
16.25 in
(41.0 cm)
16.5 in
(41.9 cm)
16.25 in
(41.3 cm)
16.25 in
(41.0 cm)
16.5 in
(41.9 cm)
24.75 in
(62.9 cm)
24.75 in
(62.9 cm)
24.75 in
(62.9 cm)
24.75 in
(62.9 cm)
24.75 in
(62.9 cm)
24.75 in
(62.9 cm)
64 lb
(29.0 kg)
77 lb
(34.9 kg)
78 lb
(35.4 kg)
84 lb
(38.1 kg)
88 lb
(39.9 kg))
100 lb
(45.4 kg))
109 lb
(49.4 kg)
122 lb
(55.3 kg)
123 lb
(55.8 kg)
129 lb
(58.5 kg)
133 lb
(60.3 kg))
145 lb
(65.8 kg)
84 lb
(38.1 kg)
97 lb
(44.0 kg)
98 lb
(44.5 kg)
104 lb
(47.2 kg)
108 lb
(49.0 kg)
120 lb
(54.4 kg)
*Height does not include the optional status light. The status light is 6 in (15.2 cm) high.
**Leave an additional 3.5 in (9 cm) for cabling.
Software
requirements
Rimage Producer Software Suite (PSS) installed
on the external PC (7100 and 8100 only).
The required software is installed on the
embedded PC.
Minimum PC
requirements
Supported operating systems:
• Windows Vista Business SP1, Vista
Enterprise and Vista Ultimate SP1 (Rimage
PSS versions 8.2 or higher only)***
• Windows XP Professional SP2 (Rimage PSS
versions 8.1 and lower only)
• Windows XP Professional SP3
• Windows 2000 Professional SP4 (Rimage
PSS versions 8.1 and lower only
• Windows Server 2003
Note: For additional minimum and optimum
PC requirements for the Producer 6100,
refer to the Additional 6100 Specications
section on page 8.
Supported operating system:
The supported operating system is installed on
the embedded PC. Only the installed operating
system is supported on this product.
-Important!
If you do not
understand
these
requirements,
ask your
computer
technician for
help or refer
to your PC
documentation.
***Standalone Everest II printers and autoloaders using Everest II printers are not supported by the Windows
Vista operating system.
Specications are continued on page 7.
English

72000538_D
Important Information
Producer III Producer IIIN
6100 7100 8100 6100N 7100N 8100N
Input bin
capacity
100 discs per bin. This system has 3 input bins.
Note: You can congure the Producer 6100, 6100N, 8100 and 8100N to have 4 input bins if you
congure the external output bin as the only output bin. If you set up your system this way, user
intervention is required after 75 discs for the 8100 and 8100N, and after 20 discs for the 6100
and 6100N.
Output bin
capacity
300 discs before operator intervention is required when the carousel is used as the output bin.
Note: The Producer 6100, 6100N, 8100 and 8100N have an external output bin. See the Input
bin capacity note above for additional information.
Networking
ability To submit orders from a networked PC, refer to the Rimage Advanced Setup (Networking) Guide.
Power 100 – 240 VAC, 60/50 Hz, 4.7 – 3.7 Amp, 500 watt maximum
Media
requirements
Refer to your printer user guide for the correct media requirements. Rimage Media Kits™ are
designed for optimum recording and print performance.
Ribbon
requirements
Refer to your printer user guide for the correct printer ribbons. Rimage Media Kits include the
required print ribbons.
Label design
requirements Refer to your printer user guide for label design requirements.
Temperature
and humidity
Operating
temperature 60° to 86° F (16° to 30° C)
Humidity 40% to 80% non-condensing
Storage
temperature 5° to 95° F (-15° to 35° C)
English

8 2000538_D
Rimage Producer™ III and Producer™ IIIN User Guide
Additional 6100 Specications
-Important! If you do not understand these requirements, ask your computer technician for help or refer to your PC
documentation.
6100
Minimum PC Requirements Optimum PC Requirements*
Processor Celeron, 2.0 GHz Core 2 Duo, E4300
RAM/Memory 1GB 1GB, DDR2-533
Fixed storage 60 GB of free space Two 250GB, 7,200 RPM Enterprise Class
Serial ATA hard drives congured in RAID 0:
• Partition one is used to house the operating
system
• Partition two is used for the Rimage System
Folder
Graphics 1024x768, 16-bit color 1024X768, 32-bit high color
Ports One USB 2.0 port One USB 2.0 port
Software Rimage Producer Software Suite (PSS) version
8.1 or higher.
Rimage Producer Software Suite (PSS) version
8.1 or higher.
* These optimum PC specications are recommended if you are using the Rimage Producer 6100 to record DVD/BDs. Throughput is based on
this system conguration. For optimum performance, use a PC with these specications.
English

92000538_D
Identify the Parts of the Producer III Autoloader
Identify the Parts of the Producer III
Note: Your system may not look exactly like the system pictured.
Front View
Disc Dispenser
Operator Button
Operator Panel
Output Bin
Carousel
Embedded PC Power Button
(6100N Only) Front Door
Recorder
Lift Arm
6100 and 6100N
Disc Dispenser (8100 and 8100N
only)
Operator Button
Status Light (Optional)
Operator Panel
Output Bin (8100 and 8100N only)
Carousel
Embedded PC Power Button
(7100N and 8100N Only)
Lift Arm
Recorder(s)
Front Door
7100, 7100N, 8100, and 8100N
English

10 2000538_D
Rimage Producer™ III and Producer™ IIIN User Guide
Back View
Power Cord Network Cable
Power
Switch
6100N
7100/8100
Power Cord
Power Switch
FireWire Cables
USB
Cable
Power Switch
USB Cable
Power Cord
6100
7100N/8100N
Power Cord Network Cable
Power
Switch
English

112000538_D
Identify the Parts of the Producer III Autoloader
Parts Information
Status Light
The Producer III can be equipped with an optional status light that indicates various conditions. This table shows status light
states and explains the conditions indicated by each state.
Light state System condition
Green light
on
The system is operating properly. No jobs are currently processing.
Green light
blinking
The system is operating properly. Jobs are currently processing.
Yellow light
on
The autoloader is waiting for the software to start. If the control center is not started, switch on
the control center. Check the cable connections on the autoloader and control center.
Yellow light
blinking
The front door may be open. Close the front door to allow jobs to process.
The print ribbon or media may be running low. Read the operator panel to determine which
supply is running low.
Red light
on
The carousel is out of blank discs. Fill the supply bins with the appropriate media type.
A system error requires operator intervention. Check the client workstation or control center for
a message.
An equipment error occurred at initial start up, such as a missing carousel. Check the client
workstation or control center for a message.
Operator Panel
The operator panel has a two-line display that informs you of operations or conditions that require operator intervention. This
includes the consumable status. After initialization, the Producer IIIN displays the name of the embedded PC. Refer to the
Operate Gemini Utilities section on page 25 to see other options.
Note: The caret symbol ‘^’ in the upper right corner of the display indicates that the Rimage software is currently
communicating with the autoloader.
Operator Button
To access the operator button, open the front door. Press the operator button to rotate the carousel and position a bin so that
discs can be loaded or unloaded. Each time you press the operator button, the carousel rotates to the next bin.
Tip: The carousel will rotate to a bin only after the autoloader has completed initializing.
Disc Dispenser
The disc dispenser moves discs into the output bin. Only the 6100, 6100N, 8100 and 8100N have the disc dispenser and
output bin.
Beeper
The Producer III has a beeper that sounds when user intervention is required. Read the error message that displays on the
operator panel or on your PC monitor and take appropriate action to correct the problem. Refer to the Enable the Beeper
section on page 25 for beeper settings.
English

132000538_D
Operate the Producer III Autoloader
Operate the Producer III
This section provides the information that you need to produce discs with the Producer III.
Power On the Producer III
Before you begin:
The carousel must be installed before you power on the system.
For more information about installing the carousel, refer to the
Install the Carousel section on page 14.
1. Press the power switch on the rear of the autoloader. The
Producer III powers on.
If you have a Producer 6100N, 7100N, or 8100N, continue
with step 2.
2. On the front of the autoloader, press the PC power button to power on
the embedded PC. The Producer IIIN and embedded PC power on.
Power Off the Producer III
1. Close all open applications.
• If you have a Producer 6100, 7100 or 8100, continue to step 3.
• If you have a Producer 6100N, 7100N, or 8100N, continue to step 2.
2. Briey press the PC power button. This shuts down the software, Windows, and the embedded PC.
nCaution: Do not press and hold the PC power button. If you press and hold the PC power button, the embedded PC
will not shut down properly. This may cause data loss or corruption.
Note: It takes approximately 30 seconds for the system to power off.
3. Press the main power switch to power off the Producer III.
-Important! If you have a Producer IIIN, do not press the main power switch until the embedded PC is completely
powered off.
Pause the Producer III
Pause the Producer III to add discs to the autoloader.
1. Open the front door. The operation pauses.
2. Close the front door. The operation resumes.
Power Switch
PC Power Button
English

14 2000538_D
Rimage Producer™ III and Producer™ IIIN User Guide
Install the Carousel
Tip: To prevent errors, install the carousel before operating the software or powering on the autoloader.
1. Open the front door.
2. Install the carousel in the Producer III.
a. Slide the carousel straight in so that the center post slides through the slot opening of the bearing guide.
b. Rotate the carousel until the top support bearing lowers into the bearing guide.
3. Close the front door.
Remove the Carousel
Remove the carousel from the autoloader to load or unload discs.
-Important! If software is currently running an operation on the autoloader, wait for the software to complete the operation,
or pause the software operation.
1. Open the front door.
2. Grasp the bottom of the carousel with two hands and lift the carousel off the carousel platter until the top support bearing
clears the bearing guide.
3. Move the carousel outward and away from the autoloader.
Center Post
Bearing Guide Top Support Bearing
English

152000538_D
Operate the Producer III Autoloader
Load the Discs
You can load up to 100 discs in a bin. You can either remove the carousel to load discs or use the procedure below to place
discs in each bin.
1. Open the front door.
2. Press the operator button to rotate the carousel and place a bin
in position to load discs.
3. After removing all completed discs from the bin, place up to 100
discs to be recorded in the bin.
-Important! Place the discs with the recording side facing
down.
Tip: You may designate bins 1 through 4 as input, output,
reject, or a specic media type through your software.
4. Repeat steps 2 - 3 until the required bins are lled.
5. Close the front door.
Unload the Discs
1. Open the front door.
2. Press the operator button to rotate the carousel and place a bin in position to remove discs.
3. Remove the discs from the bin.
4. Repeat steps 2 - 3 until the required bins are empty.
5. Close the front door.
Set Your Printing Preferences
Printing preferences allow you to set up and run your Producer III to produce the best possible label on your discs. Refer to
your printer user guide for specic printing preferences instructions.
English

172000538_D
Maintain the Producer III Autoloader
Maintain the Producer III
Use the information in this section to keep your Producer III in optimal operating condition.
Overview
Regular preventative maintenance of your Producer III can help to ensure error-free recordings and clean printed labels.
Maintenance involves cleaning the system and aligning the printer on top of the autoloader.
Note: The printer has its own maintenance requirements. Refer to your printer user guide for information.
Cautionary Information
nCaution: To avoid damaging the Producer III during maintenance:
• Never use oils, silicone, or other lubricants on any part of the Producer III .
• Use only non-abrasive cleaners to wipe down the surfaces of your Producer III.
• Never use cleaners to clean the embedded PC.
• Avoid pouring cleaners directly onto the Producer III. Instead, apply the cleaner to the cloth rst.
• Observe precautions for electrostatic-sensitive devices whenever you access the embedded PC.
Preventative Maintenance Schedule
Note: Your system may require more frequent maintenance if used in a dusty area, such as a store or warehouse.
Before you begin:
,Warning! Always power off the autoloader and unplug the power cord before you access the embedded PC.
1. Power off the Producer III.
2. Disconnect the power cord.
-Important! Failure to follow the maintenance schedule outlined below may void your warranty.
Task Tool Frequency
Wipe down the lift arm shaft and pay close attention to:
• The area around the base of the shaft
• The area just above the lift arm
Lint-free cloth Weekly
Wipe down all surfaces of the autoloader, including:
• Sides and top
• Door
• Output bin
• Carousel
• Base (remove the carousel rst)
• Top surface on the lift arm
Lint-free cloth
Non-abrasive, all-
purpose cleaner
Weekly
Remove dust and debris from the fans at the back of the autoloader. Can of compressed
air
Monthly
Remove dust and debris from the openings at the back of the autoloader.
For embedded systems only (6100N, 7100N, and 8100N), remove the carousel
and remove dust and debris from the openings to the PC module.
Vacuum Monthly
Align the printer. Refer to the Align the Printer instructions on page 22. Torx T25
screwdriver
Upon installation,
if the discs are not
picked correctly
or if there are
clamping errors.
English

18 2000538_D
Rimage Producer™ III and Producer™ IIIN User Guide
Diagnostic Tests
This section provides the information needed to access, select, and perform the Producer III diagnostic tests for rmware
versions 3.601 or higher. If your system has rmware versions lower than 3.601, refer to www.rimage.com/support for the
proper diagnostic test instructions.
-Important!
• Perform only the diagnostic tests provided below. Do not attempt to perform other diagnostic tests without the
assistance of a Rimage trained technician.
• Make sure that the Producer III is not in an error state before you perform any of the diagnostic tests.
Access and Select Diagnostic Tests
Access Diagnostic Mode
1. Power on the autoloader.
2. Allow the autoloader to initialize. This may take several minutes.
3. Open the front door of the autoloader.
4. Press and hold the operator button until [BUTTON DIAGNOSTIC] displays on the operator panel.
Note: Other status messages display on the operator panel while the operator button is being held in. Do not release
the button until the operator panel displays [BUTTON DIAGNOSTIC].
5. Release the operator button. [CHOOSE DIAGNOSTIC] displays on the operator panel. The autoloader is in diagnostic
mode.
Select a Diagnostic Test
1. Press the operator button the same number of times as the test number (indicated in the test title).
2. Hold the operator button in on the last press for ve seconds to start the selected test.
For example: To start diagnostic test 3 (calibrate diagnostic), press the operator button three times and hold it in on the
third press.
Tip: To display each diagnostic test number and name, press the operator button at a rate that is slow enough to
read the test on the operator panel. If you pass the desired diagnostic test, release the operator button and wait for
the autoloader to return to diagnostic mode or until the operator panel displays [CHOOSE DIAGNOSTIC].
3. Continue with the desired diagnostic test.
Exit Diagnostic Mode
1. If a diagnostic test is currently in process, press the operator button once to stop the test.
Note: To exit diagnostic test 1 (carousel diagnostic test), press and hold the operator button to stop the test and
return to diagnostic mode.
2. When the diagnostic test is stopped, press the operator button six times and hold it in on the sixth press. The operator
panel displays [EXIT DIAGNOSTIC].
3. Release the operator button. The autoloader exits diagnostic mode and the system resets.
English

192000538_D
Maintain the Producer III Autoloader
Diagnostic Test 1 – Carousel Diagnostic Test
This test has two modes. The rst mode evaluates the position of the carousel. The second mode evaluates the alignment of
the lift arm to the carousel.
Check the Position of the Carousel
This test veries that the carousel is positioned correctly in the autoloader.
1. Make sure that the autoloader is in diagnostic mode. Refer to the Access and Select Diagnostic Tests section onpage 18.
2. Press and hold the operator button until the operator panel displays [01 CAROUSEL CHK DIAGNOSTIC].
3. Release the operator button.
4. Press the operator button to rotate the carousel from the current bin position to the next bin position.
Note: Each time the carousel rotates, the operator panel displays the actual carousel position and the target carousel
position on the operator panel. The actual carousel position number is displayed as [A+00000], and the target
carousel position is displayed as [T+00000].
5. Repeat step 4 for each of the four carousel bins.
Note: After the carousel rotates clockwise from bin 1 to bin 4, it rotates counterclockwise from bin 4 to bin 1.
6. Press and hold the operator button to exit the test and return to diagnostic mode.
Check the Alignment of the Lift Arm to the Carousel
This test veries that the lift arm aligns properly with each carousel bin.
1. Make sure that the autoloader is in
diagnostic mode. Refer to the Access and
Select Diagnostic Tests section on page 18.
2. Press and hold the operator button
until the operator panel displays [01
CAROUSEL CHK].
3. Release the operator button.
4. Place a disc on the lift arm. Press the disc
into the gripper while you press the disc
release button.
5. Release the disc release button. The
gripper holds the disc.
6. Press the operator button to rotate the
carousel to bin 1.
7. Manually move the lift arm and disc down
into bin 1. Make sure that the disc does not
interfere with the carousel as it moves into the bin.
-Important! If the disc interferes with the carousel in step 7, the lift arm may be miscalibrated or there may be an
issue with the hardware that positions the carousel. Perform Diagnostic Test 3 (Calibrate Diagnostic Test) on page 20 to
calibrate the lift arm and the carousel.
8. Manually move the lift arm out of bin 1.
9. Repeat steps 6-8 for bins 2, 3, and 4.
10. Press the disc release button to release the disc and remove it from the lift arm.
11. Press and hold the operator button to exit the test and return to diagnostic mode.
12. Refer to the Exit Diagnostic Mode section on page 18 to exit diagnostic mode.
Disc Release Button
Gripper
English

20 2000538_D
Rimage Producer™ III and Producer™ IIIN User Guide
Diagnostic Test 3 – Calibrate Diagnostic Test
This test has two modes. The rst mode calibrates the lift arm to accurately detect the number of discs in the carousel bins.
The second mode calibrates the carousel.
-Important! If you are updating the autoloader rmware, you must prompt the system to run the carousel calibration test
immediately after the lift arm calibration test.
Calibrate the Lift Arm
This test calibrates the lift arm to accurately detect the number of discs in the carousel bins.
1. Remove all discs from the carousel bins.
2. Make sure that the autoloader is in diagnostic mode. Refer to the Access and Select Diagnostic Tests section on page 18.
3. Press the operator button three times and hold on the third press until the operator panel displays [03 CALIBRATE].
4. Release the operator button. The lift arm moves to the home position and the light on the operator button ashes.
-Important!
• If you are updating the autoloader rmware, you must prompt the system to run the carousel calibration test
immediately after the lift arm calibration test. Move the lift arm to the top of the lift column at this time and then
continue to step 5.
• If you want to proceed with the lift arm calibration test only, continue to step 5 at this time.
5. Place one disc in bin 1.
-Important! Place only one disc in bin 1.
Tip: If you need to rotate the carousel to load media into bin 1, rotate it manually. Pressing the operator button
prompts diagnostic test 3 to begin.
6. Press the operator button.
• The lift arm moves down into bin 1.
• The lift arm picks up and releases the disc to measure the gripper length.
• The lift arm moves up to its home position.
• The lift arm moves back down into bin 1, picks up the disc, and releases the disc into bin 2 to measure the lift length.
• The carousel rotates back to bin 1.
-Important! If you moved the lift arm to the top of the lift column in step 4, the lift arm moves to the carousel and
the operator panel displays [CAL CAROUSEL POS PUT DISC ON GRPR]. Place one disc on the lift arm and
continue to step 8 in the Calibrate the Carousel section on page 20.
• The autoloader exits diagnostic test 3 and the system restarts.
Note: Diagnostic test 3 causes the autoloader to exit diagnostic mode. To continue the diagnostic tests, refer to
the Access and Select Diagnostic Tests section on page 18.
Calibrate the Carousel
This test measures the position of the carousel, as well as the gear-train backlash of the carousel.
1. Remove all discs from the carousel bins.
2. Make sure that the autoloader is in diagnostic mode. Refer to the Access and Select Diagnostic Tests section on page 18.
3. Press the operator button three times and hold on the third press until the operator panel displays [03 CALIBRATE].
4. Release the operator button. The lift arm moves to the home position and the light on the operator button ashes.
English
This manual suits for next models
3
Table of contents
Other Rimage Computer Hardware manuals