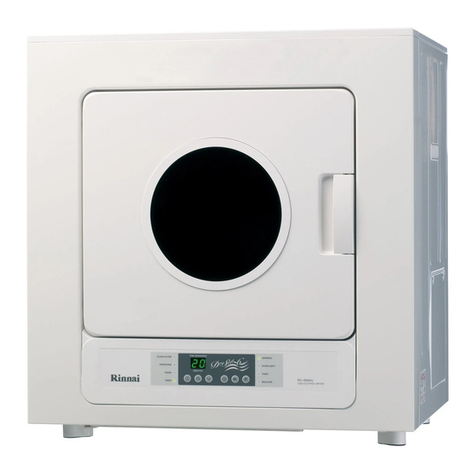
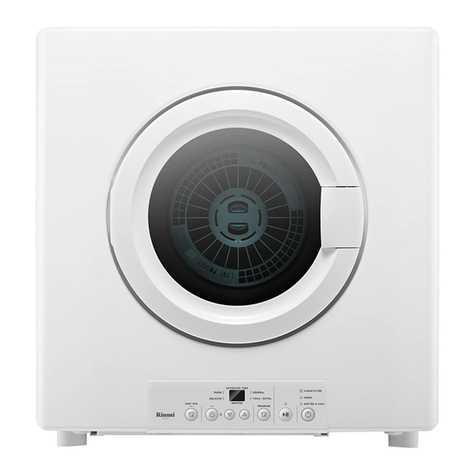
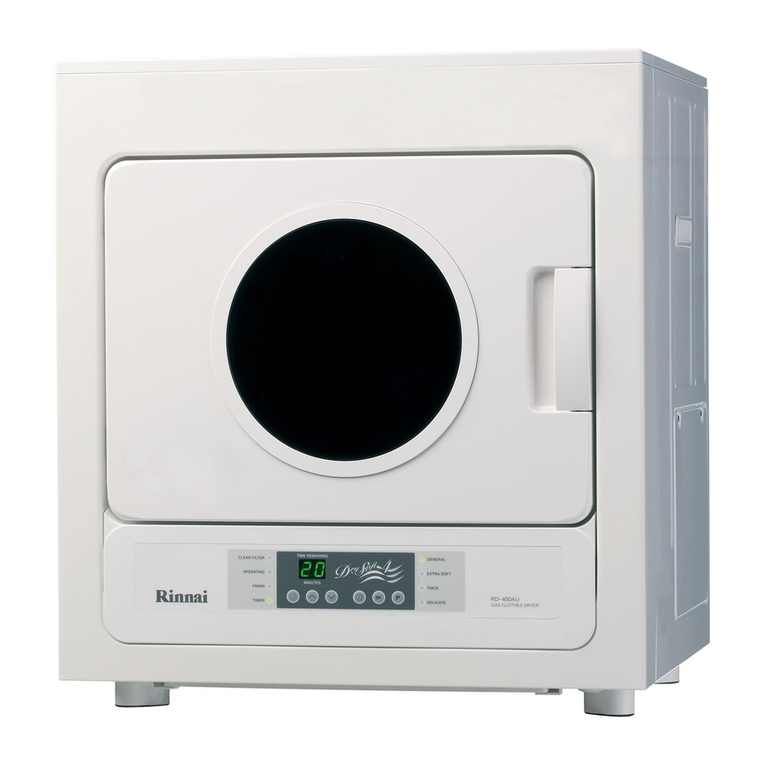
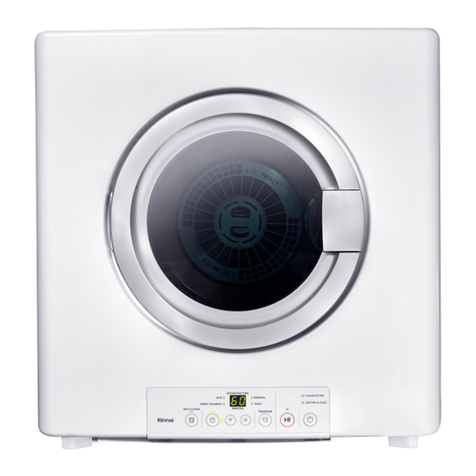
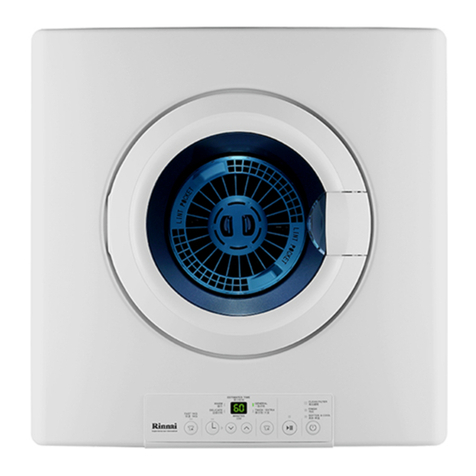
Rinnai Dry-Soft 9 User manual

Gas Clothes Dryer
Operation & Installation Manual
Model:
Dry-Soft 9 RDT-90-AU

Rinnai 2 GD OIM
Congratulations on the purchase of your new Rinnai Dry-Soft gas clothes dryer. We trust you will have many years
of comfort and enjoyment from your appliance.
IMPORTANT
BEFORE USING THIS APPLIANCE.
Before proceeding with the operation or installation read this manual thoroughly and gain a full
understanding of the appliance, to ensure safe and correct use.
This appliance must be installed in accordance with:
• Manufacturer’s Installation Instructions
• Current AS/NZS 3000, AS/NZS 3500 & AS/NZS 5601
• Local Regulations and Municipal Building Codes
including local OH&S requirements
This appliance must be installed, serviced and removed by
an authorised person. An authorised person will have the
licensing and insurance required by the relevant
state/territory gas regulating authority and will issue any
necessary compliance certificates for work undertaken.
For continued safety of this appliance it must be installed
and maintained in accordance with the manufacturer’s
instructions.
All Rinnai gas products
sold in Australia are
A.G.A certified.

Rinnai 3 GD OIM
OPERATION TABLE OF CONTENTS
Warnings & Important Information 4
Before Using This Appliance .............................................................................................................................................. 4
Regulatory Information ....................................................................................................................................................... 4
Safety Devices ..................................................................................................................................................................... 6
General Information ............................................................................................................................................................. 6
Features & Benets ............................................................................................................................................................. 6
Operation 7
Appliance Overview ............................................................................................................................................................ 7
Control Panel ....................................................................................................................................................................... 8
Automatic Programs ........................................................................................................................................................... 9
Drying Programs .................................................................................................................................................................. 9
Drying Time ........................................................................................................................................................................ 10
How to Fold Sheets/Blankets ........................................................................................................................................... 10
Operational Time ................................................................................................................................................................11
Soften & Cool Function ......................................................................................................................................................11
Interruptions to Programs .................................................................................................................................................11
Audible Signals .................................................................................................................................................................. 12
Loading Considerations .................................................................................................................................................... 13
Fabric Care & Drying Hints ............................................................................................................................................... 13
How To Use Automatic Programs .................................................................................................................................... 14
How To Use a Timer Program ........................................................................................................................................... 15
Cancelling a Set Timer Program ...................................................................................................................................... 16
How to Use The Self-Clean Program ............................................................................................................................... 17
Care & Maintenance 18
Cleaning the Appliance Body ........................................................................................................................................... 18
Cleaning the Lint Filter ...................................................................................................................................................... 18
Cleaning the Air Inlet Filter ............................................................................................................................................... 19
Trouble Shooting 20
Check List ........................................................................................................................................................................... 20
General Dryer Characteristics .......................................................................................................................................... 20
Service ................................................................................................................................................................................ 20
Error Codes ........................................................................................................................................................................ 21
Installation Table of Contents 23
Contacts 40

Rinnai 4 GD OIM
IMPORTANT
BEFORE USING THIS APPLIANCE
Before proceeding with the operation or installation read this manual thoroughly and gain a full
understanding of the appliance, to ensure safe and correct use.
Always comply with the following precautions to avoid dangerous situations and to ensure
optimum performance.
Failure to carefully read and follow all instructions in this manual can result in equipment
malfunction, property damage, personal injury and/or death.
DANGER: Indicates an imminently hazardous situation which, if not avoided, will result in
personal injury or death.
WARNINGS: Indicates a potentially hazardous situation which, if not avoided, could result in
personal injury or death.
CAUTIONS: Indicates a potentially hazardous situation which, if not avoided, could result in
minor or moderate injury or damage to the appliance. It may also be used to alert against unsafe
practices.
WARNING
REGULATORY INFORMATION
This appliance shall be installed in accordance with:
Manufacturer’s Installation Instructions.
Current AS/NZS 3000.
Local Regulations and Municipal Building Codes including local OH&S requirements.
This appliance has been certied by the Australian Gas Association. The A.G.A. Certication
Number is shown on the data plate.
This appliance must be installed, maintained and removed by an Authorised Person.
For continued safety of this appliance it must be installed and maintained in accordance with the
manufacturers instructions.
This appliance is heavy, use 2 people or mechanical lifting device. Improper lifting may result in
serious injury.
Take care when opening or unpacking this appliance. Failure to do so may result in serious injury
or product failure.
Do not modify the electrical wiring of this appliance. If the power cord is damaged or deteriorated
then it must be replaced by an authorised person. Failure to do so may result in electric shock,
re, serious injury or product failure.
Please keep this instruction booklet in a safe place for future reference. All dimensions referred
to in these instructions are in millimetres, unless otherwise specied.
WARNING
MANDATORY INSPECTION PRIOR TO INSTALLATION OR USE
Immediately report any damage or discrepancies to the Supplier of the appliance. This
appliance was inspected and tested at the time of manufacture and packaging, and released for
transportation without known damage. Upon receipt, inspect the exterior for evidence of rough
handling in shipment. Ensure that the appliance is labelled correctly for the gas and electrical
supply, and/or other services it is intended to be connected to.
For safety and warranty purposes, appliances that may be damaged or incorrect must not be
installed or operated under any circumstances. Installation of damaged or incorrect appliances
may contravene local government regulations. Rinnai disclaims any liability or responsibility
whatsoever in relation to the installation or operation of damaged or incorrect appliances.
NOTE
A NOTE ON ILLUSTRATIONS
The illustrations used in this manual are for explanatory purposes only and the shape of your unit
may vary slightly from that which is shown in this manual.
WARNINGS & IMPORTANT INFORMATION

Rinnai 5 GD OIM
WARNING
WARNINGS
DO NOT Operate this appliance before reading the instruction booklet.
DO NOT Place articles on or against this appliance.
DO NOT Store chemicals or ammable materials, or spray aerosols near this appliance.
DO NOT Operate with panels, covers or guards removed from this appliance.
DO NOT Load materials containing ammable solvents into this appliance.
Ensure all articles are removed from pockets. These include ammable items such as matches
and cigarette lighters.
DO NOT modify this appliance
DO NOT dry clothes or materials containing foam, glue or other ammable substances or
materials.
DO NOT dry clothes or materials containing foam rubber (latex foam), shower caps, waterproof
textiles, rubber backed articles and clothes or pillows with foam rubber pads.
DO NOT use this appliance to dry o solvents, dry-cleaning uids or other ammable substances.
DO NOT dry unwashed items in the dryer.
Items that have been soiled with substances such as cooking oil, acetone, alcohol, petrol,
kerosene, spot removers, turpentine, waxes and wax removers should be washed in hot water
with an extra amount of detergent before being dried in the dryer.
If it is unavoidable that fabrics that contain vegetable or cooking oil or have been contaminated
by hair care products be placed in a tumble dryer they should rst be washed in hot water with
extra detergent. This will reduce, but not eliminate the hazard.
Items such as foam rubber (latex foam), shower caps, waterproof textiles, rubber backed articles
and clothes or pillows with foam rubber pads should not be dried in the dryer.
Fabric softeners, or similar products, should only be used as specied by the fabric softener
instructions.
The dryer is NOT to be used if industrial chemicals have been used for cleaning
DO NOT operate the dryer while the CLEAN FILTER light is on. Any lint must be regularly removed
in accordance with these instructions.
DO NOT open the dryer door whilst the dryer is in operation. The dryer door should only be
opened after the FINISH light illuminates.
When the dryer cycle is nished, take care when removing laundry items. They may still be warm
or H O T.
DO NOT use the gas clothes dryer for any purpose other than the drying of clothes.
Fresh air ventilation openings shall not be blocked and/or sealed, including by carpets.
This appliance is not intended for use by persons (including children) with reduced physical,
sensory or mental capabilities or lack of experience and knowledge, unless they have been given
supervision or instructions concerning use of the appliance by a person responsible for their
safety. Children shall be supervised to ensure they do not play with this appliance.
DO NOT cover or place any articles on or against this appliance.
DO NOT store chemicals or ammable materials or spray aerosols near this appliance.
DO NOT unplug the electric power cord whilst in operation.
Ensure clothes DO NOT get stuck between the dryer door and drum. Appliance and clothing
damage may occur and an unsafe situation could result.
DO NOT operate these appliances without the exhaust duct. These appliances must be operated
with the exhaust duct connected and terminated in accordance with these instructions.
If the supply cord is damaged, it must be replaced by the manufacturer, its service agent or
similarly qualied person in order to avoid a hazard.
Oil aected items can ignite spontaneously, especially when exposed to heat sources such as
in a dryer. The items become warm, causing an oxidation reaction in the oil. Oxidation creates
heat. If the heat cannot escape, the items can become hot enough to catch re. Piling, stacking
or storing oil-aected items can prevent heat from escaping and so create a re hazard.
WARNINGS & IMPORTANT INFORMATION

Rinnai 6 GD OIM
WARNING
ITEMS UNSUITABLE FOR TUMBLE DRYING
DO NOT tumble dry fabrics if the care label states that tumble drying is not suitable. These
may include items made from silk, wool, wool blends, leather, lace or hemp. These fabrics may
shrink, deform or fade. The same applies to items with printing or glued emblems which may
fade or separate.
Non breathable fabrics, materials or items such as rain coats, leather, glued clothes, quilts,
mats, carpet, stued cushions and toys are unsuitable for tumble drying.
SAFETY DEVICES
For your safety and peace of mind the Dry-Soft® range of gas clothes dryers are tted with following safety devices:
Flame Failure Sensing - Appliances shuts down in case of ame failure.
Drying Drum Overheat Switch - Appliance shuts down in case the drying drum overheats. Self resetting.
Electric Motor Overheat Switch - Appliance shuts down in case the motor overheats. Self resetting.
Drum Belt Safety Switch - Appliance shuts down in case of drum belt breakage.
Door Switch - Appliance cannot start unless appliance door is properly closed.
Blocked Filter Warning - Filter indicator lights up in case of blocked lter(s).
Electric Fuses - Protects appliance in case of electrical overload.
GENERAL INFORMATION
• DO NOT exceed the maximum drying load: The Maximum load for the Dry-Soft® 9 (Model RDT-90-AU) is 9kg.
Exceeding the maximum drying load may result in uneven drying or appliance malfunction.
• Ensure clothes have been spin dried by a washing machine before placing into the gas clothes dryer. Wet
clothes may damage the dryer and will take excessively long to dry.
• Ensure washing detergents, bleaches and fabric softeners have been fully rinsed from clothes before placing
them into the gas clothes dryer. These substances may damage internal dryer components.
• It is preferable that the space in which the gas clothes dryer is installed is well ventilated. This can be achieved
by opening a window during use.
FEATURES & BENEFITS
Quick Drying
The range of Rinnai gas clothes dryers utilise gas as the drying medium rather than electricity. This results in a
considerable reduction in drying time when compared to most electric clothes dryers.
Economical
The range of Rinnai gas clothes dryers are highly ecient. In addition, they utilise gas rather than electricity as the
drying medium. Depending on the gas type used considerable running costs savings are possible when compared
to electric clothes dryers.
Soft Clothes
Using gas as the drying medium results in clothes that feel softer when compared to electric clothes dryers.
Automatic Operation
Dryer stops automatically when drying is completed. This eliminates the need by the user to guess how long drying
might take.
Time remaining indicator
Indicates the remaining time for completion of drying.
Exhaust Duct
The exhaust duct vents to outside. This prevents the discharge of moist air, dust and lint into the room containing
the clothes dryer.
WARNINGS & IMPORTANT INFORMATION

Rinnai 7 GD OIM
APPLIANCE OVERVIEW
7
2
8
9
2
1
6
3
4
5
10
11
12
OPERATION

Rinnai 8 GD OIM
1. CONTROL PANEL
2. DOOR (left or right opening install options)
3. DRUM
4. DRUM LINT POCKET (Blue)
5. DRUM FILTER (Black)
6. AIR INLET FILTER (Protects burner from lint)
7. APPLIANCE DATA PLATE
8. GAS CONNECTION
9. POWER CORD
10. CARRY HANDLES
11. FLUE / SPIGOT ADAPTER
12. FEET / MOUNTING POINTS
CONTROL PANEL
1. ON / OFF BUTTON
Turns the power ON and OFF to the appliance.
Note that the power is automatically turned OFF
after approximately 10 minutes of non use.
2. START/PAUSE BUTTON
Starts or pauses drying operation.
3. OPERATION INDICATOR
Illuminates green when drying operation has
started, blinks green when drying operation paused,
Illuminates red when the gas burner is OPERATION.
4. AUTOMATIC PROGRAM BUTTON
Select the one of four automatic drying programs
(see page 9 and 14 for details).
5. TIMER BUTTON
Selects operation in Timer mode from a set of
pre‑set times (see page 11 and 15 for details).
6. TIMER SETTING INDICATOR
Blinks green during the timer set up.
7. UP / DOWN BUTTONS
Used to increase or decrease the drying time (Timer
operation only).
8. TIMER INDICATOR
Illuminates green during operation in Timer mode.
9. SELF-CLEAN BUTTON
Selects the SELF‑CLEAN program before starting
the drying process to sterilise the drum. This
program runs for a period of 3 minutes (see page
11 and 17 for details).
10. SELF-CLEAN INDICATOR
Illuminates green when the SELF‑CLEAN program
has been selected.
11. DIGITAL DISPLAY
Displays the remaining drying time and error codes.
12. AUTOMATIC PROGRAM INDICATORS
Illuminates green against the program(s) that has
been selected.
13. SOFTEN & COOL INDICATOR
Illuminates green when SOFTEN & COOL function
is taking place (see page 11 for details).
14. CLEAN FILTER INDICATOR
Illuminates red when the lter requires cleaning.
NOTE
A short beep will sound when pressing buttons to conrm that the action has been registered.
12310 478 59
1413
12
11
6
OPERATION

Rinnai 9 GD OIM
AUTOMATIC PROGRAMS
Four automatic drying programs are available.
GENERAL THICK SHEET/BLANKET ECO
NOTE
The default automatic drying program is GENERAL.
In TIMER and SELF-CLEAN modes the user can not select any of the drying programs.
DRYING PROGRAMS
GENERAL
In this mode the gas dryer operates at full drying
capacity. Ideal for regular clothes that are used
daily. When these cannot be dried by the GENERAL
course, try the THICK/EXTRA cycle.
THICK
In this mode the gas dryer operates for longer than
in the GENERAL mode. Ideal for thick, dicult to dry
clothes such as jeans, sweat shirts and towels.
SHEET/BLANKET
• Items that are hard to dry, such as sheets and
doona/duvet covers
• Items that are dicult to dry, such as Meyer
blankets (eece or throw blankets)
ECO
In this mode the gas dryer operates by minimising
the gas usage and extending the drying time beyond
the GENERAL course of drying period.
• With this course of drying, clothes are rst dried
by ambient air blowing operation, and are then
nished up using the warm air operation.
• It generally takes about 1.5 times longer than
using the GENERAL cycle.
Operating time and gas consumption may vary
depending on the usage and environmental
conditions. On days when clothes are dicult to
dry, such as cold days or rainy days, the ventilation
operation stops and immediately switches to warm
operation.
OPERATION

Rinnai 10 GD OIM
DRYING TIME
Type of Clothes Weight of 1 Item
(size)
Amount of clothes that can
be dried in a single operation. Drying Time
Long‑sleeved shirts
(mixed spun bre) Approx. 200 g Approx. 45 Approx. 90 minutes
Work clothes tops and
bottoms (mixed spun bre) Approx. 800 g Approx. 11 sets Approx. 85 minutes
Pyjama tops and bottoms
(mixed spun bre) Approx. 500 g Approx. 18 sets Approx. 90 minutes
Towel (cotton) Approx. 80 g Approx. 62 Approx. 80 minutes
Meyer blankets / eece or
throw (acrylic) Single size 2 Approx. 80 minutes
Sheets (100% cotton) Single‑size duvets
150 x 210 cm 6 Approx. 95 minutes
In the following instances, the drying time increases.
• When clothes have not been suciently spun-dried • When the surrounding temperature is low
• When the lint lter is blocked with lint • When the room is insuciently ventilated
NOTE
• The table above shows reference drying times when drying clothes that have been spun-dried
5 minutes in a fully automatic washing machine at a room temperature of 20ºC.
• Set the volume of towels that can be dried in a single operation slightly lower than other
clothes since their volume during drying swells to approximately 1.5 times other clothes.
Drying times also become longer or uneven drying occurs with regular clothes when too many
clothes are forced into the dryer.
• The drying time sometimes is longer than the times in the table above depending on the type,
thickness, etc. of the fabric.
• Drying weight is the weight when clothes are dry.
HOW TO FOLD SHEETS/BLANKETS
Items such as sheets, doonas/duvet covers that are dicult to dry when rolled up
• Put sheets and duvet covers folded individually into the dryer.
• If they do not dry when rolled up, repeat the same operation.
• Up to 6 single‑size items can be dried at a time, or up to 3 double‑size items.
Blankets (Meyer/Fleece/Throw blankets) and other hard-to-dry items
• Fold the blanket in two lengthwise and then fold it into a zigzag.
• You can only dry two blankets at a time.
• When drying new blankets, a little fabric may fall out and accumulate in the lint lter, but this
is just waste fabric from the blanket.
• If the blanket isn't dry enough due to insucient spin-drying etc., turn it over and dry again.
Blankets that can be dried Do not dry:
• Single‑size products weighing 3.0 kg or less,
made of 100% synthetic bre with "Hand wash"
Hand-wash
, or
symbols.
• Acrylic blankets
• Tufted blankets
• Woven blankets
• The blanket will be damaged if it is dried using
a cycle other than the SHEET/BLANKET mode.
• Long‑piled blankets with piles of 10 mm or more
(may cause pile attening)
• Electric blankets
• Blankets made of 100% wool
• Items marked with "Do not tumble dry
Zigzag fold
OPERATION

Rinnai 11 GD OIM
OPERATIONAL TIME
Automatic Programs: When using Automatic Programs the dryer
senses the clothes volume, moisture content and drying progress
continuously. Drying will continue until the items have dried suciently.
The approximate remaining drying time is indicated on the digital display
approximately 2 minutes after the start of operation.
NOTE
In Automatic Drying mode the remaining drying time indicated is approximate only and will be less
accurate if the CLEAN FILTER indicator is illuminated. The remaining drying time indicated on the
digital display counts down in 5 minute increments until there is only 1 minute remaining.
Timer Operation: When using TIMER based drying, the user selects the duration of the drying period. Drying
operation will end when the time has elapsed regardless of whether clothes are dry or not. The remaining drying
time indicated on the digital display counts down in 5 minute increments until there is only 1 minute remaining.
SELF-CLEAN Operation: Before drying, the inside of the drum is sterilized with warm air at 80°C or higher for 3
minutes. This function is useful if you used the equipment to dry items other than clothes and you want to clean
the inside of the drum before using it again.
SOFTEN & COOL FUNCTION
This function starts 1 minute after the selected drying operation ends. As the inside of the drum is hot and oils
remaining on items can cause spontaneous combustion. This function is automatically started 1 minute after a
drying operation ends. This involves 3 minutes of continuous drum rotation followed by intermittent drum rotation
(1 minute approximately every 4 minutes) for a maximum of 76 minutes.
NOTE
To cancel SOFTEN & COOL operation:
1. Press the START/PAUSE button.
2. Wait for the drum to stop rotating and
then open the door.
3. Remove any items.
4. Press the ON/OFF button. The SOFTEN
& COOL operation will now stop and
the dryer is turned OFF.
5. Close the door.
INTERRUPTIONS TO PROGRAMS
If a power outage occurs when the dryer is operating, when power is restored the dry will be in the OFF condition.
Pressing the power button will place the dryer into SOFTEN & COOL operation and the error code 00 will also be
ashing in the digital display.
IMPORTANT
To clear an error condition caused by disruption to power, follow the procedure used to cancel the
SOFTEN & COOL function in the previous section.
~ 2 min
3
BEEP
1
2
Wait for drum to stop rotating and then open the door.
BEEP
OPERATION

Rinnai 12 GD OIM
AUDIBLE SIGNALS
This appliance is equipped with audible signals that can notify you when both correct or incorrect operations are
being selected, when drying operations have been completed and of possible error conditions.
By default these signals are turned on (recommended), however some operational signals may be muted by
following the procedure at the bottom of this page.
Button Operation or Appliance State Signal
Power ON signal Short beep
Correct button operation, acceptance signal Short beep
Incorrect button operation, refusal tone 2 Short beeps
Power OFF signal Long beep
Drying program complete signal 3 Long beeps (these will sounds 3 times)
Clean Filter indicator ashing (at end of drying program) * 10 short beeps
Door open warning after 5 minutes (when appliance is ON) * Short continuous double beeps
Safety Device activation / appliance in error state * 20 beeps
NOTE
* For safety of operation the muting procedure will not apply to these specic operational signals.
To Mute Signals
1. Close the door.
2. Press the ON/OFF button.
3. Press the PROGRAM and TIMER buttons at the same time.
4. Press the DOWN button, the digital display shows 00.
5. Press the ON/OFF button.
To Enable Signals
1. Close the door.
2. Press the ON/OFF button.
3. Press the PROGRAM and TIMER buttons at the same time.
4. Press the UP button, the digital display shows 01.
5. Press the ON/OFF button.
33
BEEP
2
BEEP
5
BEEP
4
BEEP
1
Clicks
in place
33
BEEP
2
BEEP
5
BEEP
4
BEEP
Clicks
in place
1
OPERATION

Rinnai 13 GD OIM
LOADING CONSIDERATIONS
Overloading
Placing to many items inside the drum may cause the drum to stall and prevent drying
operations from starting.
DO NOT load the drum greater than 2/3 of it's capacity.
DO NOT load excessively wet / heavy articles into the drum, ensure they have been
suciently spun dried before loading into the dryer and running a drying operation.
Articles That Produce Lint
Items with loose bres and items such as new towels can produce large amounts of
lint, when drying articles such as these it is best done separately.
Lint has a tendency to stick to articles made from man made bres.
Reducing Static Build-up
Using a fabric softener during the wash can help to reduce the build up of static
electricity when articles are being tumble dried.
Man made bres such as Nylon, etc. may have a greater tendency to produce static
electricity when being tumble dried.
Reducing Uneven Drying & Wrinkles
To reduce wrinkles, place articles evenly into the drum one piece at a time, atten out
tangled or knotted items.
Reduce the load to between 70% to 80% of a full load.
When drying small amounts, add in articles such as dried bath towels to help even
out the load.
When drying a mix of both thin and thick articles select the THICK program.
Articles With Fasteners or Hooks
Close fasteners and turn articles inside out before loading.
This will prevent damage to the items as well as protect the inside of the drum.
FABRIC CARE & DRYING HINTS
• Read the fabric care label attached to most clothes to conrm if they are suitable for tumble drying and, if so,
select the drying cycle recommended by the manufacturer. In the absence of manufacturer recommendations
Rinnai suggests the following:
• Use the 'GENERAL' cycle for items such as towels, shirts and underwear.
• Use the 'THICK’ drying cycle for items such as jeans, sweatshirts or heavier winter clothes.
• If thick items are mixed with thin items, select the 'THICK' drying cycle.
OPERATION

Rinnai 14 GD OIM
HOW TO USE AUTOMATIC PROGRAMS
1. Open the dryer door and place items selected for
drying evenly into the dryer drum and close the door.
2. Press the ON/OFF button, the dryer will turn ON,
and defaults to the last setting that was used.
3. If not already in Automatic Program mode, press
the PROGRAM button by default the GENERAL
program will be illuminated.
To select an alternative program press the
PROGRAM button until desired program indicator
is illuminated. The order that the programs cycle
through is as followings: GENERAL THICK
SHEET/BLANKET ECO
4. Press the START/PAUSE button. The OPERATION
(Combustion) indicator will show green, and
changes to red after the burner ignition (which may
take up to 10 seconds), drying will commence after
ignition.
After approximately 2 minutes of operation an
estimate of the remaining drying time will appear
in the digital display and count down in 5 minute
increments until there is only 1 minute remaining.
NOTE
The OPERATION (Combustion) indicator
may alternate between showing green and
red, and will show green towards the end
of the drying cycle, however this is normal.
When the front door is opened during
operation, the operation/combustion lamp
lights (green) and operation stops. Drying
operation is resumed when the front door
is closed. If drying operation is continued
immediately after cooling operation, drying
operation begins immediately after cooling
operation of two minutes maximum.
Dryer operation will stop when items are suciently
dry and 3 long beeps will sound 3 times.
The OPERATION (Combustion) indicator will show
green and the SOFTEN & COOL indicator will begin
to ash.
NOTE
At this point the items may be removed if
so desired. Before opening the dryer door,
ensure the SOFTEN & COOL indicator is
ashing.
If no action is taken the SOFTEN & COOL
function will begin.
5. Approximately 1 minute after the dryer program
nishes the SOFTEN & COOL function will begin.
The SOFTEN & COOL indicator will now be
illuminated and the dryer will automatically turn OFF
once the SOFTEN & COOL function is completed.
NOTE
Refer to the section "Soften & Cool
Function" on page 11 for instruction on
how to cancel operation.
2
BEEP
3
BEEP
4
BEEP
~10 sec
Green Red
Red Green
~2 min
3 ~ 76 min
1 min
OFF!
Clicks
in place
Clicks
in place
1
6
ECO
3 BEEPS x 3
OPERATION

Rinnai 15 GD OIM
HOW TO USE A TIMER PROGRAM
1. Open the dryer door and place items selected for
drying evenly into the dryer drum and close the door.
2. Press the ON/OFF button, the dryer will turn ON,
and defaults to the last setting that was used.
3. If not already in TIMER mode, press the TIMER
button. The TIMER indicator illuminates and the
TIMER SETTING indicator will also begin to ash.
NOTE
The digital display will now show a set
drying time from one of the pre-set times
available (5, 10, 15, 20, 25, 30, 40, 50, 60, 70,
80, 90). Set time defaults to that last used.
4. To adjust the set drying time, press the UP or DOWN
buttons to select the next pre‑set time.
5. Press the START/PAUSE button, the TIMER
SETTING indicator will go out to signify that a
TIMER operation has now begun.
The OPERATION (Combustion) indicator will show
green, and changes to red after the burner ignition
which may take up to 10 seconds, after which drying
commences. The drying time in the digital display
and will also begin to be counted down in 5 minute
increments until there is only 1 minute remaining.
NOTE
During operation the drying time may be
increased or decreased to the next pre-set
time by pressing the UP or DOWN buttons.
The OPERATION (Combustion) indicator
may alternate between showing green and
red, and will show green towards the end
of the drying cycle, however this is normal.
If the dryer door is opened during operation
the dryer will be paused and resume once
the door is closed.
Dryer operation will stop when the set drying time
has elapsed and 3 long beeps will sound 3 times.
The OPERATION (Combustion) indicator will show
green and the SOFTEN & COOL indicator will begin
to ash.
NOTE
At this point the items may be removed if
so desired. Before opening the dryer door,
ensure the SOFTEN & COOL indicator is
ashing.
If no action is taken the SOFTEN & COOL
function will begin.
6. Approximately 1 minute after the dryer program
nishes the SOFTEN & COOL function will begin.
The SOFTEN & COOL indicator will now be ashing
steadily and the dryer will automatically turn OFF
once the SOFTEN & COOL function is completed.
NOTE
Refer to the section "Soften & Cool
Function" on page 11 for instruction on
how to cancel operation.
2
BEEP
3
BEEP
3 ~ 76 min
5
BEEP
Red Green
1 min
OFF!
4
BEEP
6
3 BEEPS x 3
~10 sec
Green Red
Clicks
in place
Clicks
in place
1
OPERATION

Rinnai 16 GD OIM
CANCELLING A SET TIMER PROGRAM
1. Press the PROGRAM button.
The digital display will now be to showing two dashes
and the OPERATION (Combustion) indicator will
ash green and the SOFTEN & COOL Indicator will
begin to ash.
2. Wait for the drum to stop rotating and then open the
door. If no further drying is to take place remove all
the items from the drum.
3. With the door still open press the ON/OFF button, the
dryer is turned OFF and the door may now be closed.
NOTE
If the door is not opened the SOFTEN &
COOL function will begin.
4. Approximately 1 minute after cancelling the TIMER
operation the SOFTEN & COOL function will begin,
the SOFTEN & COOL indicator will now be illuminated
steady.
NOTE
Refer to the section "Soften & Cool
Function" on page 11 for instruction on
how to cancel operation.
BEEP
1
Green
2
3
BEEP
OFF! Clicks
in place
OPERATION

Rinnai 17 GD OIM
HOW TO USE THE SELF-CLEAN PROGRAM
This mode operates with the drum empty and cleans the
inside of the drum (for about three minutes). It sterilises
the inside of the drum with warm air at 80°C or higher.
1. Open the dryer door and make sure there are no
clothes in the drum and close the door.
2. Press the ON/OFF button, the dryer will turn ON,
and defaults to the last setting that was used.
3. If not already in SELF‑CLEAN mode press the
SELF‑CLEAN button, the SELF‑CLEAN indicator
illuminates. The Digital display will show a set time
of 3 minutes.
NOTE
The digital display will now show a xed
SELF-CLEAN time of 3 minutes this time
can not be changed.
4. Press the START/PAUSE button.
The OPERATION (Combustion) indicator will show
green, and changes to red after the burner ignition
which may take up to 10 seconds, after which drying
commences. The SELF‑CLEAN time in the digital
display will also be counted down until there is only
1 minute remaining.
NOTE
The OPERATION (Combustion) indicator
may alternate between showing green and
red, and will show green towards the end
of the SELF-CLEAN cycle. However, this is
normal.
If the dryer door is opened during operation
the dryer will be paused and resume once
the door is closed.
Dryer operation will stop when the xed
SELF‑CLEAN time has elapsed and 3 long beeps
will sound 3 times.
The OPERATION (Combustion) indicator will show
OFF and the SOFTEN & COOL indicator will begin
to ash.
NOTE
At this point the items may be removed if
so desired. Before opening the dryer door,
ensure the SOFTEN & COOL indicator is
ashing.
If no action is taken the SOFTEN & COOL
function will begin.
5. Approximately 1 minute after the dryer program
nishes the SOFTEN & COOL function will begin.
The SOFTEN & COOL indicator will now be ashing
steadily and the dryer will automatically turn OFF
once the SOFTEN & COOL function is completed.
NOTE
Refer to the section "Soften & Cool
Function" on page 11 for instruction on
how to cancel operation.
2
BEEP
3
BEEP
3 ~ 76 min
4
BEEP
Red OFF
1 min
OFF!
5
3 BEEPS x 3
~10 sec
Green Red
Clicks
in place
1
OPERATION

Rinnai 18 GD OIM
WARNING
DO NOT USE SOLVENTS FOR CLEANING THIS APPLIANCE.
CLEANING THE APPLIANCE BODY
Unplug the electrical cord before cleaning. All external parts of the appliance can be cleaned using a soft, damp
cloth and mild detergent, such as mild dish washing soap.
CLEANING THE LINT FILTER
CAUTION
The drum may be HOT especially immediately after use, it is important to ensure sucient time
has passed to allow for cooling drum surfaces before attempting clean the lint lter.
The lint lter should be cleaned after every drying cycle. Regular cleaning is important to maintain drying eciency.
When the CLEAN FILTER indicator illuminates and an audible alarm signal consisting of 10 short beeps sounds
after the completion of a drying operation. The lint lter is now too blocked for correct drying operations to continue
and therefore the internal lint lter MUST BE cleaned as soon as possible. If the lint lter is not cleaned, the
appliance will eventually stop operating and an 'error' code will show on the digital display. Refer to the "Trouble
Shooting" on page 20 for details.
Clean the lint lter as follows:
1. Reach inside the drum of the dryer and remove the lint pocket / lter assembly from the dryer drum, do this by
squeezing on the two release tabs as shown.
2. Separate the lint lter from the lint pocket by squeezing the two tabs at the back of the lter and pulling apart.
3. Remove any lint from the lint lter by using your hands, a soft cloth or a soft brush as shown. If removal of
the lint proves dicult, the lint lter may also be cleaned with the assistance of COLD water and a soft cloth
or brush, a mild dish washing detergent may also be used. Also consider cleaning the area inside the drum
behind where the lint pocket/lter is located, using a soft cloth or brush. Ensure that any dust or lint particles
removed do not remain in the drum.
CAUTION
If water has been used to clean the lint lter, then the lter MUST BE thoroughly dried before it
can be reassembled and reinstalled.
The components of the lint pocket / lter assembly are NOT dishwasher safe.
4. Reassemble the lint pocket / lter assembly, ensuring that both halves are locked together.
5. Place the pocket / lter assembly into the dryer drum, the assembly will CLICK into place when correctly tted.
1 2
Lint Pocket Tabs
Lint Pocket / Filter Assembly
Lint Filter Tabs Lint Pocket (blue)
Lint Filter
3 4 5
Lint Pocket (blue)
Lint Filter
Clicks
in place
CARE & MAINTENANCE

Rinnai 19 GD OIM
CLEANING THE AIR INLET FILTER
1. The air inlet lter is located at the bottom of the appliance. Pull it out as shown.
2. Remove any dust from the lint lter by using your hands, a soft cloth or a soft brush as shown. If removal of
the lint proves dicult, the lint lter may also be cleaned with the assistance of COLD water and a soft cloth or
brush, a mild dish washing detergent may also be used.
CAUTION
If water has been used to clean the air inlet lter, then the lter MUST BE thoroughly dried before
it can be reassembled and reinstalled.
The air inlet lter is NOT dishwasher safe.
The air inlet lter MUST NOT be obstructed by carpets.
3. After removing dust, re-insert the air inlet lter. The sides of the lter are located and guided by rails at the
bottom of the dryer body.
4. Insert the air inlet lter along the rails on the base of the main unit and push in as far as possible.
1 2 3
Air Inlet Filter
4
Make sure to insert the front and back
of the filter in correctly.
CARE & MAINTENANCE

Rinnai 20 GD OIM
CHECK LIST
Please check the following list before calling for Service. Service calls may be charged if faults are caused by
operation errors. Refer to the separate warranty booklet for more details.
If the dryer does not operate at all, check to see if the digital display is ashing with two numbers. If yes, refer to
"Error Codes" on page 21. If no, check the following items:
• Is the gas supply turned on?
• Is the electrical plug connected to the power supply and is the power supply switched on?
• Is electrical power available? Check supply fuses are serviceable.
• Have the ON/OFF and START/PAUSE buttons been pressed in accordance with these instructions?
• Is the dryer door properly closed?
• Is the digital display ashing with two numbers?
If the dryer takes too long to dry or clothing is not drying well, check the following items:
• Is the CLEAN FILTER indicator illuminated? If yes, clean lters in accordance with instructions on page 18.
• Ensure items have been through the washing machine spin cycle before loading into the appliance for drying.
• Ensure garments for drying are not added during operation.
• Ensure the THICK automatic drying programme has been selected if thick items are being dried.
GENERAL DRYER CHARACTERISTICS
The following characteristics are part of the normal operation of the appliance and do not indicate a fault:
Indication Explanation
The drum is turning even after the nishing signal
has sounded.
Dryer is operating in SOFTEN & COOL mode. Refer to
the section "SOFTEN & COOL Function" on page 11.
There is a delay after pressing the START / PAUSE
button before the OPERATION indicator shows red.
It may take some time before the burner ignites and
combustion starts. This is a normal characteristic,
however if the burner does not ignite at all, contact Rinnai.
Steam is emitted from the discharge duct terminal. High eciency appliances tend to discharge steam,
especially on cold days. This is normal.
There are some clicking noises after drying rst
starts and after the drying cycle has nished.
This is due to the expansion and contraction of burner
components with heat and is a normal characteristic.
The 'time remaining' shown in the digital display has
not changed for a number of minutes.
During operation when using Automatic Programs, the
control system continually calculates the remaining
drying time based on the rate of drying of the items being
dried. This is a normal characteristic.
SERVICE
NOTE
Faults caused by insucient gas supply, gas quality, installation errors or operation errors are
NOT covered by the Rinnai warranty. Refer to separate warranty booklet for details.
When making a service enquiry, having both the model and serial numbers available, will help our
sta quickly identify your appliance and better attend to your needs.
This information should have been copied to the "Installation Record" on page 34 by your
installer, however if this is not the case, the information can also be found on the data plate located
on the right hand side of the appliance.
This appliance does not contain user serviceable parts and MUST ONLY be serviced and repaired by an authorised
person. Rinnai has a Service and Spare Parts network with personnel who are fully trained and equipped to give
the best service on your Rinnai appliance. If your appliance requires service, please call our National Help Line
(contact numbers for which are on the back cover of this manual).
Rinnai recommends that this appliance be serviced every 2 years.
TROUBLE SHOOTING
This manual suits for next models
1
Table of contents
Other Rinnai Dryer manuals
Popular Dryer manuals by other brands

VALBERG
VALBERG DHP 8 A++ W205T Instructions for use

Frigidaire
Frigidaire GLER341CES0 operating instructions

Manrose
Manrose Thin Dry FAN7418 installation instructions

Whirlpool
Whirlpool YLEW0050PQ0 Use & care guide

OMEGA AIR
OMEGA AIR B-DRY Series Installation and operating manual

Amana
Amana LEA80AL operating instructions

Zanussi
Zanussi TC 484 W Instruction booklet

Miele
Miele TKG 440 WP operating instructions

Nacecare
Nacecare TGB 2120 Owner's instructions

Kenmore
Kenmore 796.9002 Series Use & care guide and installation instructions

Whirlpool
Whirlpool LEB6400KQ1 parts list

Frigidaire
Frigidaire GLGQ332A Factory parts catalog