Rise Ticker User manual

Rise Ticker Hardware Install Guide
www.RiseDisplay.com

Table of Contents
Tools Required 1
Technical Specifications 1
ETL Certifications 2
Wall Mount 3
Ceiling Mount (option a) 4
Ceiling Mount (option b) 5
Ceiling Mount (option c) 6
Connecting Sections 7
Installing Corners 9
Network Connectivity 9
Troubleshooting 11
Tools Required
● Cordless drill with phillips bit #1 & #2
● Standard set of drill bits
● 3/8" nut driver
● Torpedo Level
● Chalk line (or a laser level if possible)
● Tape measure
Technical Specifications
●32 Pixel (4mm)
●48 Pixel (4mm)
●64 Pixel (4mm)
●32 Pixel (6mm)
●48 Pixel (6mm)
●64 Pixel (6mm)
support@risedisplay.com 1


Wall Mount
1. Connect the two metal brackets together with the two nut / bolt / washer sets.
2. Screw Wall Brackets (vertically) into wall studs (or use Anchors/drywall plugs) using a minimum of
two-inch screws.
3. Attach the Sign Bracket onto the top frame via the caged nuts located in the top frame itself (there
will be 4 caged nuts, 2 nuts per Sign Bracket.)
support@risedisplay.com 3

Ceiling Mount (option a)
1. Attach the Triangular Sign Bracket onto the top frame via the caged nuts located in the top frame.
Slide along the top of the ticker top to position the brackets then tighten.. (there will be 4 caged
nuts, 2 nuts per Sign Bracket.)
2. Attach a chain or aircraft cable to the bracket.
support@risedisplay.com 4
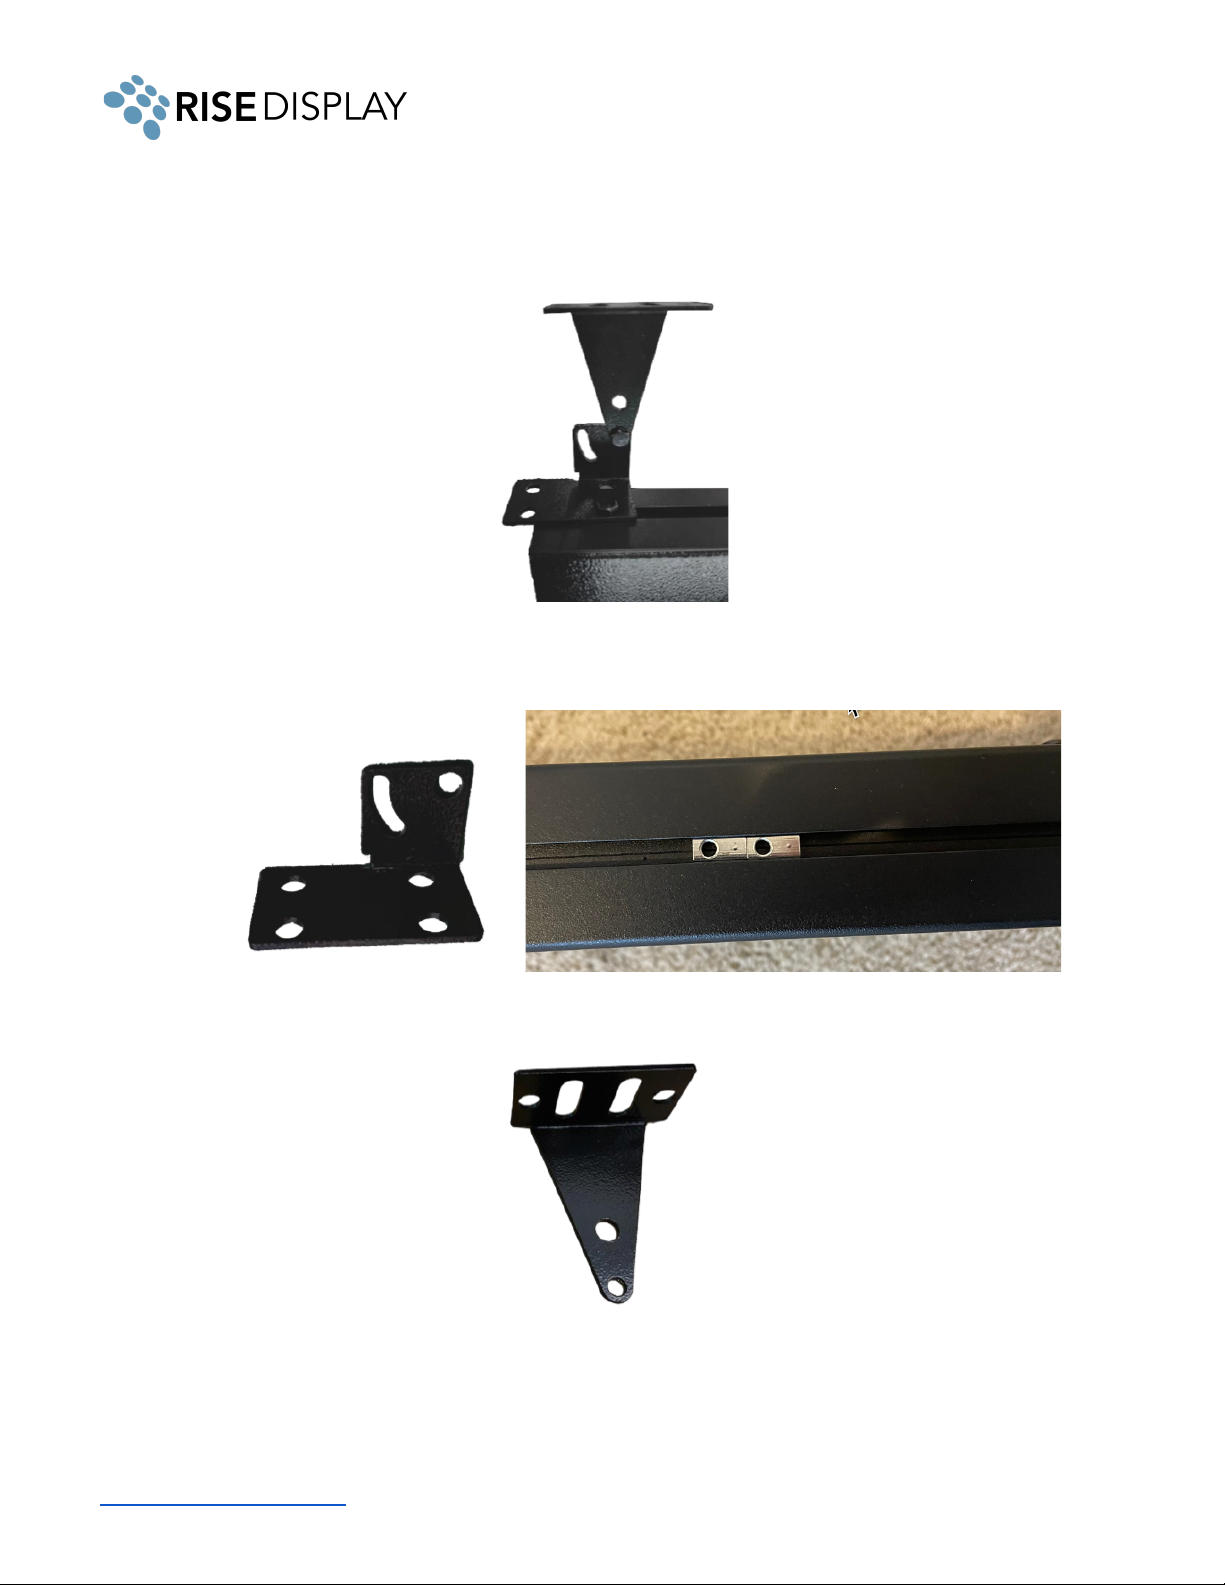
Ceiling Mount (option b)
1. Attach the Sign Bracket onto the top frame via the caged nuts located in the top frame - slide
along the top of the ticker top position the brackets. (there will be 4 caged nuts, 2 nuts per Sign
Bracket.)
2. Attach the triangle shaped bracket to the ceiling.
3. Connect the two metal brackets together with the two nut / bolt / washer sets.
support@risedisplay.com 5
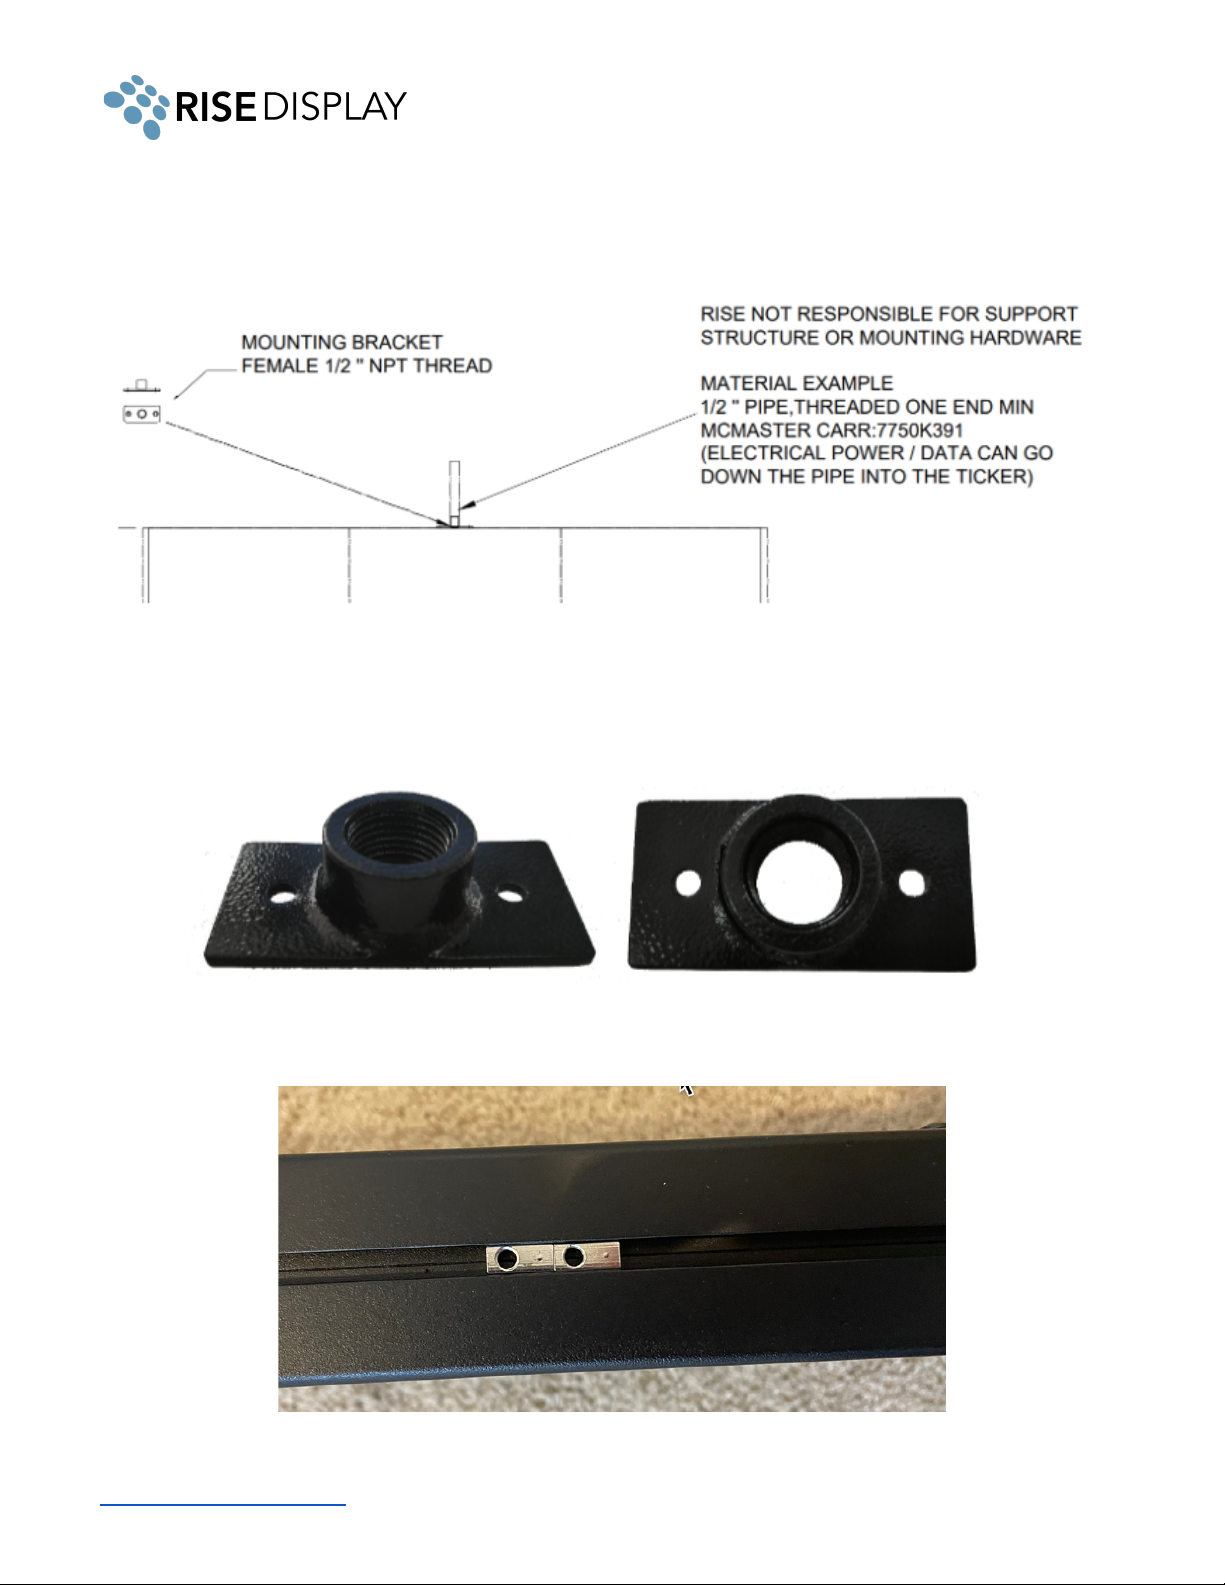
Ceiling Mount (option c)
1. Loosely thread the ½” NPT female adapter (shown below) onto the ½” NPT support (male), do
not fully tighten. NPT support not included.
2. Lift the ticker section and slide to align the cage nuts inside the channel on the top of the ticker
with the adapter.
support@risedisplay.com 6

3. Tighten the adapter and use set screws to attach the adapter to the cage nuts in the top of the
ticker.
4. Repeat for each of the support points for that section.
Connecting Sections
1. Align all sign sections as diagrammed below. A1 is the master section with the controller and
WIFI data receiver. It should be positioned at the far right, starting point.
2. Remove the module on both ends of each section. Insert the handle into the top between the
chassis and module, make sure the spring is facing the module and pull out. The module is fixed
by five magnets attached to the frame at the top, and after loosening you can lift the module out
of the track holding the bottom in place.
3. Connect the RJ45 data cable between sections A1 and A2
support@risedisplay.com 7
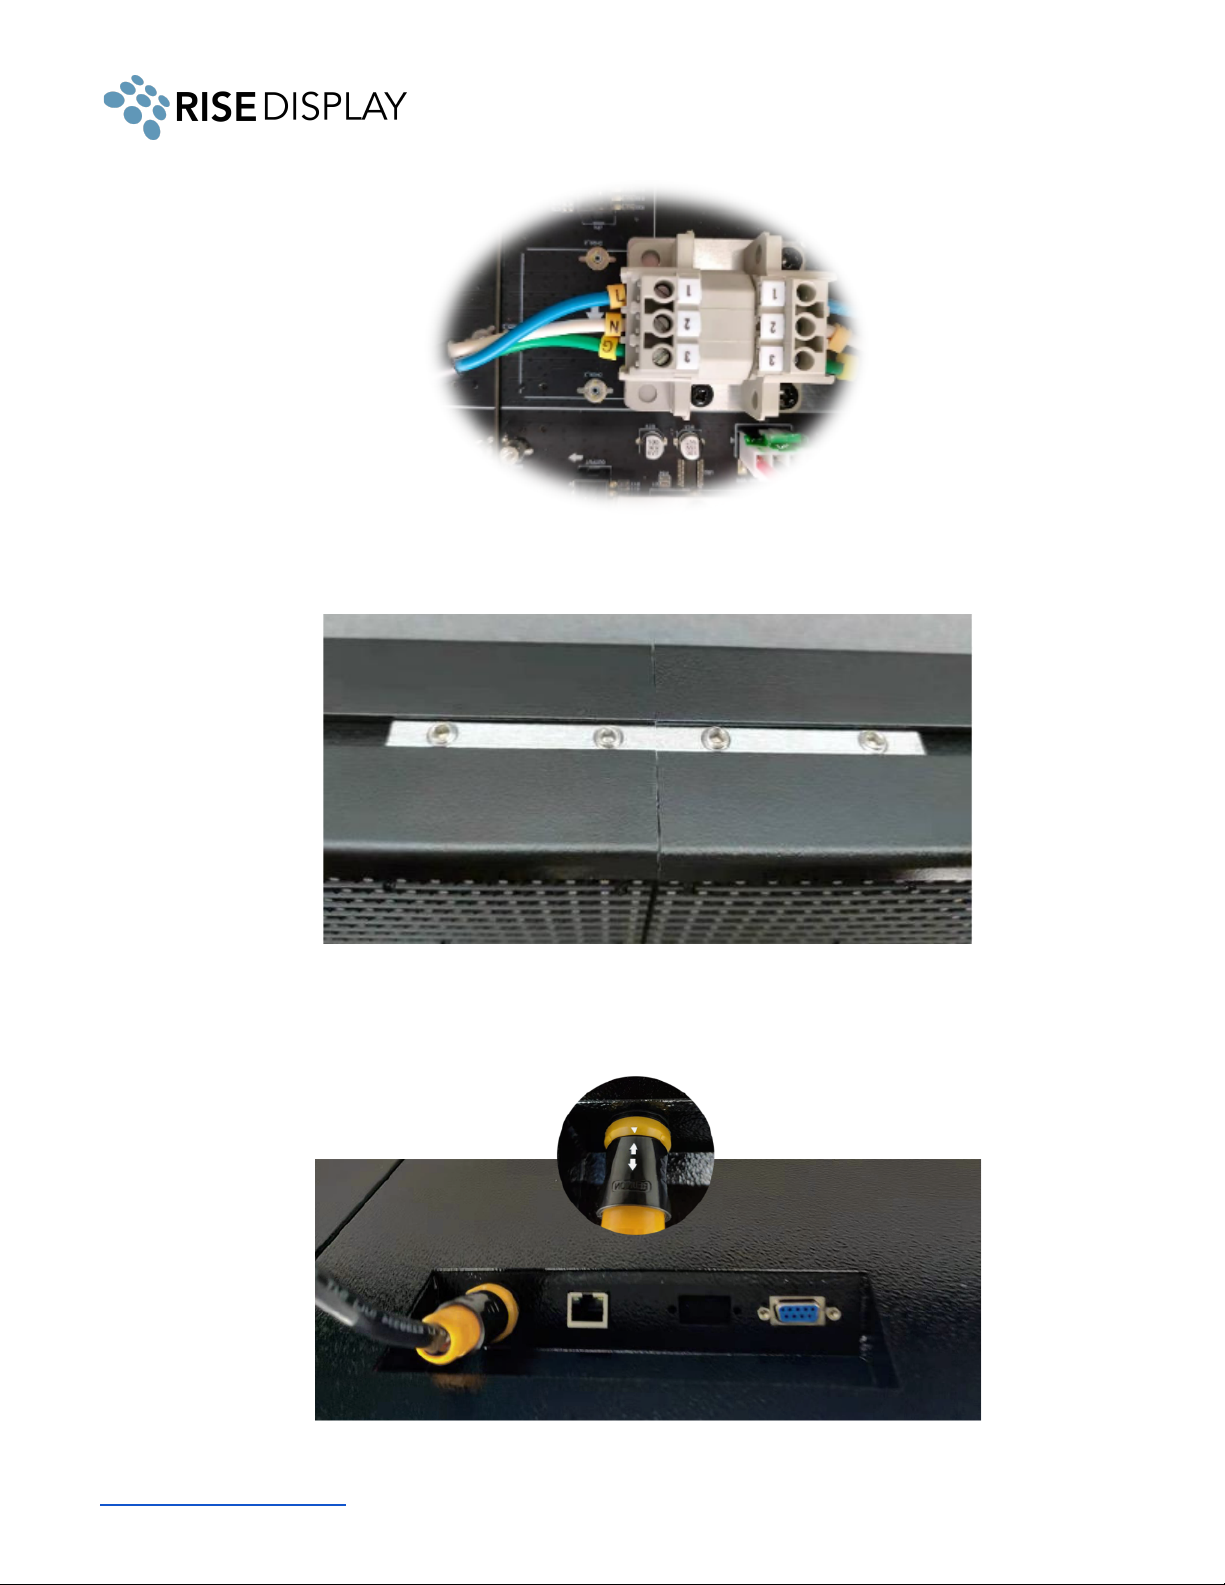
4. Connect the power connection between sections A1 and A2.
5. Slide in a flat joining metal between sections A1 and A2, ensure the two sections are tightly
together eliminating any seam, thread in and tighten 4 bolts on top and bottom of the cabinet to
secure in place.
6. Repeat the above steps until all sections are connected.
7. Plug the AC power cable into the port on the back of Sign. Once the power cable is plugged in
the right direction, it will be locked in place.
support@risedisplay.com 8
8. The pre-loaded message should start at section A1 and scroll continuously across the entire sign
from right to left. If the message doesn’t properly scroll through all sections check the data and
power cable connections between sections (steps 3 and 4 above).
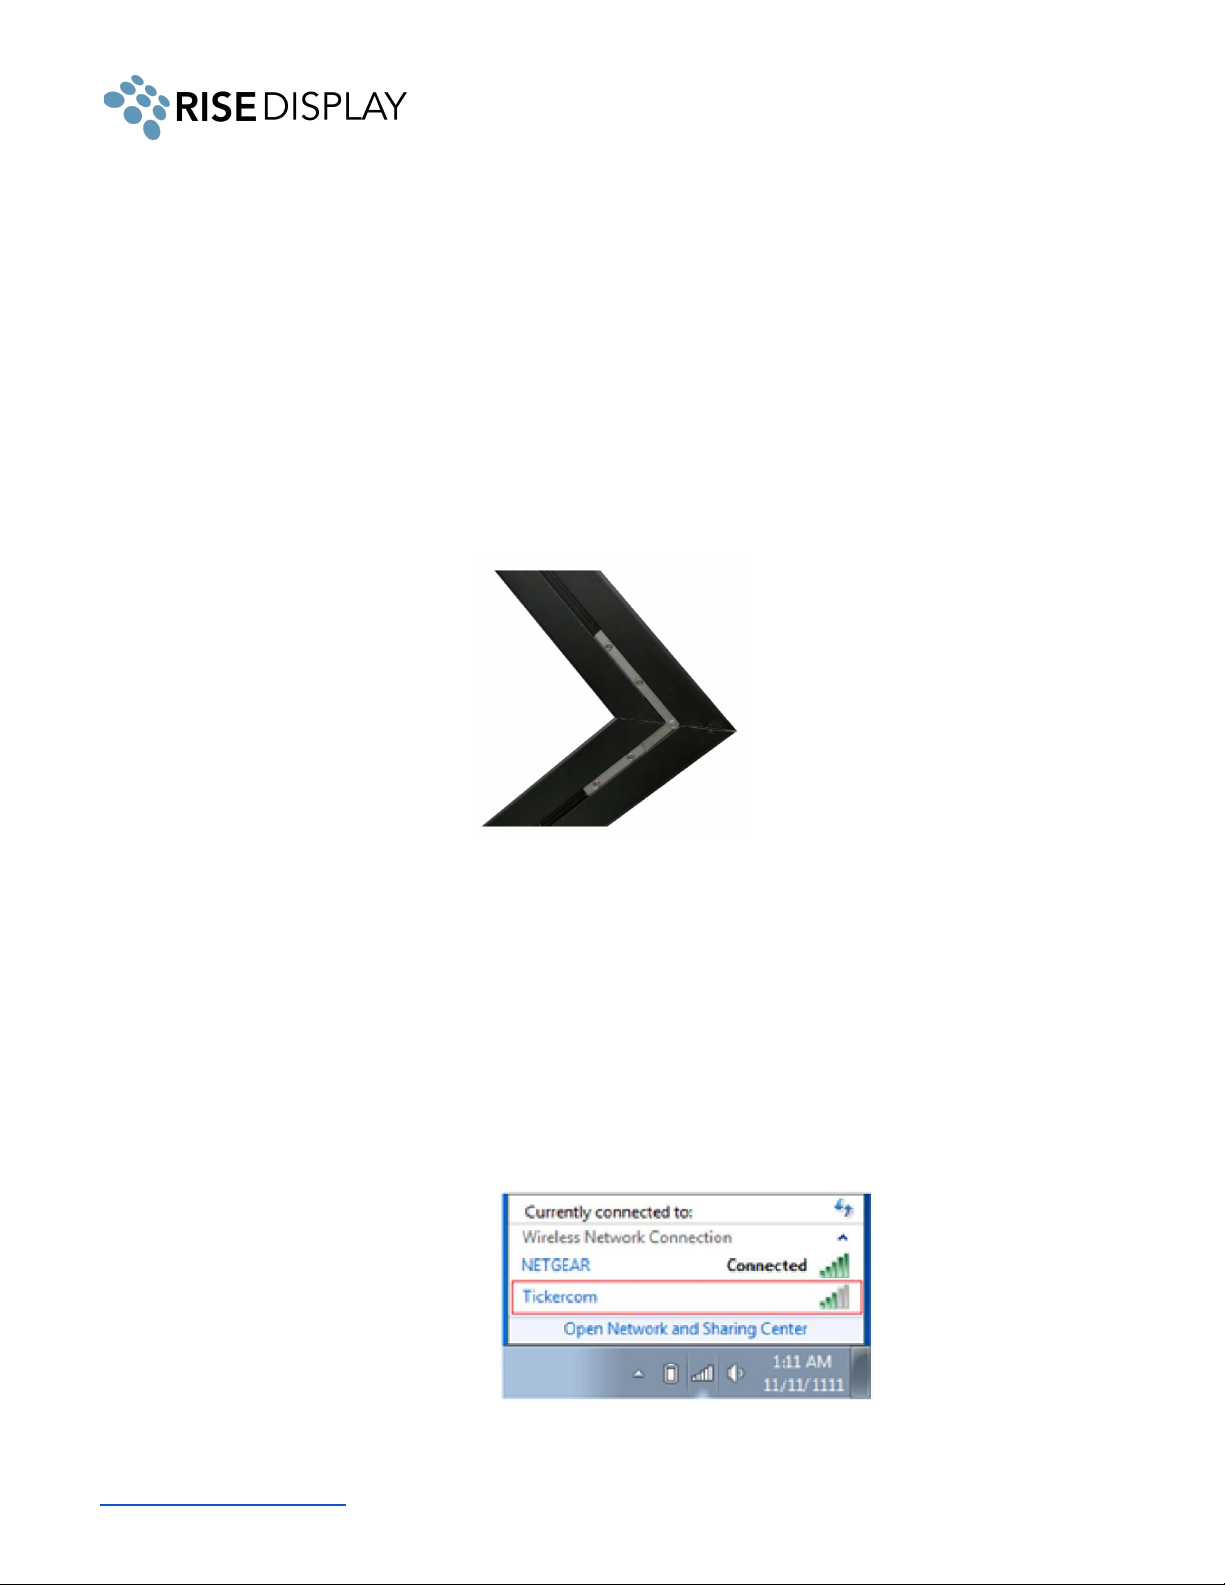
Installing Corners
If your ticker has corners:
1. Place the two segments together and connect the data cable and power cables between the two
segments. (see steps 2-4 in Connecting Sections).
2. Rotate the joining metal to the desired angle and slide in the slot, tighten the screws to fix the two
segments together in the determined degree.
Network Connectivity
1. If you are using a wired connection, plug your Cat5 cable to the RJ45 port (see photo in step 7 on
the previous page). If you ordered a twin ticker, there will be one RJ45 port on the right side and
one on the left side.
2. For a wireless connection, once the sign is turned on with either a Smartphone or PC/Laptop that
can detect wireless networks, follow these steps:
a. Check available wireless networks, locate and connect to the network named 'Tickercom'
the password for this network is 'PASSWORD ' all in upper case. Once Connected to
'Tickercom' your device may state that you have 'Limited Connectivity' this is normal. If it
says "Unable to join the network", please try the WIFI setup on a different device.
b. Once connected to 'Tickercom' open your browser and in the address bar type in
192.168.0.1 and press enter.
support@risedisplay.com 9

c. A pop-up screen will appear requesting a login Username and Password. Enter the
following and click Sign in.
Username: admin
Password: PASSWORD
d. From the ticker sign’s wireless setup screen interface select the "QuickConnect" option
from the left hand menu to view all available wireless networks.
e. Select the desired wireless network and enter the associated password and click submit.
f. After you see the confirmation screen your ticker has successfully connected and you can
exit your browser.
3. Ensure your network / firewall is set up to allow Outbound TCP/IP communication to
cms.risedisplay.com via port 9090. More details check out the Rise Ticker App User Guide.
4. To update your content and control the scroll speed and brightness by downloading the Rise
Ticker App from the Apple App Store or Google Play Store.
support@risedisplay.com 10

Troubleshooting
● No content is appearing on your ticker - make sure the power cable is firmly connected.
○ If there is a white blinking LED in the top right of section A1, this means your ticker is in
power save mode. Use the remote to turn off power save and resume scrolling content.
● Content is only scrolling on a portion of the ticker - it is likely that something wasn’t connected
properly during installation or something came loose in shipping. Start by removing the section to
the left of the last working section. Disconnect and reconnect the power cable and the CAT5
jumper.
● My ticker data is not updating - unplug your ticker for 5 seconds then reconnect power and wait
60 seconds to see if the content updates. Then check your Rise Ticker App to see if the ticker
shows online, if it is showing red go to a device connected to the same network and type
192.168.0.1 in the address bar and log in with Username: admin Password: PASSWORD.
Navigate to the Interface wlan0 menu item and see if the Connection State is “Connected”. If it
says disconnected repeat the step 2 under Network Connectivity from this guide.
○ If your ticker is not properly updating and you have verified it is connected, share the Rise
Ticker App User Guide with your IT department and have them check your organization
firewall to ensure it is not blocking connectivity to the ticker.
● If you have any other questions or need assistance email us at support@risedisplay.com.
support@risedisplay.com 11
Table of contents
Other Rise Lighting Equipment manuals


Popular Lighting Equipment manuals by other brands


JB-Lighting
JB-Lighting Upgrade-Dongle quick start guide

Volt
Volt 520 Series installation instructions

Nimbus Water Systems
Nimbus Water Systems WINGLET CL instruction manual

Ovation
Ovation B-19 user manual

BION TECHNOLOGIES
BION TECHNOLOGIES linea xs inground eco user manual

Selecon
Selecon MaxAV user guide