manuals.online logo
Brands
  1. Home
  2. •
  3. Brands
  4. •
  5. Rixen & Kaul
  6. •
  7. Adapter
  8. •
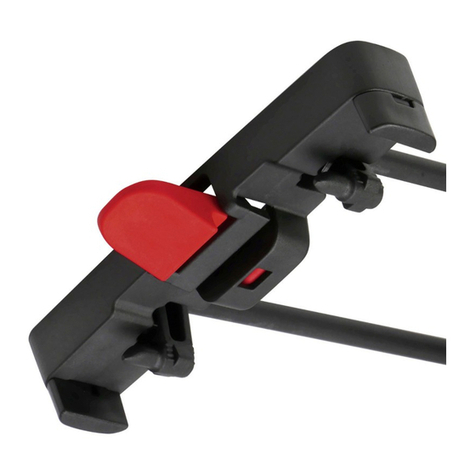
  9. Rixen & Kaul Klickfix MINI ADAPTER User manual

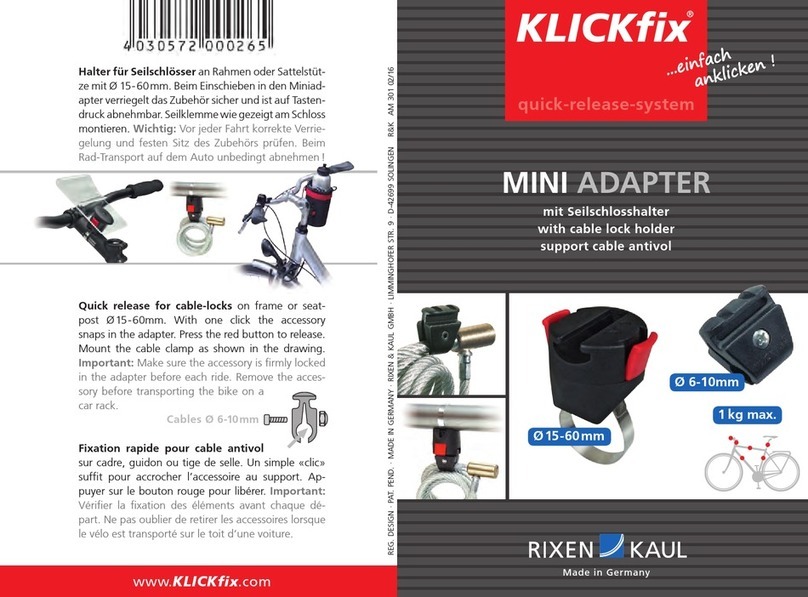
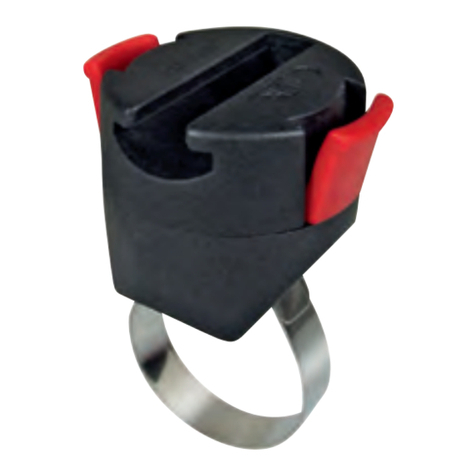
Rixen & Kaul Klickfix MINI ADAPTER User manual

www.KLICKfix.com
Made in Germany
1kg max.
Ø 15-60mm
AM300 01/20
Schnellbefestigung für Zubehör an Lenker, Rah-
men und Sattelstütze mit Ø 15-60mm. Beim Ein-
schieben in den KLICKfix Adapter verriegelt das
Zubehör sicher und ist auf Tastendruck abnehmbar.
WICHTIG Vor jeder Fahrt korrekte Verriegelung
und festen Sitz des Zubehörs prüfen. Zubehör vor
Transport auf dem Auto-Fahrradträger unbedingt
abnehmen! Von der Verwendung an Carbon-Teilen
Für Lenker, Vorbau, Rahmen, Sattelstütze
For handlebar, stem, frame or seat post
Support Mini pour cadre, guidon ou tige de selle
raten wir ab oder empfehlen den Rat des jeweiligen
Herstellers einzuholen.
Quick release for accessories on handlebar, frame
and seatpost Ø 15-60mm. With one click the
accessory snaps in the adapter. Press the red button
to release. IMPORTANT Make sure the accessory is
firmly locked in the adapter before each ride. Remo-
ve the accessory before transporting the bike on a
car rack. We advise against installation on carbon
parts and recommend consulting the manufacturer.
Fixation rapide pour accessoires sur cadre, guidon
ou tige de selle. Un simple «clic» suffit pour accro-
cher l’accessoire au support. Appuyer sur le bouton
rouge pour libérer. IMPORTANT Vérifier que les
éléments sont correctement fixés avant chaque dé-
part. Ne pas oublier de retirer les accessoires lors-
que le vélo est transporté sur un porte-vélos. Nous
déconseillons fortement l’utilisation sur tubes à
carbone ou consultez le fabriquant.
REGISTERED DESIGN · MADE IN GERMANY · RIXEN & KAUL GMBH · LIMMINGHOFER STR. 9 · D-42699 SOLINGEN
MINI ADAPTER
vor Gebrauch
entfetten
degrease
before use
dégraisser
avant montage
Gummi Band / rubber band
Gummi Band
rubber band
(optional)
PRESS
www.KLICKfix.com
1
2
3
4
5
Montage Miniadapter Der Adapterkopf ist
in 90° Schritten drehbar [1]. Zur Veränderung
der Einschubrichtung die beiden Schrauben im
Sockel lösen [2], Kopf drehen und Schrauben
um 90° versetzt durch die beiden anderen Loch-
positionen verschrauben.
Montage mit Edelstahlband Bandlänge je
nach Rohrdurchmesser wählen. Ein Ende von
unten durch das Spannstück führen und um-
biegen [3]. Zum Schutz des Rahmens kann
optional das Gummi Band unterlegt werden
(vor Gebrauch entfetten).
Metallband um das Rohr legen, durch den zwei-
ten Schlitz im Spannstück führen, straff ziehen,
umbiegen und Enden möglichst flach andrü-
cken [4]. Gehäuse auf Spannstück setzen [5]
und die Innensechskantschraube M4 durch das
Loch in der Adaptermitte festschrauben bis das
Band fest gespannt ist (2 Nm).
Mounting Miniadapter You can turn the head
part of the adapter [1] in 90° steps. To change
the direction [2] loosen the 2 bottom screws
and turn the head part around 90°. When
assembling the parts again use the other screw
holes and make sure that the hex-screw M4
is inserted in the center of the socket.
Mounting with stainless strap choose strap
length according to your tube diameter. Insert
one end from below through the clamping
piece and fold it [3]. To protect the frame, the
rubber band can be optionally underlaid (degre-
ase before usage).
Lay the metal band around the tube, pass it
through the second slot, pull slightly tight and
fold it as flat as possible [4]. Place the adap-
ter on clamping piece [5] and fasten the center
screw with the hex-wrench until the strap is se-
curely tightened (2 Nm).
Choix de la position et du système de mon-
tage. La tête de l’adaptateur [1] pivote sur 90°.
Pour changer son orientation [2] dévisser les
2 vis du haut et tourner la tête 90°. Lorsque
vous assemblez à nouveau les pièces, utilisez
les autres trous de vis et assurez-vous que la vis
hexagonale M4 est inséré au centre.
Montage avec languette en acier inox
Faites passer une extrémité par le bas à travers
la pièce de serrage et pliez-le [3]. Pour pro-
téger le cadre, la bande de caoutchouc peut
être sous-couche en option (dégraissage avant
l‘utilisation).
Insérez la bande métallique autour du tuyau
[4], passez-la dans la deuxième fente de la pi-
èce de serrage, tirez-la légèrement et repliez
là de façon à ce qu‘elle soit bien à plat. Placez
l‘adaptateur sur la pièce de serrage [5] et serrez
la vis centrale avec la clé hexagonale jusqu‘à ce
que la sangle soit solidement serrée (2 Nm).
Other Rixen & Kaul Adapter manuals

Rixen & Kaul KLICKfix MINI ADAPTER User manual

Rixen & Kaul

Rixen & Kaul KLICKfix MINI ADAPTER User manual

Rixen & Kaul KLICKfix 0501B User manual

Rixen & Kaul

Rixen & Kaul KLICKfix 0501B User manual

Rixen & Kaul KLICKfix 0000MA User manual

Rixen & Kaul

Rixen & Kaul KLICKfix 0000MA User manual

Rixen & Kaul Klickfix Racktime Vario User manual

Rixen & Kaul

Rixen & Kaul Klickfix Racktime Vario User manual

Popular Adapter manuals by other brands

D-Link DWM-152 Quick installation guide

D-Link

D-Link DWM-152 Quick installation guide

Motion 39911 User manual & assembly instructions

Motion

Motion 39911 User manual & assembly instructions

Lorex AP24V500B Series quick start guide

Lorex

Lorex AP24V500B Series quick start guide

SMC Networks SMCWAPS-G Quick installation guide

SMC Networks

SMC Networks SMCWAPS-G Quick installation guide

Canon CA-PS700 Safety precautions

Canon

Canon CA-PS700 Safety precautions

Assmann Digitus DA-70892 manual

Assmann

Assmann Digitus DA-70892 manual

NETGEAR MA111v1 - 802.11b Wireless USB Adapter Technical specifications

NETGEAR

NETGEAR MA111v1 - 802.11b Wireless USB Adapter Technical specifications

Toshiba B-FP800-AC-QM-S owner's manual

Toshiba

Toshiba B-FP800-AC-QM-S owner's manual

Edimax HP-6002 Quick installation guide

Edimax

Edimax HP-6002 Quick installation guide

Anuraco BLE-485 Getting Starded Guide

Anuraco

Anuraco BLE-485 Getting Starded Guide

JTS MA-XU quick guide

JTS

JTS MA-XU quick guide

Kinivo WID380 user manual

Kinivo

Kinivo WID380 user manual

TP-Link UB400 Quick installation guide

TP-Link

TP-Link UB400 Quick installation guide

Benning MA 2-16 instruction manual

Benning

Benning MA 2-16 instruction manual

D-Link DWA-566 Quick install guide

D-Link

D-Link DWA-566 Quick install guide

TRENDnet TPL-4052E user guide

TRENDnet

TRENDnet TPL-4052E user guide

NETGEAR XAV2501 - Powerline AV Ethernet Adapter user manual

NETGEAR

NETGEAR XAV2501 - Powerline AV Ethernet Adapter user manual

Steren COM-865 quick guide

Steren

Steren COM-865 quick guide

manuals.online logo
manuals.online logoBrands
  • About & Mission
  • Contact us
  • Privacy Policy
  • Terms and Conditions

Copyright 2025 Manuals.Online. All Rights Reserved.