RLE Technologies WiNG-MGR v2 User manual

User Guide
WiNG System
WiNG-MGR v2
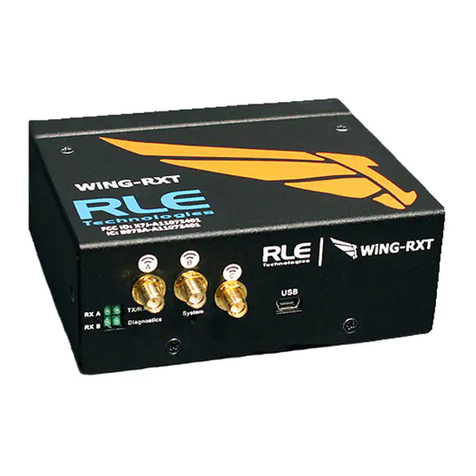
WiNG-RXT
www.rletech.com RLE Technologies 800.518.1519
User Guide Version 05.22
Documented Using Firmware Version 1.2.0

2 WiNG-MGR v2 User Guide 800.518.1519
Copyright and Trademark Notices
© Raymond & Lae Engineering, Inc. 2015. All rights reserved. RLE® is a registered trademark and
SeaHawk™, Falcon™, and Raptor™ are trademarks of Raymond & Lae Engineering, Inc. The
products sold by Raymond & Lae Engineering, Inc. are subject to the limited warranty, limited liability,
and other terms and conditions of sale set forth at rletech.com.
Revision History
Rev. No. Date
10.20 October 2020
05.21 May 2021
05.22 May 2022

rletech.com WiNG-MGR v2 User Guide 3
Manufacturer’s Notes
This product is manufactured by RLE Technologies, 104 Racquette Drive, Fort Collins, CO, 80524.
If this product is used in any manner other than that specified by the manufacturer, the protection
provided by the equipment may be impaired.
Product Warranty
Warranty information for RLE products can be found at www.rletech.com.
Product Registration
Product registration helps RLE Technologies inform owners of:
• Product upgrades
• Firmware enhancements
• New products and technologies
• Special offers available only to registered users
Any information provided to RLE Technologies through the registration form will be regarded as
confidential. RLE will not sell or distribute any of the information to third parties. To read our Privacy
Policy, please visit our website: rletech.com.
Technical Support
Personal assistance is available Monday through Friday, from 8:00 a.m. to 5:00 p.m. MST.
A request for assistance may be sent to s[email protected].
Otherwise, please call us directly at: 800-518-1519.
The following information is located on the bottom of each WiNG-MGR unit. Please have this
information available whenever a technical support call is placed:
The WiNG-MGR is not a field-serviceable item and must be sent back to RLE Technologies for
mechanical repair. Only RLE certified service personnel is allowed to access the interior of this
equipment, and power must be disconnected (unplugged) from the WiNG-MGR any time the unit is
mechanically serviced. Physically unplug power from the unit any time you are making wiring
connections to or from the WiNG-MGR.
RLE cannot accept an item for repair without a Return Materials Authorization number, which must be
provided by RLE.
Product Model Number
Product Serial Number
Product Manufacture Date

4 WiNG-MGR v2 User Guide 800.518.1519

Contents
rletech.com WiNG-MGR v2 User Guide 5
1 System Overview . . . . . . . . . . . . . . . . . . . . . . . . . . . . . . . . . . . . . . . . . . . . . . . . . . .11
Product Description. . . . . . . . . . . . . . . . . . . . . . . . . . . . . . . . . . . . . . . . . . . . . . . . . . . . . . . . . . . . . . . . 11
Indicators. . . . . . . . . . . . . . . . . . . . . . . . . . . . . . . . . . . . . . . . . . . . . . . . . . . . . . . . . . . . . . . . . . . . . . . . 11
Physical Connections . . . . . . . . . . . . . . . . . . . . . . . . . . . . . . . . . . . . . . . . . . . . . . . . . . . . . . . . . . . . . . 12
Reset Button . . . . . . . . . . . . . . . . . . . . . . . . . . . . . . . . . . . . . . . . . . . . . . . . . . . . . . . . . . . . . . . . . . . . . 13
SW1 Switch Settings. . . . . . . . . . . . . . . . . . . . . . . . . . . . . . . . . . . . . . . . . . . . . . . . . . . . . . . . . . . . . . . 13
2 Getting Started . . . . . . . . . . . . . . . . . . . . . . . . . . . . . . . . . . . . . . . . . . . . . . . . . . . . .15
Installation . . . . . . . . . . . . . . . . . . . . . . . . . . . . . . . . . . . . . . . . . . . . . . . . . . . . . . . . . . . . . . . . . . . . . . . 15
Wiring . . . . . . . . . . . . . . . . . . . . . . . . . . . . . . . . . . . . . . . . . . . . . . . . . . . . . . . . . . . . . . . . . . . . . . . . . . 15
Power Supply and Ground Connections . . . . . . . . . . . . . . . . . . . . . . . . . . . . . . . . . . . . . . . . . . . 15
Wired Relay Outputs . . . . . . . . . . . . . . . . . . . . . . . . . . . . . . . . . . . . . . . . . . . . . . . . . . . . . . . . . . 17
Connectivity. . . . . . . . . . . . . . . . . . . . . . . . . . . . . . . . . . . . . . . . . . . . . . . . . . . . . . . . . . . . . . . . . . . . . . 17
RJ45 Ethernet Connection . . . . . . . . . . . . . . . . . . . . . . . . . . . . . . . . . . . . . . . . . . . . . . . . . . . . . . 17
Modbus EIA-485 Connections . . . . . . . . . . . . . . . . . . . . . . . . . . . . . . . . . . . . . . . . . . . . . . . . . . . 18
Antenna . . . . . . . . . . . . . . . . . . . . . . . . . . . . . . . . . . . . . . . . . . . . . . . . . . . . . . . . . . . . . . . . . . . . 19
Communication: Set the IP Address . . . . . . . . . . . . . . . . . . . . . . . . . . . . . . . . . . . . . . . . . . . . . . . . . . . 19
Set the IP Address Using a Web Browser . . . . . . . . . . . . . . . . . . . . . . . . . . . . . . . . . . . . . . . . . . 19
Set the IP Address via USB Connection . . . . . . . . . . . . . . . . . . . . . . . . . . . . . . . . . . . . . . . . . . . 20
Deploy Your Sensors . . . . . . . . . . . . . . . . . . . . . . . . . . . . . . . . . . . . . . . . . . . . . . . . . . . . . . . . . . . . . . 21
Use the Sensor Discovery Wizard . . . . . . . . . . . . . . . . . . . . . . . . . . . . . . . . . . . . . . . . . . . . . . . . 21
Manually Launch Sensor Auto Discovery . . . . . . . . . . . . . . . . . . . . . . . . . . . . . . . . . . . . . . . . . . 21
Set Notification Parameters For Your Sensors . . . . . . . . . . . . . . . . . . . . . . . . . . . . . . . . . . . . . . . . . . . 21
Global Sensor Settings . . . . . . . . . . . . . . . . . . . . . . . . . . . . . . . . . . . . . . . . . . . . . . . . . . . . . . . . 22
Individual Sensor Configuration . . . . . . . . . . . . . . . . . . . . . . . . . . . . . . . . . . . . . . . . . . . . . . . . . . 22
Sensor Mounting Tips . . . . . . . . . . . . . . . . . . . . . . . . . . . . . . . . . . . . . . . . . . . . . . . . . . . . . . . . . . . . . . 22
3 Web Interface. . . . . . . . . . . . . . . . . . . . . . . . . . . . . . . . . . . . . . . . . . . . . . . . . . . . . . .23
Header Icons. . . . . . . . . . . . . . . . . . . . . . . . . . . . . . . . . . . . . . . . . . . . . . . . . . . . . . . . . . . . . . . . . . . . . 25
Alarm Bell. . . . . . . . . . . . . . . . . . . . . . . . . . . . . . . . . . . . . . . . . . . . . . . . . . . . . . . . . . . . . . . . . . . 25
Relay Output Status . . . . . . . . . . . . . . . . . . . . . . . . . . . . . . . . . . . . . . . . . . . . . . . . . . . . . . . . . . . 25
Sensor Discovery Wizard. . . . . . . . . . . . . . . . . . . . . . . . . . . . . . . . . . . . . . . . . . . . . . . . . . . . . . . 25
Refresh. . . . . . . . . . . . . . . . . . . . . . . . . . . . . . . . . . . . . . . . . . . . . . . . . . . . . . . . . . . . . . . . . . . . . 27
System Information . . . . . . . . . . . . . . . . . . . . . . . . . . . . . . . . . . . . . . . . . . . . . . . . . . . . . . . . . . . 27
Sign In/Out . . . . . . . . . . . . . . . . . . . . . . . . . . . . . . . . . . . . . . . . . . . . . . . . . . . . . . . . . . . . . . . . . . 27
Sensors . . . . . . . . . . . . . . . . . . . . . . . . . . . . . . . . . . . . . . . . . . . . . . . . . . . . . . . . . . . . . . . . . . . . . . . . . 28
Individual Sensor Pages . . . . . . . . . . . . . . . . . . . . . . . . . . . . . . . . . . . . . . . . . . . . . . . . . . . . . . . 29
Readings . . . . . . . . . . . . . . . . . . . . . . . . . . . . . . . . . . . . . . . . . . . . . . . . . . . . . . . . . . . . . . . . 29
Wireless Network Metrics . . . . . . . . . . . . . . . . . . . . . . . . . . . . . . . . . . . . . . . . . . . . . . . . . . . 29
Activity History . . . . . . . . . . . . . . . . . . . . . . . . . . . . . . . . . . . . . . . . . . . . . . . . . . . . . . . . . . . . 30
Sensor Configuration. . . . . . . . . . . . . . . . . . . . . . . . . . . . . . . . . . . . . . . . . . . . . . . . . . . . . . . 31
Sensor Objects . . . . . . . . . . . . . . . . . . . . . . . . . . . . . . . . . . . . . . . . . . . . . . . . . . . . . . . . . . . 34
Wireless Network Metrics . . . . . . . . . . . . . . . . . . . . . . . . . . . . . . . . . . . . . . . . . . . . . . . . . . . . . . . . . . . 35
Alarms . . . . . . . . . . . . . . . . . . . . . . . . . . . . . . . . . . . . . . . . . . . . . . . . . . . . . . . . . . . . . . . . . . . . . . . . . . 36
Map . . . . . . . . . . . . . . . . . . . . . . . . . . . . . . . . . . . . . . . . . . . . . . . . . . . . . . . . . . . . . . . . . . . . . . . . . . . . 37
System Configuration . . . . . . . . . . . . . . . . . . . . . . . . . . . . . . . . . . . . . . . . . . . . . . . . . . . . . . . . . . . . . . 38
Identity . . . . . . . . . . . . . . . . . . . . . . . . . . . . . . . . . . . . . . . . . . . . . . . . . . . . . . . . . . . . . . . . . . . . . 38

6 WiNG-MGR v2 User Guide 800.518.1519
IP . . . . . . . . . . . . . . . . . . . . . . . . . . . . . . . . . . . . . . . . . . . . . . . . . . . . . . . . . . . . . . . . . . . . . . . . . 39
Time . . . . . . . . . . . . . . . . . . . . . . . . . . . . . . . . . . . . . . . . . . . . . . . . . . . . . . . . . . . . . . . . . . . . . . . 41
Relay Outputs. . . . . . . . . . . . . . . . . . . . . . . . . . . . . . . . . . . . . . . . . . . . . . . . . . . . . . . . . . . . . . . . 43
Mapping . . . . . . . . . . . . . . . . . . . . . . . . . . . . . . . . . . . . . . . . . . . . . . . . . . . . . . . . . . . . . . . . . . . . 44
Communications . . . . . . . . . . . . . . . . . . . . . . . . . . . . . . . . . . . . . . . . . . . . . . . . . . . . . . . . . . . . . . . . . . 47
EIA-485. . . . . . . . . . . . . . . . . . . . . . . . . . . . . . . . . . . . . . . . . . . . . . . . . . . . . . . . . . . . . . . . . . . . . 47
Modbus. . . . . . . . . . . . . . . . . . . . . . . . . . . . . . . . . . . . . . . . . . . . . . . . . . . . . . . . . . . . . . . . . . . . . 48
BACnet . . . . . . . . . . . . . . . . . . . . . . . . . . . . . . . . . . . . . . . . . . . . . . . . . . . . . . . . . . . . . . . . . . . . . 49
DNS . . . . . . . . . . . . . . . . . . . . . . . . . . . . . . . . . . . . . . . . . . . . . . . . . . . . . . . . . . . . . . . . . . . . . . . 50
SMTP . . . . . . . . . . . . . . . . . . . . . . . . . . . . . . . . . . . . . . . . . . . . . . . . . . . . . . . . . . . . . . . . . . . . . . 51
E-mail . . . . . . . . . . . . . . . . . . . . . . . . . . . . . . . . . . . . . . . . . . . . . . . . . . . . . . . . . . . . . . . . . . . . . . 52
SNMP . . . . . . . . . . . . . . . . . . . . . . . . . . . . . . . . . . . . . . . . . . . . . . . . . . . . . . . . . . . . . . . . . . . . . . 53
Admin. . . . . . . . . . . . . . . . . . . . . . . . . . . . . . . . . . . . . . . . . . . . . . . . . . . . . . . . . . . . . . . . . . . . . . . . . . . 55
XML . . . . . . . . . . . . . . . . . . . . . . . . . . . . . . . . . . . . . . . . . . . . . . . . . . . . . . . . . . . . . . . . . . . . . . . 55
Firmware. . . . . . . . . . . . . . . . . . . . . . . . . . . . . . . . . . . . . . . . . . . . . . . . . . . . . . . . . . . . . . . . . . . . 56
Sensors . . . . . . . . . . . . . . . . . . . . . . . . . . . . . . . . . . . . . . . . . . . . . . . . . . . . . . . . . . . . . . . . . . . . 58
Radios . . . . . . . . . . . . . . . . . . . . . . . . . . . . . . . . . . . . . . . . . . . . . . . . . . . . . . . . . . . . . . . . . . . . . 60
Alarms . . . . . . . . . . . . . . . . . . . . . . . . . . . . . . . . . . . . . . . . . . . . . . . . . . . . . . . . . . . . . . . . . . . . . 62
Users . . . . . . . . . . . . . . . . . . . . . . . . . . . . . . . . . . . . . . . . . . . . . . . . . . . . . . . . . . . . . . . . . . . . . . 65
Radius . . . . . . . . . . . . . . . . . . . . . . . . . . . . . . . . . . . . . . . . . . . . . . . . . . . . . . . . . . . . . . . . . . . . . 66
Certificate . . . . . . . . . . . . . . . . . . . . . . . . . . . . . . . . . . . . . . . . . . . . . . . . . . . . . . . . . . . . . . . . . . . 68
4 Modbus Communications . . . . . . . . . . . . . . . . . . . . . . . . . . . . . . . . . . . . . . . . . . . . 69
Implementation Basics. . . . . . . . . . . . . . . . . . . . . . . . . . . . . . . . . . . . . . . . . . . . . . . . . . . . . . . . . . . . . . 69
Modes of Transmission . . . . . . . . . . . . . . . . . . . . . . . . . . . . . . . . . . . . . . . . . . . . . . . . . . . . . . . . 69
Unit ID Address Field . . . . . . . . . . . . . . . . . . . . . . . . . . . . . . . . . . . . . . . . . . . . . . . . . . . . . . . 69
Function Field. . . . . . . . . . . . . . . . . . . . . . . . . . . . . . . . . . . . . . . . . . . . . . . . . . . . . . . . . . . . . 69
Data Field. . . . . . . . . . . . . . . . . . . . . . . . . . . . . . . . . . . . . . . . . . . . . . . . . . . . . . . . . . . . . . . . 70
Error Check (Checksum) Field. . . . . . . . . . . . . . . . . . . . . . . . . . . . . . . . . . . . . . . . . . . . . . . . 70
Exception Responses. . . . . . . . . . . . . . . . . . . . . . . . . . . . . . . . . . . . . . . . . . . . . . . . . . . . . . . . . . 70
Packet Communications for the WiNG-MGR. . . . . . . . . . . . . . . . . . . . . . . . . . . . . . . . . . . . . . . . . . . . . 70
Function 03: Read Output Registers . . . . . . . . . . . . . . . . . . . . . . . . . . . . . . . . . . . . . . . . . . . . . . 70
Function 06: Preset Single Register & Function 16: . . . . . . . . . . . . . Preset Multiple Registers 71
RTU Framing . . . . . . . . . . . . . . . . . . . . . . . . . . . . . . . . . . . . . . . . . . . . . . . . . . . . . . . . . . . . . . . . . . . . . 72
5 WiNG-RXT . . . . . . . . . . . . . . . . . . . . . . . . . . . . . . . . . . . . . . . . . . . . . . . . . . . . . . . . . 73
Add A WiNG-RXT Range Extender To Your System . . . . . . . . . . . . . . . . . . . . . . . . . . . . . . . . . . . . . . 73
Safety Precautions. . . . . . . . . . . . . . . . . . . . . . . . . . . . . . . . . . . . . . . . . . . . . . . . . . . . . . . . . . . . . . . . . 73
A Communications Objects . . . . . . . . . . . . . . . . . . . . . . . . . . . . . . . . . . . . . . . . . . . . 75
B Update Firmware . . . . . . . . . . . . . . . . . . . . . . . . . . . . . . . . . . . . . . . . . . . . . . . . . . . 79
Load the Application Firmware . . . . . . . . . . . . . . . . . . . . . . . . . . . . . . . . . . . . . . . . . . . . . . . . . . . . . . . 80
Load the Firmware Using TFTP. . . . . . . . . . . . . . . . . . . . . . . . . . . . . . . . . . . . . . . . . . . . . . . . . . . . . . . 80
C Alternate Channel Pair Communications. . . . . . . . . . . . . . . . . . . . . . . . . . . . . . . . 83
WiNG Sensor Communications. . . . . . . . . . . . . . . . . . . . . . . . . . . . . . . . . . . . . . . . . . . . . . . . . . . . . . . 83
Change the Sensor’s Channel Pair . . . . . . . . . . . . . . . . . . . . . . . . . . . . . . . . . . . . . . . . . . . . . . . 83
Manager Communications. . . . . . . . . . . . . . . . . . . . . . . . . . . . . . . . . . . . . . . . . . . . . . . . . . . . . . . . . . . 84
Change the Manager’s Channel Pair . . . . . . . . . . . . . . . . . . . . . . . . . . . . . . . . . . . . . . . . . . . . . . 84
Add a Range Extender to A WiNG System . . . . . . . . . . . . . . . . . . . . . . . . . . . . . . . . . . . . . . . . . . . . . . 85
D Troubleshooting . . . . . . . . . . . . . . . . . . . . . . . . . . . . . . . . . . . . . . . . . . . . . . . . . . . . 87
WiNG-MGR Troubleshooting. . . . . . . . . . . . . . . . . . . . . . . . . . . . . . . . . . . . . . . . . . . . . . . . . . . . . . . . . 87
Sensor Troubleshooting. . . . . . . . . . . . . . . . . . . . . . . . . . . . . . . . . . . . . . . . . . . . . . . . . . . . . . . . . . . . . 89
E Technical Specifications . . . . . . . . . . . . . . . . . . . . . . . . . . . . . . . . . . . . . . . . . . . . . 91

Figures
rletech.com WiNG-MGR v2 User Guide 7
1 System Overview . . . . . . . . . . . . . . . . . . . . . . . . . . . . . . . . . . . . . . . . . . . . . . . . . . .11
Figure 1.1 WiNG-MGR Physical Connections . . . . . . . . . . . . . . . . . . . . . . . . . . . . . . . . . . . . . . . . 12
2 Getting Started . . . . . . . . . . . . . . . . . . . . . . . . . . . . . . . . . . . . . . . . . . . . . . . . . . . . .15
Figure 2.1 Power Supply and Grounding Connections. . . . . . . . . . . . . . . . . . . . . . . . . . . . . . . . . . 16
Figure 2.2 Wired Relay Output Connection . . . . . . . . . . . . . . . . . . . . . . . . . . . . . . . . . . . . . . . . . . 17
Figure 2.3 Ethernet Connection to a PC Using an Ethernet Cable . . . . . . . . . . . . . . . . . . . . . . . . . 17
Figure 2.4 Ethernet Connection to a PC on a Subnet, Using a Hub/Switch . . . . . . . . . . . . . . . . . . 18
Figure 2.5 EIA-485 Connection. . . . . . . . . . . . . . . . . . . . . . . . . . . . . . . . . . . . . . . . . . . . . . . . . . . . 18
Figure 2.6 Antenna Connections. . . . . . . . . . . . . . . . . . . . . . . . . . . . . . . . . . . . . . . . . . . . . . . . . . . 19
Figure 2.7 Sensor Serial Number and Index Number. . . . . . . . . . . . . . . . . . . . . . . . . . . . . . . . . . . 22
3 Web Interface . . . . . . . . . . . . . . . . . . . . . . . . . . . . . . . . . . . . . . . . . . . . . . . . . . . . . . 23
Figure 3.1 Dashboard Navigation . . . . . . . . . . . . . . . . . . . . . . . . . . . . . . . . . . . . . . . . . . . . . . . . . . 23
Figure 3.2 Relay Output Status. . . . . . . . . . . . . . . . . . . . . . . . . . . . . . . . . . . . . . . . . . . . . . . . . . . . 25
Figure 3.3 Sensor Discovery Wizard Modal . . . . . . . . . . . . . . . . . . . . . . . . . . . . . . . . . . . . . . . . . . 25
Figure 3.4 Sensor Discovery Wizard - Select the Sensors for This WiNG-MGR . . . . . . . . . . . . . . 26
Figure 3.5 Close the Sensor Discovery Wizard . . . . . . . . . . . . . . . . . . . . . . . . . . . . . . . . . . . . . . . 26
Figure 3.6 System Information . . . . . . . . . . . . . . . . . . . . . . . . . . . . . . . . . . . . . . . . . . . . . . . . . . . . 27
Figure 3.7 Sensors Page . . . . . . . . . . . . . . . . . . . . . . . . . . . . . . . . . . . . . . . . . . . . . . . . . . . . . . . . 28
Figure 3.8 Individual Sensor Page - Readings Tab . . . . . . . . . . . . . . . . . . . . . . . . . . . . . . . . . . . . 29
Figure 3.9 Individual Sensor Page - Wireless Network Metrics Tab . . . . . . . . . . . . . . . . . . . . . . . . 30
Figure 3.10 Individual Sensor Page - Activity History Tab . . . . . . . . . . . . . . . . . . . . . . . . . . . . . . . . 30
Figure 3.11 Individual Sensor Page - Sensor Configuration Tab . . . . . . . . . . . . . . . . . . . . . . . . . . . 31
Figure 3.12 Individual Sensor Page - Sensor Objects Tab. . . . . . . . . . . . . . . . . . . . . . . . . . . . . . . . 34
Figure 3.13 Wireless Network Metrics Page. . . . . . . . . . . . . . . . . . . . . . . . . . . . . . . . . . . . . . . . . . . 35
Figure 3.14 Alarms Page . . . . . . . . . . . . . . . . . . . . . . . . . . . . . . . . . . . . . . . . . . . . . . . . . . . . . . . . . 36
Figure 3.15 Map Page. . . . . . . . . . . . . . . . . . . . . . . . . . . . . . . . . . . . . . . . . . . . . . . . . . . . . . . . . . . . 37
Figure 3.16 Identity Page . . . . . . . . . . . . . . . . . . . . . . . . . . . . . . . . . . . . . . . . . . . . . . . . . . . . . . . . . 38
Figure 3.17 IP Page . . . . . . . . . . . . . . . . . . . . . . . . . . . . . . . . . . . . . . . . . . . . . . . . . . . . . . . . . . . . . 39
Figure 3.18 Time Configuration. . . . . . . . . . . . . . . . . . . . . . . . . . . . . . . . . . . . . . . . . . . . . . . . . . . . . 41
Figure 3.19 Relay Output Configuration . . . . . . . . . . . . . . . . . . . . . . . . . . . . . . . . . . . . . . . . . . . . . . 43
Figure 3.20 Mapping Configuration. . . . . . . . . . . . . . . . . . . . . . . . . . . . . . . . . . . . . . . . . . . . . . . . . . 44
Figure 3.21 Mapped Point Confirmation Message . . . . . . . . . . . . . . . . . . . . . . . . . . . . . . . . . . . . . . 45
Figure 3.22 EIA-485 Configuration . . . . . . . . . . . . . . . . . . . . . . . . . . . . . . . . . . . . . . . . . . . . . . . . . . 47
Figure 3.23 Modbus Configuration . . . . . . . . . . . . . . . . . . . . . . . . . . . . . . . . . . . . . . . . . . . . . . . . . . 48
Figure 3.24 BACnet Configuration . . . . . . . . . . . . . . . . . . . . . . . . . . . . . . . . . . . . . . . . . . . . . . . . . . 49
Figure 3.25 DNS Configuration. . . . . . . . . . . . . . . . . . . . . . . . . . . . . . . . . . . . . . . . . . . . . . . . . . . . . 50
Figure 3.26 SMTP Configuration. . . . . . . . . . . . . . . . . . . . . . . . . . . . . . . . . . . . . . . . . . . . . . . . . . . . 51
Figure 3.27 Email Configuration . . . . . . . . . . . . . . . . . . . . . . . . . . . . . . . . . . . . . . . . . . . . . . . . . . . . 52
Figure 3.28 SNMP Configuration . . . . . . . . . . . . . . . . . . . . . . . . . . . . . . . . . . . . . . . . . . . . . . . . . . . 53
Figure 3.29 XML Page . . . . . . . . . . . . . . . . . . . . . . . . . . . . . . . . . . . . . . . . . . . . . . . . . . . . . . . . . . . 55
Figure 3.30 Firmware Page. . . . . . . . . . . . . . . . . . . . . . . . . . . . . . . . . . . . . . . . . . . . . . . . . . . . . . . . 56
Figure 3.31 Sensors Page . . . . . . . . . . . . . . . . . . . . . . . . . . . . . . . . . . . . . . . . . . . . . . . . . . . . . . . . 58
Figure 3.32 Radios Page . . . . . . . . . . . . . . . . . . . . . . . . . . . . . . . . . . . . . . . . . . . . . . . . . . . . . . . . . 60
Figure 3.33 Alarms Page . . . . . . . . . . . . . . . . . . . . . . . . . . . . . . . . . . . . . . . . . . . . . . . . . . . . . . . . . 62
Figure 3.34 Users Page . . . . . . . . . . . . . . . . . . . . . . . . . . . . . . . . . . . . . . . . . . . . . . . . . . . . . . . . . . 65

8 WiNG-MGR v2 User Guide 800.518.1519
Figure 3.35 Radius Page. . . . . . . . . . . . . . . . . . . . . . . . . . . . . . . . . . . . . . . . . . . . . . . . . . . . . . . . . . 66
Figure 3.36 Certificate Page . . . . . . . . . . . . . . . . . . . . . . . . . . . . . . . . . . . . . . . . . . . . . . . . . . . . . . . 68
4 Modbus Communications . . . . . . . . . . . . . . . . . . . . . . . . . . . . . . . . . . . . . . . . . . . . 69
5 WiNG-RXT . . . . . . . . . . . . . . . . . . . . . . . . . . . . . . . . . . . . . . . . . . . . . . . . . . . . . . . . 73
A Communications Objects . . . . . . . . . . . . . . . . . . . . . . . . . . . . . . . . . . . . . . . . . . . . 75
B Update Firmware . . . . . . . . . . . . . . . . . . . . . . . . . . . . . . . . . . . . . . . . . . . . . . . . . . . 79
Figure B.1 Admin Menu, Firmware Tab - Configuration File Download. . . . . . . . . . . . . . . . . . . . . . 79
Figure B.2 Admin Menu, Firmware Page - Firmware File Upload . . . . . . . . . . . . . . . . . . . . . . . . . . 80
C Alternate Channel Pair Communications . . . . . . . . . . . . . . . . . . . . . . . . . . . . . . . 83
Figure C.1 Sensor Channel Pair Button. . . . . . . . . . . . . . . . . . . . . . . . . . . . . . . . . . . . . . . . . . . . . . 83
D Troubleshooting . . . . . . . . . . . . . . . . . . . . . . . . . . . . . . . . . . . . . . . . . . . . . . . . . . . 87
E Technical Specifications . . . . . . . . . . . . . . . . . . . . . . . . . . . . . . . . . . . . . . . . . . . . . 91

Tables
rletech.com WiNG-MGR v2 User Guide 9
1 System Overview . . . . . . . . . . . . . . . . . . . . . . . . . . . . . . . . . . . . . . . . . . . . . . . . . . 11
Table 1.1 WiNG-MGR LED Indicators . . . . . . . . . . . . . . . . . . . . . . . . . . . . . . . . . . . . . . . . . . . . . . 11
Table 1.2 WiNG-MGR Physical Connection Descriptions . . . . . . . . . . . . . . . . . . . . . . . . . . . . . . . 12
Table 1.3 Reset Button Functions . . . . . . . . . . . . . . . . . . . . . . . . . . . . . . . . . . . . . . . . . . . . . . . . . 13
Table 1.4 SW1 Switch Settings . . . . . . . . . . . . . . . . . . . . . . . . . . . . . . . . . . . . . . . . . . . . . . . . . . . 13
2 Getting Started . . . . . . . . . . . . . . . . . . . . . . . . . . . . . . . . . . . . . . . . . . . . . . . . . . . . 15
3 Web Interface. . . . . . . . . . . . . . . . . . . . . . . . . . . . . . . . . . . . . . . . . . . . . . . . . . . . . . 23
Table 3.1 Dashboard Navigation Options . . . . . . . . . . . . . . . . . . . . . . . . . . . . . . . . . . . . . . . . . . . 23
Table 3.2 Sensor Page Field Descriptions. . . . . . . . . . . . . . . . . . . . . . . . . . . . . . . . . . . . . . . . . . . 28
Table 3.3 Wireless Network Metrics Field Descriptions. . . . . . . . . . . . . . . . . . . . . . . . . . . . . . . . . 30
Table 3.4 Individual Sensor Page - Sensor Configuration Tab Options . . . . . . . . . . . . . . . . . . . . 31
Table 3.5 Wireless Network Metrics Field Descriptions. . . . . . . . . . . . . . . . . . . . . . . . . . . . . . . . . 35
Table 3.6 Identity Configuration Options . . . . . . . . . . . . . . . . . . . . . . . . . . . . . . . . . . . . . . . . . . . . 38
Table 3.7 IP Configuration Options . . . . . . . . . . . . . . . . . . . . . . . . . . . . . . . . . . . . . . . . . . . . . . . . 39
Table 3.8 Time Configuration Options . . . . . . . . . . . . . . . . . . . . . . . . . . . . . . . . . . . . . . . . . . . . . . 41
Table 3.9 Relay Output Configuration Options . . . . . . . . . . . . . . . . . . . . . . . . . . . . . . . . . . . . . . . 43
Table 3.10 Mapping Configuration Options . . . . . . . . . . . . . . . . . . . . . . . . . . . . . . . . . . . . . . . . . . . 44
Table 3.11 EIA-485 Configuration Options . . . . . . . . . . . . . . . . . . . . . . . . . . . . . . . . . . . . . . . . . . . 47
Table 3.12 Modbus Configuration Options . . . . . . . . . . . . . . . . . . . . . . . . . . . . . . . . . . . . . . . . . . . 48
Table 3.13 BACnet Configuration Options. . . . . . . . . . . . . . . . . . . . . . . . . . . . . . . . . . . . . . . . . . . . 49
Table 3.14 DNS Configuration Options . . . . . . . . . . . . . . . . . . . . . . . . . . . . . . . . . . . . . . . . . . . . . . 50
Table 3.15 SMTP Configuration Options . . . . . . . . . . . . . . . . . . . . . . . . . . . . . . . . . . . . . . . . . . . . . 51
Table 3.16 Email Configuration Options . . . . . . . . . . . . . . . . . . . . . . . . . . . . . . . . . . . . . . . . . . . . . 52
Table 3.17 SNMP Configuration Options. . . . . . . . . . . . . . . . . . . . . . . . . . . . . . . . . . . . . . . . . . . . . 53
Table 3.18 XML Configuration Options . . . . . . . . . . . . . . . . . . . . . . . . . . . . . . . . . . . . . . . . . . . . . . 55
Table 3.19 Firmware Configuration Options . . . . . . . . . . . . . . . . . . . . . . . . . . . . . . . . . . . . . . . . . . 56
Table 3.20 Sensor Configuration Options . . . . . . . . . . . . . . . . . . . . . . . . . . . . . . . . . . . . . . . . . . . . 58
Table 3.21 Radio Configuration Options . . . . . . . . . . . . . . . . . . . . . . . . . . . . . . . . . . . . . . . . . . . . . 60
Table 3.22 Alarms Configuration Options . . . . . . . . . . . . . . . . . . . . . . . . . . . . . . . . . . . . . . . . . . . . 62
Table 3.23 Users Configuration Options . . . . . . . . . . . . . . . . . . . . . . . . . . . . . . . . . . . . . . . . . . . . . 65
Table 3.24 Radius Configuration Options . . . . . . . . . . . . . . . . . . . . . . . . . . . . . . . . . . . . . . . . . . . . 66
Table 3.25 Certificate Configuration Options. . . . . . . . . . . . . . . . . . . . . . . . . . . . . . . . . . . . . . . . . . 68
4 Modbus Communications . . . . . . . . . . . . . . . . . . . . . . . . . . . . . . . . . . . . . . . . . . . 69
Table 4.1 Exception Codes . . . . . . . . . . . . . . . . . . . . . . . . . . . . . . . . . . . . . . . . . . . . . . . . . . . . . . 70
Table 4.2 Read Output Registers Packet Structure. . . . . . . . . . . . . . . . . . . . . . . . . . . . . . . . . . . . 70
Table 4.3 Read Output Registers . . . . . . . . . . . . . . . . . . . . . . . . . . . . . . . . . . . . . . . . . . . . . . . . . 71
Table 4.4 Preset Single and Multiple Registers. . . . . . . . . . . . . . . . . . . . . . . . . . . . . . . . . . . . . . . 71
Table 4.5 Response Sample . . . . . . . . . . . . . . . . . . . . . . . . . . . . . . . . . . . . . . . . . . . . . . . . . . . . . 72
5 WiNG-RXT . . . . . . . . . . . . . . . . . . . . . . . . . . . . . . . . . . . . . . . . . . . . . . . . . . . . . . . . 73
A Communications Objects. . . . . . . . . . . . . . . . . . . . . . . . . . . . . . . . . . . . . . . . . . . . 75
Table A.1 Modbus Registers, BACnet Instances, and SNMP OIDs. . . . . . . . . . . . . . . . . . . . . . . . 76
B Update Firmware . . . . . . . . . . . . . . . . . . . . . . . . . . . . . . . . . . . . . . . . . . . . . . . . . . . 79

10 WiNG-MGR v2 User Guide 800.518.1519
C Alternate Channel Pair Communications. . . . . . . . . . . . . . . . . . . . . . . . . . . . . . . 83
D Troubleshooting . . . . . . . . . . . . . . . . . . . . . . . . . . . . . . . . . . . . . . . . . . . . . . . . . . . 87
E Technical Specifications . . . . . . . . . . . . . . . . . . . . . . . . . . . . . . . . . . . . . . . . . . . . 91
Table E.1 WiNG-MGR Technical Specifications. . . . . . . . . . . . . . . . . . . . . . . . . . . . . . . . . . . . . . . 91
Table E.2 WiNG-RXT Technical Specifications . . . . . . . . . . . . . . . . . . . . . . . . . . . . . . . . . . . . . . . 92

rletech.com WiNG-MGR v2 User Guide 11
CHAPTER
1
CHAPTER 0SYSTEM OVERVIEW
1.1. Product Description
The WiNG-MGR is a wireless sensor network manager that receives signals from wireless
devices and relays them to facilities monitoring systems as SNMP, Modbus TCP/IP, Modbus
RTU, BACnet/IP, and BACnet MS/TP signals.
1.2. Indicators
The LEDs on the WiNG-MGR indicate the status of a variety of actions.
5
1
2
4
3
8
67
LED Label Description
1 RX A The WiNG-MGR is receiving information over antenna A.
2 RX B The WiNG-MGR is receiving information over antenna B.
3 TX /RX C The WiNG-MGR is either receiving or transmitting information over
antenna C
4 Diagnostic Used for customer support and troubleshooting
Table 1.1
WiNG-MGR LED Indicators

12 WiNG-MGR v2 User Guide 800.518.1519
1 System Overview
1.3. Physical Connections
Figure 1.1
WiNG-MGR Physical Connections
5 System
900MHz
WiNG-MGR
868MHz
WiNG-MGR
Indicates on which radio communications channel set the manager
is operating:
•Blue blink pattern - WiNG-MGR is operating on the primary
900MHz channel set.
•Green blink pattern - WiNG-MGR is operating on the alternate
900MHz channel set.
•Purple blink pattern - WiNG-MGR is operating on the primary
868MHz channel set.
•Yellow blink pattern - WiNG-MGR is operating on the alternate
868MHz channel set.
6 RO1 | RO2 The relay output is activated
7 USB RX TX USB Receive/Transmit status LED
8 Status System status LED
9 RS485 RX TX RS485 Receive/Transmit status LED
LED Label Description
Table 1.1
WiNG-MGR LED Indicators
Item Description
Antenna A RP-SMA connector
Antenna B RP-SMA connector
Antenna C RP-SMA connector
USB USB mini B connector
RO 1 Relay output 1 (NC/NO/C)
RO 2 Relay output 2 (NC/NO/C)
Caution! Potential high voltage connection
24 VDC/VAC Power terminal block
Barrel Wall adapter connector
USB USB mini B connector
RS485 Port RS485 circuit connector (+ - GND)
Network 10/100 BASE-T connector Ethernet port
Earth ground connection
Table 1.2
WiNG-MGR Physical Connection Descriptions

rletech.com WiNG-MGR v2 User Guide 13
1 System Overview
1.4. Reset Button
The reset button functions as follows:
1.5. SW1 Switch Settings
SW1 functions as follows:
Action Indicator Function
Push and hold button Solid blue Confirms button is being pushed correctly
Hold button 15 seconds Yellow Once light turns yellow, release button to
reset the Username and password
Hold button 30 seconds Red Once light turns red, release button to reset
the Username, password, and IP address
Hold button 45 seconds Off Once light turns off, release button to perform
a full factory reset of the unit.
Table 1.3
Reset Button Functions
Status Indicator Figure
SW1-1 Not used
SW1-2 EIA-485 Termination
(On=100 ohm termination)
Table 1.4
SW1 Switch Settings

14 WiNG-MGR v2 User Guide 800.518.1519
1 System Overview

rletech.com WiNG-MGR v2 User Guide 15
CHAPTER
2
CHAPTER 0GETTING STARTED
2.1. Installation
The WiNG-MGR can be rack, wall, or DIN rail mounted or left free standing. Rack mount
tabs ship with the WiNG-MGR. Wall mount tabs and a 35mm DIN rail mount bracket are sold
separately.
Mount the WiNG-MGR in either the front or the back of a 19-inch rack - You will need two
of RLE’s L-shaped rack mount tabs (included with the WiNG-MGR). Remove the screws
from the sides of the WiNG-MGR, put the tabs in place, and reapply the screws. Mount the
device in the front or the back of your rack. Use the preferred anchoring method as
suggested by the rack manufacturer to mount the unit securely.
If you would prefer to mount the WiNG-MGR on a wall, wall mount tabs (sold separately)
provide a secure solution. Remove the screws from the sides of the WiNG-MGR, put the
wall mount tabs in place, and reapply the screws. Mount the device securely in the desired
location.
If you would prefer to mount the WiNG-MGR on a 35mm DIN rail, a WiNG-MGR DRM
bracket is also available (sold separately). Remove the screws from the sides of the WiNG-
MGR, slide the unit into the bracket, and reapply the screws. Snap the device securely onto
the DIN rail. You will hear the bracket click into place.
2.2. Wiring
2.2.1 Power Supply and Ground Connections
RLE Technologies recommends powering the WiNG-MGR from a UPS supply so the device
can send alarm notifications during a power outage. The device can be powered through either
the barrel or the power supply terminal block, but you must use only one of these power
options at a time - you cannot connect to both power sources simultaneously or damage will
occur. Power must be supplied from a Class I or Class II limited energy circuit, 24V with a
maximum available current of 6A or a Class 2 circuit. When necessary, be sure to unplug the
unit for complete disconnection.

16 WiNG-MGR v2 User Guide 800.815.1519
2 Getting Started
1If you would like to connect protected Earth ground to the unit, a threaded insert is provided
on the enclosure. Connect an 18AWG ground wire from the threaded insert ground terminal
to a suitable Earth ground.
2Plug the provided wall adapter into the barrel at P1 and a UPS outlet. The wall adapter has a
five foot (1.524m) power cord.
3If you’re providing your own power supply, connect 24VDC to the unit through the power
terminal block.
Figure 2.1
Power Supply and Grounding Connections
Grounding
PEM
Power unit through EITHER
the terminal block or barrel,
but NOT BOTH!

rletech.com WiNG-MGR v2 User Guide 17
2 Getting Started
2.2.2 Wired Relay Outputs
The WiNG-MGR accommodates two wired relay outputs. Any relay output connections must
be made with double insulated wire (jacketed multi-conductor cable). If you wish to use this
functionality, wire the connections now. Your wiring may look similar to the connections
shown here:
Figure 2.2
Wired Relay Output Connection
2.3. Connectivity
2.3.1 RJ45 Ethernet Connection
The WiNG-MGR has an internal 10/100BASE-T Ethernet port that is used for configuration.
The Ethernet port supports Web browser access, email (SMTP), BACnet secondary, Modbus
server, and SNMP. Use an Ethernet cable to connect the device directly to a PC or to a hub or
switch.
Figure 2.3
Ethernet Connection to a PC Using an Ethernet Cable

18 WiNG-MGR v2 User Guide 800.815.1519
2 Getting Started
Figure 2.4
Ethernet Connection to a PC on a Subnet, Using a Hub/Switch
2.3.2 Modbus EIA-485 Connections
The WiNG-MGR can function as a Modbus server over an EIA-485, 2-wire hardware
connection, as shown in Figure 2.5.
When using the EIA-485 port for Modbus RTU communication, RLE Technologies
recommends an 18AWG shielded twisted pair stranded copper wire for the connection, using
no more than 2000 feet (609.6m) of wire at this specification. If longer runs are needed, please
contact RLE Technologies.
Figure 2.5
EIA-485 Connection

rletech.com WiNG-MGR v2 User Guide 19
2 Getting Started
2.3.3 Antenna
The WiNG-MGR is shipped with three 900 MHz antennas. Plug each antenna into its
appropriate jack on the back of the WiNG-MGR and tighten the connections firmly.
Figure 2.6
Antenna Connections
Once the antennas are secure, you’ll need to ensure proper antenna position. Antennas A and
B can be close together, but to avoid signal interference they both need to be as far away from
antenna C as possible. Extend the leader cables on the antennas to their fullest lengths and
secure the antennas as far away from the WiNG-MGR - and as high off the ground - as
possible.
2.4. Communication: Set the IP Address
The WiNG-MGR will not communicate over a user’s network the first time it is connected.
This is because the manufacturer programs the device with a default IP address:
10.0.0.188
,
Subnet Mask:
255.255.255.0
. This default address must be changed to an IP address that
corresponds with the user’s network before the WiNG-MGR can communicate over the
network. There are two ways to set the WiNG-MGR’s IP address: via the web browser or via
the EIA-232 interface.
2.4.1 Set the IP Address Using a Web Browser
Attention: If you have not set an IP address before, consult your IT Department for support.
NOTE The default IP address for the WiNG-MGR is 10.0.0.188
The default Subnet Mask is 255.255.255.0
There is no default user name or password.
1Contact your IT Department to obtain an available IP address, Subnet Mask, and default
Gateway.
2Plug an Ethernet cable into the laptop or workstation that will be used to configure the
WiNG-MGR.
3You’ll need to change the IP address and Subnet Mask of your computer so it can
communicate with the WiNG-MGR in its factory-configured state. Before you change
anything, write down the original IP address and Subnet Mask of your computer - you’ll
need to revert back to these original settings once the WiNG-MGR is configured.
4Change the IP address and Subnet Mask of the computer from its existing address to one
that will allow it to communicate with the WiNG-MGR, such as 10.0.0.189. It may be
Antenna Connections

20 WiNG-MGR v2 User Guide 800.815.1519
2 Getting Started
beneficial to set the IP address to one that is one number different from the WiNG-MGR’s
IP address (10.0.0.188).
5Connect the other end of the Ethernet cable to the Ethernet port on the back of the
WiNG-MGR.
6Access the WiNG-MGR through a Web browser — type the WiNG-MGR’s IP address
(10.0.0.188) into the location bar.
7From the WiNG-MGR’s Dashboard, select the System Configuration link on the left side
of the page. Then click the IP link to access the IP configuration tab. Change the IP address,
Subnet Mask, and default Gateway to the one provided by your IT Department, or change it
to 0.0.0.0 to enable DHCP. Press the Save Changes button. The WiNG-MGR will save the
new IP address, Subnet Mask and default Gateway and then reboot itself.
8Change the IP address of the computer back to its original IP address. If the computer was
configured as DHCP (the network domain controller assigns an IP address) return it to this
state. This may require assistance from your IT Department, or you may need to consult the
computer's manual.
9The computer and the WiNG-MGR are now both configured to communicate on the
network. Both should be accessible via the network. Connect the PC and the WiNG-MGR
to the network. From the PC web browser, type in the new IP address of the WiNG-MGR.
Enter the user name and password as stated above to verify network access to the device.
2.4.2 Set the IP Address via USB Connection
To use the USB interface:
1Contact your IT Department to obtain an available IP address, Subnet Mask, and default
Gateway.
2Use a USB Mini cable to connect the WiNG-MGR to a terminal or PC running terminal
emulation software (HyperTerminal, Terra Term, PuTTY, etc.).
3Set the appropriate communication port to 115200 baud, NO parity, 8 data bits, 1 stop
bit, (115200/N/8/1), and no software or hardware flow command.
4Once the terminal emulation software starts, press Enter on the keyboard and the
WiNG-MGR boot prompt should appear, (mgr> or boot>). If the boot prompt does not
appear, check the communication settings and make sure the unit is powered on.
5From the boot prompt type IP then type one space and type the IP address your IT
Department provided for the unit. If you’d like to enable DHCP, type 0.0.0.0 as the IP
address. Press the enter key. For example, IP 192.168.103.211 The WiNG-MGR will
reboot after the IP address is changed.
6From the boot prompt type NM then type one space and type the Subnet Mask address your
IT Department provided for the unit. Press the enter key. For example,
NM 255.255.255.0 The WiNG-MGR will reboot after the Subnet Mask is changed.
7From the boot prompt type DG then type one space and type the Default Gateway address
your IT Department provided for the unit. Press the enter key. For example,
DG 192.168.103.1
8Type REBOOT and press the enter key to reset the WiNG-MGR and apply the changes.
Table of contents
Other RLE Technologies Measuring Instrument manuals
RLE Technologies
RLE Technologies LD5100 User manual

RLE Technologies
RLE Technologies WiNG-MGR Instruction Manual
RLE Technologies
RLE Technologies WiNG-CO2 User manual
RLE Technologies
RLE Technologies SeaHawk LD310 User manual

RLE Technologies
RLE Technologies Falcon F200 User guide
RLE Technologies
RLE Technologies Falcon FMS User manual
RLE Technologies
RLE Technologies Falcon WiNG-RXT Use and care manual
