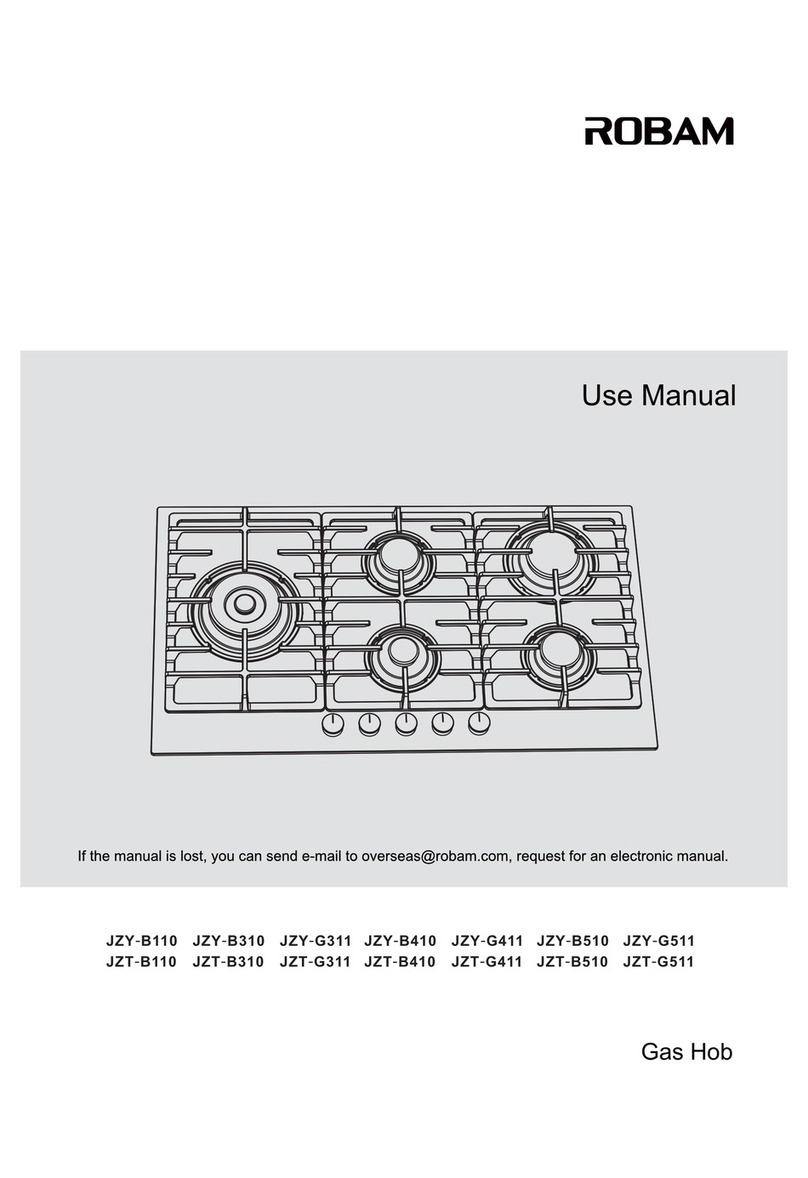
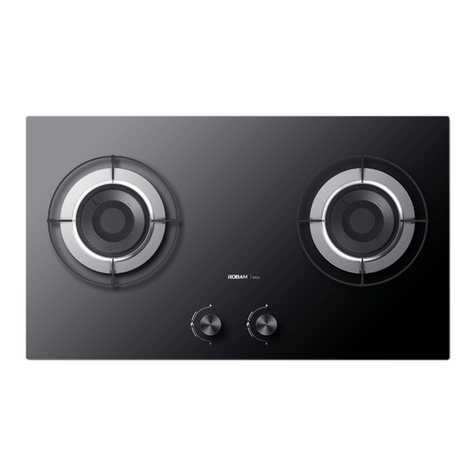
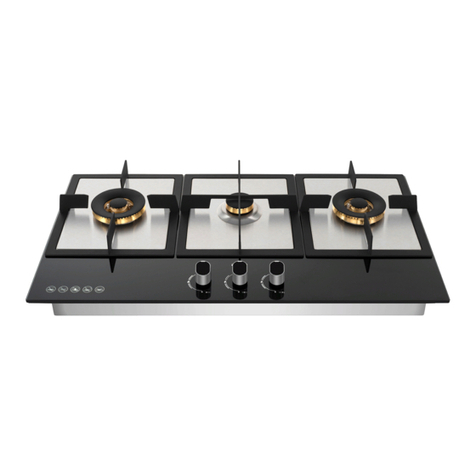
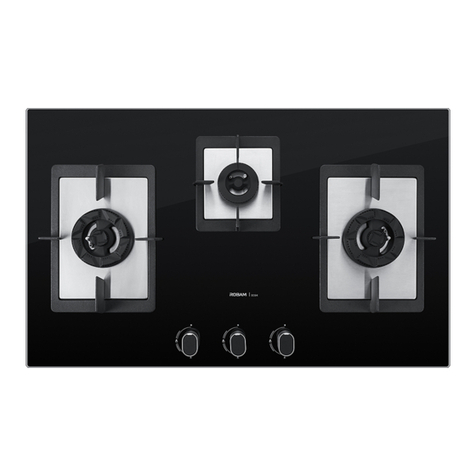
Robam JZT-B291 Mounting instructions

JZT-B291
Use Manual
Gas Hob

1
3
9
10
12
12
Installation Instruction
Clean And Maintenance
Important Safety Information
Performance Parameters
Operation Methods
Common Faults And Solutions
Annex
............................................................................
.................................................................................
........................................................................................
............................................................................................
..................................................................................
........................................................................
...................................................................................................................
.............................................................................................. 13
After Sale Service
3
Contents

Important Safety Information
Child Safety
1
Gas Hob
◆This
◆IMPORTANT: The adjacent furniture and all materials used in the installation must be able to withstand a
minimum temperature of 85°C above the ambient temperature of the room it is located in, whilst in use.
◆Certain types of vinyl or laminate kitchen furniture are particularly prone to heat damage or discolouration at
temperatures below the guidelines given above.
◆Any damage caused by theappliance being installed in contravention of this temperature limit, will be the
liability of the owner.
◆Your new appliance is guaranteed against electrical or mechanical defects, subject to certain exclusio that are
noted in ROBAM APPLIANCES CO.,LTD.conditions of guarantee. The foregoing does not affect your statutory
rights.
◆The use of this appliance for any other purpose or in any other environment without the express agreement
of ROBAM APPLIANCES CO.,LTD.will invalidate any warranty or liability claim.
◆You should not use this appliance to store items on or as a work surface.
◆Do Not Modify This appliance.
◆You should not store or place flammable or highly flammable liquids/materials on top of or near the appliance.
Items made from aluminium, plastic or plastic film should also be kept away from the appliance, as they may
fuse to the surface.
◆Repairs may only be carried out by ROBAM APPLIANCES CO.,LTD.service engineers or their authorised
service agent.
appliance is designed for domestic household use and for the cooking and frying of domestic foodstuffs.
◆ROBAM
being near to the appliance and not allowed to touch the appliance at any time. During and after use, all
surfaces will be hot.
◆If it is necessary for younger family members to be in the kitchen, please ensure that they are kept under.
close supervision at all times.
◆Older children should only be allowed to utilise the appliance when supervised.
◆Children should be supervised to ensure that they do not play with the appliance.
APPLIANCES CO.,LTD.strongly recommend that babies and young children are prevented from
THIS PRODUCT BELONGS TO THE EMBEDDED HOUSEHOLD GAS STOVE, YOUR SAFETY IS OF THE
UTMOST IMPORTANCE TO ROBAM APPLIANCES CO.,LTD.PLEASE MAKE SURE THAT YOU READ THIS
INSTRUCTION BOOKLET BEFORE ATTEMPTING TO INSTALL OR USE THE APPLIANCE. IF YOU ARE
UNSURE OF ANY OF THE INFORMATION CONTAINED IN THIS BOOKLET, PLEASE CONTACT THE ROBAM
APPLIANCES CO.,LTD.
General Information
General Safety
◆Installation must be carried out by an AUTHORISED PERSON in accordance with the regulation in force.
◆Care should be taken to ensure that the units and work surfaces that you build the appliance into, meet with
The relevant standards.
◆This appliance is not intended for use by persons(including children)with reduced physical, sensory or mental
capabilities, or lack of experience and knowledge, unless they have been given supervision or instruction
concerning use of the appliance by a person responsible for their safety.
◆Do not use or store flammable materials in the appliance storage drawer or near this appliance.
◆Do not spray aerosols in the vicinity of this appliance while it is in operation.
◆Do not modify this appliance.
◆Do not use this appliance as a space heater.

During use
◆
◆
appear on the appliance,it is necessary to refer to the technical instructions, which will provide the necessary
instructions concerning modification of the appliance to the conditions of use of the country.
◆Prior to installation, ensure that the local distribution conditions (nature of the gas and gas pressure) and
the adjustment of the appliance are compatible.
◆The adjustment conditions fro this appliance are stated on the label (or data plate).
◆This appliance is not connected to a combustion product evacuation device.It shall be installed and
connected in accordance with current installation regulations. Particular attention shall be given to the
relevant requirements regarding ventilation.
◆CAUTION: The use of a gas cooking appliance results in the production of heat and moisture in the room in
which it is installed. Ensure the kitchen is well ventilated, keep natural ventilation holes open or install a
mechanical ventilation device(mechanical extractor hood).
◆CAUTION: This appliance is for cooking purposes only. It must not be used for other purposes, for example
room heating.
◆Prolonged intensive use of the appliance may call for additional ventilation, for example opening of a window
or more effective ventilation, for example increasing the level of mechanical ventilation where present.
◆Care should be used when utilising the appliance, otherwise there is a risk of burns being caused.
◆You should not allow the electrical connection cables to come into contact with the hob surface when it is hot
or any hot cookware.
◆If fat and oil overheats, then it can ignite extremely quickly. For this reason, when cooking with fat and oil the
appliance should not be left unattended.
◆Make sure that all of the cooking zones are switched off after use.
Any film or stickers that are present on the hob surface when it is delivered should be removed before use.
These instructions are only valid if the country symbol appears on the appliance.If the symbol does not
2
Do not place anything (e.g. a flame tamer
or an asbestos mat) between the pan and
pan support, as serious damage to the
appliance may result.
Do not remove the pan support and enclose
the burner with a wok stand, as this will
concentrate and deflect the heat onto the
hotplate.
Do not use large pots or heavy weights that
can bend the pan support or deflect flame
onto the hotplate.
Locate the pan centrally over the burner so
that it is stable and does not overhang the
appliance
Gas Hob

3
16
753 478 ×
2
860×525 146×
Performance Parameters
Product Size(mm)
Net Weight(kg)
Gas Burner Number
Air In Flow
Panel
Built-in Size(mm)
Lgnition Method
Tempered Glass
Pulse
1.All the parameters in table are provided for reference only and subject to the specific data on the
of stove.
2.The opening size of embedded stove shall subject to the size of the opening template in carton.
3.The Company reserves the rights of modifying products' designs and specifications.
4.Connection: Rp1/2 "(ISO R7).
5.This product uses one size D battey DC 1.5V.
nameplate
Upward Wind
Product
Model
Gas Type
Contry Code
Total Gas Consumption
Test Point Pressure
Elecrical Supply
Injector Size(mm)
Gas Hob
JZT-B291
Natural Gas
NZL, AUS
26 MJ/h
1kPa
Size D Battery DC 1.5V
0.97×2, 0.91
Gas Hob
◆
improper use or improper installation.
◆ROBAM APPLIANCES CO.,LTD. not recommend that this appliance is installed on any type of marine
vessel.
◆Gas Safety Regulations.
◆Building Regulations.
◆Building Standards.
◆IEE Wiring Regulations.
◆Installation Of Domestic Gas Cooking Appliance.
◆ROBAM APPLIANCES CO.,LTD.Installation Instructions.
◆AS/NZS 5601.
ROBAM APPLIANCES CO.,LTD. not responsible for any personal injury or property damage caused by
▶AUTHORISED PERSON, IN ACCORDANCE WITH THE
CURRENT VERSION OF THE FOLLOWING.
▶FOR APPLIANCE INTENDED FOR USE WITH A FLEXIBLE CONNECTION TO A FIXED GAS SUPPLY SYSTEM,
PLEASE CONFIRM THE GAS TYPE WITH THE LOCAL GAS SUPPLIER, IF IN DOUBT.
▶THIS APPLIANCE MUST BE CORRECTLY INSTALLED BY AN AUTHORISED PERSON, STRICTLY IN
ACCORDANCE WITH THE MANUFACTURER'S INSTRUCTIONS AND THE RELEVANT STANDARDS.
▶PLEASE SEE THE SPECIFIC SECTION OF THIS BOOKLET THAT REFERS TO INSTALLATION.
THE INSTALLATION MUST BE CARRIED OUT BY AN
Installation Instruction

Positioning
100mm
55mm
200mm
55mm
55mm
400mm
55mm
400mm
Clearances required when fitting
without a cooker hood
Clearances required when fitting
with a cooker hood
Coo ker hood
4
700mm700mm
Gas Hob
The adjacent furniture must be able to withstand a minimum temperature rise of 65°C above the ambient
temperature of the room it is located in, during periods of use.
◆The edges of the hob must be a minimum distance of 55 mm from a side or rear wall.
◆700 mm between the highest point of the hob surface (including the burners) and the underside of any
horizontal surface directly above it.
◆400 mm between the hob surfaces, providing that the underside of the horizontal surface is in line with the
outer edge of the hob. If the underside of the horizontal surface is lower than 400 mm, then it must be at least
55 mm away from the outer edges of the hob.
◆55 mm clearance around the appliance and between the hob surface and any combustible materials.
◆This appliance can be located in a kitchen.
IMPORTANT: The appliance must not be installed in a bathroom or shower room.
This appliance is classified as class 3 and therefore is to be built into a kitchen unit(depending on size)
or 600mm worktop, providing the following minimum distances are allowed:
525mm
860mm
47mm
478mm 753mm
Unpacking the appliance
Remove any protective wrapping before installing.

◆Cut a hole in the worktop that corresponds with the relevant drawing on the previous page.
◆appliance and any
surface that is below it.
◆IMPORTANT: Do not use a silicon sealant to seal the appliance against the aperture. This will make it
difficult to remove the hob from the aperture in future, particularly if it needs to be serviced.
◆The minimum clearance from a combustible surface shall be a 200 mm horizontal distance from the
periphery of any gas burner (AS/NZS 5601.1).
IMPORTANT: You must have a gap of at least 50 mm between the underneath of the
5
47mm
50mm
Gas Hob
Important information
◆
◆Failure to install the appliance correctly could invalidate ROBAM APPLOAMCES CO.,LTD. guarantee and
lead to prosecution under the regulations quoted above.
◆An AUTHORISED PERSON undertake the installation and service work, in compliance with the above
regulations.
The hob must be installed by a qualified person, in accordance with the current edition of the gas safety
(Installation and use) (amendment) regulations and the relevant building/I.E.E. regulations.
Ventilation requirements
◆The room containing the hob should have an air supply in accordance with the current edition of AS/NZS.5601
◆The room must have opening windows or equivalent; some rooms may also require a permanent vent.
◆If the room has a volume between 5 and 10m³, it will require an air vent of 50cm²(effective area). Unless it
has a door which opens directly to the outside.
◆If the room has a volume of less than 5m³, it will require an air vent of 100cm²(effective area).
◆If it is installed in a room with a volume that exceeds 11m³, then no air vent is required.
◆If there are any other fuel burning appliance in the same room the current edition of AS/NZS 5601 should
be consulted to determine air vent requirements.
◆Ensure that the room containing the hob is well ventilated, keep natural ventilation holes or install a
mechanical ventilation device(mechanical cooker hood).
◆Prolonged intensive use of the appliance may call for additional ventilation, either by the opening of a
window, or by increasing the level of the mechanical ventilation device(where present).
◆This hob is not fitted with a device for discharging the products of combustion. Ensure that the ventilation
rules and regulations are followed.

Gas Safety(Installation and Use)Regulations
IMPORTANT: The appliance must be connected to the gas supply by use of a 15 mm x 1/2"conical thread
female.coupler, seal, copper pipe and an isolation tap fitted in an easily accessible position.
◆It is the law that all gas appliance are installed by competent persons in accordance with the current
edition of the gas safety installation and use regulations.
◆It is in your interest and that of safety to ensure compliance with the law.
◆An AUTHORISED PERSON work to safe standards of practice. The hob must also be installed in
accordance with the current edition of AS/NZS 5601. Failure to install the cooker correctly could invalidate
the warranty, liability claims and lead to prosecution.
6
Gas Hob
Inlet connection region for flexible hose
800
250
50
250
Width of
appllance
Gas connection
1.Flexibility hose connection
The flexibility hose must be certified to AS/NZS1869 - class B or class D.The inner Ø must be
10mm and the maximum length 1.2m(The gas connection has a Rp 1/2" conical thread).
Any hose assembly used must be restrained from accidental contact with the flue outlet of an under bench
oven. This hose assembly shall be suitable for connection to a fixed consumer piping outlet located as
follows:Hotplates at a point 800 mm to 850 mm above the floor and in the region outside the width of the appli
ance to a distance of 250 mm.
◆The walls behind and near the hob should be resistant to heat, steam and condensation.
◆Remember that the quantity of air necessary for combustion must never be less than 2m³/h for each kW of
power (see total power in kW on the appliance rating plate).
Note: Injector or cone end fittings dependant on the national situations in countries of destination.
Note: Cylinder, regulator type, gas type and gas pressure dependant on the national situations in
countries of destination.
▶THIS
CURRENT VERSIONS OF THE FOLLOWING.
▶HOSE ASSEMBLY MUST BE RESTRAINED TO PREVENT ACCIDENTAL CONTACT WITH THE FLUE
OF AN UNDERBENCH OVEN.
APPLIANCE MUST BE INSTALLED BY A COMPETENT PERSON IN ACCORDANCE WITH THE

7
Step 1: Remove the hose connector Step 2: Install the one-way
connector on the inlet pipe
Step 3: the flexibility
hose coupler with the
one-way connector
Connect
Pressure Test Point
2.Or contact local authorized person to connect to consumer piping. (If you need to install plesse use hoop),
Note:
Gas hose assemblies or Limited flexibility
The gas connection point must be between 800 to 850mm above the floor and in theregion outside the width
of the appliance to a distance of 250mm.
Natural gas regulator model: RTZ-ED.
Dismantling tools: adjustable spanner and ptfe.
Remove hose connector before installation.
Please connect the natural gas regulator with the pipe interface of the gas company.
hose shall be purchased by the user.
Gas Hob
◆
◆ "
◆IMPORTANT: The connector must be positioned the right way up, as shown in the picture above.
Put the gas seal inside of the 15 mm x 1/2"conical thread connector.
Fully tighten the 15 mm x 1/2 conical thread connector and seal onto the gas rail.
IMPORTANT: On completion carry out a gas leakage test.
After installation don't rotate fixed screw nut connecting with inlet gas pipe arbitrary. It must be tested
leakage after rotating the direction or inlet gas pipe.(Method: Paint tenuous and neuter cleaning solution on the
connecting part, then open the valve. If there is air bladder, please close the valve and tighten screw nut, test
it again until there is nothing leakage).
Test the appliance
After installing the cooktop, ignite all burners to check that they are operating correctly
- The flame must not go out on the lowest setting, or when the control is turned quickly from the highest
to the lowest setting.
- On the highest setting, the flame must have a distinctive and visible core.
- If any problem occurs, refer to the common faults and solutions.
Normal
( Combustion well)
Yellow flame
(Air deficiency)
Left flame
(Air superabundance)
Installation diagram
Step 4: Flexible the other end of the
hose connector is connected to the
cone of the connector, The
connector on the other side is
connected to the output gas regulator.
two-way The cone of the two-way
connector
Hose Connector One-way Connector
Two-way Coupler
Gas Inlet Pipe Gas Inlet Pipe
Pressure test point
- This is provided in the gas regulator.
- Remove the screw; connect the hose from the pressure gauge.
- Turn on the gas to the rapid burner and manually light the burner.
- The pressure is shown on the data plate.
- To increase the pressure, loosen locking nut and turn clockwise.
- Disconnect gauge and replace test point screw.

8
Gas tap maintenance
These maintenance operations must only be carried out by
IMPORTANT: Before carrying out any maintenance operations, disconnect the appliance from the gas
and electricity supplies.
an AUTHORISED PERSON.
If a gas tap becomes stiff to operate, then you should proceed as follows:
◆Remove the control knobs, pan supports, burners, hob fixing screws and clamps.
◆Remove the hob from the worktop and remove any underside protective covers.
◆Disconnect the fixings holding the tap to the fascia panel and separate the assembly. then clean the cone
and seating, with a cloth dampened with solvent.
◆Lightly smear the cone with high temperature grease, reassemble into position and rotate a few times.
◆Remove the cone again and remove any excess grease, making sure that the gas ducts are not obstructed
with grease.
Gas Hob
Carefully reassemble the components and perform a gas leakage test. If it becomes necessary to
tap, then you should proceed as follows:
◆Remove the control knobs, pan supports, burners, hob fixing screws and clamps.
◆Remove the hob from the worktop and remove any underside protective covers.
◆Disconnect the fixings holding the tap to the fascia panel and separate the assembly.
◆Disconnect the gas pipe from the gas tap, and then disassemble them from the gas rail by removing the
fixing screws.
◆When fitting a new tap, ensure that a new gasket is used.
◆Reconnect the gas tap, perform a gas leakage test and then reassemble the hob.
replace a gas
My appliance isn't working correctly
DO NOT ATTEMPT TO REPAIR THE APPLIANCE YOURSELF.
◆
◆The appliance must be accessible for the engineer to perform any necessary repair. If your appliance is
installed in such a way that an engineer is concerned that damage will be caused to the appliance or your
kitchen, then he will not complete a repair.
◆This includes situations where appliance have been tiled in, sealed in with sealant, have wooden obstructions
placed in front of the appliance, like plinths, or any installation other than the one specified by
ROBAM APPLIANCES CO.,LTD.has been completed.
◆Please refer to the conditions of guarantee that appear on the warranty card that you receive with the appli ance.
◆IMPORTANT:ROBAM APPLIANCES CO.,LTD.operates a policy of continuous improvement and reserves
the right to adjust and modify its products without prior notification.
Please note that if an engineer is asked to attend whilst the product is under guarantee and finds that the
problem is not the result of an appliance fault, then you may be liable for the cost of the call out charge.
Note:
◆the cook top must be installed with provision to allow the gas to be turned off and disconnected for servicing
and removal of the appliance as required from gas supply.
◆The gas pressure must be set by an approved gas fitter and a full operational test and a test forpossible
leakages must be carried out by the gas fitter after installation.
◆The gas pressure must be set by the approved gas fitter as shown on the data plate natural gas 1kPa.
◆Minimum flow adjustment is no need, because minimum flow has been adjusted when manufacturing.If the
minimum flow is not working properly, please contact local dealer to solve the problem.contact information
see“After Sale Service”

9
Before first use
YOU SHOULD CLEAN THE HOB SURFACE(SEE“CLEANING AND MAINTENANCE” SECTION).
The following symbols will appear on the control panel,
next to each control knob:: Gas Off
: Maximum Setting
: Minimum Setting
Picture2
Picture1Picture3
Operation Methods
“ ”
“ ”
“ ”
Gas Hob
To ignite a burner:
◆
◆
◆Never select a knob position between the maximum and off position.
◆The symbol on the control panel, next to the control knob will indicate which gas burner it operates.Automatic
ignition with flame failure safety device, the appliance is fitted with a flame failure safety device on each burner,
which is designed to stop the flow of gas to the burner head in the event of the flame going out.
The minimum setting is at the end of the anti-clockwise rotation of the control knob.
All operation positions must be selected between the maximum and minimum position.
◆Check if the burner, copper cap, copper core or other parts are positioned correctly, and confirm the knob
button(Picture 1) position, then turn on the gas valve.
◆If you keep the control knob depressed, the automatic ignition for the burner will operate.
◆Ignition:Press the control button then contrarotate 90 degree accordingly, it's Large flame.You should hold
down the control knob for 15 seconds after the flame on the burner has lit. If after 15s the burner has not lit,
stop operating the device and open the compartment door and wait at least 1 min before attempting a further
ignition of the burner.
◆After this 15-second interval, to regulate the flame you should continue turning the control knob anti-clockwise
until the flame is at a suitable level. The operating position must be at a position between the maximum position
(Picture 2)and minimum position(Picture 3).
◆To switch the burner off, turn the control knob fully clockwise to the gas off position.
◆In case of power failure, the burners can be lit by carefully using a match.
◆Extinguish: the burner will be extinguished when the knob turn to(Picture1) the position.
◆The use-method of hob at low temperature is the same as in normal temperature.
Energy saving tips
Pan Size
Burners Ø min Ø max
Rapid 220 mm 260 mm
◆
to that of the burner.
The diametre of the bottom
of the pan should correspond
◆
◆Use flat bottomed pans only.
◆When possible, keep a lid on the pan whilst cooking.
◆Cook vegetables with as little water as possible, to reduce cooking times.
IMPORTANT: Always place pans centrally over the hob burners and position them so that the handles cannot
get accidentally caught or knocked off. You should also make sure that the handle is not over one of the other
hob burner flames.
The burner flame must never extend beyond the diametre of the pan.

10
Gas Hob
Cleaning
CLEANING OPERATIONS MUST ONLY BE CARRIED OUT WHEN THE HOB IS COOL.
SHOULD BE DISCONNECTED FROM YOUR MAINS SUPPLY BEFORE COMMENCING ANY CLEANING
PROCESS.
THE APPLIANCE
Cleaning the hob top
◆remove any
residues with warm soapy water.
◆Abrasive cleaners or sharp objects will damage the hob surface; you should clean it using warm soapy water.
◆Although it is easier to clean some deposits whilst the hob surface is still warm. make sure that the hob surface,
pan supports and hob burners have all cooled sufficiently before you attempt to touch them.
Any residues that are left on the hob top surface from cleaning agents will damage it. you should
After each use
◆appliance over with a soft, damp cloth that has been put into warm
soapy water. The cloth should be wrung out after being taken out of the soapy water.
◆Dry the appliance by rubbing the surface with a soft, clean cloth.
◆We would recommend that an appropriate stainless steel cleaner and polish is regularly used on the stainless
steel surfaces of this appliance.
Remove the pan stands and wipe the
Cleaning the hob burners
◆The hob burners should be cleaned once a week or more frequently if they get soiled.
◆Remove the hob burners by pulling them upwards and away from the hob top.
◆Soak them for about ten minutes in hot water and a little detergent.
◆After cleaning and washing them, wipe and dry them carefully.
◆Before placing the burners back on the hob top, make sure that the gas jet is not blocked.
◆IMPORTANT:
Clean And Maintenance
Copper core
Copper cap
Aluminum seat
Ignition electrode
(The figure is provided for reference only and subject to the actual product.)
Thermocouple
Burner
Make sure that you reassemble the burners in the original way.
Make sure that the hob surface, pan stands and hob burners have cooled before you attempt to
touch them.
◆
◆
◆Great care should be taken whilst using this appliance and when following the cleaning procedure.
◆You should not use a steam jet or any other high pressure cleaning equipment to clean the appliance.
Cleaning of the hob should be carried out on a regular basis.
Before attempting to clean the appliance, it should be disconnected from the mains and cool.

11
Gas Hob
1.Surface maintenance: Please clean the surface of stove with neutral detergent and then wipe it with dry
cloth. Do not clean the surface with wire brush or other hard objects.
2.In order to maintain the normal operation and good combustion status of the stove, brush and steel needle
must be used regularly to unblock the flame outlet (groove) and remove the dirt on burners, so that stove
damages by flareback due to blocked flame outlet (groove) can be avoided. Do not wash the flame outlet (groove)
with water.
3.Check the cooper core, cooper cap and their seats regularlyfor any displacement or deviation and carry out
rectification accordingly (to put them in place), so as to avoid the occurrence of accident.
(The figure is provided for reference only and subject to the actual product.)
Aluminum tube
Injector holder
Injector
Waterproof ring
Knob
Guard ring
Pot rack
Copper core
Copper cap
Aluminum base
Thermocouple
Electrode needle
Drain pan
Drain pan apron
Panel
Furnace end holder
Intake pipe
Valve body
Impulse portfire
Battery pack
Furnace foot
Underpan
Baffle
Valve bracket
auxiliary Pot rack
◆IMPORTANT: In order to ensure the stability and safety of the pan, please do not use the pan less
than 100mm size, and when using a 100mm size pan cooking must first placed the auxiliary pot rack
on the pot rack.

12
Gas Hob
Gas leakage
(odor of gas)
Abnormal
combustion
or noises
Close the switch knob
Connect the hose properly or replace it
The switch knob is not closed
The hose is not proper connected
or has cracks
Faults
Ignition failure
Flame extinct
after releasing
Solutions
Close the switch knob of stove and then open
the valve of gas source
Carry out ignition repeatedly to exhaust the air
in pipe
Straighten, unblock or replace the hose
Clean the head
Adjust the distance between the ignition
electrode and the receiving end at around 4mm
The cooper core and cooper cap must be put
in place
Narrow down the throttle
After ignition, hold and press the switch knob
for 3~5 seconds(to the maximum extend)and
then release it
Causes
The cooper core and cooper cap are
not in place
The knob is not pressed to the
maximum extend
Bending, blocking or pressing of hose
Air in gas pipe
The switch of gas source closes
The porcelain head of ignition electrode
is not clean
Improper distance between the ignition
electrode and the receiving end
The throttle is so wide that causes lifted
flame
No battery, wrong battery installation or
insufficient electric power
Correct install the battery or replace it with a
new one
Improper adjustment of throttle
Blockage of burner or flame outlet
The gas used is not in consistence
with the gas type marked on stove
Unstable gas pressure, water in hose
Adjust the throttle
Remove the blockage
Select correct stove
Remove the water in hose
Annex
Natural Gas Regulator
Annex Name
Manual
One-way Connector
Two-way Connector
Hole Template
Quantity
1
1
1
1
1
Common Faults And Solutions
Two-way
Connector
One-way
Connector
2
anchor ears

13
Gas Hob
After Sale Service
In the event of any faults which you cannot easily remedy, please contact local dealer to repair or
replace them.
Contact details as follow:
Servicing must be carried out by ROBAM's authorized personnel.
Customer Support 13000 ROBAM(76226)
Wechat:ROBAM_AU
Facebook:www.facebook.com/robamau
Youtube:www.youtube.com/c/robamau
Please quote the model and serial number of your appliance when contacting.
Bar code
Space in which to stick the extra data plate and bar code supplied with the appliance. Ensure that the
model number is the same as the one on the back of these operating instructions.
Data Plate
Bar Code

Address:No. 339, Zhong Xing Road, Yuhang Economic Development Zone, Yuhang District, Hangzhou
Edition: A/0
Publication Date: August, 10, 2017
Table of contents
Other Robam Hob manuals

Robam
Robam JZ-B312 User manual

Robam
Robam JZY-B594 User manual

Robam
Robam JZ-B594 User manual

Robam
Robam JZY-B398 User manual

Robam
Robam Vigour Series User manual

Robam
Robam B396 Series User manual

Robam
Robam JZY-G370 User manual

Robam
Robam JZT B110 User manual

Robam
Robam JZ-B715 User manual

Robam
Robam HS44-W211 User manual
Popular Hob manuals by other brands

Bosch
Bosch PCD345D instruction manual

Meireles
Meireles MPVMV2607 Technical instructions

Bertazzoni
Bertazzoni PM6030X Instructions for the installation, maintenance and use

Morris
Morris PG4VQ251CFT instruction manual

Hotpoint Ariston
Hotpoint Ariston PCN 762 S/IX/HA operating instructions

AEG
AEG HK764403FB user manual