manuals.online logo
Brands
  1. Home
  2. •
  3. Brands
  4. •
  5. ROBBE
  6. •
  7. Toy
  8. •
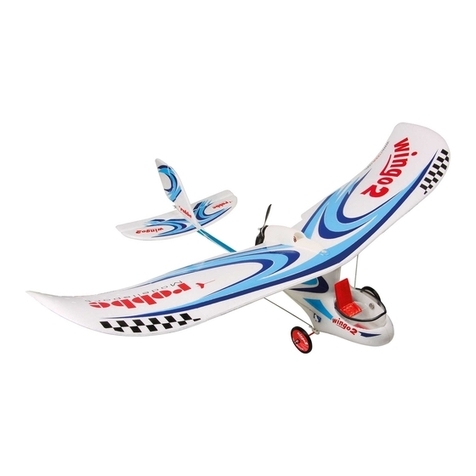
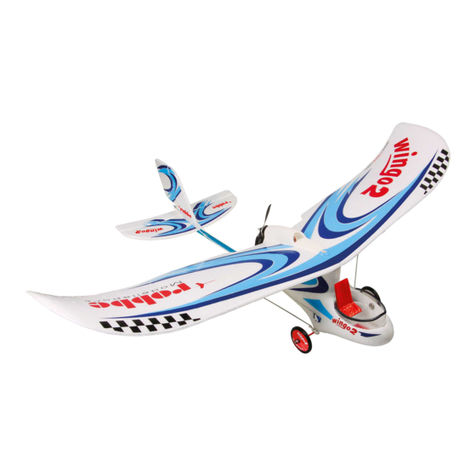
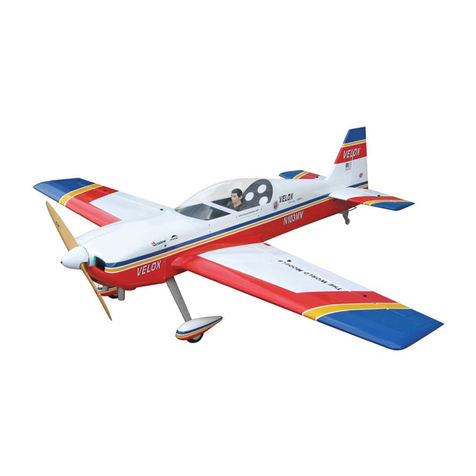
  9. ROBBE Wingo 2 Instruction Manual

ROBBE Wingo 2 Instruction Manual

Modellsport
www.robbe.com
V2_08/2020
Nr.: 265601
Schwimmer / Floats / Flotteurs Wingo 2
FLUGSPASS
ZU LANDE, ZU
WASSER UND
IM SCHNEE!
BAU- UND BETRIEBSANLEITUNG
INSTRUCTIONS AND USER MANUAL
MANUEL D´UTILISATION
DE/EN/FR
2
BAU- UND BETRIEBSANLEITUNG / INSTRUCTIONS AND USER MANUAL / MANUEL D´UTILISATION
Modellsport
01 05
02 06
03 07
04 08
KIT KIT
PNP PNP
RTF RTF
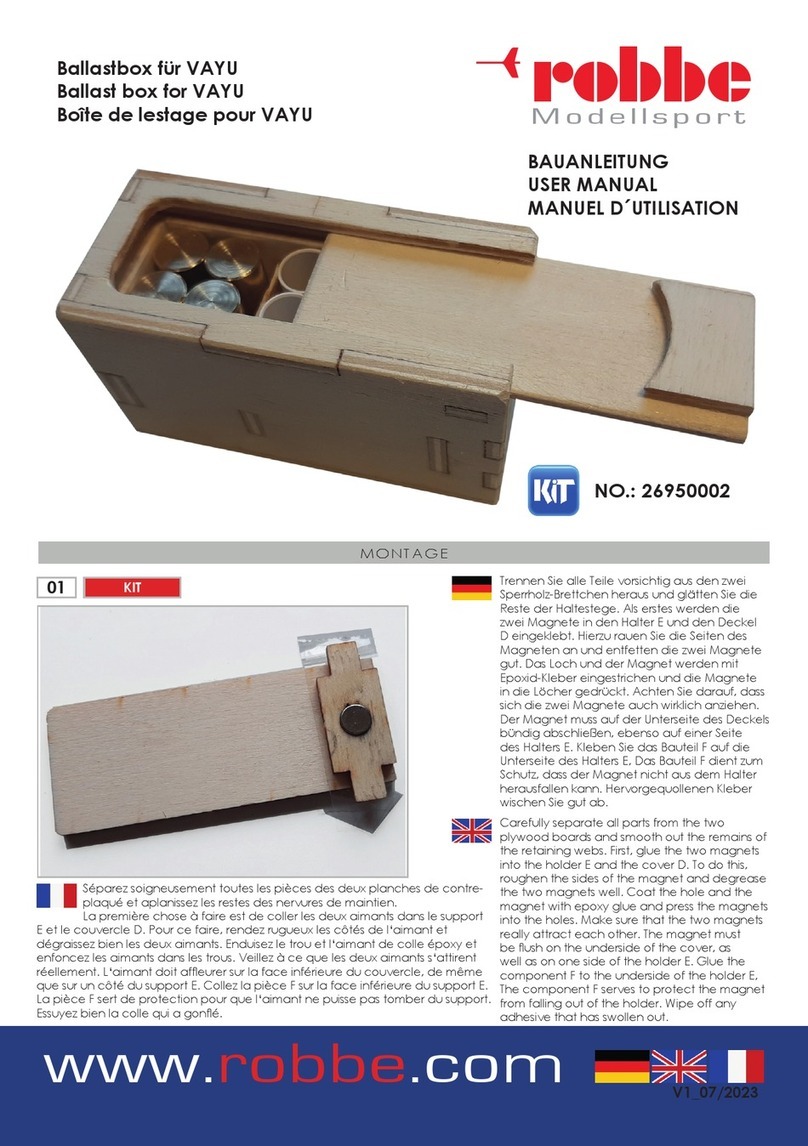
Inhalt des Schwimmer-Set Wingo2. Den ABS-Streifen in den Absatz am Schwimmer aue-
gen und markieren.
Contenu du jeu de otteurs Wingo2. Placez la bande d‘ABS sur la base du otteur et
marquez-la.
Contents of the Wingo2 oat set. Place the ABS strip in the section of the oat and
mark it.
KIT KIT
PNP PNP
RTF RTF
Die Schwimmer-Halter (4 Stk.) vom Spritzbaum ab-
trennen.
Den ABS-Streifen mit der Schere auf die passende
Länge abschneiden.
Déconnectez les supports de otteur (4 pièces) de la
grappe.
Coupez la bande ABS à la longueur requise à l‘aide
des ciseaux.
Disconnect the oat holder (4 pieces) from the parts
tree.
Cut the ABS strip with the scissors to the required
length.
KIT KIT
PNP PNP
RTF RTF
Die Halter an den Klebeächen mit Sekundenkleber
benetzen.
Den Schwimmer an der Stufe mit Sekundenkleber
benetzen.
Mouillez les supports sur les surfaces adhésives avec
de la super-colle.
Mouillez le otteur au niveau avec de la super-colle.
Wet the holder on the adhesive surfaces with super
glue.
Wet the oat at the level with superglue.
KIT KIT
PNP PNP
RTF RTF
Die Halter in den Ausschnitt des Schwimmers bündig
einschieben.
Das ABS-Plättchen am Absatz anlegen und bündig
aufdrücken.
Placez les supports dans la découpe du otteur. Placez la plaque d‘ABS contre la section et appuyez
dessus pour qu‘elle afeure.
Push the holders ush into the cut-out in the oat. Place the ABS plate against the section and press it
on ush.
DE/EN/FR
3
BAU- UND BETRIEBSANLEITUNG / INSTRUCTIONS AND USER MANUAL / MANUEL D´UTILISATION
Modellsport
09 13
10 14
11 15
12 16
KIT KIT
PNP PNP
RTF RTF
Das ABS-Plättchen gedrückt halten bis der Sekunden-
kleber ausgehärtet ist.
Das Schwimmer-Dekor mit der Schere wie abgebildet
ausschneiden …
Maintenez la plaque ABS pressée jusqu‘à ce que la
super-colle ait durci.
Découpez les décalques du otteur avec les ciseaux
comme indiqué ...
Keep the ABS-plate pressed until the superglue has
hardened.
Cut out the oat decals with the scissors as shown ...
KIT KIT
PNP PNP
RTF RTF
Der Überstand muss sein, damit beim Wasserstart der
Wasserlm abreißt.
... Darauf achten, dass ein ca. 2-3 mm transparenter
Rand erhalten bleibt.
Le dépassement doit être sufsant pour rompre le lm
d‘eau lors du démarrage sur l‘eau.
... Veillez à ce qu‘il reste un bord transparent
d‘environ 2-3 mm.
The overhang must be sufcient to break off the
water lm during the water start. ... Make sure that an approx. 2-3 mm transparent
edge remains.
KIT KIT
PNP PNP
RTF RTF
Das Anbringen der ABS-Plättchen am Schwimmer-
Ende erfolgt im gleichen Ablauf.
Die Trägerfolie wie abgebildet segmentweise lösen
und abschneiden.
Le montage de la plaque ABS à l‘extrémité du ot-
teur s‘effectue selon la même procédure.
Retirez la feuille de support segment par segment
comme indiqué et coupez-la.
Mounting the ABS plate at the end of the oat is
carried out in the same procedure.
Loosen the carrier foil segment by segment as shown
and cut it off.
KIT KIT
PNP PNP
RTF RTF
Hier bleibt der Überstand der Abrisskante ebenfalls
erhalten.
Das Dekor wird mit der vorderen Trägerfolie am
Schwimmer ausgerichtet …
Ici, la projection du bord d‘arrachage est également
conservée.
Les décalcomanies sont alignées avec le support
avant du otteur ...
Here the projection of the tear-off edge is also
retained.
The decals are aligned with the front carrier foil on
the oat ...
Achtung: Bitte nicht abschneiden!
Caution: Please do not cut off!
Attention: Ne coupez pas!
DE/EN/FR
4
BAU- UND BETRIEBSANLEITUNG / INSTRUCTIONS AND USER MANUAL / MANUEL D´UTILISATION
Modellsport
17 21
18 22
19 23
20 24
KIT KIT
PNP PNP
RTF RTF
...Danach wird das Dekor wie abgebildet angedrückt
…
... Jetzt wird die Schwimmerstrebe bis zur Mitte durch-
geschoben.
...puis les autocollants sont pressés comme indiqué... ... Maintenant, la jambe de force du otteur est
poussée vers le milieu.
...then the decals are pressed on as shown... ... Now the oat strut is pushed through to the middle.
KIT KIT
PNP PNP
RTF RTF
... Jetzt wird das Dekor von der vorderen Trägerfolie
gelöst und aufgeklebt.
Die Schwimmerstrebe ist nun auf der Unterseite des
Leitwerksträgers xiert.
... Les décalcomanies doivent maintenant être reti-
rées de la feuille de support avant et collées.
Le otteur est maintenant xé sur la face inférieure
de la poutre de queue.
... Now the decals have to be removed from the
front carrier foil and glued on.
The oat strut is now xed to the underside of the tail
boom.
KIT KIT
PNP PNP
RTF RTF
Die restlichen Dekorteile werden in gleicher Reihen-
folge aufgeklebt.
Die roten Distanz-Röhrchen werden auf dem langen
Fahrwerksdraht und auf die kurze Heckstrebe aufge-
schoben.
Les autres parties de la décalcomanie sont collées
dans le même ordre.
Les tubes de distance rouges sont poussés sur le long
câble du châssis et sur les jambes arrières.
The remaining decal parts are glued on in the same
order.
The red distance tubes are pushed onto the long
chassis wire and onto the short rear strut.
KIT KIT
PNP PNP
RTF RTF
3 Stück Gummiringe werden wie dargestellt auf die
Schwimmerstrebe aufgeschoben …
Nach dem die Schwimmer an dem Schwimmerhalter
aufgeschoben sind, werden diese mit den Stellringen
wie dargestellt gesichert.
3 élastiques en caoutchouc sont glissés sur le support
du otteur comme indiqué ...
Après avoir été poussés sur le support de otteur, les
otteurs sont xés à l‘aide des bagues de réglage
comme indiqué.
3 rubber rings are pushed onto the oat strut as
shown ...
After the oats have been pushed onto the oat
holder, they are secured with the adjusting rings as
shown.
DE/EN/FR
5
BAU- UND BETRIEBSANLEITUNG / INSTRUCTIONS AND USER MANUAL / MANUEL D´UTILISATION
Modellsport
25 29
26 30
27
31
28
KIT KIT
PNP PNP
RTF RTF
Die Standard-Luftschaube wird entfernt … Bild zeigt den Wingo 2 mit der Aero-Nase (Artikel-
nummer: 26560037, separat erhältlich) gesichert mit
Magneten.
L‘hélice standard doit être enlevée... La photo montre le Wingo 2 avec le nez aérodyna-
mique (numéro d‘article : 26560037, vendu séparé-
ment) xé par des aimants.
The standard prop have to be removed... Picture shows the Wingo 2 with the aero nose (item
number: 26560037, sold separately) secured with
magnets.
KIT KIT
PNP PNP
RTF RTF
... Und durch die im Baukasten beiliegende größere
Luftschraube ersetzt, da für den Wasserstart mehr
Schub notwendig ist.
Beim starten des Wingo2 mit Schwimmern ist folgendes
zu beachten:
1. Den Wingo2 neu auswiegen, da die Schwimmer und die
Aero-Nase ein neues Gewichtsverhältnis haben.
2. Um keinen unnötigen Ballast mitzuschleppen, können auch
2 Stück 3s 1100mAH Lipo Akkus mit einem XT 30 Stecker parallel
gesteckt werden.
... Et remplacée par l‘hélice plus grande incluse dans
le kit, car plus de poussée est nécessaire pour le
démarrage sur l‘eau.
Lorsque vous démarrez le Wingo2 avec des otteurs, veuillez noter ce qui suit :
1. Pesez à nouveau le Wingo2 car les otteurs et le nez de l‘avion ont un nouveau rapport de poids.
2. Pour éviter un lestage inutile, 2 pièces de batterie 3s 1100mAH avec une prise XT 30 peuvent être connectées en parallèle.
... And replaced by the larger prop included in the
kit, because more thrust is needed for the water start.
When starting the Wingo2 with oats please note the
following:
1. Re-weigh the Wingo2 because the oats and aero nose have
a new weight ratio.
2. To avoid unnecessary ballast, 2 pieces of 3s 1100mAH batte-
ries with an XT 30 plug can be connected in parallel.
KIT
KIT
PNP
PNP
RTF
RTF
Wir empfehlen, die Sitzschale gegen die ...
Fahren Sie den Wingo2 mit niedriger Drehzahl zur
Startstelle und schalten dann den Motor aus.
Der Wingo2 stellt sich automatisch wie ein Windzeiger
gegen den Wind.
Nous recommandons de placer la coque du siège
contre ...
Conduisez la Wingo 2 à basse vitesse jusqu‘au point
de départ, puis coupez le moteur.
Le Wingo2 se positionne automatiquement contre le
vent comme un anémomètre.
We recommend placing the seat shell against the ...
Drive the Wingo2 at low speed to the starting point
and then switch off the engine.
The Wingo2 automatically positions itself against the
wind like a wind pointer.
KIT PNP RTF
... Aero-Nase zu ersetzten (separat erhältlich). Damit
wird verhindert, dass Spritzwasser in den Rumpf
gelangt und dadurch Platz für 2 Akkus vorhanden ist,
um die Flugzeit zu verdoppeln, und den Schwerpunkt
ohne Trimmgewicht-Zugabe zu erreichen.
... Aero-Nose (vendu séparément). Cela empêche
les éclaboussures d‘eau de pénétrer dans le fuse-
lage, laissant de la place pour 2 batteries an de
doubler la durée du vol et d‘atteindre le centre de
gravité sans ajouter de masses d‘équilibrage.
... Aero-Nose (sold separately). This prevents splashing
water from entering the fuselage, leaving room for 2
batteries to double the ight time and to reach the
centre of gravity without adding trim weights.
Achtung: Beachten Sie, dass die gewölbte Fläche
in Flugrichtung zeigt!
Caution: Make sure that the curved surface is poin-
ted in ight direction!
Attention: Veillez à ce que la surface courbée soit
orientée dans la direction du vol !
TIPP: Vorteil: Sie haben mit den beiden Akkus doppelt so viel Energie an Bord und das erhöht die Flugzeit deutlich.
TIP: Advantage: With the two batteries you have double the capacity on board and this increases the ight time
signicantly.
CONSEIL: Avantage : Avec les deux batteries, vous aurez le double de capacité à bord et cela augmente con-
sidérablement la durée du vol.
Achtung: Der dem Wingo2 beiliegende Serien-Regler ist für den Einsatz von 2 Stück 3s 1100 mAh Lipo-Akku
parallel geschaltet nicht geeignet. Bedingt durch die längere Motorlaufzeit von ca. 20 Minuten, kommt es zur
Überlastung des BEC, was zur Zerstörung des Reglers führt. Es wird daher speziell für diesen Einsatz ein BL-Regler
mit höherer BEC-Auslegung empfohlen.
Caution: The serial controller supplied with the Wingo2 is not suitable for the use of 2 pieces of 3s 1100 mAh lipo
battery connected in parallel. Due to the longer motor running time of approx. 20 minutes, the BEC is overloa-
ded, which leads to the destruction of the controller. A brushless controller with a higher BEC rating is therefore
recommended especially for this application.
Attention: Le contrôleur de série fourni avec le Wingo 2 n‘est pas adapté pour 2 lipos de 3s 1100 mAh connec-
tées en parallèle. En raison de la durée de fonctionnement du moteur plus longue (environ 20 minutes), le BEC
est surchargé, ce qui entraîne la destruction du contrôleur. Un contrôleur Brushless avec un BEC plus puissant est
donc recommandé spécialement pour cette application.
DE/EN/FR
6
BAU- UND BETRIEBSANLEITUNG / INSTRUCTIONS AND USER MANUAL / MANUEL D´UTILISATION
Modellsport
32 36
33 37
34
38
35
KIT KIT
PNP PNP
RTF RTF
Fahren Sie die Drehzahl kontinuierlich hoch, der Win-
go2 geht auf die Schwimmerstufe.
Kurz vor dem Aufsetzen leicht ziehen.
Augmentez continuellement la vitesse, le Wingo2
passe au réglage de otteur.
Tirez légèrement juste avant l‘atterrissage.
Increase the speed continuously, the Wingo2 goes to
the oat setting.
Pull slightly just before landing.
KIT KIT
PNP PNP
RTF RTF
Wingo2 beschleunigt auf der Schwimmerstufe. Der Wingo2 gleitet kurz beim Aufsetzen.
Le Wingo2 accélère sur le réglage du otteur. Le Wingo2 glisse peu avant l‘atterrissage.
Wingo2 accelerates on the oat setting. The Wingo2 glides shortly when landing.
KIT
KIT
PNP
PNP
RTF
RTF
Nur wenige Meter Startstrecke reichen aus, bzw. ein
leichtes ziehen am Höhenruder und der Wingo2 hebt
ab.
Anmerkung:
Durch den Druckpropeller ist der Wingo2 gut im Wasser zu steuern. Sollte durch eine Windböe der
Wingo2 umgeworfen werden ist das nicht schlimm, da sich das Modell an den Schwimmer-Spitzen
und den Flächen-Ohren im Wasser abstützt. Warten Sie einfach ab bis der Wind Ihren Wingo2 an
das Ufer treibt und bergen Sie dann Ihr Modell.
Quelques mètres seulement de distance de décolla-
ge sufsent, ou une légère traction sur la profondeur
et le Wingo2 décolle.
Note :
Grâce à l‘hélice de poussée, le Wingo2 est facile à diriger dans l‘eau. Si le Wingo2 est renversée
par un coup de vent, ce n‘est pas un gros problème, car le modèle est soutenu dans l‘eau par les
otteurs et les bouts d‘ailes. Il suft d‘attendre que le vent pousse votre Wingo2 vers le rivage et
de récupérer votre modèle.
Only a few meters of take-off distance are sufcient,
or a light pull on the elevator and the Wingo2 takes
off.
Note:
Thanks to the push prop the Wingo2 is easy to steer in the water. If the Wingo2 is knocked over
by a gust of wind, this is not a big problem, because the model is propped up in the water by
the oattips and the wingtips. Just wait until the wind drives your Wingo2 to the shore and then
recover your model.
KIT PNP RTF
Der Landeanug erfolgt ebenfalls gegen den Wind.
Einfach den Gasknüppel kontinuierlich zurückfahren
und der Wingo2 schwebt aus.
L‘approche à l‘atterrissage se fait également contre
le vent. Il suft de baisser continuellement la manette
des gaz et le Wingo2 se met à otter.
The landing approach is also against the wind. Simply
move the throttle stick back continuously and the
Wingo2 will oat out.
Achtung: Versuchen Sie niemals den auf dem Rücken treibenden Wingo2 mit dem Elektro-
Motor an das Ufer zu kommen, denn der Propeller berührt dabei das Wasser und zerstört durch
die Überlastung den Regler und Motor. Der Hersteller lehnt daher grundsätzlich Ersatzansprüche
diesbezüglich ab!
Für Druckfehler wird keine Haftung übernommen. Technische Änderung unter Vorbehalt.
Caution: Never try to bring the Wingo2 oating on its back to shore with the electric motor, as
the propeller will touch the water and destroy the ESC and motor due to overloading. The ma-
nufacturer will reject any warranty claims in these cases!
No liability is accepted for printing errors. Technical changes are subject to reservation.
Attention: N‘essayez jamais de ramener le Wingo 2 ottant sur le rivage avec le moteur élec-
trique, car l‘hélice toucherait l‘eau et détruirait le contrôleur et le moteur en cas de surcharge.
Le fabricant rejette donc toute demande d‘indemnisation à cet égard ! Aucune responsabilité
n‘est acceptée pour les erreurs d‘impression. Modications techniques sous réserve.
DE/EN/FR
7
BAU- UND BETRIEBSANLEITUNG / INSTRUCTIONS AND USER MANUAL / MANUEL D´UTILISATION
Modellsport
GEWÄHRLEISTUNG
Unsere Artikel sind mit den gesetzlich vorgeschriebenen 24 Monaten Gewährleistung ausgestattet.
Sollten Sie einen berechtigten Gewährleistungsanspruch geltend machen wollen, so wenden Sie
sich immer an Ihren Händler, der Gewährleistungsgeber und für die Abwicklung zuständig ist. Wäh-
rend dieser Zeit werden evtl. auftretende Funktionsmängel sowie Fabrikations oder Materialfehler
kostenlos von uns behoben. Weitergehende Ansprüche z. B. bei Folgeschäden, sind ausgeschlossen.
Der Transport zu uns muss frei erfolgen, der Rücktransport zu Ihnen erfolgt ebenfalls frei. Unfreie
Sendungen können nicht angenommen werden. Für Transportschäden und Verlust Ihrer Sendung
können wir keine Haftung übernehmen. Wir empfehlen eine entsprechende Versicherung.
Zur Bearbeitung Ihrer Gewährleistungsansprüche müssen folgende Voraussetzungen erfüllt werden:
• Legen Sie Ihrer Sendung den Kaufbeleg (Kassenzettel) bei.
• Die Geräte wurden gemäß der Bedienungsanleitung betrieben.
• Es wurden ausschließlich empfohlene Stromquellen und original robbe Zubehör verwendet.
• Feuchtigkeitsschäden, Fremdeingriffe, Verpolung, Überlastungen und mechanische Beschädi-
gungen liegen nicht vor.
• Fügen Sie sachdienliche Hinweise zur Aufndung des Fehlers oder des Defektes bei.
Dieses Symbol bedeutet, dass elektrische und elektronische Kleingeräte am
Ende ihrer Nutzungsdauer, vom Hausmüll getrennt, entsorgt werden müssen.
Entsorgen Sie das Gerät bei Ihrer örtlichen kommunalen Sammelstelle oder
Recycling-Zentrum. Dies gilt für alle Länder der Europäischen Union sowie
anderen Europäischen Ländern mit separatem Sammelsystem.
ENTSORGUNG
VERSICHERUNG
Bodengebundene Modelle sind üblicherweise in einer Privathaftpichtversicherung mitversichert. Für
Flugmodelle ist eine Zusatzversicherung oder Erweiterung erforderlich. Überprüfen Sie Ihre Versiche-
rungspolice (Privathaftpicht) und schließen sie ggf. eine geeignete Versicherung ab.
HAFTUNGSAUSSCHLUSS
Sowohl die Einhaltung der Montage und Betriebsanleitung als auch die Bedingungen und Methoden
bei Installation, Betrieb, Verwendung und Wartung der Modellbaukomponenten können von Robbe
Modellsport nicht überwacht werden. Daher übernehmen wir keinerlei Haftung für Verluste, Schaden
oder Kosten, die sich aus fehlerhafter Verwendung und Betrieb ergeben oder in irgendeiner Weise
damit zusammenhängen. Soweit gesetzlich zulässig ist die Verpichtung zur Schadenersatzleistung,
gleich aus welchen Rechtsgründen, auf den Rechnungswert der an dem schadensstiftenden Ereig-
nis unmittelbar beteiligten Robbe-Produkten begrenzt.
WARRANTY
Our articles are equipped with the legally required 24 months warranty. Should you wish to assert a
justied warranty claim, always contact your dealer, who is responsible for the warranty and the pro-
cessing. During this time, any functional defects that may occur, as well as manufacturing or other
problems, will be rectied.
Material defects corrected by us free of charge. Further claims, e.g. for consequential damages, are
excluded.
The transport to us must be free, the return transport to you is also free. Freight collect shipments can-
not be accepted. We cannot accept liability for transport damage and loss of your consignment.
We recommend appropriate insurance.
To process your warranty claims, the following requirements must be met:
• Attach the proof of purchase (receipt) to your shipment.
• The units have been operated in accordance with the operating instructions.
• Only recommended power sources and original robbe accessories have been used.
• There is no moisture damage, external interference, reverse polarity, overloading or mechanical
damage.
• Attach relevant information for nding the fault or defect.
This symbol means that small electrical and electronic devices must be dis-
posed of at the end of their useful life, separated from the household refuse.
Dispose of the device at your local municipal collection point or recycling
centre. This applies to all countries of the European Union and other Europe-
an countries with a separate collection system.
DISPOSAL
INSURANCE
Ground-based models are usually covered by personal liability insurance. Additional insurance or
extension is required for aircraft models. Check your insurance policy (private liability) and take out
suitable insurance if necessary.
DISCLAIMER
Robbe Modellsport cannot monitor compliance with the assembly and operating instructions or the
conditions and methods for installation, operation, use and maintenance of the model components.
Therefore, we accept no liability for losses, damage or costs arising from or in any way connected
with incorrect use and operation.To the extent permitted by law, the obligation to pay damages,
irrespective of the legal grounds, shall be limited directly to the invoice value of the claims arising
from the event causing the damage.
DE/EN/FR
8
BAU- UND BETRIEBSANLEITUNG / INSTRUCTIONS AND USER MANUAL / MANUEL D´UTILISATION
Modellsport
Modellsport
Robbe Modellsport
Industriestraße 10
4565 Inzersdorf im Kremstal
Österreich
Telefon: +43(0)7582/81313-0
Mail: [email protected]
UID Nr.: ATU69266037
„robbe Modellsport“ ist einge-
tragenes Markenzeichen.
Irrtum, Druckfehler und
technische Änderungen
vorbehalten.
Copyright 2020
Robbe Modellsport 2020
Kopie und Nachdruck, auch
auszugsweise, nur mit
schriftlicher Genehmigung.
Service-Adresse
Über Ihren Fachhändler oder:
Robbe Modellsport,
Industriestraße 10,
4565 Inzersdorf im Kremstal
[email protected]
+43(0)7582-81313-0
Robbe Modellsport
Industriestraße 10
4565 Inzersdorf im Kremstal
Austria
Phone: +43(0)7582/81313-0
Mail: [email protected]
UID No.: ATU69266037
„robbe Modellsport“ is a
registered Trademark.
Errors, misprints and technical
changes reserved.
Copyright 2020
Robbe Modellsport 2020
Copy and reprint only with our
permission.
Service-Address
Contact your Dealer or:
Robbe Modellsport, Industriestra-
ße 10,
4565 Inzersdorf im Kremstal
[email protected],
+43(0)7582-81313-0
Robbe Modellsport
Industriestraße 10
4565 Inzersdorf im Kremstal
Autriche
Téléphone: +43(0)7582/81313-0
Email: [email protected]
UID Nr.: ATU69266037
„robbe Modellsport“ est une
marque déposée.
Sous réserve d‘erreurs, de
fautes d‘impression et de
modications techniques.
Copyright 2020
Robbe Modellsport 2020
Copie et réimpression,
même partielle,
uniquement avec
autorisation écrite.
Service
Par l‘intermédiaire de votre
revendeur spécialisé ou :
Robbe Modellsport,
Industriestraße 10,
4565 Inzersdorf im Kremstal
[email protected]
+43(0)7582-81313-0
INVERKEHRBRINGER / DISTRIBUTOR / MISE SUR LE MARCHÉ
Made in Germany
GARANTIE
Nos articles sont couverts par la garantie légale de 24 mois. Si vous souhaitez faire valoir un droit
de garantie justié, veuillez toujours contacter votre revendeur, qui est le garant et responsable du
traitement. Pendant ce temps, tout défaut de fonctionnement qui pourrait survenir ainsi que les dé-
fauts de fabrication ou de fabrication, ou erreurs matérielles seront corrigées gratuitement par nos
soins. D‘autres droits, par exemple pour des dommages consécutifs, sont exclus.
Le transport jusqu‘à nous doit être gratuit, le transport de retour jusqu‘à vous est également gratuit.
Les envois non prépayés ne peuvent être acceptés. Nous déclinons toute responsabilité pour les
dommages de transport et la perte de votre envoi. Nous recommandons une assurance appro-
priée.
Pour traiter vos demandes de garantie, les conditions suivantes doivent être remplies:
• Veuillez joindre la preuve d‘achat (reçu) à votre envoi.
• Les appareils ont été utilisés conformément au mode d‘emploi.
• Seules les sources d‘alimentation recommandées et les accessoires d‘origine ont été utilisés.
• Il n‘y a pas de dommages dus à l‘humidité, d‘interventions extérieures, d‘inversion de polarité, de
surcharges et de dommages mécaniques.
• Inclure les informations pertinentes pour localiser le défaut ou le défaut.
Ce symbole indique que les petits appareils électriques et électroniques doivent
être éliminés séparément des déchets ménagers à la n de leur vie utile. Jetez
l‘appareil dans un point de collecte municipal ou un centre de recyclage local.
Ceci s‘applique à tous les pays de l‘Union européenne ainsi qu‘aux autres pays
européens disposant d‘un système de collecte sélective.
MISE AU REBUT
ASSURANCE
Les modèles au sol sont généralement couverts par une assurance responsabilité civile privée. Une
assurance supplémentaire ou une prolongation est requise pour les modèles d‘avion. Vériez votre
police d‘assurance (responsabilité civile) et, si nécessaire, souscrivez une police d‘assurance appro-
priée.
AVIS DE NON-RESPONSABILITÉ
Robbe Modellsport ne peut contrôler le respect de la notice de montage et d‘utilisation ainsi que
les conditions et méthodes d‘installation, de fonctionnement, d‘utilisation et d‘entretien des com-
posants du modèle. Par conséquent, nous n‘acceptons aucune responsabilité, quelle qu‘elle soit,
pour toute perte, dommage ou dépense découlant de l‘utilisation ou de l‘exploitation inappropriée
de ce modèle ou y étant liée de quelque façon que ce soit. Dans la mesure où la loi le permet,
l‘obligation de payer des dommages-intérêts, quelle qu‘en soit la raison juridique, est directement
imputable à la valeur facturée de l‘événement à l‘origine du dommage.
www.robbe.com

Other manuals for Wingo 2

2

This manual suits for next models

1

Other ROBBE Toy manuals

ROBBE Wingo 2 Instruction Manual

ROBBE

ROBBE Wingo 2 Instruction Manual

ROBBE Nino 3267 User manual

ROBBE

ROBBE Nino 3267 User manual

ROBBE PILATUS PC-6 ARF Operating instructions

ROBBE

ROBBE PILATUS PC-6 ARF Operating instructions

ROBBE Eolo R 22 User manual

ROBBE

ROBBE Eolo R 22 User manual

ROBBE Air Beaver Instruction Manual

ROBBE

ROBBE Air Beaver Instruction Manual

ROBBE Sopwith Pub 3126 User manual

ROBBE

ROBBE Sopwith Pub 3126 User manual

ROBBE Spirit Fun PLUS RTF User manual

ROBBE

ROBBE Spirit Fun PLUS RTF User manual

ROBBE BK 117 User manual

ROBBE

ROBBE BK 117 User manual

ROBBE 26950002 User manual

ROBBE

ROBBE 26950002 User manual

ROBBE ARCUS E-RISE 500 RTF User manual

ROBBE

ROBBE ARCUS E-RISE 500 RTF User manual

ROBBE HeliCommand 3A User manual

ROBBE

ROBBE HeliCommand 3A User manual

ROBBE Curtiss Jenny JN-4 User manual

ROBBE

ROBBE Curtiss Jenny JN-4 User manual

ROBBE AMX-Jet User manual

ROBBE

ROBBE AMX-Jet User manual

ROBBE Twister 3121 User manual

ROBBE

ROBBE Twister 3121 User manual

ROBBE Pilatus PC21 Nano-Racer Operating instructions

ROBBE

ROBBE Pilatus PC21 Nano-Racer Operating instructions

ROBBE Amica User manual

ROBBE

ROBBE Amica User manual

ROBBE 3341 User manual

ROBBE

ROBBE 3341 User manual

ROBBE TOMAHAWK SPORT BOLT User manual

ROBBE

ROBBE TOMAHAWK SPORT BOLT User manual

ROBBE Spad User manual

ROBBE

ROBBE Spad User manual

ROBBE Gemini User manual

ROBBE

ROBBE Gemini User manual

ROBBE Junior Wing User manual

ROBBE

ROBBE Junior Wing User manual

ROBBE PAULA IV Instruction Manual

ROBBE

ROBBE PAULA IV Instruction Manual

ROBBE millennium 60 II User manual

ROBBE

ROBBE millennium 60 II User manual

ROBBE FW001001 User manual

ROBBE

ROBBE FW001001 User manual

Popular Toy manuals by other brands

Eduard 48 880 manual

Eduard

Eduard 48 880 manual

DOM FAMILY 398 instructions

DOM FAMILY

DOM FAMILY 398 instructions

Lionel SD80MAC owner's manual

Lionel

Lionel SD80MAC owner's manual

Fisher-Price FNV40 quick start guide

Fisher-Price

Fisher-Price FNV40 quick start guide

Fisher-Price STAR STATION H8908 instruction sheet

Fisher-Price

Fisher-Price STAR STATION H8908 instruction sheet

Fisher-Price BFH64 manual

Fisher-Price

Fisher-Price BFH64 manual

marklin 37258 user manual

marklin

marklin 37258 user manual

Fisher-Price T5053 quick start guide

Fisher-Price

Fisher-Price T5053 quick start guide

Thames & Kosmos 623715 Experiment manual

Thames & Kosmos

Thames & Kosmos 623715 Experiment manual

Faller LIQUID MANURE PIT manual

Faller

Faller LIQUID MANURE PIT manual

Hangar 9 Sundowner 50 ARF Assembly manual

Hangar 9

Hangar 9 Sundowner 50 ARF Assembly manual

Bengtson Company Albatros DII instructions

Bengtson Company

Bengtson Company Albatros DII instructions

Kohs & Company Norfolk & Western Y6a Mallet Operation and maintenance instructions

Kohs & Company

Kohs & Company Norfolk & Western Y6a Mallet Operation and maintenance instructions

Power Wheels BCK92 owner's manual

Power Wheels

Power Wheels BCK92 owner's manual

Little Tikes CAPE COTTAGE PLAYHOUSE 637902M Assembly instructions

Little Tikes

Little Tikes CAPE COTTAGE PLAYHOUSE 637902M Assembly instructions

INTERACTIVE TOY CONCEPTS iFly VAMP instruction manual

INTERACTIVE TOY CONCEPTS

INTERACTIVE TOY CONCEPTS iFly VAMP instruction manual

Eduard 48 612 manual

Eduard

Eduard 48 612 manual

Barbie Fairytopia instructions

Barbie

Barbie Fairytopia instructions

manuals.online logo
manuals.online logoBrands
  • About & Mission
  • Contact us
  • Privacy Policy
  • Terms and Conditions

Copyright 2025 Manuals.Online. All Rights Reserved.