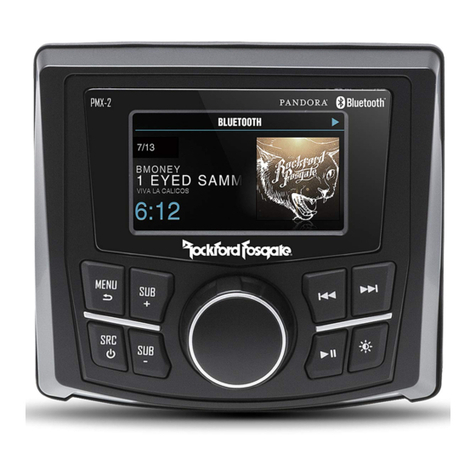
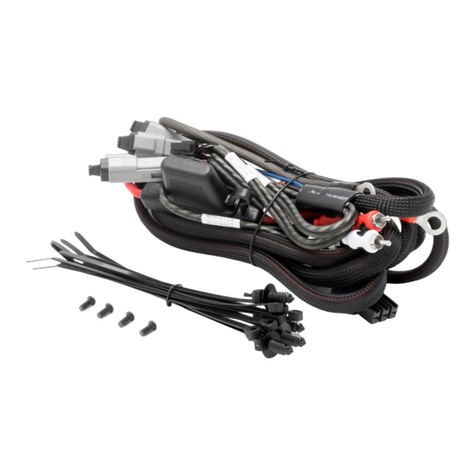
Rockford Fosgate RFRNGR-PMXDK Guide

•
ELEMENf->~
&<6READY"
POLARIS®
RANGER®
PMX
DASH
KIT
RFRNGR-PMXDK
+
"'\cxldbrd(osqab.
Installation & Operation

Introduction
Dear
Customer,
Congratulations
on
your purchase ofthe world's finest brand of
audio products.
At
Rockford
Fosgate
we
are
fanatics about musical
reproduction at its best,
and
we
are
pleased
you
chose
our product.
Through
years
of
engineering expertise, hand craftsmanship
and
critical
testing procedures,
we
have
created awide
range
of products that
reproduce music with all the clarity
and
richness
you
deserve.
For
maximum performance
we
recommend
you
have
your new
Rockford
Fosgate
product installed
by
an
Authorized
Rockford
Fosgate
Dealer,
as
we
provide specialized trainingthrough
Rockford
Technical
Training Institute
(RTTI).
Please
read
yourwarranty
and
retain your
receipt
and
original carton for possible future
use.
Great
product
and
competent installations
are
only a
piece
ofthe puzzle
when
it
comes
to your
system.
Make
sure
thatyour installer
is
using
100%
authentic installation
accessories
from
Rockford
Fosgate
in
your
installation.
Rockford
Fosgate
has
everything
from
RCA
cables
and
speaker
wire to powerwire
and
batteryconnectors. Insist
on
it! After all,
you
r new
system
deserves
nothing but the
best.
To
add
the finishing touch to your new
Rockford
Fosgate
image order
your
Rockford
accessories,
which include everything from T-shirts to
hats.
Visit our
web
site for the latest information
on
all
Rockford
products;
www
.rockfordfosgate.com
or,
in
the
U.S.
call1-800-669-9899 or
FAX
1-800-398-3985.
For
all other
countries, call
+001-480-967-3565
or
FAX
+001-480-966-3983.
Table
of
Contents
2
3
Introduction
Installation
4 Warranty
If,
after reading your manual,
you
still
have
questions regarding this
product,
we
recommend that
you
see
your
Rockford
Fosgate
dealer.
If
you
need
further
assistance,
you
can
call
us
direct at
1-800-669-
9899
.
Be
sure
to
have
yourserial number, model number
and
date
of
purchase available
when
you
call.
Safety
This
symbol with
"WARNING"
is
intended to
alertthe
user
to the
presence
of important
instructions.
Failure
to
heed
the instructions
will result
in
severe
injury or death.
Lh
WARNING
This
symbol with
"CAUTION"
is
intended to
alertthe
user
to the
presence
of important
instructions.
Failure
to
heed
the instructions
can
result
in
injuryor unit damage. A CAUTION
•
To
prevent injury and
da
m
age
to the unit, please read and
follow the instructions in this man
ua
l.
We want you to enjoy
this system, not
get
a headache.
• If you feel unsure
about
installing this system yourself, have
it installed
by
a
qua
lified Rockford Fosgate technician.
• Before installation, di
sconnect
the battery negative (-)
terminal to prevent
damage
to
the unit, fire and/or possible
injury ·
Contents
(1)
Main
Dash
Bezel
(1)
PMX
-2Carrier
(1)
PMX
-0Carrier
•
PMX-2
Vehicle
Harness
PMX
-0
Vehicle
Harness
Installation Tools
PMX-0
Power
Harness
•
(4)
ButtConnectors
(8)
Carrier Mounting
Screws
• Plastic
Wire
Tie
Wraps
• Grommet
The
following
is
alist of
suggested
tools
needed
for installation:
T-20
Torx
Driver
• 3
mm
Allen
Driver
10
mm
SocketI
Wrench
1.75"
Hole
Saw
Drill
Drill Bit
•
Wire
Cutters
Panel
Tool
Jigsaw
Masking
Tape
File
rt
~fill
'1
Jd
f
Jrf.
(;c
,~or
1',or All
<'.
iL
Pr>scrvE::
J ROCKF()Fl J
FCJ<;c;,.,_
E c
,d
ass()C
L'c
lc
]C':
vv
Jer<
JPr Illa
bit'
art..
rAqJst,'rE
d
t
1•
r~
f
h,ll
kforrJ
( 0
~'(J
r 11
')1'
'l
r Unl
cJ
s,)''s ,·
ld,nr
[
•tr
•r
r
Jll
trice All uther tr c >I'Tl.J'<S (
r,
r.
pr')ptr
J
()(
t
'If
f"'W
•ct,v,
lW'le
Sp( c r t
,n__,
· b
L'C-
c u
n!Jn
vv
tr
ut
'10
1 C<
Installation Considerations
This section focuses
on
s
ome
considerations for installing
your
Polaris
RA
NGER
dash kit. Thisda
sh
kit
is
desigend
to
wo
rk
in
conjuction with
Roc
kf
or
d'
s other
RANGE
Rspecific audio kits and parts.
If you feel
un
sure abo
ut
installingthis system yourse
lf,
have it installed
by a
qu
alified technician.
When
drilling
hole
s,
ma
ke sure
what
is
on
the
o
th
erside.
Be
sure
that
any electrical, fuel lines
or
any
other
important
components are free
and clearfrom
the
area.
~WARNING
A CAUTION
A CAUTION
Before installation, disconnect
the
battery
negative(-) terminal to prevent da
ma
ge
to
the unit, fire and/
or
possible injury.
Before beg
inning
any installation, fol
low
th
eses
impl
e rules:
Be
sure
to
carefully read and understand the
instructions
bef
ore at
tempting
to
install this
wiring kit.
• Cons
ult
your
UT
V'sservi
ce
manual for model specific inform
at
i
on
.
M
ode
lsmay d
iff
er from y
ea
r
to
year depen
di
ng
on factory
op
tions
and after
mar
ket accesso
ri
es
added.
Th
is
dash kit isspecifically designed
to
w
or
k with Rockford
Fo
sgate's
comp
act sou
rce
units.
With
th
e
addit
ion of an amplifier
or
source unit, be sure
th
at your
current chargingsystem is
in
proper
wo
rking order.
V
is
it
rockfordfosgate.com for
mo
re com
pr
ehensive product
informa
ti
o
n.
Vis
it
ourVouTube channel for co
mpr
ehensive
in
stalla
ti
on videos
demonstratingc
omplete
installation guides and install tips.
NEED
HELP
WITH
YOUR
INSTALLATION?
@
UOUTUBE
VISIT
OUR
CHANNEL
FOR
A
COMPLETE
J'
INSTALLATION
VIDEO
AND
OTHER
TIPS
WWW.YOUTUBE.COMJUSERIROCKFORDFOSGATE
Applicable
Models:
Full Size Polaris
RANGER
900/1000/900
Crew/1000 Crew
Thisd
as
h k
it
enclosure isd
es
igned
to
wo
rk
wi
th
Rockford Fosgate's
R
FR
N
GR
-K8 amplifier kit and
compact
source u
nit
s.The enclosure can
be installed
in
both
Cr
ew
a
nd
non-crew
mo
dels on the
pa
sse
nger si
de
of
the vehicle.
St
ep
1.
Remove the t
op
of thedash.
Th1
swill giveyou acce
ss
for
installi
ng
the dash kit and wir
es.
Step 2. Remove
th
e existingf
ac
t
ory
d
as
h bezel with yo
ur
To
rx d
ri
ver.
Step
3.
Disconnect any existing switch
es
or hardware on
th
e original
beze
l.
Installation
Step
4.
Mount
the
source
unit
to the newdash bezel.
NOT
E: Ifyou have heater
cont
rols,v
en
ts
or
additional switches, use
the
guides
on
the back
of
the
bezel asa guide
to
cut
out
hol
es.
Be
sure
to
cut
your hol
es
prior
to
moun
t
ing
any source unit.
Dash Kit
with
PMX-2/PMX-3 Option
~
~:
~
~
~
(}
-------------
~
~
-
-
--
-
- -
--
...
_______
...
.,.-
---
Dash Kit Assembly
with
PMX-0 Option
S
tep
5.
Drill
an
access
ho
le be
hi
nd where the so
ur
ce will go in
th
e
fir
ewall
us
inga 1.75" hole saw.
Step 6.
In
stall
th
esupplied
grommet
in
to
the
access hole.
Step
7.
Ru
n the so
ur
ce
unit harn
ess
through hole
in
firewall toward
inside
of
thevehicl
e.
Step
8.
Connect the
RED
and
BL
ACKwir
es
on
the harness
to
the
factory terminal bl
oc
k.
NO
TE:
When using
th
e
PMX
-0 youwill need
to
connect the
YE
LLOWw
ir
e
to
th
e cigarette lighe
r.
Step 9. Plug
th
e ha
rn
ess
into the back of the so
ur
ce
unit.
Step
10.
Sec
ur
e
th
e dash using the (2) factory scre
ws.
Step
11
Reinstall the dash t
op
.

Warranty
Rockford Corporation offers a limited
warranty
on Rockford Fosgate products on
the
following terms:
Length
of
Warranty
POWER
Amplif
iers-
2
Yea
rs
BMW®
Direct Fit Speakers - 2
Years
P
UN
CH®
&
PR
I
ME
®
Amplifi
ers
- 1
Year
Spe
akers,
Si
gna
l
Processors,
Accessories
a
nd
Capac
itors - 1
Year
All
marine, motorcycle,motorsport products- 2
Ye
ars
Any
Factory
Refurbi
she
d P
ro
duct -
90
Days
(rece
ipt
requ
ir
ed)
What is Covered
Thi
s
wa
rran
ty appli
es
only to Rockford
Fosg
at
eproductssold
to
consume
rs
by autho
ri
ze
d
Rock
ford F
osga
tede
ale
rsinthe United Stat
es
ofAmerica.
Products purch
ased
by consumersfrom
an
Authorized Rockford Fosgate Dealer in another
cou
ntry
are
cover
ed
only by thatcountr
y's
Distributor and
n
ot
by
Ro
ckford Corporation.
Who is Covered
This
wa
rranty covers only the
or
igi
na
l purchaser of
Rockfo
rd
product purchased from
an
autho
rized
Rockford
Fosg
ate dealerin t
he
Un
ited
States.
In
orderto
receive
servi
ce,
the
pu
rchaser
mu
st provide
Roc
kford with acopy of the receipt stating t
he
customer name, dealer
na
me, product
pu
rchased
and date ofpurchase.
Products found to bedefective duringthe
wa
rranty
per
i
od
will be
re
pair
ed
or
repl
ace
d
(w
ith a product dee
me
d to be
eq
uivalent) at
Ro
ckfor
d's
discreti
on.
What is Not Covered
1.
Dam
age
c
au
se
d by
acc
ident, abuse, improper installation, operatio
ns,
theft, water
(o
n n
on
-Element R
ea
dy product
s)
.
2.
Any
cost orexpense related to the removalor
re
installation of product.
3.
Se
rvice performed by anyone other than Rockford or
an
au
th
or
i
zed
Rockford
Fosga
teservi
ce
cente
r.
4.
Any product w
hi
ch
has
had
th
e
ser
ial number defaced, alter
ed
,
or
removed.
5.
Subsequent damage to other
co
mpon
en
ts.
6.
A
ny
product purch
ased
outsidethe
U.S.
7.
Any
product not
pu
rch
ased
from
an
author
ized
Roc
kfo
rd F
osga
te
dea
le
r.
Re
fer to rockfordfosgate.com
dea
ler locator
fo
rmoredetail.
Limit on Implied Warranties
Any
implied
wa
rranti
es
includingwarranties offitness for
use
and merchantability
are
limited
in
durati
on
to the
pe
ri
od
of
the
exp
re
ss
wa
r
ra
nty set
forth above. Some
sta
t
es
do not allow limitations
on
the length
of
an
implied
wa
rr
an
t
y,
so
thislimitation may not apply.
No
person isautho
rized
to
assume
fo
r
Rock
fo
rd
Fo
sg
ate a
ny
other liability in conn
ec
tionwith t
he
saleofthe produc
t.
How to Obtain Service
Pl
ease
ca
lll-
800
-
669
-
9899
for
Ro
ckfo
rd
Cus
tomer
Se
rvi
c
e.
You must obtain
an
R
A#
(Re
turn Authorizati
on
number)to return
any
product to Rockford
Fosgate.
Yo
uare responsible for shipme
nt
of product to Rockford.
EU Warranty
Th
is
product meets the curre
nt
EUwarranty r
eq
u
ire
me
nt
s,
see
yourAuthori
zed
dealer for detail
s.

-Installation assistance available at: -
www.rockfordfosgate.com/rftech
600 South Rockford Drive • Tempe, Arizona 85281 United States
Direct: (480) 967-3565 • Toll Free: (800) 669-9899
R 0 C K
FORD
FO
S
GATE.
COM
Table of contents
Other Rockford Fosgate Automobile Accessories manuals

Rockford Fosgate
Rockford Fosgate DSR1 User manual

Rockford Fosgate
Rockford Fosgate CPC05 User guide

Rockford Fosgate
Rockford Fosgate Polaris PMX-P2 User manual

Rockford Fosgate
Rockford Fosgate RFYXZ-RSW16 Guide

Rockford Fosgate
Rockford Fosgate RFX8310 Installation and operating manual

Rockford Fosgate
Rockford Fosgate Connecting Punch CPC05-03 User manual

Rockford Fosgate
Rockford Fosgate ELEMENT READY RFGNRL-K8 Guide