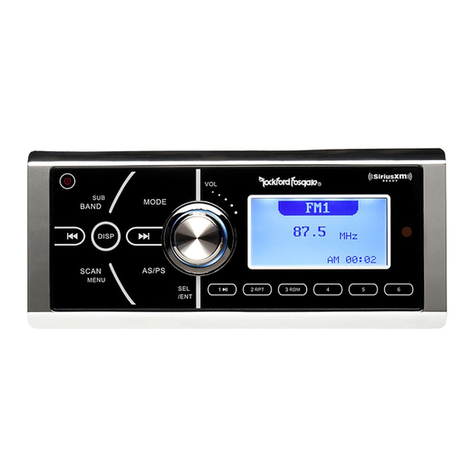
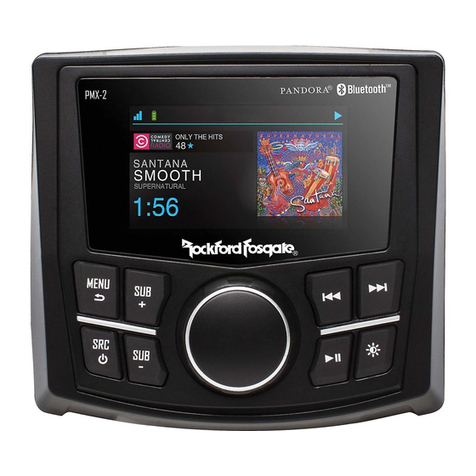
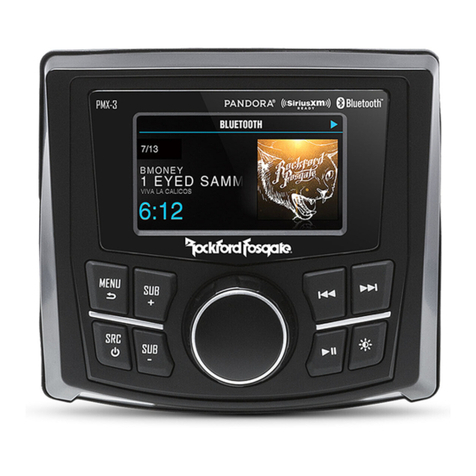
Rockford Fosgate Punch PMX-2 User manual

Instore "130"youcanfind and buy almostall necessary goodsforyourauto in
Kyiv and other cities,delivery by ground andpostal services.Ourexperienced
consultantswill provide youwithexhaustive informationand helpyoutochose
the very particular thing. We are waiting foryou atthe address
https://130.com.ua
PHONES
0 (800) 800 130
(050) 462 0 130
(063) 462 0 130
(067) 462 0 130
Internet storeof
autogoods
CARRECEIVERS —Receivers •Mediareceiversandstations•Nativereceivers •CD/DVD changers •FM-modulators/USBadapters•Flashmemory•Faciaplates and adapters •Antennas •Accessories |
CARAUDIO —Car audiospeakers •Amplifiers•Subwoofers •Processors•Crossovers •Headphones•Accessories|TRIPCOMPUTERS —Universalcomputers •Modelcomputers •Accessories|
GPSNAVIGATORS —PortableGPS•Built-in GPS•GPSmodules •GPStrackers •Antennas forGPSnavigators•Accessories|VIDEO —DVR •TVsetsand monitors•Car TVtuners•Cameras •Videomodules
•Transcoders •Car TVantennas•Accessories|SECURITYSYSTEMS —Car alarms •Bikealarms •Mechanicalblockers •Immobilizers •Sensors •Accessories |OPTICANDLIGHT —Xenon•Bixenon •Lamps
•LED •Stroboscopes •OpticandHeadlights •Washers •Light,rainsensors •Accessories |PARKTRONICS ANDMIRRORS —Rear parktronics•Frontparktronics •Combined parktronics •Rear-viewmirrors
•Accessories |HEATINGANDCOOLING —Seat heaters •Mirrorsheaters •Screen-wipers heaters •Engineheaters •Auto-refrigerators •Airconditioningunits •Accessories |TUNING —Vibro-isolation
•Noise-isolation •Tintfilms •Accessories |ACCESSORIES —Radar-detectors•Handsfree,Bluetooth•Windowlifters•Compressors •Beeps,loudspeakers •Measuring instruments •Cleaners •Carsits
•Miscellaneous|MOUNTING —Installationkits •Upholstery•Grilles•Tubes•Cableand wire •Tools•Miscellaneous|POWER —Batteries •Converters •Start-chargingequipment•Capacitors
•Accessories |MARINE AUDIOANDELECTRONICS —Marinereceivers•Marineaudiospeakers •Marinesubwoofers •Marineamplifiers•Accessories |CARCARE PRODUCTS —Additives •Washer fluid •
Care accessories •Car polish •Flavors •Adhesives andsealants |LIQUIDANDOIL —Motoroil•Transmissionoil •Brakefluid •Antifreeze•Technicallubricant
SKYPE
km-130

Installation & Operation
PMX-2
DIGITAL MEDIA
RECEIVER
Serial Number: Date of Purchase:
Installation assistance available at:
www.rockfordfosgate.com/rftech
ROCKFORDFOSGATE.COM
600 South Rockford Drive • Tempe, Arizona 85281 United States
Direct: (480) 967-3565 • Toll Free: (800) 669-9899
Printed in China
091515
1230-59187-01-G
Autogoods “130”
130.com.ua

2
Dear Customer,
Congratulations on your purchase of the world’s finest brand of
audio products. At Rockford Fosgate we are fanatics about musical
reproduction at its best, and we are pleased you chose our product.
Through years of engineering expertise, hand craftsmanship
and critical testing procedures, we have created a wide range of
products that reproduce music with all the clarity and richness you
deserve.
For maximum performance we recommend you have your new
Rockford Fosgate product installed by an Authorized Rockford Fos-
gate Dealer, as we provide specialized training through Rockford
Technical Training Institute (RTTI). Please read your warranty and
retain your receipt and original carton for possible future use.
Great product and competent installations are only a piece of the
puzzle when it comes to your system. Make sure that your installer
is using 100% authentic installation accessories from Rockford
Fosgate in your installation. Rockford Fosgate has everything from
RCA cables and speaker wire to power wire and battery connec-
tors. Insist on it! After all, your new system deserves nothing but
the best.
To add the finishing touch to your new Rockford Fosgate image,
order your Rockford accessories, which include everything from
T-shirts to hats.
Visit our web site for the latest information on all Rockford
products;
www.rockfordfosgate.com
or, in the U.S. call 1-800-669-9899 or FAX 1-800-398-3985. For all other
countries, call +001-480-967-3565 or FAX +001-480-966-3983.
Table of Contents
If, after reading your manual, you still have questions regarding this
product, we recommend that you see your Rockford Fosgate dealer. If you
need further assistance, you can call us direct at 1-800-669-9899. Be sure
to have your serial number, model number and date of purchase available
when you call.
Safety
This symbol with “WARNING” is intended
to alert the user to the presence of important
instructions. Failure to heed the instructions
will result in severe injury or death.
This symbol with “CAUTION” is intended to
alert the user to the presence of important
instructions. Failure to heed the instructions
can result in injury or unit damage.
To prevent injury and damage to the unit, please read and follow the instruc-
tions in this manual. We want you to enjoy this system, not get a headache.
If you feel unsure about installing this system yourself, have it installed by a
qualified Rockford Fosgate technician.
Before installation, disconnect the battery negative (-) terminal to prevent
damage to the unit, fire and/or possible injury.
FCC Compliance Statement
This equipment has been tested and found to comply with the limits for a
Class B digital device, pursuant to part 15 of the FCC Rules. These limits are
designed to provide more reasonable protection against harmful interference
in a residential installation.
Operation is subjected to the following two conditions: (1) This device may
not cause harmful interference, and (2) the device must accept any interfer-
ence received, including interference that may cause undesired operation.
This equipment generates, uses, and can radiate radio frequency energy
and, if not installed and used in accordance with the instructions, may cause
harmful interference to radio communications. However, there is no guaran-
tee that interference will not occur in a particular installation. If this equip-
ment does cause harmful interference to radio or television reception, which
can be determined by turning the equipment off and on, you are encouraged
to try to correct the interference by one of the following measures:
• Reorient or relocate the receiving antenna.
• Increase the separation between the equipment and receiver.
• Connect the equipment into an outlet on a circuit different from that to
which the receiver is connected.
• Consult the dealer or an experienced radio/TV technician for help
Introduction
PRACTICE SAFE SOUND
Continuous exposure to sound pressure levels over 100dB
may cause permanent hearing loss. High powered auto sound
systems may produce sound pressure levels well over 130dB.
Use common sense and practice safe sound.
2 Introduction
3 Specifications
4 Design Features
5 Wiring
6 Installation/Mounting
7-10 Operation
Settings
Tuner (AM/FM/WB)
USB-iPod
AUX (Auxiliary Input)
Bluetooth®
Pandora®
11 Troubleshooting
12-31 French, Spanish, German and Italian
32 Limited Warranty Information
©2015 Rockford Corporation. All Rights Reserved. PUNCH® and associated logos where applicable, are registered trademarks of Rockford Corporation in the United States and/
or other countries. iPhone and iPod are trademarks of Apple Inc., registered in the U.S. and other countries. The Bluetooth®word mark and logos are registered trademarks owned
by Bluetooth SIG, Inc. and any use of such marks by Rockford Corporation is under license. All other trademarks are the property of their respective owners. Specifications subject to
change without notice.
“Made for iPod” and “Made for iPhone” mean that an electronic accessory has been designed to connect specifically to iPod, or iPhone, respectively, and has been certified by the
developer to meet Apple performance standards. Apple is not responsible for the operation of this device or its compliance with safety and regulatory standards. Please note that the
use of this accessory with iPod or iPhone may affect wireless performance.
Pandora, the Pandora logo, and the Pandora trade dress are trademarks or registered trademarks of Pandora Media, Inc. Used with permission. Pandora is only available in certain
countries. Please visit http://www.pandora.com/legal for more information.
Autogoods “130”
130.com.ua

3
Specifications
Model PMX-2
Operating Voltage 10.5V - 16V
Fuse Rating 20A
Power Output 25 W X 4 @ 4 Ohms RMS
50 W x 4 @ 2 Ohms Peak
Max. RCA Output Voltage 4V
Output Impedance 500Ω
Frequency Response 20 - 20kHz
FM Frequency Range 87.5MHz - 107.9MHz
AM Frequency Range 530kHz - 1710kHz
WB Frequency Range 162.40 - 162.55
(US & Canada)
Tuner Presets 18 FM / 12 AM / 6 WB
Clock No Clock
Display 2.7” Color TFT
Bluetooth 3.0+EDR, A2DP 1.3
USB Compatibility 2.0
USB Output 1A
Made for iPhone Model Names-
iPhone 6 Plus
iPhone 6
iPhone 5S
iPhone 5C
iPhone 5
iPhone 4S
iPhone 4
iPhone 3GS
Made for iPod Model Names
iPod Touch (5th generation)
iPod Touch (4th generation)
iPod Nano (7th generation)
iPod Nano (6th generation)
Android Compatibility Bluetooth®Only
Audio File Compatibility MP3, WMA
Compatible Wired Remotes PMX-1R, PMX-0R
(3 Remote Limit,
100 ft Total Wired Distance)
CEA 2006
Power ratings on Rockford Fosgate source units conform to CEA-2006 industry standards. These guide-
lines mean your source unit’s output power ratings are REAL POWER numbers, not inflated marketing
ratings.
Autogoods “130”
130.com.ua

4
Design Features
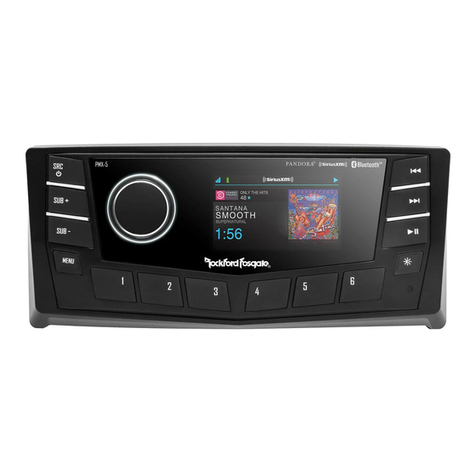
Rotary Encoder
This knob is for adjusting main volume, zone volumes,
menu navigation and setting adjustments.
REV / FWD button
Use this button to skip back and forward through
channels or tracks with a short press. Long
pressing will activate manual seek mode.
MENU button
This button gives you access to the main settings of
the unit by long pressing. Short pressing will give you
access to the settings for the active source.
DIMMER button
Pressing this button will allow you to select between
the two brightness values for the display.
PLAY / PAUSE button
Press this button to play or pause your music. This
button also acts as a MUTE when the source is in AUX
& TUNER mode.
SRC (Power) Button
This button allows you to switch between
sources (short press) and power the unit ON
and OFF (long press).
SUB Buttons
These buttons allow you to adjust the subwoofer
output or rear line out UP or DOWN (0-20).
Fig. 1
Autogoods “130”
130.com.ua

5
Wiring Diagram
USB
RADIO ANTENNA
WIRED REMOTE
BLACK
BLACK
BLACK
GREY
RED
BLACK
RED (REAR LINE OUT RIGHT OR SUB-W OUT)
WHITE (REAR LINE OUT LEFT OR SUB-W OUT)
RED (FRONT LINE OUT RIGHT)
WHITE (FRONT LINE OUT LEFT)
RED (AUX IN RIGHT)
WHITE (AUX IN LEFT)
13DIN FEMALE
1
4
7
10
2
5
8
11
3
6
9
12
SECTION A-A
1
4
7
10
2
5
8
11
3
6
9
12
SECTION B-B
SPEAKER REAR LEFT (+)
REMOTE (+)
ACC (+12V)
1
RED
7
12
11
10
9
8
4
5
6
3
2
BLACK GROUND (-)
PURPLE/BLACK
BLUE/WHITE
PURPLE
GREEN/BLACK
GREEN
ORANGE/WHITE
GREY/BLACK
GREY
WHITE/BLACK
WHITE
PIN NO. WIRE COLOR WIRE DEFINITION
ILLUMINATION
ORIENTATION
SPEAKER REAR LEFT (-)
SPEAKER FRONT LEFT (+)
SPEAKER FRONT LEFT (-)
SPEAKER FRONT RIGHT (+)
SPEAKER FRONT RIGHT (-)
SPEAKER REAR RIGHT (+)
SPEAKER REAR RIGHT (-)
AWG
20
16
16
20
20
20
20
20
20
20
20
20
WHITE
WHITE/BLACK
GREEN/BLACK
ORANGE/WHITE
RED
GREEN
B
GRAY
GRAY/BLACK
PURPLE/BLACK
BLUE/WHITE
BLACK
PURPLE
IN
OUT
20A FUSE
B
FILTER &
FUSE BOX
Fig. 2
Autogoods “130”
130.com.ua

6
Installation / Mounting
Contents
Installation Considerations
The following is a basic list of tools needed for installation:
This section focuses on some of the vehicle considerations for installing
your new source unit. Pre-planning your system layout and best wiring
routes will save installation time. When deciding on the layout of your
new system, be sure that each component will be easily accessible for
making adjustments.
If you feel unsure about installing this system yourself, have it installed
by a qualified Rockford Audio technician.
Before installation, disconnect the battery negative (-) terminal to prevent
damage to the unit, fire and/or possible injury.
Before beginning any installation, follow these simple rules:
1. Be sure to carefully read and understand the instructions before
attempting to install the unit.
2. For safety, disconnect the negative lead from the battery prior to
beginning the installation.
3. For easier assembly, we suggest you run all wires prior to mounting
your unit in place.
4. Route all of the RCA cables close together and away from any high
current wires.
5. Use high quality connectors for a reliable installation and to minimize
signal or power loss.
6. Think before you drill! Be careful not to cut or drill into gas tanks, fuel
lines, brake or hydraulic lines, vacuum lines or electrical wiring when
working on any vehicle.
7. Never run wires underneath the vehicle. Running the wires inside the
vehicle provides the best protection.
8. Avoid running wires over or through sharp edges. Use rubber
or plastic grommets to protect any wires routed through metal,
especially the firewall.
9. ALWAYS protect the battery and electrical system from damage with
proper fusing. Install the appropriate fuse holder and fuse on the
+12V power wire within 18” (45.7 cm) of the battery terminal.
10. When grounding to the chassis of the vehicle, scrape all paint from
the metal to ensure a good, clean ground connection. Grounding
connections should be as short as possible and always be connected
to metal that is welded to the main body, or chassis, of the vehicle.
Seatbelt bolts should never be used for connecting to ground.
• Volt/Ohm meter
• Wire strippers
• Wire crimpers
• Wire cutters
• #2 Phillips screwdriver
• Battery post wrench
• Hand held drill w/ assorted
bits
• Heat shrink tubing
• Soldering iron
• Solder
• Heat gun
• 7mm wrench
• Source Unit
• Trim Bezel
• Mounting Plate
• U Bracket
• Screws
• Power / Speaker Harness
• Installation & Operation
Manual
Mounting (Using Mounting Plate)
To mount the unit, you will need to find a flat surface with adequate
clearance behind it that provides enough clearance for the unit and all it’s
necessary wiring.
1. Once you have determined a mounting location, you will need to cut
a circular hole 3” (77mm) in diameter.
2. After the hole is cut slide the unit and wiring through the hole.
3. Slide the mounting plate over the backside of the unit and secure with
the supplied screws.
4. Press on the trim bezel to the front side of the unit.
5. Plug in all wiring harnesses and cables. Refer to the wiring diagram
for wire harness connection types.
Mounting (Using U Bracket)
To mount the unit, you will need to find a flat surface with adequate
clearance behind it that provides enough clearance for the unit and all it’s
necessary wiring.
1. Once you have determined a mounting location, you will need to cut
a circular hole 3” (77mm) in diameter.
2. After the hole is cut slide the unit and wiring through the hole.
3. Take the U bracket and slide over the two studs on the back of the
unit. Tighten down with supplied nuts.
4. Press on the trim bezel to the front side of the unit.
5. Plug in all wiring harnesses and cables. Refer to the wiring diagram
for wire harness connection types.
Trim Bezel
Panel
Bracket
Mounting Screws
Mounting Plate
Source Unit
Source Unit
Nuts
Panel
Trim Bezel
Trim Bezel
Panel
Bracket
Mounting Screws
Mounting Plate
Source Unit
Source Unit
Nuts
Panel
Trim Bezel
Fig. 4
Fig. 3
Autogoods “130”
130.com.ua

7
Settings
Source Unit Settings
To access the source unit’s settings, long press the MENU button until
the options appear. Rotate the encoder to scroll through the list of
settings and short press the encoder button to select the setting you
wish to change. (BALANCE>FADER>AUDIO>VOLTAGE GAUGE>BT
PAIRING>BEEP>TUNER REGION>SOFTWARE>FACTORY DEFAULT)
This source unit has a zero current draw when turned off. All of your
settings and presets will be saved along with your boat’s battery during
storage.
BALANCE
Short press the encoder button to access BALANCE adjustment settings.
Rotate the encoder button to set output BALANCE.
FADER
Short press the encoder button to access FADER adjustment settings.
Rotate the encoder button to set output FADER.
AUDIO
To access the AUDIO settings, short press the AUDIO option from
the MENU screen. Rotate the encoder to scroll through the list of
settings and short press the encoder button to select the setting you
wish to change. (7 BAND EQ>CROSSOVER>PEQ>REAR RCA>AUX
INPUT>SOURCE GAIN>INTERNAL AMPLIFIER)
7 BAND EQ
Short press the encoder button to access the 7 BAND EQ settings. Use
the rotary encoder to scroll through the EQ settings. (FLAT > ROCK
> CLASSIC > ACOUSTIC > DANCE > ELECTRONIC > HIP-HOP >
CUSTOM) When setting up the CUSTOM EQ, short press the encoder
button to set the first frequency. Once active, rotate the encoder to adjust
the frequency settings. Short press encoder button again to access the
next frequency. Repeat until all EQ settings are complete. Short press the
MENU button to exit and go back up one level.
CROSSOVER
Short press to access the CROSSOVER settings. Use the rotary
encoder to select the crossover zone options (FRONT>REAR>SUB).
Short press the encoder to adjust the frequency of the crossover
(60Hz>80Hz>120Hz>APF). Short press MENU to exit and go back up
one level.
REAR RCA
Short press to access the REAR RCA options. Use the rotary encoder to
select options (LINE OUT>SUBWOOFER).
PUNCH EQ
Short press to access the PUNCH EQ settings. Use the rotary encoder
to adjust the gain output (0-12). Short press MENU to exit and go back
up one level.
Punch EQ is an onboard equalizer with up to +18dB @ 45Hz and/or up to
+12dB boost at 12.5kHz
AUX INPUT
RENAME – To rename AUX, short press the encoder button to set the first
letter of the new name. Once active, rotate encoder to adjust letters. Short
press the encoder button again to set the next letter. Repeat until AUX has
been renamed. Short press MENU to exit and go back up one level.
ENABLE - Short press the encoder button to access options. Rotate the
encoder button to select if unit is discoverable. (ENABLE > DISABLE)
SOURCE GAIN
To adjust the level of device input gain, scroll through the inputs (FM
TUNER>AM TUNER>WB TUNER>USB>AUX>BLUETOOTH>PANDORA)
to the device you want to adjust, short press the encoder button to access
the gain settings. Rotate the encoder button to set the level of gain. (-3dB
> -2dB > -1dB > 0dB > +1dB > +2dB > +3dB)
INTERNAL AMPLIFIER
Short press to access the INTERNAL AMPLIFIER options. Use the rotary
encoder to select options (ON>OFF). When using an amplifier to power
your speakers, select OFF. If you are powering your speakers directly
from the source unit, select the INTERNAL AMPLIFIER to ON.
VOLTAGE GAUGE
To display the vehicle voltage, short press the encoder button on the
VOLTAGE GAUGE option.
BT DEVICE PAIRING
Short press the encoder button to access options. Rotate the encoder
button to select if unit is discoverable for pairing. (ENABLE > DISABLE)
Once enabled, the source unit is now discoverable and ready for pairing
to your device. Open the Bluetooth settings on your device to find the
source unit labeled “Rockford PMX” and select.
BEEP
Short press the encoder button to access the BEEP options. Rotate the
encoder button to turn system beep ON/ OFF.
TUNER REGION
To adjust, short press the encoder button to access. Rotate the encoder
button to select the TUNER REGION of your preference. (EUROPE > USA
> RUSSIA > LATIN > ASIA > JAPAN > MIDEAST > AUSTRALIA)
SOFTWARE
VERSION - Short press the encoder button to display the current
firmware version of the unit.
UPDATE - Short press the encoder button to update the firmware. Follow
the instructions on the screen when updating.
FACTORY DEFAULT
AUDIO – Short press the encoder button to access. Rotate the encoder
button to select YES/NO. Selecting YES will reset your unit back to
factory default settings.
SYSTEM - Short press the encoder button to access. Rotate the encoder
button to select YES/NO. Selecting YES will reset your unit back to
factory default settings.
Basic Operation
TURNING THE UNIT ON / OFF
Long press the SRC (Power) button to turn the unit ON or OFF
ADJUSTING THE VOLUME
Rotate encoder knob left or right to desired volume level (0-40). The
current volume level will be displayed during adjustment.
Autogoods “130”
130.com.ua

8
Settings
ADJUSTING THE SUBWOOFER OUTPUT
Press the SUB + or SUB- buttons to adjust the output level (0-20).
ADJUSTING THE SCREEN BRIGHTNESS
Short press the SCREEN BRIGHTNESS button to adjust the brightness
level. There are two brightness levels.
SELECTING A SOURCE TO PLAY
Short press the SRC button to show the different source options (FM
TUNER>AM TUNER>WB TUNER>USB>AUX>BLUETOOTH>PANDORA>S
IRIUSXM). Use the rotary encoder or short press the SRC button to scroll
through sources.
Tuner Operation (FM/AM/WB)
To operate, use the rotary encoder to select the tuner source you want to
listen to (FM>AM>WB).
To AUTO SEEK stations, short press the FWD and REV buttons. To
MANUAL SEEK stations, long press the FWD and REV buttons to tune to
the desired frequency.
To MUTE the TUNER, short press the PLAY/PAUSE button.
FM BAND SETTINGS
To access the FM BAND SETTINGS, short press the MENU when
using the FM TUNER source. This will give you access to the settings
specific to the FM TUNER (FM>PRESETS>ADD PRESETS>REMOVE
PRESETS>AUTO STORE>LOCAL).
PRESETS
Short press the encoder button to access the PRESETS list. Using this
feature allows you to see what PRESETS are saved on the unit.
ADD PRESETS
Short press the encoder button on the ADD PRESETS option. You will
need to be on both the station and PRESET group you want to add first
(FM1>FM2>FM3). Using this feature allows you to save stations to the
unit. Once selected, use the rotary encoder to select the PRESET number
(1-6) you want the station saved to.
REMOVE PRESETS
Short press the encoder button on the REMOVE PRESETS option.
You will need to be under the PRESET group you want to adjust first
(FM1>FM2>FM3). Using this feature allows you to remove saved
stations on the unit. Once selected, use the rotary encoder to select the
PRESET number (1-6) of the station you want removed.
FM
Short press the encoder button to access the FM PRESET options
(FM1>FM2>FM3). Using this feature allows you to have separate tuner
preset groups to choose from. Use the rotary encoder button to scroll
through the TUNER groups and short press to select the group.
AUTO STORE
Short press the encoder button to access the AUTO STORE function.
You will need to be under the PRESET group you want to adjust first
(FM1>FM2>FM3). This feature automatically stores presets on the unit.
It will stop when presets 1-6 are set. Select the next PRESET group and
repeat to fill next set.
LOCAL
Short press the encoder button to access the LOCAL options. Once
selected, use the rotary encoder to select ON or OFF. The local option
tunes to nearby radio stations with sufficiently strong signals for good
reception. In areas where reception is poor, switching to distance tuning
enables the unit to tune in to more distant stations. Distance tuning is
the default.
AM BAND SETTINGS
To access the AM BAND SETTINGS, short press the MENU when
using the AM TUNER source. This will give you access to the settings
specific to the AM TUNER (AM>PRESETS>ADD PRESETS>REMOVE
PRESETS>AUTO STORE>LOCAL).
PRESETS
Short press the encoder button to access the PRESETS list. Using this
feature allows you to see what PRESETS are saved on the unit.
ADD PRESETS
Short press the encoder button on the ADD PRESETS option. You will
need to be on both the station and PRESET group you want to add first
(AM1>AM2). Using this feature allows you to save stations to the unit.
Once selected, use the rotary encoder to select the PRESET number (1-6)
you want the station saved to.
REMOVE PRESETS
Short press the encoder button on the REMOVE PRESETS option.
You will need to be under the PRESET group you want to adjust first
(AM1>AM2). Using this feature allows you to remove saved stations
on the unit. Once selected, use the rotary encoder to select the PRESET
number (1-6) of the station you want removed.
AM
Short press the encoder button to access the FM PRESET options
(AM1>AM2). Using this feature allows you to have separate tuner preset
groups to choose from. Use the rotary encoder button to scroll through
the TUNER groups and short press to select the group.
AUTO STORE
Short press the encoder button to access the AUTO STORE function.
You will need to be under the PRESET group you want to adjust first
(AM1>AM2). This feature automatically stores presets on the unit. It will
stop when presets 1-6 are set. Select the next PRESET group and repeat
to fill next set.
LOCAL
Short press the encoder button to access the LOCAL options. Once
selected, use the rotary encoder to select ON or OFF. The local option
tunes to nearby radio stations with sufficiently strong signals for good
reception. In areas where reception is poor, switching to distance tuning
enables the unit to tune in to more distant stations. Distance tuning is
the default.
WB BAND SETTINGS
To access the WB BAND SETTINGS, short press the MENU when using
the WB TUNER source. This will give you access to the settings specific
to the WB TUNER (PRESETS>ADD PRESETS>REMOVE PRESETS).
Autogoods “130”
130.com.ua

9
PRESETS
Short press the encoder button to access the PRESETS list. Using this
feature allows you to see what PRESETS are saved on the unit.
ADD PRESETS
Short press the encoder button on the ADD PRESETS option. You will
need to be on both the station you want to add first. Using this feature
allows you to save stations to the unit. Once selected, use the rotary
encoder to select the PRESET number (1-6) you want the station saved
to.
REMOVE PRESETS
Short press the encoder button on the REMOVE PRESETS option.
You will need to be under the PRESET group you want to adjust first
(AM1>AM2). Using this feature allows you to remove saved stations
on the unit. Once selected, use the rotary encoder to select the PRESET
number (1-6) of the station you want removed.
USB (iPod) Operation
After your device is connected to the source unit, this feature allows you
to control playback from your device directly from the unit. Select the
USB source option on the source unit.
To play or pause a song, short press the PLAY/PAUSE button.
To skip a track forward, short press the FWD button. To skip a track
backwards, short press the REV button.
To access USB specific settings, short press the MENU button for the list
of settings (BROWSER>REPEAT>SHUFFLE). Use the encoder to select
the option to change.
BROWSER
Short press the encoder button to access the BROWSER options (PLAY
LISTS>ARTISTS>ALBUMS>GENRES>SONGS>COMPOSERS>AUDIOBO
OKS>PODCASTS). Using this feature allows you to search for tracks or
songs by different types of categories.
REPEAT
Short press the encoder button to access the REPEAT feature options
(OFF>ONE>ALL).
SHUFFLE
Short press the encoder button to access the SHUFFLE feature options
(OFF>ALL). This feature allows you to set your preference on shuffling
tracks or songs.
AUX Operation
After your device is plugged into the source unit, this feature allows
you to play music from your device. Select the AUX source option on
the source unit and use your plugged in device to control song/track
selection, PLAY/PAUSE and track skip FWD/REV.
Bluetooth®Operation
After your device is paired to the source unit, this feature allows you
to control playback from your device directly from the unit. Select the
BLUETOOTH source option on the source unit.
To play or pause a song, short press the PLAY/PAUSE button.
To skip a track forward, short press the FWD button. To skip a track
backwards, short press the REV button.
To access BLUETOOTH specific settings, short press the MENU button
for the list of settings (BROWSER>REPEAT>SHUFFLE). Use the encoder
to select the option to change.
BROWSER
Short press the encoder button to access the BROWSER options (PLAY
LISTS>ARTISTS>ALBUMS>GENRES>SONGS>COMPOSERS>AUDIOBO
OKS>PODCASTS). Using this feature allows you to search for tracks or
songs by different types of categories.
REPEAT
Short press the encoder button to access the REPEAT feature options
(OFF>ONE>ALL). This feature allows you to set your preference on the
amount of times a track or song will repeat.
SHUFFLE
Short press the encoder button to access the SHUFFLE feature options
(OFF>ALL). This feature allows you to set your preference on shuffling
tracks or songs.
Operation
Autogoods “130”
130.com.ua

10
Operation
Pandora®
This feature allows you to control the Pandora®app from the source unit
directly (Android users will have to use Bluetooth only, iOS users can
use both USB and Bluetooth). You will need to start the Pandora®app on
your device first, then select the Pandora®source option on the source
unit. To use the “Thumbs Up” feature, long press the SUB+ button. To
use the “Thumbs down” feature, long press the SUB - button.
To play or pause a song, short press the PLAY/PAUSE button.
To skip a track forward, short press the FWD button.
To access Pandora®specific settings, short press the MENU button for
the list of settings (STATIONS>BOOKMARKS>STATIONS MANAGE). Use
the encoder to select the option to change.
STATIONS
To adjust, short press the encoder button to access. Rotate the encoder
button to select your options (SHUFFLE>SORT DATE/A-Z>STATIONS).
Selecting the SHUFFLE option will shuffle your stations and selecting the
SORT feature will sort your stations by date added or alphabetically. You
can also select your saved stations directly from this list.
BOOKMARKS
To BOOKMARK an artist or track that is playing, short press the encoder
button to display your BOOKMARK options (ARTIST>TRACK). Select the
option you wish to use for bookmarking.
STATIONS MANAGE
To create stations, short press the encoder button to display your
STATION MANAGE options (CREATE FROM ARTIST> CREATE FROM
TRACK> CREATE FROM GENRE>DELETE). Selecting the CREATE FROM
ARTIST OPTION allows you to create a station from the artist that you are
currently listening to. CREATE FROM TRACK works similarly by creating
a station from the current track being played. If you create a station by
selecting CREATE FROM GENRE, this will give you music genres to
select from to create your station. Selecting DELETE will delete the now
playing station.
Pandora, the Pandora logo, and the Pandora trade dress are trademarks
or registered trademarks of Pandora Media, Inc. Used with permission.
Pandora is only available in certain countries. Please visit http://www.
pandora.com/legal for more information.
Autogoods “130”
130.com.ua

11
Symptom Diagnosis Remedy
Basic
Source unit does not turn on.
Blown fuse Check fuse of the unit, replace with correct rating.
Vehicle’s ignition is off If connected following the instructions, the unit will not
operate with ignition off.
Voltage applied to Red wire is not
between 10.5 & 16 volts or there is no
voltage present
Check battery, connections and fuses and repair or replace
as necessary. If voltage is above +16 volts, have the
electrical system inspected by an authorized service center.
Unit is not properly grounded Check wiring and repair as necessary.
Radio Tuner
Tuner fails to tune any stations No antenna or disconnected or open
connection in cable Check all connections and repair as necessary.
Unable to tune stations in seek
mode You are in a weak signal area Make sure the tuner LOC mode is off.
USB Devices
USB device cannot be inserted
The USB device has been inserted in
the wrong direction Reversing the connection direction of the USB device, try
reinserting.
The USB device connector is broken Replace with a new USB device.
USB device is not recognized
The USB device is damaged Disconnect USB device and reconnect. If the device is still
not recognized, try replacing with a different USB device.
USB does not work with Android devices.
Connectors are loose
No sound heard with the display
“No File” shown No MP3/WMA files are stored on the
USB device Store these files properly on the USB device. USB does not
work with Android devices.
Sound skips or is noisy MP3/WMA files are not created
properly Use MP3/WMA files that are encoded correctly.
AUX
MP3 is not playing back Writing error occurred. The MP3 format
is not compatible. Make sure MP3 has been written in a supported format
Troubleshooting
Autogoods “130”
130.com.ua

12
Français
Caractéristiques de conception (Fig. 1)
Encodeur rotatif
Ce bouton sert à ajuster le volume principal, les volumes de zones, la
navigation du menu et les réglages des paramètres.
Bouton MENU
Ce bouton donne accès aux paramètres principaux de l’appareil par
une longue pression. Appuyer dessus brièvement pour avoir accès aux
paramètres pour la source active.
Bouton SRC (Alimentation)
Ce bouton permet de commuter entre les sources (pression courte) et
d’activer et de désactiver l’appareil (pression longue).
Boutons SUB
Ces boutons permettent d’ajuster la sortie du subwoofer ou la ligne arrière
vers le haut ou vers le bas (0-20).
Bouton LECTURE/PAUSE
Appuyer sur ce bouton pour jouer ou pauser la musique. Ce bouton sert
aussi de VEILLEUSE quand la source est en mode AUX et TUNER.
Bouton DIMMER (GRADATEUR)
Appuyer sur ce bouton pour sélectionner entre les valeurs de luminosité
de l’affichage.
Bouton REV/FWD
Utiliser ce bouton pour sauter en arrière et en avant parmi les chaînes ou
les pistes avec une pression courte. Une pression longue activera le mode
de recherche manuelle.
Contenu
Considérations d’installation
Voici une liste de base des outils nécessaires pour l’installation :
Cette section se concentre sur certaines des considérations automobiles
pour l’installation de la nouvelle unité source. Pré-planifier l’aménagement
du système et les meilleures voies de câblage fera gagner du temps en
installation. Lors de la décision de l’aménagement du nouveau système,
s’assurer que chaque composant soit facilement accessible pour effectuer
des réglages.
En cas de question sur l’installation de ce système soi-même, le faire
installer par un technicien qualifié Audio Rockford.
Avant l’installation, débrancher la borne négative (-) de la batterie pour
prévenir tout dommage matériel, tout incendie et/ou des blessures
éventuelles.
Avant de commencer toute installation, suivre ces simples règles :
1. Faire attention de lire attentivement et de comprendre les instructions
avant de tenter l’installer l’unité.
2. Par mesure de sécurité, débrancher le fil négatif de la batterie avant
de commencer l’installation.
3. Pour faciliter l’assemblage, il est conseillé d’acheminer tous les fils
avant de monter l’unité en place.
4. Acheminer tous les câbles RCA près les uns des autres et à l’écart
des fils à haute intensité.
5. Utiliser des connecteurs de haute qualité pour une installation fiable
et pour minimiser la perte de signal ou d’alimentation.
6. Penser avant de percer ! Faire attention de ne pas couper ni percer
dans les réservoirs à essence, les canalisations de carburant, les
conduites de freins ou conduites hydrauliques, les lignes de vide ou
• Unité source
• Lunette profilée
• Plaque de montage
• Support en U
• Vis
• Faisceau alimentation/haut-
parleur
• Manuel d’installation et
d’exploitation
• Voltmètre/Ohmmètre
• Dénudeuse
• Sertisseuse
• Coupe-fils
• Tournevis cruciforme n° 2
• Clé de borne de batterie
• Perceuse portative avec
embouts assortis
• Tubulure thermorétractable
• Fer à souder
• Soudage
• Pistolet thermique
• Clé de 7 mm
le câblage électrique lors de toute opération sur un véhicule.
7. Ne jamais acheminer les fils sous le véhicule. Acheminer les fils à
l’intérieur du véhicule fournit la meilleure protection.
8. Éviter d’acheminer les fils sur ou à travers des bords coupants.
Utiliser des œillets en caoutchouc ou en plastique pour protéger les
fils acheminés dans du métal, en particulier le pare-feu.
9. TOUJOURS protéger la batterie et le système électrique de tout
dommage grâce à des fusibles appropriés. Installer le porte-fusible
approprié et le fusible sur le fil d’alimentation de +12 V dans les
45,cm (18 po) de la borne de batterie.
10. Lors de la mise à la terre au châssis du véhicule, gratter toute
peinture du métal pour assurer une bonne connexion à la masse
propre. Les raccordements de mise à la terre doivent être aussi courts
que possible et toujours connectés au métal qui est soudé au corps
principal, ou au châssis, du véhicule. Les boulons de ceinture de
sécurité ne doivent jamais être utilisés pour raccorder à la terre.
Montage (Utilisation de la plaque de montage) - Fig. 3
Pour monter l’unité, il faudra une surface plate disposant d’un dégagement
adéquat derrière qui offre suffisamment de dégagement pour l’unité et tout
son câblage nécessaire.
Une fois que l’emplacement de montage aura été déterminé, il faudra
couper un trou circulaire de 77 mm de diamètre.
Une fois le trou coupé, faire glisser l’unité et le câblage à travers le trou.
Faire glisser la plaque de montage sur l’arrière de l’unité et la sécuriser à
l’aide des vis fournies.
Appuyer sur la lunette profilée sur le devant de l’unité.
Brancher les faisceaux de câblage et les câbles. Consulter le schéma de
câblage pour les types de connexion de faisceaux de câbles.
Montage (utilisation du support en U) - Fig. 4
Pour monter l’unité, il faudra une surface plate disposant d’un dégagement
adéquat derrière qui offre suffisamment de dégagement pour l’unité et tout
son câblage nécessaire.
Une fois que l’emplacement de montage aura été déterminé, il faudra
couper un trou circulaire de 77 mm de diamètre.
Une fois le trou coupé, faire glisser l’unité et le câblage à travers le trou.
Prendre le support en U et faire glisser les deux goujons sur l’arrière de
l’unité. Serrer avec les écrous fournis.
Appuyer sur la lunette profilée sur le devant de l’unité.
Brancher les faisceaux de câblage et les câbles. Consulter le schéma de
câblage pour les types de connexion de faisceaux de câbles.
Paramètres de l’unité source
Pour accéder aux paramètres de l’unité source, appuyer longuement sur
le bouton MENU jusqu’à affichage des options. Faire pivoter l’encodeur
pour faire défiler la liste des paramètres et effectuer une pression
courte sur le bouton d’encodeur pour sélectionner le paramètre que l’on
souhaite modifier. (BALANCE>FADER>AUDIO>VOLTAGE GAUGE>BT
PAIRING>BEEP>TUNER REGION>SOFTWARE>FACTORY DEFAULT)
Cette unité source a un courant nul quand elle est désactivée. Tous les
paramètres et préréglages seront sauvegardés avec la batterie du bateau
pendant l’entreposage.
BALANCE
Appuyer brièvement sur le bouton d’encodeur pour accéder aux
paramètres de réglage de BALANCE. Faire pivoter le bouton d’encodeur
pour régler la BALANCE de sortie.
FADER
Appuyer brièvement sur le bouton d’encodeur pour accéder aux
paramètres de réglage du FADER. Faire pivoter le bouton d’encodeur pour
régler le FADER de sortie.
AUDIO
Pour accéder aux paramètres AUDIO, effectuer une pression courte sur
l’option AUDIO à partir de l’écran MENU. Faire pivoter l’encodeur pour
faire défiler la liste des paramètres et effectuer une pression courte sur le
bouton d’encodeur pour sélectionner le paramètre que l’on souhaite modi-
fier. (7 BAND EQ>CROSSOVER>PEQ>REAR RCA>AUX INPUT>SOURCE
GAIN>INTERNAL AMPLIFIER)
7 BAND EQ
Appuyer brièvement sur le bouton d’encodeur pour accéder aux
Autogoods “130”
130.com.ua

13
Français
paramètres 7 BAND EQ. Utiliser l’encodeur rotatif pour faire défiler les
paramètres EQ. (FLAT > ROCK > CLASSIC > ACOUSTIC > DANCE
> ELECTRONIC > HIP-HOP > CUSTOM) Lors de la configuration du
CUSTOM EQ, effectuer une pression courte sur le bouton d’encodeur pour
régler la première fréquence. Une fois activé, faire pivoter l’encodeur pour
ajuster les paramètres de fréquence. Effectuer une autre pression courte
sur le bouton d’encodeur pour accéder à la fréquence prochaine. Répéter
jusqu’à ce que tous les paramètres EQ soient terminés. Appuyer briève-
ment sur le bouton MENU pour quitter et revenir d’un niveau en arrière.
CROISEMENT
Appuyer brièvement pour accéder aux paramètres de CROISEMENT.
Utiliser l’encodeur rotatif pour sélectionner les options de zones de
croisement (FRONT>REAR>SUB). Effectuer une courte pression sur
l’encodeur pour ajuster la fréquence du croisement (60 Hz>80 Hz>120
Hz>APF). Appuyer brièvement sur le bouton MENU pour quitter et revenir
d’un niveau en arrière.
RCA ARRIÈRE
Effectuer une pression courte pour accéder aux options RCA AR-
RIÈRE. Utiliser l’encodeur rotatif pour sélectionner les options (LINE
OUT>SUBWOOFER).
PUNCH EQ
Appuyer brièvement pour accéder aux paramètres de PUNCH EQ. Utiliser
l’encodeur rotatif pour ajuster la sortie de gain (0-12). Appuyer brièvement
sur le bouton MENU pour quitter et revenir d’un niveau en arrière.
Punch EQ est un égaliseur embarqué avec un amplificateur maximum de
+18 dB à 45 Hz et/ou de +12 dB à 12,5 kHz
ENTRÉE AUX
RENOMMER – Pour renommer AUX, appuyer brièvement sur le bouton
d’encodeur pour régler la première lettre du nouveau nom. Une fois
activé, faire tourner l’encodeur pour ajuster les lettres. Effectuer une autre
pression courte sur le bouton d’encodeur pour régler la prochaine lettre.
Répéter jusqu’à ce que AUX ait été renommé. Appuyer brièvement sur le
bouton MENU pour quitter et revenir d’un niveau en arrière.
ACTIVER - Appuyer brièvement sur le bouton d’encodeur pour accéder
aux options. Faire tourner le bouton d’encodeur pour sélectionner si
l’unité est découvrable. (ENABLE > DISABLE)/(ACTIVER>DÉSACTIVER)
GAIN SOURCE
Pour ajuster le niveau du gain d’entrée de périphérique, faire défiler les
entrées (FM TUNER>AM TUNER>WB TUNER>USB>AUX>BLUETOOT
H>PANDORA) jusqu’au périphérique que l’on souhaite ajuster, appuyer
brièvement le bouton d’encodeur pour accéder aux paramètres de gain.
Faire tourner le bouton d’encodeur pour régler le niveau de gain. (-3 dB >
-2 dB > -1 dB > 0 dB > +1 dB > +2 dB > +3 dB)
AMPLIFICATEUR INTERNE
Appuyer brièvement pour accéder aux options AMPLIFICATEUR INTERNE.
Utiliser l’encodeur rotatif pour sélectionner les options (ON>OFF). Lors de
l’utilisation d’un amplificateur pour alimenter les haut-parleurs, sélection-
ner OFF. Si on alimente les haut-parleurs directement de l’unité source,
sélectionner l’AMPLIFICATEUR INTERNE sur ON.
INDICATEUR DE TENSION
Pour afficher la tension du véhicule, appuyer brièvement sur le bouton
d’encodeur sur l’option INDICATEUR DE TENSION.
APPAIRAGE DE PÉRIPHÉRIQUE BT
Appuyer brièvement sur le bouton d’encodeur pour accéder aux options.
Faire tourner le bouton d’encodeur pour sélectionner si l’unité est
découvrable pour appairage. (ENABLE > DISABLE) Une fois activé, l’unité
source est désormais découvrable et prête pour appairage au périphéri-
que. Ouvrir les paramètres Bluetooth sur le périphérique pour trouver
l’unité source étiquetée « Rockford PMX » et sélectionner.
BIP
Appuyer brièvement sur le bouton d’encodeur pour accéder aux options
BIP. Faire tourner le bouton d’encodeur pour activer/désactiver le bip du
système.
RÉGION DU TUNER
Pour ajuster, appuyer brièvement sur le bouton d’encodeur pour accéder.
Faire tourner le bouton d’encodeur pour sélectionner la RÉGION DU
TUNER de préférence. (EUROPE > USA > RUSSE > AMÉRIQUE LATINE >
ASIE > JAPON > MOYEN-ORIENT > AUSTRALIE)
LOGICIEL
VERSION - Appuyer brièvement sur le bouton d’encodeur pour afficher la
version de logiciel actuelle de l’unité.
MISE À JOUR - Appuyer brièvement sur le bouton d’encodeur pour mettre
le logiciel à jour. Suivre les instructions à l’écran pour mettre à jour.
Réglage d’usine
AUDIO – Appuyer brièvement sur le bouton d’encodeur pour accéder.
Faire pivoter le bouton d’encodeur pour sélectionner YES/NO (OUI/NON).
Sélectionner YES/OUI pour remettre l’unité aux réglages d’usine.
SYSTÈME - Appuyer brièvement sur le bouton d’encodeur pour accéder.
Faire pivoter le bouton d’encodeur pour sélectionner YES/NO (OUI/NON).
Sélectionner YES/OUI pour remettre l’unité aux réglages d’usine.
Fonctionnement de base
ACTIVER/DÉSACTIVER L’UNITÉ
Appuyer longuement sur le bouton SRC (Alimentation) pour ACTIVER ou
DÉSACTIVER l’unité
RÉGLAGE DU VOLUME
Faire tourner le bouton d’encodeur vers la gauche ou vers la droite au
niveau de volume souhaité (0-40). Le niveau de volume actuel s’affiche
pendant le réglage.
RÉGLAGE DE LA SORTIE DU SUBWOOFER
Appuyer sur le bouton SUB + ou SUB- pour régler le niveau de sortie
(0-20).
RÉGLAGE DE LA LUMINOSITÉ DE L’ÉCRAN
Appuyer brièvement sur le bouton LUMINOSITÉ DE L’ÉCRAN pour ajuster
le niveau de luminosité. Il existe deux niveaux de luminosité.
SÉLECTIONNER UNE SOURCE À JOUER
Appuyer brièvement sur le bouton SRC pour afficher les différentes
options de source (FM TUNER>AM TUNER>WB TUNER>USB>AUX>BL
UETOOTH>PANDORA>SIRIUSXM). Utiliser l’encodeur rotatif ou appuyer
brièvement sur le bouton SRC pour faire défiler les sources.
Fonctionnement du tuner (FM/AM/WB)
Pour faire fonctionner, utiliser l’encodeur rotatif pour sélectionner la
source de tuner que l’on souhaite écouter (FM>AM>WB).
Pour RECHERCHER AUTOMATIQUEMENT des stations, appuyer briève-
ment sur les boutons FWD et REV. Pour RECHERCHER MANUELLEMENT
des stations, appuyer longuement sur les boutons FWD et REV pour régler
à la fréquence souhaitée.
Pour mettre le TUNER en SOURDINE, appuyer brièvement sur le bouton
PLAY/PAUSE.
PARAMÈTRES DE BANDE FM
Pour accéder aux PARAMÈTRES DE BANDE FM, appuyer brièvement
sur le MENU lors de l’utilisation de source FM TUNER. Ceci donnera
accès aux paramètres spécifiques au FM TUNER (FM>PRESETS>ADD
PRESETS>REMOVE PRESETS>AUTO STORE>LOCAL).
STATIONS PRÉRÉGLÉES
Appuyer brièvement sur le bouton d’encodeur pour accéder à la liste des
STATIONS PRÉRÉGLÉES. Utiliser cette fonction pour voir quelles STA-
TIONS PRÉRÉGLÉES sont sauvegardées sur l’unité.
ADD PRESETS (AJOUTER DES STATIONS PRÉRÉGLÉES)
Effectuer une pression courte sur le bouton d’encodeur sur l’option
AJOUTER DES STATIONS PRÉRÉGLÉES. Il faudra se trouver sur la station
et sur le groupe des STATIONS PRÉRÉGLÉES que l’on souhaite ajouter en
premier (FM1>FM2>FM3). Utiliser cette fonction pour pouvoir sauveg-
arder des stations sur l’unité. Une fois sélectionnée, utiliser l’encodeur
rotatif pour sélectionner le numéro de STATION PRÉRÉGLÉE (1-6) sur
lequel on souhaite sauvegarder la station.
REMOVE PRESETS (SUPPRIMER DES STATIONS PRÉRÉGLÉES)
Effectuer une pression courte sur le bouton d’encodeur sur l’option
SUPPRIMER DES STATIONS PRÉRÉGLÉES. Il faudra se trouver sous le
groupe des STATIONS PRÉRÉGLÉES que l’on souhaite ajuster en premier
(FM1>FM2>FM3). Utiliser cette fonction pour pouvoir supprimer des
stations sauvegardées sur l’unité. Une fois sélectionnée, utiliser l’encodeur
rotatif pour sélectionner le numéro de STATION PRÉRÉGLÉE (1-6) de la
station que l’on souhaite supprimer.
Autogoods “130”
130.com.ua

14
FM
Effectuer une pression courte sur le bouton d’encodeur pour accéder
aux options STATIONS PRÉRÉGLÉES FM (FM1>FM2>FM3). Utiliser
cette fonction permet d’avoir des groupes de stations préréglées de tuner
séparés parmi lesquels choisir. Utiliser le bouton d’encodeur rotatif pour
faire défiler les groupes de TUNER et appuyer brièvement pour sélection-
ner le groupe.
AUTO STORE (SAUVEGARDE AUTOMATIQUE)
Appuyer brièvement sur le bouton d’encodeur pour accéder à la fonction
SAUVEGARDE AUTOMATIQUE. Il faudra se trouver sous le groupe
des STATIONS PRÉRÉGLÉES que l’on souhaite ajuster en premier
(FM1>FM2>FM3). Cette fonction sauvegarde automatiquement les sta-
tions préréglées sur l’unité. Cela s’arrêtera lorsque les stations préréglées
1-6 sont réglées. Sélectionner le prochain groupe de STATIONS PRÉRÉ-
GLÉES et répéter pour remplir le jeu prochain.
LOCAL
Appuyer brièvement sur le bouton d’encodeur pour accéder aux options
LOCAL. Une fois sélectionnée, utiliser l’encodeur rotatif pour sélectionner
ON ou OFF. L’option LOCAL se règle sur les stations de radio proches
avec des signaux suffisamment forts pour une bonne réception. Dans les
zones où la réception est médiocre, passer au réglage à distance permet à
l’unité de se régler dans des stations plus distantes. Le réglage à distance
est le réglage d’usine.
PARAMÈTRES DE BANDE AM
Pour accéder aux PARAMÈTRES DE BANDE AM, appuyer brièvement
sur le MENU lors de l’utilisation de source AM TUNER. Ceci donnera
accès aux paramètres spécifiques au AM TUNER (AM>PRESETS>ADD
PRESETS>REMOVE PRESETS>AUTO STORE>LOCAL).
STATIONS PRÉRÉGLÉS
Appuyer brièvement sur le bouton d’encodeur pour accéder à la liste des
STATIONS PRÉRÉGLÉES. Utiliser cette fonction pour voir quelles STA-
TIONS PRÉRÉGLÉES sont sauvegardées sur l’unité.
ADD PRESETS (AJOUTER DES STATIONS PRÉRÉGLÉES)
Appuyer brièvement sur le bouton d’encodeur pour accéder à l’option ADD
PRESETS. Il faudra se trouver sur la station et sur le groupe des STA-
TIONS PRÉRÉGLÉES que l’on souhaite ajouter en premier (AM1>AM2).
Utiliser cette fonction pour pouvoir sauvegarder des stations sur l’unité.
Une fois sélectionnée, utiliser l’encodeur rotatif pour sélectionner le nu-
méro de STATION PRÉRÉGLÉE (1-6) sur lequel on souhaite sauvegarder
la station.
REMOVE PRESETS (SUPPRIMER DES STATIONS PRÉRÉGLÉES)
Effectuer une pression courte sur le bouton d’encodeur sur l’option
SUPPRIMER DES STATIONS PRÉRÉGLÉES. Il faudra se trouver sous le
groupe des STATIONS PRÉRÉGLÉES que l’on souhaite ajuster en premier
(AM1>AM2). Utiliser cette fonction pour pouvoir supprimer des stations
sauvegardées sur l’unité. Une fois sélectionnée, utiliser l’encodeur rotatif
pour sélectionner le numéro de STATION PRÉRÉGLÉE (1-6) de la station
que l’on souhaite supprimer.
AM
Appuyer brièvement sur le bouton d’encodeur pour accéder aux options
STATIONS PRÉRÉGLÉES FM (AM1>AM2). Utiliser cette fonction permet
d’avoir des groupes de stations préréglées de tuner séparés parmi
lesquels choisir. Utiliser le bouton d’encodeur rotatif pour faire défiler les
groupes de TUNER et appuyer brièvement pour sélectionner le groupe.
AUTO STORE (SAUVEGARDE AUTOMATIQUE)
Appuyer brièvement sur le bouton d’encodeur pour accéder à la fonction
SAUVEGARDE AUTOMATIQUE. Il faudra se trouver sous le groupe
des STATIONS PRÉRÉGLÉES que l’on souhaite ajuster en premier
(AM1>AM2). Cette fonction sauvegarde automatiquement les stations
préréglées sur l’unité. Cela s’arrêtera lorsque les stations préréglées 1-6
sont réglées. Sélectionner le prochain groupe de STATIONS PRÉRÉGLÉES
et répéter pour remplir le jeu prochain.
LOCAL
Appuyer brièvement sur le bouton d’encodeur pour accéder aux options
LOCAL. Une fois sélectionnée, utiliser l’encodeur rotatif pour sélectionner
ON ou OFF. L’option LOCAL se règle sur les stations de radio proches
avec des signaux suffisamment forts pour une bonne réception. Dans les
zones où la réception est médiocre, passer au réglage à distance permet à
l’unité de se régler dans des stations plus distantes. Le réglage à distance
est le réglage d’usine.
PARAMÈTRES DE BANDE WB
Pour accéder aux PARAMÈTRES DE BANDE WB, appuyer brièvement
sur le MENU lors de l’utilisation de source WB TUNER. Ceci donnera
accès aux paramètres spécifiques au WB TUNER (PRESETS>ADD
PRESETS>REMOVE PRESETS).
STATIONS PRÉRÉGLÉES
Appuyer brièvement sur le bouton d’encodeur pour accéder à la liste des
STATIONS PRÉRÉGLÉES. Utiliser cette fonction pour voir quelles STA-
TIONS PRÉRÉGLÉES sont sauvegardées sur l’unité.
ADD PRESETS (AJOUTER DES STATIONS PRÉRÉGLÉES)
Effectuer une pression courte sur le bouton d’encodeur sur l’option
AJOUTER DES STATIONS PRÉRÉGLÉES. Il faudra se trouver sur les deux
stations que l’on souhaite ajouter en premier. Utiliser cette fonction pour
pouvoir sauvegarder des stations sur l’unité. Une fois sélectionnée, utiliser
l’encodeur rotatif pour sélectionner le numéro de STATION PRÉRÉGLÉE
(1-6) sur lequel on souhaite sauvegarder la station.
REMOVE PRESETS (SUPPRIMER DES STATIONS PRÉRÉGLÉES)
Appuyer brièvement sur le bouton d’encodeur sur l’option SUPPRIMER
DES STATIONS PRÉRÉGLÉES. Il faudra se trouver sous le groupe
des STATIONS PRÉRÉGLÉES que l’on souhaite ajuster en premier
(AM1>AM2). Utiliser cette fonction pour pouvoir supprimer des stations
sauvegardées sur l’unité. Une fois sélectionnée, utiliser l’encodeur rotatif
pour sélectionner le numéro de STATION PRÉRÉGLÉE (1-6) de la station
que l’on souhaite supprimer.
Fonctionnement USB (iPod)
Une fois le périphérique connecté à l’unité source, cette fonction permet
de contrôler la lecture à partir du périphérique directement de l’unité.
Sélectionner l’option source USB sur l’unité source.
Pour jouer ou pauser une chanson, appuyer brièvement sur le bouton
PLAY/PAUSE.
Pour sauter une piste vers l’avant, appuyer brièvement sur le bouton FWD.
Pour sauter une piste vers l’arrière, appuyer brièvement sur le bouton REV.
Pour accéder aux paramètres spécifiques USB, appuyer briève-
ment sur le bouton MENU pour obtenir la liste des paramètres
(BROWSER>REPEAT>SHUFFLE). Utiliser l’encodeur pour sélectionner
l’option à modifier.
BROWSER (NAVIGATEUR)
Appuyer brièvement sur le bouton d’encodeur pour accéder aux options
NAVIGATEUR (PLAYLISTS>ARTISTS>ALBUMS>GENRES>SONGS>COM
POSERS>AUDIOBOOKS>PODCASTS). Utiliser cette fonction permet de
chercher les pistes ou chansons par différents types de catégories.
REPEAT (RÉPÉTITION)
Appuyer brièvement sur le bouton d’encodeur pour accéder aux options
de la fonction RÉPÉTITION (OFF>ONE>ALL).
SHUFFLE
Appuyer brièvement sur le bouton d’encodeur pour accéder aux options
de la fonction SHUFFLE (OFF>ALL). Cette fonction permet de régler les
préférences de lecture aléatoire de pistes ou de chansons.
Fonctionnement AUX
Une fois le périphérique branché dans l’unité source, cette fonction
permet de jouer de musique à partir du périphérique. Sélectionner l’option
source AUX sur l’unité source et utiliser le périphérique branché pour
contrôler la sélection de chansons/pistes, PLAY/PAUSE et sauter la piste
FWD/REV.
Fonctionnement Bluetooth®
Une fois le périphérique appairé à l’unité source, cette fonction permet
de contrôler la lecture à partir du périphérique directement de l’unité.
Sélectionner l’option source BLUETOOTH sur l’unité source.
Pour jouer ou pauser une chanson, appuyer brièvement sur le bouton
PLAY/PAUSE.
Pour sauter une piste vers l’avant, appuyer brièvement sur le bouton FWD.
Pour sauter une piste vers l’arrière, appuyer brièvement sur le bouton REV.
Pour accéder aux paramètres spécifiques BLUETOOTH, appuyer
brièvement sur le bouton MENU pour obtenir la liste des paramètres
Français
Autogoods “130”
130.com.ua

15
(BROWSER>REPEAT>SHUFFLE). Utiliser l’encodeur pour sélectionner
l’option à modifier.
BROWSER (NAVIGATEUR)
Appuyer brièvement sur le bouton d’encodeur pour accéder aux options
NAVIGATEUR (PLAYLISTS>ARTISTS>ALBUMS>GENRES>SONGS>COM
POSERS>AUDIOBOOKS>PODCASTS). Utiliser cette fonction permet de
chercher les pistes ou chansons par différents types de catégories.
REPEAT (RÉPÉTITION)
Appuyer brièvement sur le bouton d’encodeur pour accéder aux options
de la fonction RÉPÉTITION (OFF>ONE>ALL). Cette fonction permet de
régler la préférence sur le nombre de fois qu’une piste ou qu’une chanson
sera répétée.
SHUFFLE
Appuyer brièvement sur le bouton d’encodeur pour accéder aux options
de la fonction SHUFFLE (OFF>ALL). Cette fonction permet de régler les
préférences de lecture aléatoire de pistes ou de chansons.
Pandora®
Cette fonction permet de contrôler l’application Pandora® à partir de
l’unité source directement (les utilisateurs Android devront utiliser
Bluetooth uniquement, les utilisateurs iOS peuvent utiliser à la fois USB
et Bluetooth). Il faudra lancer l’application Pandora® sur le périphérique
en premier, sélectionner alors l’option source Pandora® sur l’unité
source. Pour utiliser la fonction « Thumbs Up », appuyer longuement
sur le bouton SUB+. Pour utiliser la fonction « Thumbs down », appuyer
longuement sur le bouton SUB-.
Pour jouer ou pauser une chanson, appuyer brièvement sur le bouton
PLAY/PAUSE.
Pour sauter une piste vers l’avant, appuyer brièvement sur le bouton FWD.
Pour accéder aux paramètres spécifiques Pandora®, appuyer
brièvement sur le bouton MENU pour obtenir la liste des paramètres
(STATION>BOOKMARKS>STATIONS MANAGE). Utiliser l’encodeur pour
sélectionner l’option à modifier.
STATIONS
Pour ajuster, appuyer brièvement sur le bouton d’encodeur pour ac-
céder. Faire tourner le bouton d’encodeur pour sélectionner les options
(SHUFFLE>SORT DATE/A-Z>STATIONS). Sélectionner l’option SHUFFLE
pour mélanger les stations et sélectionner la fonction SORT/TRIER va trier
les stations par date ajoutée ou par ordre alphabétique. Il est également
possible de sélectionner les stations sauvegardées directement de cette
liste.
SIGNETS
Pour METTRE EN SIGNET un artiste ou une piste qui joue, appuyer
brièvement sur le bouton d’encodeur pour afficher les options BOOK-
MARK/SIGNETS (ARTIST>TRACK). Sélectionner l’option que l’on souhaite
utiliser pour la mise en signet.
STATIONS MANAGE (GESTION DES STATIONS)
Pour créer des stations, appuyer brièvement sur le bouton d’encodeur
pour afficher les options STATION MANAGE (CREATE FROM ARTIST>
CREATE FROM TRACK> CREATE FROM GENRE>DELETE). Sélectionner
l’OPTION CREATE FROM ARTIST (CRÉER À PARTIR DE L’ARTISTE) pour
pouvoir créer une station à partir de l’artiste que l’on écoute actuelle-
ment. L’option CREATE FROM TRACK (CRÉER À PARTIR DE LA PISTE)
fonctionne de la même façon en créant une station à partir de la piste
actuelle jouée. Si on crée une station en sélectionnant CREATE FROM
GENRE (CRÉER À PARTIR DU GENRE), ceci donnera le choix de genres
de musique à sélectionner pour créer une station. Sélectionner DELETE
(SUPPRIMER) pour supprimer la station qui joue maintenant.
Pandora, le logo Pandora et l’habillage Pandora sont des marques de
commerce ou des marques de commerce déposées de Pandora Media,
Inc. Utilisés avec permission. Pandora n’est disponible que dans certains
pays. Prière de consulter http://www.pandora.com/legal pour de plus
amples informations.
Français
Autogoods “130”
130.com.ua

16
Français
Symptôme/Avertissement Diagnostic Solution
De base
L'unité source ne se met pas en
marche.
Fusible grillé Vérifier le fusible de l'unité, remplacer avec le calibre
approprié.
L'allumage du véhicule est désactivé Si connectée selon les instructions, l'unité ne fonctionnera
pas avec l'allumage désactivé.
La tension appliqué sur le fil rouge
n'est pas entre 10,5 et16 volts ou
absence de toute tension
Vérifier la batterie, les connexions et les fusibles, et réparer
ou remplacer selon les besoins. Si la tension est supérieure
à +16 volts, faire inspecter le système électrique par un
centre de service homologué.
L'unité n'est pas correctement mise à
la masse. Vérifier le câblage et réparer selon les besoins.
Tuner de radio
Le tuner ne syntonise aucune
station Aucune antenne, ou connexion décon-
nectée ou ouverte dans le câble Vérifier toutes les connexions et réparer selon les besoins.
Impossible de régler des stations
en mode recherche On se trouve dans une zone à signal
faible S'assurer que le mode LOC du tuner est désactivé.
Périphériques USB
Le périphérique USB ne peut pas
être inséré
Le périphérique USB a été inséré dans
le mauvais sens Inverser le sens de connexion du périphérique USB, essayer
de le réinsérer.
Le connecteur du périphérique USB
est cassé. Le remplacer par un nouveau périphérique USB.
Le périphérique USB n'est pas
reconnu.
Le périphérique USB est endommagé. Déconnecter le périphérique USB et reconnecter. Si le péri-
phérique n'est toujours pas reconnu, tenter de le remplacer
par un périphérique USB différent. USB ne fonctionne pas
avec les périphériques Android.
Les connecteurs sont desserrés
Aucun son entendu avec l'affichage
« Aucun fichier » Aucun fichier MP3/WMA sauvegardé
sur le périphérique USB Sauvegarder ces fichiers correctement sur le périphérique
USB. USB ne fonctionne par avec les périphériques Android.
Sautes de son ou son bruyant Les fichiers MP3/WMA ne sont pas
créés correctement Utiliser les fichiers MP3/WMA qui sont correctement
encodés.
AUX
MP3 ne joue pas Une erreur d'écriture s'est produite. Le
format MP3 n'est pas compatible. S'assurer que MP3 a été écrit dans un format pris en charge
Autogoods “130”
130.com.ua

17
Características de diseño (Fig. 1)
Codificador giratorio
Esta perilla es para ajustar el volumen principal, volúmenes de zona,
menú de navegación y ajustes de la configuración.
Botón MENU
Este botón le permite acceso a las configuraciones principales de la
unidad presionando largo tiempo. Si se presiona brevemente consigue
acceso a las configuraciones de la fuente activa.
Botón SRC (encendido)
Este botón le permite conmutar entre fuentes (presión breve) y encender
(ON) o apagar (OFF) la unidad (presión prolongada)
Botones SUB
Estos botones le permiten ajustar la salida del subwoofer o de la línea de
salida posterior UP (ARRIBA) o DOWN (ABAJO) (0-20).
Botón PLAY/PAUSE (REPRODUCCION/PAUSA)
Presione este botón para reproducir o pausar su música. Este botón
también actúa como MUTE (SILENCIAMIENTO) cuando la fuente está en
el modo AUX & TUNER (AUXILIAR Y SINTONIZADOR).
Botón DIMMER (ATENUADOR)
Presionar este botón le permitirá seleccionar entre dos valores de brillo
para la pantalla.
Botón REV / FWD (REBOBINAR / AVANZAR)
Use este botón para desplazarse hacia atrás y adelante a través de canales
o pistas presionando brevemente. Si se presiona durante largo tiempo se
activa el modo de búsqueda manual.
Índice
Consideraciones para la instalación
La siguiente es una lista básica de herramientas necesarias para la
instalación:
Esta sección se enfoca en algunas de las consideraciones del vehículo
para instalar la unidad de fuente nueva. Preplanear la distribución de su
sistema y las rutas de cableado le ahorrará• tiempo de instalación. Cu-
ando decida la distribución de su nuevo sistema asegúrese de que pueda
acceder fácilmente a cada componente para hacer los ajustes.
Si no está seguro si debe hacer la instalación de este sistema usted
mismo, haga que lo instale un técnico calificado de Rockford Audio.
Antes de efectuar la instalación, desconecte el terminal negativo (-) de la
batería para evitar daños a la unidad, incendio y/o posiblemente lesiones.
Antes de comenzar cualquier instalación, siga estas simples normas:
1. Asegúrese de leer cuidadosamente y de entender las instrucciones
antes de tratar de instalar la unidad.
2. Por seguridad, desconecte el conductor negativo de la batería antes
de comenzar la instalación.
3. Para facilitar el montaje, sugerimos que tienda todos los cables antes
de montar su unidad en el sitio.
4. Tienda todos los cables RCA cerca unos de otros y alejados de los
cables de alta corriente.
5. Utilice conectores de alta calidad para tener una instalación confiable
y para reducir al mínimo las pérdidas de señal o de potencia.
6. ¡Piense siempre antes de perforar! Tenga cuidado de no cortar ni
perforar tanques de combustible, tuberías de combustible, de frenos o
hidráulicas, tuberías de vacío o cableado eléctrico al trabajar en cualquier
vehículo.
7. Nunca tienda cables abajo del vehículo. Tender los cables adentro del
vehículo proporciona la mejor protección.
8. Evite tender cables arriba o a través de bordes filosos. Use arandelas
aislantes de caucho para proteger los cables tendidos a través de metal,
especialmente en la mampara cortafuegos.
9. Proteja SIEMPRE la batería y el sistema eléctrico contra daños
usando los fusibles correspondientes. Instale el portafusibles y los fusible
correspondientes en el cable de +12 V a una distancia menor de 18 pulg.
(45.7 cm) del terminal de la batería.
10. Al conectar la tierra del chasis del vehículo raspe la pintura del metal
para asegurar una conexión buena y limpia a tierra. Las conexiones a
tierra se deben hacer lo más cortas posibles y siempre conectadas a metal
que esté soldado a la carrocería o al chasis del vehículo. Nunca debe usar
los pernos del cinturón de seguridad para la conexión a tierra.
Montaje (usando la placa de montaje) - Fig. 3
Para montar la unidad, deberá encontrar una superficie plana con espacio
suficiente atrás para que proporcione suficiente separación para la unidad
y todo el cableado necesario.
1. Una vez que haya determinado un lugar para el montaje, tendrá que
cortar un agujero circular de 3 pulg. (77mm) de diámetro.
2. Después de haber cortado el agujero deslice la unidad y el cableado
a través del agujero.
3. Deslice la placa de montaje arriba del lado posterior de la unidad y
asegure con los tornillos proporcionados.
4. Presione el marco de terminación en el lado delantero de la unidad.
5. Enchufe todos los arneses de cableado y los cables. Consulte el dia-
grama de cableado para ver los tipos de conexión de arneses de cables.
Montaje (usando un soporte en “U”) - Fig. 4
Para montar la unidad, deberá encontrar una superficie plana con espacio
suficiente atrás para que proporcione suficiente separación para la unidad
y todo el cableado necesario.
1. Una vez que haya determinado un lugar para el montaje, tendrá que
cortar un agujero circular de 3 pulg. (77mm) de diámetro.
2. Después de haber cortado el agujero deslice la unidad y el cableado
a través del agujero.
3. Tome el soporte en “U” y deslícelo arriba de la parte posterior de la
unidad. Apriete hacia abajo usando los tornillos proporcionados.
4. Presione el marco de decoración en el lado delantero de la unidad.
5. Enchufe todos los arneses de cableado y los cables. Consulte el dia-
grama de cableado para ver los tipos de conexión de arneses de cables.
Configuración de la unidad fuente
Para acceder a la configuración de la unidad fuente, presione el botón
MENU hasta que aparezcan las opciones. Haga girar el codificador
para desplazarse por la lista de configuraciones y presione breve-
mente el botón del codificador para seleccionar la configuración que
desea cambiar. (BALANCE>FADER>AUDIO>VOLTAGE GAUGE>BT
PAIRING>BEEP>TUNER REGION>SOFTWARE>FACTORY DEFAULT)
Esta unidad fuente tiene cero consumo de corriente cuando está apagada.
Se guardará todas sus configuraciones y predeterminaciones junto con la
batería de su embarcación durante el almacenamiento.
BALANCE
Presione brevemente el botón codificador para acceder al ajuste de
BALANCE. Haga girar el botón del codificador para configurar la salida
de BALANCE.
FADER (ATENUADOR)
Presione brevemente el botón codificador para acceder al ajuste de
FADER. Haga girar el botón del codificador para configurar la salida de
FADER.
AUDIO
Para acceder a la configuración de AUDIO, presione brevemente la
opción AUDIO desde la pantalla MENU. Haga girar el codificador para
desplazarse por la lista de configuraciones y presione brevemente el
botón del codificador para seleccionar la configuración que desea cam-
biar. (7 BAND EQ>CROSSOVER>PEQ>REAR RCA>AUX INPUT>SOURCE
GAIN>INTERNAL AMPLIFIER)
Español
• Unidad fuente
• Marco decorativo
• Placa de montaje
• Soporte en “U”
• Tronillos
• Arnés de alimentación /
altavoz
• Manual de Instalación y
Operación
• Multímetro
• Pelacables
• Alicates de engarzar
• Pinza de corte
• Destornillador Phillips No. 2
• Llave para bornes de batería
• Taladro de mano con brocas
varias
• Tubos termocontraíbles
• Soldador
• Soldadura
• Pistola de aire caliente
• Llave de 7mm
Autogoods “130”
130.com.ua

18
7 BAND EQ (ECUALIZADOR DE 7 BANDAS)
Presione brevemente el botón codificador para acceder a la configuración
de 7 BAND EQ. Use el codificador giratorio para desplazarse por la
configuración del EQ. (FLAT > ROCK > CLASSIC > ACOUSTIC > DANCE
> ELECTRONIC > HIP-HOP > CUSTOM) al configurar CUSTOM EQ,
presione brevemente el botón del codificador para establecer la primera
frecuencia. Una vez activo, haga girar el codificador para ajustar la
configuración de la frecuencia. Presione brevemente de nuevo el botón
del codificador para acceder a la frecuencia siguiente. Repita hasta haber
terminado la configuración del EQ. Presione brevemente el botón MENU
para salir y volver a subir un nivel.
CROSSOVER (CRUCE)
Presione brevemente el botón para acceder a la configuración de CROSS-
OVER. Use el codificador giratorio para seleccionar las opciones de la
zona de cruce (FRONT>REAR>SUB). Presione brevemente el codificador
para ajustar la frecuencia del cruce (60Hz>80Hz>120Hz>APF). Presione
brevemente MENU para salir y volver a subir un nivel.
REAR RCA
Presione brevemente el botón para acceder a la configuración de REAR
RCA. Use el codificador giratorio para seleccionar opciones (LINE
OUT>SUBWOOFER).
PUNCH EQ
Presione brevemente el botón para acceder a la configuración de PUNCH
EQ. Use el codificador giratorio para ajustar la ganancia de la salida (0 a
12). Presione brevemente MENU para salir y volver a subir un nivel.
Punch EQ es un ecualizador abordo con hasta +18dB a 45Hz y/o un
refuerzo de hasta +12dB a 12.5kHz
ENTRADA AUX.
RENAME – Para cambiar el nombre de AUX, presione brevemente el
botón del codificador para configurar la primera letra del nombre nuevo.
Una vez activado, haga girar el codificador para ajustar letras. Presione
brevemente de nuevo el botón del codificador para ajustar la letra
siguiente. Repita hasta que se haya cambiado el nombre de AUX. Presione
brevemente MENU para salir y volver a subir un nivel.
ENABLE - Presione brevemente el botón codificador para acceder a las
opciones. Gire el botón codificador para seleccionar si no puede descubrir
la unidad. (ENABLE > DISABLE)
SOURCE GAIN (GANANCIA DE LA FUENTE)
Para ajustar el nivel de ganancia del dispositivo, desplácese a través de
las entradas (FM TUNER>AM TUNER>WB TUNER>USB>AUX>BLUETOOT
H>PANDORA) hasta el dispositivo que quiere ajustar, presione brevemente
el botón del codificador para acceder a los ajustes de la ganancia. Haga
girar el botón codificador para ajustar el nivel de ganancia. (-3dB > -2dB
> -1dB > 0dB > +1dB > +2dB > +3dB)
AMPLIFICADOR INTERNO
Presione brevemente el botón para acceder a las opciones de AMPLI-
FICADOR INTERNO. Use el codificador giratorio para seleccionar las
opciones (ON>OFF). Al usar un amplificador para alimentar sus altavoces,
seleccione OFF. Si está alimentando sus altavoces directamente desde la
unidad fuente, seleccione ON en INTERNAL AMPLIFIER.
VOLTAGE GAUGE (VOLTIMETRO)
Para mostrar el voltaje del vehículo, presione brevemente el botón del
codificador en la opción VOLTAGE GAUGE.
EMPAREJADO DEL DISPOSITIVO BT
Presione brevemente el botón del codificador para acceder a las opciones.
Gire el botón codificador para seleccionar si no puede descubrir la unidad
para emparejar. (ENABLE > DISABLE) Una vez habilitada, la unidad fuente
ahora se puede descubrir y está lista para ser emparejada a su dispositivo.
Abra la configuración de Bluetooth en su dispositivo para encontrar la
unidad fuente rotulada “Rockford PMX” y seleccione.
BEEP (ZUMBIDO)
Presione brevemente el botón codificador para acceder a las opciones de
BEEP. Haga girar el botón codificador para encender y apagar (ON/OFF)
el sistema.
REGIÓN DE SINTONIZADOR
Para ajustar, presione brevemente el botón del codificador para tener
acceso. Haga girar el botón del codificador para seleccionar la REGION
DE SINTONIZADOR de su preferencia. (EUROPE > USA > RUSSIA > LATIN
> ASIA > JAPAN > MIDEAST > AUSTRALIA)
SOFTWARE
VERSION - Presione brevemente el botón del codificador para visualizar la
versión actual del firmware de la unidad.
UPDATE - Presione brevemente el botón del codificador para actualizar el
firmware. Siga las instrucciones de la pantalla al actualizar.
PREDETERMINACIÓN DE FABRICA
AUDIO – Presione brevemente el botón para tener acceso. Gire el botón
codificador para seleccionar YES/NO. Seleccionar YES repondrá su
unidad de nuevo a la configuración predeterminada de la fábrica.
SYSTEM – Presione brevemente el botón del codificador para tener
acceso. Gire el botón codificador para seleccionar YES/NO. Seleccionar
YES repondrá su unidad de nuevo a la configuración predeterminada de
la fábrica.
Funcionamiento Básico
PARA ENCENDER Y APAGAR (ON/OFF) LA UNIDAD.
Presione prolongadamente el botón SRC (encendido) para encender la
unidad o para apagarla (ON u OFF).
AJUSTE DEL VOLUMEN
Haga girar la perilla del codificador a la izquierda o a la derecha al nivel
de volumen deseado (0-40). Se visualizará el nivel de volumen actual
durante el ajuste.
AJUSTE DE LA SALIDA DEL SUBWOOFER
Presione los botones SUB + o SUB- para ajustar el nivel de la salida
(0-20).
AJUSTE DEL BRILLO DE LA PANTALLA
Presione brevemente el botón SCREEN BRIGHTNESS para ajustar el nivel
de brillo. Hay dos niveles de brillo.
SELECCIÓN DE UNA FUENTE PARA REPRODUCIR
Presione brevemente el botón SRC para mostrar las distintas opciones de
fuente (FM TUNER>AM TUNER>WB TUNER>USB>AUX>BLUETOOTH>P
ANDORA>SIRIUSXM). Use el codificador giratorio o presione brevemente
SCR para desplazarse por las fuentes.
Operación del sintonizador (FM/AM/WB)
Para operar use el codificador giratorio para seleccionar la fuente del
sintonizador que quiere escuchar (FM>AM>WB).
Para BUSCAR AUTOMÁTICAMENTE estaciones, presione brevemente los
botones FWD y REV. Para BUSCAR MANUALMENTE estaciones, presione
prolongadamente los botones FWD y REV para sintonizar la frecuencia
deseada.
Para MUTE (silenciar) el TUNER (sintonizador), presione brevemente el
botón PLAY/PAUSE (reproducción/pausa).
CONFIGURACIÓN DE BANDAS DE FW
Para acceder a FM BAND SETTINGS, presione brevemente el MENU al
utilizar la fuente FM TUNER. Esto le permite acceso a las configuraciones
específicas de FM TUNER (FM>PRESETS>ADD PRESETS>REMOVE
PRESETS>AUTO STORE>LOCAL).
PRESETS (PREDETERMINACIONES)
Presione brevemente el botón codificador para acceder a las opciones de
PRESETS. El uso de esta característica le permite ver qué PRESETS se
guardan en la unidad.
ADD PRESETS (AGREGAR PREDETERMINACIONES)
Presione brevemente el botón codificador para acceder a la opción ADD
PRESETS. Tendrá que estar en ambos, la estación y el grupo PRESET
que quiere ajustar primero (FM1>FM2>FM3). Usar esta característica le
permite guardar estaciones en la unidad. Una vez seleccionado, use el
codificador giratorio para seleccionar el número PRESET (1-6) en el que
quiere guardar la estación.
REMOVE PRESETS (ELIMINACIÓN DE PREDETERMINACIONES)
Presione brevemente el botón codificador para acceder a la opción
REMOVE PRESETS. Tendrá que estar bajo el grupo PRESET que quiere
ajustar primero (FM1>FM2>FM3). Usar esta característica le permite
eliminar las estaciones guardadas en la unidad. Una vez seleccionado,
use el codificador giratorio para seleccionar el número PRESET (1-6) de
la estación que quiere eliminar.
Español
Autogoods “130”
130.com.ua

19
FM
Presione brevemente el botón codificador para acceder a las opciones de
FM PRESET (FM1>FM2>FM3). El uso de esta característica le permite
tener grupos predeterminados de sintonizador separados de los que pu-
ede escoger. Use el botón codificador giratorio para desplazarse a través
de los grupos de TUNER y presione brevemente para seleccionar el grupo.
AUTO STORE (ALMACENAMIENTO AUTOMÁTICO)
Presione brevemente el botón codificador para acceder a la función
AUTO STORE. Tendrá que estar bajo el grupo PRESET que quiere ajustar
primero (FM1>FM2>FM3). Esta característica almacena automáticamente
predeterminaciones en la unidad. Se detiene cuando se haya configurado
las predeterminaciones 1-6. Seleccione el siguiente grupo PRESET y
repita para llenar el próximo.
LOCAL
Presione brevemente el botón codificador para acceder a las opciones
de LOCAL. Una vez seleccionado, use el codificador giratorio para
seleccionar ON u OFF. La opción local sintoniza estaciones más cercanas
con señales suficientemente fuertes para tener buena recepción. En áreas
donde la recepción es deficiente, cambiar a sintonización distante habilita
a la unidad a que sintonice estaciones más distantes. La sintonía distante
es la predeterminación.
CONFIGURACIÓN DE BANDAS DE AM
Para acceder a AM BAND SETTINGS, presione brevemente el MENU al
utilizar la fuente AM TUNER. Esto le permite acceso a las configuraciones
específicas de AM TUNER (FM>PRESETS>ADD PRESETS>REMOVE
PRESETS>AUTO STORE>LOCAL).
PRESETS
Presione brevemente el botón codificador para acceder a las opciones de
PRESETS. El uso de esta característica le permite ver qué PRESETS se
guardan en la unidad.
ADD PRESETS (AGREGAR PREDETERMINACIONES)
Presione brevemente el botón codificador para acceder a la opción ADD
PRESETS. Tendrá que estar en ambos, la estación y el grupo PRESET
que quiere ajustar primero (AM1>AM2). Usar esta característica le
permite guardar las estaciones en la unidad. Una vez seleccionado, use el
codificador giratorio para seleccionar el número PRESET (1-6) en el que
quiere guardar la estación.
REMOVE PRESETS (ELIMINACION DE PREDETERMINACIONES)
Presione brevemente el botón codificador para acceder a la opción
REMOVE PRESETS. Tendrá que estar bajo el grupo PRESET que quiere
ajustar primero (AM1>AM2). Usar esta característica le permite eliminar
las estaciones guardadas en la unidad. Una vez seleccionado, use el
codificador giratorio para seleccionar el número PRESET (1-6) de la
estación que quiere eliminar.
AM
Presione brevemente el botón codificador para acceder a las opciones de
FM PRESET (AM1>AM2). El uso de esta característica le permite tener
grupos de predeterminación de de sintonizador separados de los que pu-
ede escoger. Use el botón codificador giratorio para desplazarse a través
de los grupos de TUNER y presione brevemente para seleccionar el grupo.
AUTO STORE
Presione brevemente el botón codificador para acceder a la función
AUTO STORE. Tendrá que estar bajo el grupo PRESET que quiere ajustar
primero (AM1>AM2). Esta característica almacena automáticamente
predeterminaciones en la unidad. Se detiene cuando se configura las
predeterminaciones 1-6. Seleccione el siguiente grupo PRESET y repita
para completar el siguiente.
LOCAL
Presione brevemente el botón codificador para acceder a las opciones
de LOCAL. Una vez seleccionado, use el codificador giratorio para
seleccionar ON u OFF. La opción local sintoniza estaciones más cercanas
con señales suficientemente fuertes para tener buena recepción. En áreas
donde la recepción es deficiente, cambiar a sintonización distante habilita
a la unidad a que sintonice estaciones más distantes. La sintonía distante
es la predeterminación.
WB BAND SETTINGS (CONFIGURACIÓN DE LA BANDA WB)
Para acceder a WB BAND SETTINGS, presione brevemente el MENU
al utilizar la fuente WB TUNER. Esto le permite acceso a las configura-
ciones específicas de WB TUNER (PRESETS>ADD PRESETS>REMOVE
PRESETS).
PRESETS
Presione brevemente el botón codificador para acceder a las opciones de
PRESETS. El uso de esta característica le permite ver qué PRESETS se
guardan en la unidad.
ADD PRESETS (AGREGAR PREDETERMINACIONES)
Presione brevemente el botón codificador para acceder a la opción ADD
PRESETS. Tendrá que estar en la estación que quiere agregar primero.
Usar esta característica le permite guardar las estaciones en la unidad.
Una vez seleccionado, use el codificador giratorio para seleccionar el
número PRESET (1-6) en el que quiere guardar la estación.
REMOVE PRESETS (ELIMINACIÓN DE PREDETERMINACIONES)
Presione brevemente el botón codificador para acceder a la opción
REMOVE PRESETS. Tendrá que estar bajo el grupo PRESET que quiere
ajustar primero (AM1>AM2). Usar esta característica le permite eliminar
las estaciones guardadas en la unidad. Una vez seleccionada, use el
codificador giratorio para seleccionar el número PRESET(1-6) de la
estación que quiere eliminar.
Operación de USB (iPod)
Después que su dispositivo esté conectado a la unidad fuente, esta
característica le permite controlar la reproducción de su dispositivo
directamente desde la unidad. Seleccione la opción de fuente USB en la
unidad fuente.
Para reproducir o pausar una canción, presione brevemente el botón
PLAY/PAUSE.
Para omitir una pista y avanzar, presione brevemente el botón FWD. Para
omitir una pista y retroceder, presione brevemente el botón REV.
Para acceder a una configuración específica de USB, presione
brevemente el botón MENU para visualizar una lista de configuraciones
(BROWSER>REPEAT>SHUFFLE). Use el codificador para seleccionar la
opción a cambiar.
BROWSER
Presione brevemente el botón del codificador para acceder a las opciones
del BROWSER (PLAYLISTS>ARTISTS>ALBUMS>GENRES>SONGS>COM
POSERS>AUDIOBOOKS>PODCASTS). El uso de esta característica per-
mite la búsqueda de pistas o canciones por tipos de categorías distintas.
REPEAT
Presione brevemente el botón codificador para acceder a las opciones de
la característica REPEAT (OFF>ONE>ALL).
SHUFFLE
Presione brevemente el botón codificador para acceder a las opciones de
la característica SHUFFLE (OFF>ALL). Esta característica le permite que
configure su preferencia en cuanto a la reproducción en orden aleatorio de
pistas o canciones.
Operación AUX
Después que su dispositivo esté conectado a la unidad fuente, esta
característica le permite reproducir música desde su dispositivo. Selec-
cione la opción fuente AUX en la fuente de la unidad y use su dispositivo
enchufado para controlar la selección de canciones/pistas, REPRODUCIR/
PAUSA y omisión de pista FWD/REV.
Operación de Bluetooth®
Después que su dispositivo esté conectado a la unidad fuente, esta
característica le permite controlar la reproducción de su dispositivo di-
rectamente desde la unidad. Seleccione la opción de fuente BLUETOOTH
en la unidad fuente.
Para reproducir o pausar una canción, presione brevemente el botón
PLAY/PAUSE.
Para omitir una pista y avanzar, presione brevemente el botón FWD. Para
omitir una pista y retroceder, presione brevemente el botón REV.
Para acceder a una configuración específica de BLUETOOTH, presione
brevemente el botón MENU para visualizar una lista de configuraciones
(BROWSER>REPEAT>SHUFFLE). Use el codificador para seleccionar la
opción a cambiar.
BROWSER
Español
Autogoods “130”
130.com.ua
Other manuals for Punch PMX-2
1
Other Rockford Fosgate Receiver manuals

Rockford Fosgate
Rockford Fosgate RFX9901DM2 User manual

Rockford Fosgate
Rockford Fosgate Punch PMX-HD14 User manual

Rockford Fosgate
Rockford Fosgate PMX-0 Original operating instructions

Rockford Fosgate
Rockford Fosgate PUNCH ELEMENT READY PMX-3 Guide

Rockford Fosgate
Rockford Fosgate PUNCH PMX-1 User manual

Rockford Fosgate
Rockford Fosgate PUNCH ELEMENT READY PMX-3 User manual

Rockford Fosgate
Rockford Fosgate punchPMX-3 Guide

Rockford Fosgate
Rockford Fosgate Punch PMX-5 Original operating instructions

Rockford Fosgate
Rockford Fosgate PUNCH PMX-1 Guide

Rockford Fosgate
Rockford Fosgate PUNCH PMX-1 Guide