Blank Preparation
1. Cuttheblanksabout1/8"longerthantheBrassTubes
toallowfor“blow-out”orholeelongation.Maintaingrain
orientationofthetwoblanksforturningbyplacingan“x”
oneithersideofthecutline.
2. Drilltheblankswitha7mmdrillbitataspeedof900
to1200RPM.
3. PolishtheBrassTubeswith220gritsandpapertoremove
oxidationandroughentheTubesforbetteradhesion.This
canbedonebyhandorbychuckingtheminadrillpress
orportablehanddrill.
4. PreparetogluewithmediumCA(cyanoacrylate)glueor
two-partfastdryingepoxy.
5. ApplythegluetotheoutsideofoneBrassTubewithaliberal
amountaroundtheendthatisinsertedfirst.Donotapply
gluetotheinsideoftheblank,asthiswillcausetheglueto
getinsidetheBrassTubeandruinit.
6. InserttheBrassTubewithatwistingmotionintotheblank
untiltheTubeisequidistantbetweenbothendsofthe
blank.Wipeoffanyexcessglueontheendsoftheblank.
Allowthegluetodry.GluethesecondBrassTubeusing
thesamemethod.
7. Usingabarreltrimmer,disk,orbeltsander,trimtheends
oftheblanksuntilyoucanjustseethebrightbrassends
oftheTubes.Thefacesoftheendsmustbeperpendicular
totheBrassTubesandparallelwitheachother.Itis
imperativetomatchthelengthofthetrimmedblanksto
theoriginallengthoftheBrassTubesandthattheinsides
oftheBrassTubesarecleanandfreeofanyglue.
Turning the Blanks
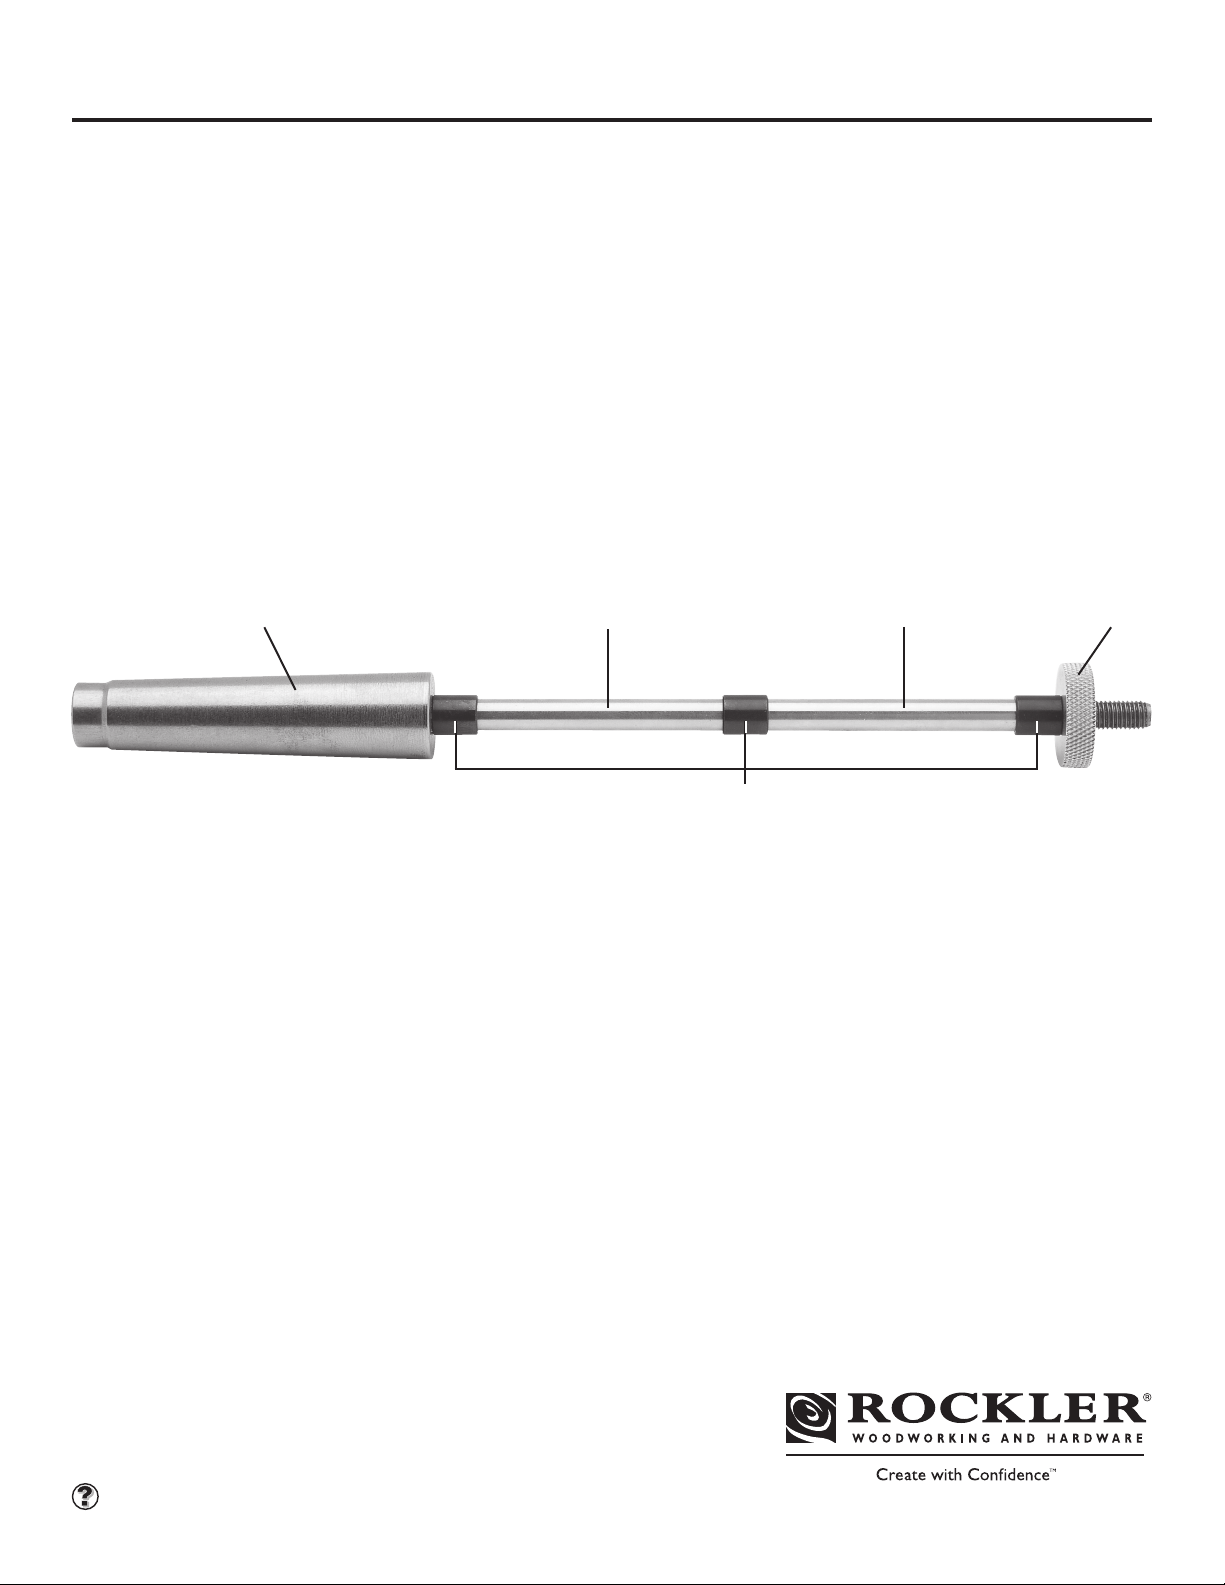
1. Assembletheblanksonthemandrelwiththebushings
placedtoeithersideoftheblanks.Keepthegrainorientation
oftheblanksinlinewhenmounting.Notethatallofthe
bushingsarethesamesize.
2. Tightenthetailstockandthentightenthemandrelnutthat
holdstheblanks.Donotover-tightenthetailstockormandrel
nutasthismaycausethemandreltoflex,causingtheblanks
togooutofround.
3. Turntheblankstothedesiredshape,makingsurethatthe
surfacesnexttothebushingsareturnedtothesame
diameterasthebushings.
4. Afterturning,sandthesurfacesinprogressivestepsof
220,400,600,and1000grit.Ifahigherfinishisdesired,
micromeshsandpapermaybeused.
5. Applythefinishofchoiceandpolish.
6. Removetheblanksfromthemandrel,keepingtheblank
orientationandgrainpatternsinline.
Gold Slimline Pencil Preparation and Turning
61254
© Rockler Companies Inc. 2012
Visit Rockler.com for the most current product
information and videos or call 1-800-260-9663.
Upper Tube Nut
Slimline Bushing Set
Mandrel “A” Lower Tube


