manuals.online logo
Brands
  1. Home
  2. •
  3. Brands
  4. •
  5. Rohl
  6. •
  7. Plumbing Product
  8. •
  9. Rohl AQUITAINE U.1323 User manual

Rohl AQUITAINE U.1323 User manual

* Where indicated please specify color
Perrin & Rowe is a registered trademark. 9001307U Issue 1
SPARES
MINI INSTANT HOT DISPENSERS
Max Temp:
For Mains: 185°F
Recommended
Working Pressures:
Min 22psi
Max 72psi
*IMPORTANT!! ENSURE A PRESSURE REDUCING VALVE (PRV) IS USED IN-LINE
WITH COLD INLET AND IDEALLY SET TO 43.5PSI (3BAR). FAILURE TO DO SO MAY
RESULT IN REDUCED PRODUCT PERFORMANCE.**
IMPORTANT WARNING!!
PLEASE ENSURE THAT THE RECOMMENDED HEATER TANK UNIT (U.1998) AND FILTER KIT (U.1106)IS
USED.
TO AVOID PRESSURISED BOILING WATER AND TO COMPLY WITH US REGULATIONS THIS IS AN OPEN
VENTED PRODUCT.
DO NOT PLUG IN THE UNIT UNTIL ALL WATER CONNECTIONS HAVE BEEN MADE AND THE TANK HAS
FILLED COMPLETELY THEN FLUSHED TO REMOVE AIR.
*IMPORTANT!! ENSURE A PRESSURE REDUCING VALVE (PRV) IS USED IN-LINE WITH COLD INLET AND
IDEALLY SET TO 43.5PSI (3BAR). FAILURE TO DO SO MAY RESULT IN REDUCED PRODUCT PERFORMANCE.*
INSTANT HOT WATER TEMPERATURES CAN REACH 210°F. THE FAUCET IS DESIGNED WITH FEATURES
TO MINIMISE RISK AND POTENTIAL INJURY; TWO ACTION OPERATION, SPRING BACK VALVE AND
DELAYED DELIVERY; BUT SHOULD BE OPERATED OR SUPERVISED BY A RESPONSIBLE ADULT.
PLEASE READ AND FULLY UNDERSTAND THE HEATER TANK INSTRUCTIONS BEFORE USE.
Registration -
Please visit
www.rohlhome.com/filtration-registration.aspx,
complete the registration card (postage paid) or
phone 1-800-777-9762 to register your product
.
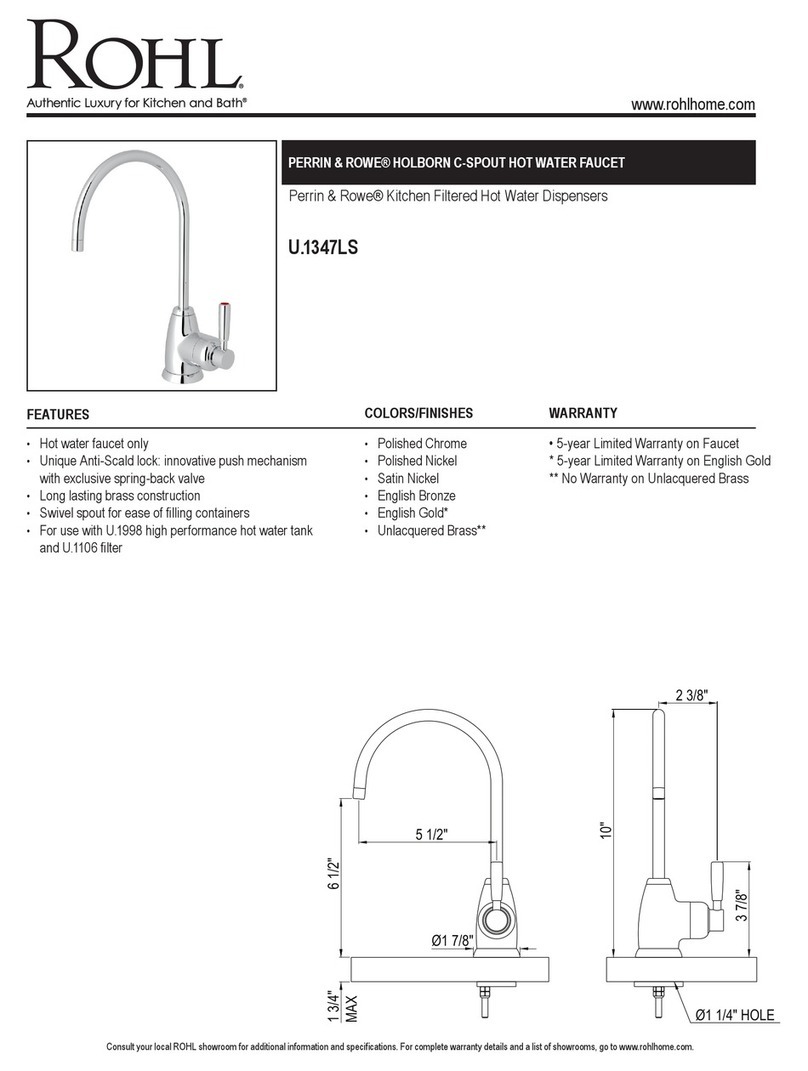
O1 1/4"
HOLE
5
1/2
"
10"
61/2"
G3/8"
OUT TO FILTER
FOR HEATER TANK
O5 I.D
SILICONE TUBE
FROM TANK
O1 1/7"
BASE RING
5
1/2
"
91/2"
71/4"
5
1/2
"
10"
61/2"
U.1323: AQUITAINE U.1347: Mimas U.1307: Parthian
9.201887*
9.26400
9.15307 9.28620
9.28749
9.13325
9.202008*
9.201166*
U.PRF1
REPLACEMENT
NANO FILTER
9.18162* 9.18846*
9.12323*
9.12348*
9.14321*
9.17801
CARE & MAINTENANCE
• Occasional cleaning with warm soapy water, followed by a polish with a soft cloth is all that is
required to keep the plated finish in good condition.
• If you wish to occasionally polish your faucet and it has a Chrome, Nickel or Pewter finish, we
recommend a gentle metal cleaner or metal polish, which is available from hardware and automotive
parts stores.
• Do not use any cleaners on Gold or English Bronze Faucets.
• Do not use proprietary abrasive liquids, powders, or pads to clean the product. You will damage the
plated finish and void your warranty.
BEFORE USE
• Carefully check the installation for leaks.
• If further building work is to be carried out in the vicinity, cover the mixer tap to avoid damaging the
finish.
• Please ensure that the installation complies with the local plumbing codes.
NOTE: Diagram shows faucet
set up with u.1998 (heater
tank) and u.1106 (filter).
FLOW REGULATOR
TO BE FITTED TO
COLD INLET 9/16"-24
ROHL WARRANTY POLICY
All products supplied by ROHL carry warranties against manufacturing defects.
For full ROHL WARRANTY please contact ROHL or visit www.rohlhome.com
Please contact the local ROHL retailer or showroom where you purchased this product for all warranty
related claims.
SPARE PARTS & SERVICE
3 Parker
Irvine
CA 92618
(714) 557-1933
www.rohlhome.com
Perrin & Rowe products are manufactured in England using
quality materials, the latest technology and built to the highest
standards.
We would like to thank you for purchasing this Perrin & Rowe
product and invite you to view the comprehensive range of Perrin
& Rowe tapware, shower fittings, bathroom accessories, soap
dispensers and bathroomware.
Please contact us to receive our latest product catalogues or
view them online at www.rohlhome.com
Preparation for the installation.
Flush the pipework before
installing this tapware.
Once unpacked, remove nuts and clamping
plate ready for installation
IMPORTANT INFORMATION
Before you proceed... We recommend you engage the services of a registered plumber to install this
product.
Perrin & Rowe taps require a maximum inlet pressure supply of 75psi. For installations where the
inlet water supply pressure is ever above 75psi, pressure-limiting valves must be installed prior to
this tap.
It is essential that the information contained herein is carefully read and understood prior to
installing and operating this tap.
Congratulations on the purchase of your Perrin and Rowe Kitchen Product. Correctly installed
and with sensible care, this product will give you many years of trouble free service.
The Mini Hot Dispensers Collection
Installation & User Guide
••
THREADED STUD
CLAMPING PLATE
NUT
BASE SEAL
WORK
SURFACE
NYLOCK NUT
BOX
SPANNER
(PROVIDED)
1 3/4" MAX
1
Mounting dispenser:
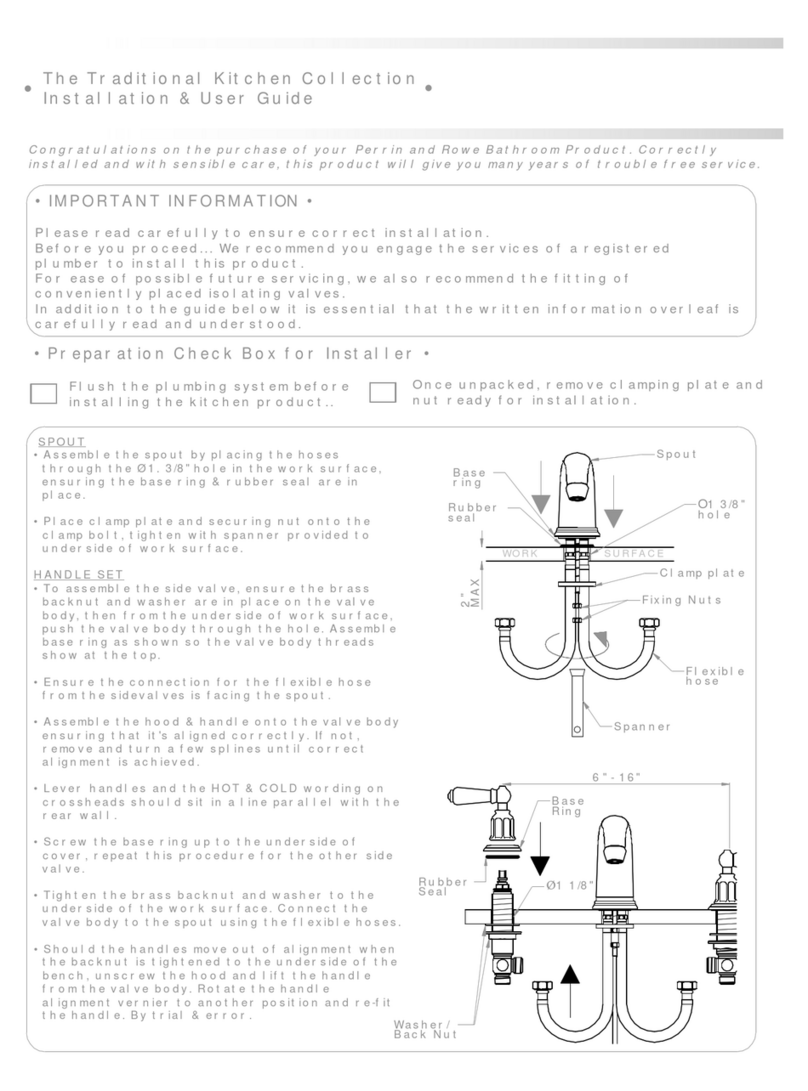
• Feed the flexible connections
through the ø1 1/4" work surface hole
ensuring the base seal is in place
between tap and mounting surface.
• Ensure the base ring and tap are
orientated correctly, Hot water lever
should rotate to point forwards. The
spout fixing screw should be at the
back.
• Secure by using the clamping plate
and nuts. (box spanner is provided)
Attach the flow regulator 9/16" to the
Cold inlet and then connect the 9/16"
flexible hose end to the flow
regulator.
Ensure all connections are firmly
tightened.
Consult the guide provided with the
heater tank to ensure correct
positioning and installation.
BASE RING
ENSURE THE SILICONE TUBE
PROTECTOR IS IN PLACE,
CENTRAL AGAINST THE BASE
OF THE TAP.
9/16"
COLD IN
3Silicone Hose
Trim the silicone hose to the right length for the installation. It must not be pulled taught, too
slack leading to a 'U' bend or twisted. Please make sure the tube isn't pinched between the
threaded stud and the braided hose as this may cause flow restriction. If the silicone is not
installed correctly it may effect the performance of the system.
4Operation
For instant hot water,
press down on the
lever/button and rotate
handle forward.
Once finished, release the
handle and the valve will
automatically close.
2
G3/8"
FEED TO
HEATER TANK
THROUGH FILTER
SILICONE TUBE
HOT FEED BACK
TO THE TAP
Connections to the filter (U.1106) and heater tank U.1998:
(See separate filter guide and heater tank installation for
further installation instructions)
• Mount the filter housing in an accessible location using
either screws in the bracket or the adhesive pad, ensuring the
mounting area is clean by using the wipe provided.
• Once the mains connections are made fit the G3/8" braided
hose to the filter as shown.
• Connect the silicone tube to the barbed connection on the
top of the heater tank as shown. (SEE NOTE 3 BELOW)
IMPORTANT: During installation the tank should remain
unplugged. The tank must be filled with water before power is
connected. A 'dry start' will void the warranty.
Avoid kinking tubes during installation as the resulting
restrictions could reduce flow and cause malfunctioning of
the expansion chamber. Do not use pipe sealing compounds on
any connections. These can foul the internal mechanics and
may cause objectionable taste and odor. Plumbing connections
must comply with all sanitary, safety and plumbing codes.
AVOID TRAPPING
SILICONE HOSE
BETWEEN STUD &
BRAIDED HOSES
SILICONE
TUBE
RETAINER
CLIP
FLOW REGULATOR
9/16" FEMALE - MALE
9/16" FLEXI-HOSE
FLOW REGULATOR
O3/8" COMPRESSION SERVICE VALVE
O3/8" COMPRESSION
SERVICE VALVE

This manual suits for next models

3

Other Rohl Plumbing Product manuals

Rohl Traditional Kitchen Edwardian U3706XEG2 Operation manual

Rohl

Rohl Traditional Kitchen Edwardian U3706XEG2 Operation manual

Rohl Perrin & Rowe U.3720L User manual

Rohl

Rohl Perrin & Rowe U.3720L User manual

Rohl CASWELL CA2217STN User manual

Rohl

Rohl CASWELL CA2217STN User manual

Rohl RCT-1 User manual

Rohl

Rohl RCT-1 User manual

Rohl TENERIFE TTE18W1LMMB User manual

Rohl

Rohl TENERIFE TTE18W1LMMB User manual

Rohl MATHESON ML2015LMAPC User manual

Rohl

Rohl MATHESON ML2015LMAPC User manual

Rohl Myrina MY55D1 User manual

Rohl

Rohl Myrina MY55D1 User manual

Rohl G1655 Assembly instructions

Rohl

Rohl G1655 Assembly instructions

Rohl PERRIN & ROWE MAYFAIR LONDON U.4841LS-2 User manual

Rohl

Rohl PERRIN & ROWE MAYFAIR LONDON U.4841LS-2 User manual

Rohl A8800 User manual

Rohl

Rohl A8800 User manual

Rohl Eclissi EC05D5 User manual

Rohl

Rohl Eclissi EC05D5 User manual

Rohl Miscelo MI09D3SDMB User manual

Rohl

Rohl Miscelo MI09D3SDMB User manual

Rohl Miscelo MI12W2SDSTN User manual

Rohl

Rohl Miscelo MI12W2SDSTN User manual

Rohl MATHESON 4 ML2011LMPN User manual

Rohl

Rohl MATHESON 4 ML2011LMPN User manual

Rohl U.4744 User manual

Rohl

Rohl U.4744 User manual

Rohl MB2009 User manual

Rohl

Rohl MB2009 User manual

Rohl Perrin & Rowe U.4846LS-2 User manual

Rohl

Rohl Perrin & Rowe U.4846LS-2 User manual

Rohl Eclissi EC09D3IW User manual

Rohl

Rohl Eclissi EC09D3IW User manual

Rohl 0326BS1 User manual

Rohl

Rohl 0326BS1 User manual

Rohl RUWUM3019WSSB User manual

Rohl

Rohl RUWUM3019WSSB User manual

Rohl PERRIN & ROWE EDWARDIAN U.KIT2L User manual

Rohl

Rohl PERRIN & ROWE EDWARDIAN U.KIT2L User manual

Rohl Perrin & Rowe U.1347LS User manual

Rohl

Rohl Perrin & Rowe U.1347LS User manual

Rohl EDWARDIAN U.3720L User manual

Rohl

Rohl EDWARDIAN U.3720L User manual

Rohl PERRIN & ROWE U.3721X User manual

Rohl

Rohl PERRIN & ROWE U.3721X User manual

Popular Plumbing Product manuals by other brands

Mirabelle MIRWSCPT800CP installation instructions

Mirabelle

Mirabelle MIRWSCPT800CP installation instructions

Flomasta 5059340065052 manual

Flomasta

Flomasta 5059340065052 manual

Kohler 22572T-9 installation instructions

Kohler

Kohler 22572T-9 installation instructions

BELLOSTA Electa 5200/1/P/E installation instructions

BELLOSTA

BELLOSTA Electa 5200/1/P/E installation instructions

Spectrum Brands Pfister Iyla R89-XTR Quick installation guide

Spectrum Brands

Spectrum Brands Pfister Iyla R89-XTR Quick installation guide

Hans Grohe Axor Starch 28491000 Instructions for use/assembly instructions

Hans Grohe

Hans Grohe Axor Starch 28491000 Instructions for use/assembly instructions

Hans Grohe Ecostat 15346000 Assembly instructions

Hans Grohe

Hans Grohe Ecostat 15346000 Assembly instructions

Axor Terrano 27834 Series quick start guide

Axor

Axor Terrano 27834 Series quick start guide

KWC 2030068175 Installation and operating instructions

KWC

KWC 2030068175 Installation and operating instructions

American Standard Two- Handle Centerset Lavatory Faucet... Specification sheet

American Standard

American Standard Two- Handle Centerset Lavatory Faucet... Specification sheet

Hans Grohe Logis E 100 71161003 Assembly instructions

Hans Grohe

Hans Grohe Logis E 100 71161003 Assembly instructions

Helvex PIA-100 installation guide

Helvex

Helvex PIA-100 installation guide

Purmo OPTIMO 500E ECO Installation & operating manual

Purmo

Purmo OPTIMO 500E ECO Installation & operating manual

Vallone NERO 01 installation instructions

Vallone

Vallone NERO 01 installation instructions

RAVAK SABINA 80 installation instructions

RAVAK

RAVAK SABINA 80 installation instructions

Hans Grohe PuraVida Series Assembly instructions

Hans Grohe

Hans Grohe PuraVida Series Assembly instructions

Hans Grohe Vernis Blend 71440007 Instructions for use/assembly instructions

Hans Grohe

Hans Grohe Vernis Blend 71440007 Instructions for use/assembly instructions

Grohe 41 205 manual

Grohe

Grohe 41 205 manual

manuals.online logo
manuals.online logoBrands
  • About & Mission
  • Contact us
  • Privacy Policy
  • Terms and Conditions

Copyright 2025 Manuals.Online. All Rights Reserved.