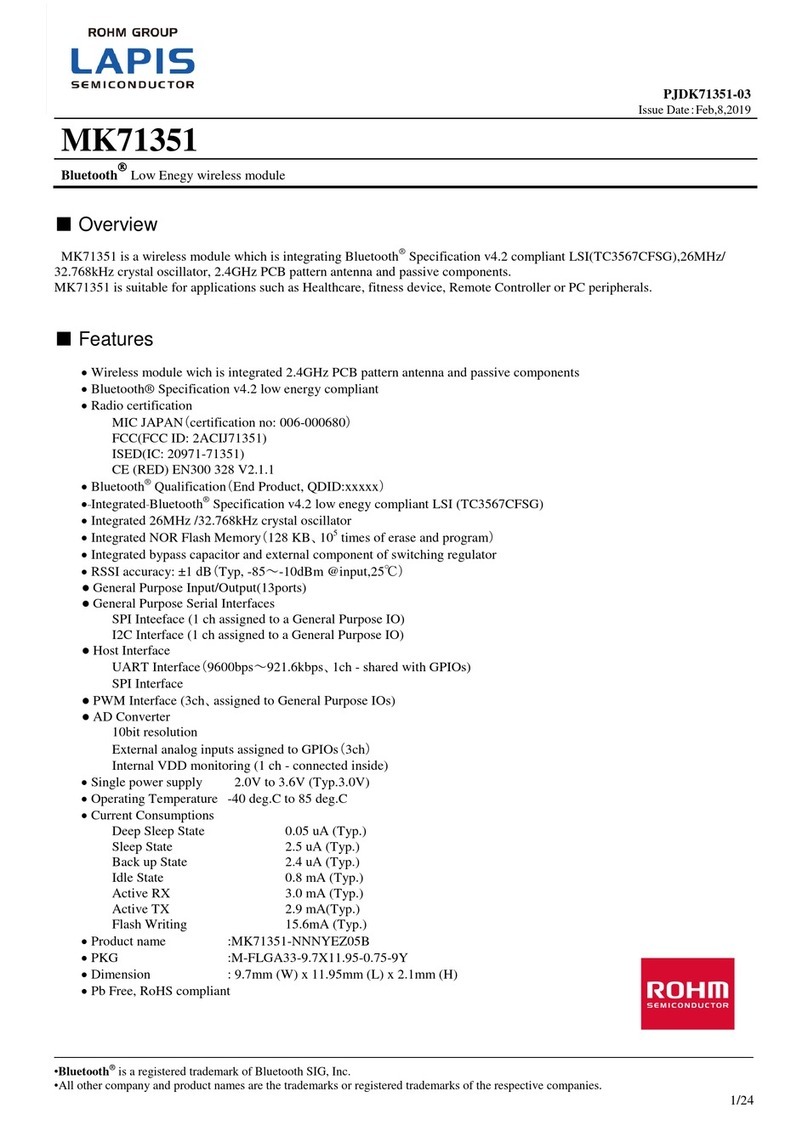
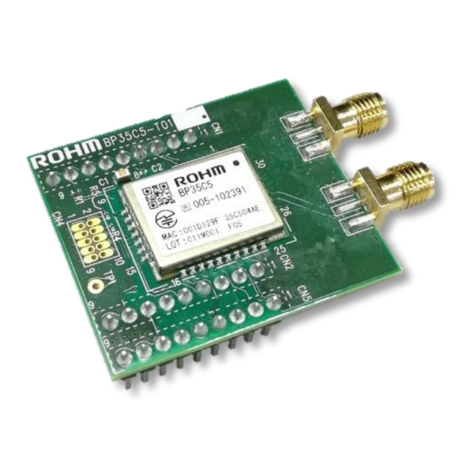
Rohm BP35C0-J11 Installation and operation manual

1/21
© 2020 ROHM Co., Ltd.
No. 63UG011E Rev.002
JUN.2020
User’s Guide
Wi-SUN module for B-Route, Enhanced HAN
BP35C0-J11 Start up manual
Version 1.0.2
Introduction
This manual describes the operation confirmation procedure using the serial communication software (Tera Term) for the Wi-SUN
module BP35C0-J11.
BP35C0-J11-T01
BP35C1-J11-T01
BP35C2-J11-T01

2/21
User’s Guide
BP35C0-J11 Start up manual
© 2020 ROHM Co., Ltd.
No. 63UG011E Rev.002
JUN.2020
1. Contents
1. Contents ........................................................................................................................................................................................ 2
2. About downloading related documents and software .................................................................................................................... 3
3. What you can do with BP35C0-J11 ............................................................................................................................................... 4
4. Setup the evaluation environment ................................................................................................................................................. 5
4.1. [STEP1] Hardware setup........................................................................................................................................................ 5
4.1.1. Adapter Board BP35C0-J11-T01..................................................................................................................................... 7
4.1.2. Evaluation Board BP359C............................................................................................................................................... 8
4.1.3. Adapter Board BP35A7A................................................................................................................................................. 9
4.1.4. Connecting to boards and PCs...................................................................................................................................... 10
4.2. [STEP2] Software setup ....................................................................................................................................................... 13
4.2.1. Serial Communication Software setup .......................................................................................................................... 13
4.3. [STEP3] Running test macros .............................................................................................................................................. 16
5. FW Update .................................................................................................................................................................................. 18
6. Appendix...................................................................................................................................................................................... 19
6.1. Connecting via D-Sub connector.......................................................................................................................................... 19
6.2. Connect UART directly from through Hole............................................................................................................................ 20
7. Revision history ........................................................................................................................................................................... 21

3/21
User’s Guide
BP35C0-J11 Start up manual
© 2020 ROHM Co., Ltd.
No. 63UG011E Rev.002
JUN.2020
2. About downloading related documents and software
The documents associated with this manual are listed at the beginning of each chapter. Please read it according to your needs.
Hardware documentation is available for download on the ROHM’s Wi-SUN support page.
ROHM Wi-SUN Support page: https://www.rohm.com/products/wireless-communication/specified-low-power-radio-
modules/bp35c0-j11-product/documents
You can also download the software documentation on the support page of ISB Co., Ltd.
Wi-SUN Enhanced HAN + B-route support page: https://wisun.isb.co.jp/enhan/wer0/
Use Tera Term of terminal software for operation confirmation.
You can download it from the following URL:
Tera term Download: https://ja.osdn.net/projects/ttssh2/
The evaluation board uses FTDI's USB-UART conversion chip. It is not automatically recognized by Windows and you
may need to install the driver, so please download the FTDI driver from the following URL if necessary.
FTDI driver Download: https://www.ftdichip.com/FTDrivers.htm

4/21
User’s Guide
BP35C0-J11 Start up manual
© 2020 ROHM Co., Ltd.
No. 63UG011E Rev.002
JUN.2020
3. What you can do with BP35C0-J11
The following communication and functions can be realized in the module BP35C0-J11.
Each function can be operated concurrently in the same network.
●Network Configuration Example
Name
Features
Wi-SUN B-route Communication
Ideal for communication with smart meters.
Enables one-to-one communication in authentication and
encryption conditions
Wi-SUN HAN Communication
Ideal for communication in the near-medium range (about
100 to 500m) in a good location.
It is possible to communicate with multiple-devices in the
authentication and encryption state.
Wi-SUN
Enhanced HAN Communication
Suitable for the operation of the communication, battery
driven, etc., where the wall is sandwiched.
Enables communication including authentication/encryption
status and low-power consumption operation

5/21
User’s Guide
BP35C0-J11 Start up manual
© 2020 ROHM Co., Ltd.
No. 63UG011E Rev.002
JUN.2020
4. Setup the evaluation environment
This chapter describes the Setup of the Evaluation environment for BP35C0-J11 operation.
The setup flow for the following evaluation environments is described in detail.
[STEP 1] Hardware setup
[STEP 2] Software setup
[STEP 3] Running test macros
4.1. [STEP1] Hardware setup
[In case of using BP35C0-J11-T01]
The evaluation environment uses the following hardware:
[In case of using BP35C1-J11-T01]
The evaluation environment uses the following hardware:
* Reference information: The following cable has been used as a USB cable in ROHM.
- “U2C-M05BK (mini-B type)” made by ELECOM

6/21
User’s Guide
BP35C0-J11 Start up manual
© 2020 ROHM Co., Ltd.
No. 63UG011E Rev.002
JUN.2020
[In case of using BP35C2-J11-T01]
The evaluation environment uses the following hardware:
The relevant documentation for the hardware is listed below. Please refer it according to your needs.
Download URL:https://www.rohm.com/products/wireless-communication/specified-low-power-radio-modules/bp35c0-j11-
product/documents
*** indicates the version information.
Name (filename)
Contents
BP35C0-J11 Datasheet
(bp35c0-j11_datasheet_v***e.pdf)
Describes the hardware specifications of the BP35C0-J11.
BP35C1-J11-T01 Evaluation Board
(bp35c1-j11-t01_evaluationboard_v***e.pdf)
Describes the hardware specifications of the BP35C1-J11-T01.
BP35C2-J11-T01 Evaluation Board
(bp35c2-j11-t01_evaluationboard_v***e.pdf)
Describes the hardware specifications of the BP35C2-J11-T01.
BP35A7A Evaluation Board
(bp35a7a_evaluationboard_v***e.pdf)
Describes the hardware specifications of the BP35A7A.
BP359C Evaluation Board
(bp359c_evaluationboard_v***e.pdf)
Describes the hardware specifications of the UART Interface Evaluation
Board (BP359C).
External antenna list
(bp35c0-j11_antennalist _v***j.pdf)
List of external antennas that can be used as certified antennas for the
BP35C0-J11 under the Japan Radio Law.

7/21
User’s Guide
BP35C0-J11 Start up manual
© 2020 ROHM Co., Ltd.
No. 63UG011E Rev.002
JUN.2020
4.1.1. Adapter Board BP35C0-J11-T01
In this document, BP35C0-J11 module is used in the evaluation board (BP359C), with the BP35C0-J11 Mounted Adapter Board
(Use BP35C0-J11-T01). This board is evaluation board that can be connected to the BP359C with BP35C0-J11.
BP35C0-J11-T01 pin outs are as follows:
”
For each terminal information of BP35C0-J11, please refer to “BP35C0-J11 Datasheet

8/21
User’s Guide
BP35C0-J11 Start up manual
© 2020 ROHM Co., Ltd.
No. 63UG011E Rev.002
JUN.2020
4.1.2. Evaluation Board BP359C
The evaluation board BP359C is designed to evaluate various types of wireless modules.
For internal schematics and pin layout, please refer to “BP359C Evaluation Board”. The terminal connector names of each part
are listed below.
The role of each jumper pin and the settings when using the USB connector (CN3) are described below. The settings for using the
“D-Sub connector” are described in Appendix6.16.1). In this document JP5, JP6, and JP7 are not used.

9/21
User’s Guide
BP35C0-J11 Start up manual
© 2020 ROHM Co., Ltd.
No. 63UG011E Rev.002
JUN.2020
When the DIP switch (SW5) is normal operation check, set it all to low as below:
4.1.3. Adapter Board BP35A7A
Solder the pin header to the through-hole of both ends of BP35A7A as follows:
Please be careful not to implement a pin header by mistaking the front and back of BP35A7A when you implement a pin header.

10/21
User’s Guide
BP35C0-J11 Start up manual
© 2020 ROHM Co., Ltd.
No. 63UG011E Rev.002
JUN.2020
4.1.4. Connecting to boards and PCs
[In case of using BP35C0-J11-T01]
Insert BP35C0-J11-T01 into BP359C from the top as shown in the figure below.
[In case of using BP35C1-J11-T01]
Insert BP35C1-J11-T01 and BP35A7A into BP359C from the top as shown in the figure below.

11/21
User’s Guide
BP35C0-J11 Start up manual
© 2020 ROHM Co., Ltd.
No. 63UG011E Rev.002
JUN.2020
To fix BP35C1-J11-T01 to BP35A7A, use the screws, spacers and nuts in the BP35A7 accessories.
[In case of using BP35C0-J11-T01 or BP35C1-J11-T01]
Connect to PC after fixing adapter board to BP359C. The Power switch (SW1) on the top should be in the OFF state when
connecting to a PC. After connection, the Evaluation Board will be automatically recognized by Windows.
* In the figure, BP35C0-J11-T01 is used, but the process is the same when using BP35C1-J11-T01.
* BP359C uses FTDI to convert USB to UART. Depending on the environment of the PC, you may need to install the driver, download
the driver if necessary (2See 2).

12/21
User’s Guide
BP35C0-J11 Start up manual
© 2020 ROHM Co., Ltd.
No. 63UG011E Rev.002
JUN.2020
[In case of using BP35C2-J11-T01]
Insert the BP35C2-J11-T01 into the USB connector of your PC.

13/21
User’s Guide
BP35C0-J11 Start up manual
© 2020 ROHM Co., Ltd.
No. 63UG011E Rev.002
JUN.2020
4.2. [STEP2] Software setup
This chapter uses the following software:
Name (filename)
Contents
Terminal Software (Tera Term)
It is a free software that can transmit serial communication and
binary file on Windows.
4.2.1. Serial Communication Software setup
For serial communication, this board uses the Tera Term of Windows free software.
[In case of using BP35C0-J11-T01 or BP35C1-J11-T01]
Turn-On the power supply of BP359C power switch (SW1) after Tera Term installation is complete. When the power switch is ON,
the LED near SW1 lights-up green.
After powering ON, activate Tera Term and follow the below procedure.
* In the figure, BP35C0-J11-T01 is used, but the process is the same when using BP35C1-J11-T01.
[In case of using BP35C2-J11-T01]
After inserting the BP35C2-J11-T01 into the USB connector, activate Tera Term and follow the below procedure.

14/21
User’s Guide
BP35C0-J11 Start up manual
© 2020 ROHM Co., Ltd.
No. 63UG011E Rev.002
JUN.2020
No.
Screen
Operation Details
1
Tera Term starts up
2
Select "File" -> "New Connection".
Check the "Serial" in the window, select COM
port (USB Serial port) you want to use, and
click OK.
The COM port is the number assigned when
the USB is inserted into the PC. If you are not
sure, check the following steps:
3
(If the COM port is not known)
Open the left screen in Device Manager (search
in the Windows Start menu).
Refer to the COM port that is displayed in the
port (COM and LPT) items.
4
Select “Setup” -> “Serial port”.
Pick up “115200” from the “speed” pull-down in
the window.
“Data” should be set to “8 bit”, “none” for
“Parity”, “1 bit” for “Stop bits”, and “none” for
“Flow control”.
Click OK after selection.
5
Select “Setup” -> “Terminal”.
Get up and send the newline code in the
window, both “CR” and check the local echo.
Click OK after selection.

15/21
User’s Guide
BP35C0-J11 Start up manual
© 2020 ROHM Co., Ltd.
No. 63UG011E Rev.002
JUN.2020
6
Select “Setup” -> “General”.
Select “English” for the language item in the
window.
Click OK after Selection.
Important: If you do not perform this
operation, the binary data will not be able
to communicate properly.
7
TERATERM.ini
* If the display is not switch, run Tera Term as an
administrator
If you want to display binary data on Tera
Term, edit the configuration file
(TERATERM.ini) and Debug=on. After
Restarting Tera Term, Shift+Esc you can
switch the display mode to:
Normal view -> debug mode
-> Hexadecimal debug mode -> Hide
You can put binary data into hexadecimal view
by using hexadecimal debug mode.
For more information, see the Tera Term Help.
You are now ready for Tera term.

16/21
User’s Guide
BP35C0-J11 Start up manual
© 2020 ROHM Co., Ltd.
No. 63UG011E Rev.002
JUN.2020
4.3. [STEP3] Running test macros
In order to confirm the operation, you can try to test sample macros. If you need it, please contact ROHM sales or distributor.
Name (filename)
Contents
Sample macro
(TeraTerm macro.zip)
It is a macro to realize the communication of Wi-SUN Enhanced
HAN on Tera Term.
How to run a macro:
No.
Screen
Operation Details
1
Select “Control” -> “Macros” and select the
macro you want to run. Please refer to
README of the sample macro for the macro
operation method.
You can confirm the communication like the following the sequence between PAN coordinator and End device with the macro.
目次へ戻る
Reset Hardware Reset Hardware
NotifyStartup Completion NotifyStartup Completion
PAN coordinator, Dual, arbitrary channel
ArbitraryPAN ID
Enhanced Beacon Request(MAC address)
Enhanced Beacon
PANA-Client-Initiation
PANA-Auth-Request(PANA_SUCCESS)
PANA-Auth-Answer(Complete)
Pairing ID: MAC address
retained when pairing
NotifyConnection Status Change (PANA
authentication)
Initiate HAN PANAResponse
Initiate HAN PANARequest
Initiate HAN PANAResponse
NotifyConnection Status Change (MAC
connection)
Initiate HAN Operation Response
Initiate HAN Operation Request
Initiate HAN PANARequest
NotifyPANAAuthentication Result
(authentication succeeded)
Set HAN PANAAuthentication Information
Response
Initiate HAN Operation Request
Initiate HAN Operation Response
Setup Initial Settings Response
Set HAN PANAAuthentication Information
Request
Set HAN PANAAuthentication Information
Response
Authentication information on device to
accept connection
External control
application
Module (in PAN coordinator
or Dual mode)
Module (in coordinator
or end device mode)
External control
application
Setup Initial Settings Request
Setup Initial Settings Response
Set HAN PANAAuthentication
Information Request
Coordinator, end device,
Retained channel when
pairing
Authentication information
on the device itself
PANA sequence
Normal connection complete

17/21
User’s Guide
BP35C0-J11 Start up manual
© 2020 ROHM Co., Ltd.
No. 63UG011E Rev.002
JUN.2020
If you want to use your own macro, make the following statement first in the macro, if necessary:
Tera Term Macro command
Contents
Set echo 1
Enable local echo.
Set debug 2
Displays the display mode in hexadecimal.
When the hexadecimal display is displayed, it is possible to wait for
the hexadecimal character by the wait command etc.
When sending binary data with the Send command or similar, append $ to hex.
Example: Sending "ABC": “send $41 $42 $43”
For more information, refer to the "TTL Command Reference" in the help of Tera Term.
It is also possible to create binary data and send data from "file" to "file".
If you do not use Tera Term and want to communicate directly with the MCU etc6.2., refer to Appendix 6.2.

18/21
User’s Guide
BP35C0-J11 Start up manual
© 2020 ROHM Co., Ltd.
No. 63UG011E Rev.002
JUN.2020
5. FW Update
This chapter is provided on the Wi-SUN enhanced HAN+B-route support page of ISB Co., Ltd. Use the following documentation and
software:
Wi-SUN Enhanced HAN+B-route Support page: https://wisun.isb.co.jp/enhan/wer0/
Name (filename)
Contents
FW for OTA
(BP35C0_J11_0400************_OTA_Bank*.zip)
This is the FW to use in the OTA update.
Please note that Bank0 and BANK1 will
change depending on the order in which they
are written.
OTA Update function Manual
(J11_ota Update function Manual _ part**.pdf
This document describes the commands and
sequences used in the OTA update.
OTA Update sample macro/operation manual
(OTA Update _ Sample script.zip)
This document describes the OTA Update
sample program described in Python and
how to use it.
* Indicates version information and bank number.
BP35C0-J11 is compatible with OTA (Over-The-Air: Via radio) update. We have released the FW (firmware) for the OTA update, so
please perform an OTA UPDATE if there is a FW update. The version of FW that is being written can be checked by getting version
information (Command code: 0x006B).
OTA update samples (Python) are available for OTA update implementation. Please use it as a reference when you check the
function and implement it to the MCU. Refer to the OTA update function manual and the OTA Update sample macro operation
manual for more information on how to use it.

19/21
User’s Guide
BP35C0-J11 Start up manual
© 2020 ROHM Co., Ltd.
No. 63UG011E Rev.002
JUN.2020
6. Appendix
6.1. Connecting via D-Sub connector
Set the jumper pin as follows. Depending on the power supply method (via USB connector or via AC adapter), switch the JP8.
The actual connection between the D-Sub connector and the AC adapter is as follows.
* In the figure, BP35C0-J11-T01 is used, but the process is the same when using BP35C1-J11-T01.
* Please use a plug with an external diameter of 5.5 mm, internal through Φ 2.1 mm, and a length of 9.5 mm. Also, please use the
output voltage of 5V products.

20/21
User’s Guide
BP35C0-J11 Start up manual
© 2020 ROHM Co., Ltd.
No. 63UG011E Rev.002
JUN.2020
6.2. Connect UART directly from through Hole
BP359C has a through-hole as follows.
The terminals (TXD, RXD, etc.) required for BP35C0-J11 UART can be extracted from the through-hole group 1 and through-hole
group 2 as described in on the BP359C board.
Please note that when using the UART terminal of through-hole group1, it is necessary to connect the JP1 and enable the terminal.
Through-hole 2, it is possible to take out the UART terminal from BP35C0-J11 without switching the JP1.
It is also possible to connect the BP35C0-J11 to the host MCU and the through-hole by the wiring as follows. Please try to evaluate
using the MCU without using Tera Term etc.,
* In the figure, BP35C0-J11-T01 is used, but the process is the same when using BP35C1-J11-T01.
This manual suits for next models
3
Table of contents
Other Rohm Control Unit manuals