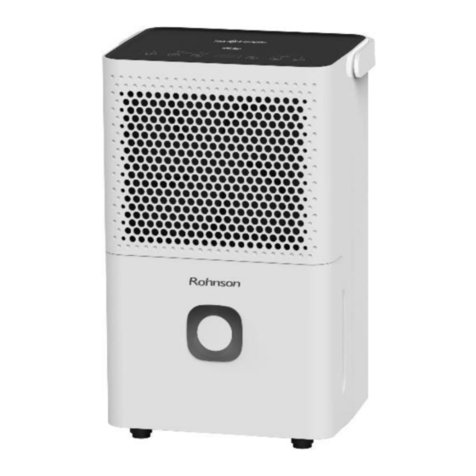
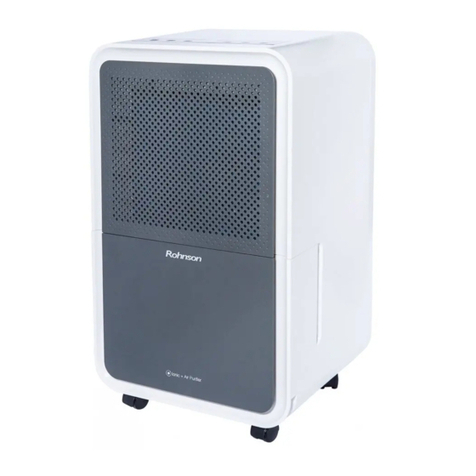
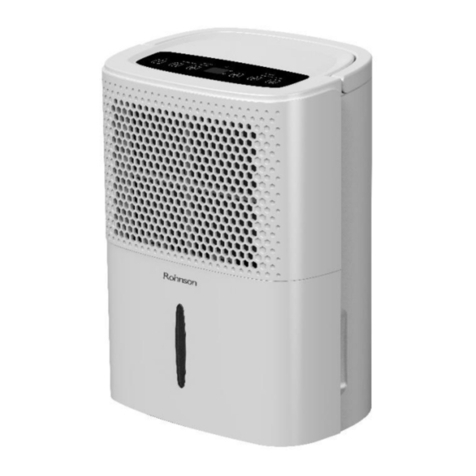
Rohnson R-9310 User manual

R-9310 IONIC
DEHUMIDIFIER
Thank you for choosing our product.
For proper operation, please read and keep this manual carefully.
Instruction Manual

Operation Notices
● Operation Area......................................................................................................1
● Safety Precautions..................................................................................................2
● Parts Name............................................................................................................3
● Check Before Operation........................................................................................4
Operation Instructions
● Operation Method.................................................................................................5
● Drainage Option.....................................................................................................8
Maintenance
● Clean and Maintenance........................................................................................10
Malfunction
● Troubleshooting...................................................................................................12
● Malfunction Codes..............................................................................................13
Note:
Graphics in this manual are only for reference. Please refer to actual
products for specific details.
Content

Operation Area
not be used for commercial or industrial applications.
enclosed area, such as a closet.
temperature will not below 5°C or
above 32°C.
● Allow at least 30 cm of air space on all sides of the unit.
● Close all doors, windows and other outside openings of the room to improve
the working effect.
● Please keep the air inlet/outlet clean and not blocked.
● Avoid direct sunlight.
from the bucket or
1
NNotes:
Left:30cm or more
Right:30cm or more
UP: 30 cm or more

Safety Precautions
● This appliance can be used by children aged from 8 years and above and pe-
rsons with reduced physical, sensory or mental capabilities or lack of experie-
nce and knowledge if they have been given supervision or instruction concer-
ning use of the appliance in a safe way and understand the hazards involved.
● Before operation, please check the power cord if it complies with the require-
ment indicated on the nameplate.
● Before cleaning, please turn it off and unplug the dehumidifier.
● Make sure the power cord is not pressed by any hard object.
● Do not remove the power plug or move unit by pulling the power cord.
● Do not use any heating application near the dehumidifier.
● Do not remove the power plug in wet hands.
● Please use grounded power cord and make sure it's well connected and not
damaged.
● Children and disabled people are not allowed to use the dehumidifier without
supervision.
● Children shall not play with the appliance.
● Keep children from playing or climbing on the dehumidifier.
● Do not place the dehumidifier under dripping objects.
● Memory function is included in this dehumidifier. When nobody is taking care
of the unit, please turn it off and remove the power plug or disconnect power.
● Do not repair or disassemble the unit by yourself.
● If the supply cord is damaged, it must be replaced by the manufacturer, its
service agent or similarly qualified persons in order to avoid a hazard.
● Cleaning and user maintenance shall not be made by children without
supervision.
● If abnormal condition occurs (e.g. burned smell), please disconnect power at
once and then contact local dealer.
● Dehumidifier can not be disposed of everywhere. If you want to get rid of this
dehumidifier, please check with local handling disposal or information service
center about what to do.
2

Parts Name
Front Side
Back Side
3
CONTROL
PANEL
Air Outlet
Water
Bucket
Air Inlet
Handle

Check Before Operation
aced.
Below are the checking steps:
1. Hold the handles on both sides of the water bucket and pull it out following the
arrow direction.
moved a little after long-time transportation. If it's not placed properly, move it
to the correct position by hand.
3. Replace the bucket as instructed in step 1.
4
Float

7
1
Basic Functions of the Buttons
5
indicator
light
Operation Method
● Do not remove the bucket while unit is in operation.
● If you want to use drain hose to drain water away, please install the hose acc-
ording to section "Drainage method".
● Each time pressing the effective button on the control panel will give out a
"beep" sound.
Notes:
1 ON/OFF Button
Set dehumidity, set the range of 30%-80%. Press or in order to choose
the appropriate level of humidity. The normal level is 40-50 %
Ionizer - Air Cleaner
If you choose this option, the compressor stop to work and the unit work as air purifier only.
In order to choose this option please press MODE button for 5 seconds
Dehumidit Settings

6
3 Fan Speed Button
Pressing this button can set fan speed circularly as: High, Low.
Corresponding indicator will be on for each fan speed.
Clild Lock
Long press 5 seconds to lock and
Again long press 5 second to unlock
Timer Button
Press this button to set Timer On or Timer Off (Timing range 01~24h).
●Set Timer Off:
When unit is on, press this button and the Timer Indicator will be blink.
Timer will increase each time you press the button by 01 to 24 h.
When time is set, wait for 5s or press this button to turn this function on.
●Cancel Timer Off:
Under the condition that this function is turned on, press the button TIMER until the
timer screen 00 h
● Timing range: 01~24 hours.
Dehumidify Mode Button
Press this button to select different kinds of working mode. After each pres-
and use the arrows UP or DOWN ( or )
you will switch among the below options
•Dehumidify
•Automatic-SMART
•Continuous
•Fast Dry Clothes.
•Fan

You can set the target humidity 30% - 80 % and se the speed fan as you wish.
7
4. Full of water light
This indicates that bucket is full or removed or not placed correctly.
If bucket is full or not locked into place for over 3min, buzzer will go off for 10s
to remind you to empty bucket or put it back into the correct place.
2. Auto Stop
When bucket is full, removed or not placed correctly or the humidity is 5% lower
than the set humidity, unit will automatically stop.
3. Memory Function
If power is lost, all of the control settings are remembered. So when power is
restored, the unit will start back up in the settings it was in when power was
lost.
1. Alarm Warning
Other Instructions
•Fast Dry Clothes
In this option the unit work appropriate in order to dry your clothes the fan speed set in
HIGH speed automatically. In this option you cannot set the humidity the unit works.
continuously.
•Continuous
In this option the unit work without any set of humidity but the fan speed is in
LOW speed automatically. In this option you cannot set the humidity the unit
works continuously.
•Dehumidify
•Automatic-Smart
Automatically set humidity of 50-55%, the wind speed is automatically adjusted to
maintain the humidity at 50- 55%. The wind speed is in LOW level

Drainage Option
Option 1 Emptying Manually
Notes:
● Do not remove the bucket when unit is in operation or has just stopped.
● Do not use the hose if using water bucket to collect water. When the hose is
connected, water will be drained out through it instead of into the bucket.
1. Hold the handles on both sides of the water bucket and pull it out following the
arrow direction. (Attention: Pull out the bucket carefully in case the water may
2. Empty the bucket by grasping the handle on the top of bucket with one hand
and grasping the bottom of bucket with the other hand.
8
Handle
Bucket

Option 2 Gravity Drain Hose
1. Hose is provided, so user shall prepare it in advance.
[Size: The hose thread should have an outer diameter of 17 mm and length 1 meter ]
2. Remove bucket from the unit as instructed.
3. Thread the drain hose onto the nozzle and make sure it's securely locked.
9
the hole with a lid. Note that drain hose should not be pressed, otherwise
water can not be drained out.
4. Replace the bucket. Make sure the drain hose goes through the bucket's drain
Note: When you want to take off the drain hose, prepare a receptacle to collect
water from the nozzle.
Set an air clean filter to a dehumidifier
1.Remove the filter holder from the front cover.
2.To set the air clean filter to the back cover.
Take the air clean filter out of polyethylene bag, and put it
onto the back filter. Set the air clean filter to the back
cover with the filter fitted into the four catches in the
cover.
Put the filter holder on the cover with the flat surface
of the holder up, and set the holder to the four catches in the
cover (with the convex portions of the holder upward).
To set the holder securely, press its perimeter with fingers.
Then check the condition.
Notes:
The time life of the carbon filter is based on the environmental air, normally it replaces
after 1-2 years If it is dirty, clean up dust or debris with a brush and out it in the sunshine..

Clean and Maintenance
Warning:
may lead to electric shock.
.
Otherwise it will damage unit's appearance.
1. Grille and Case
To clean the case:
When there is dust on the case, use soft towel
to dust it off; When the case is very dirty(greasy),
use mild detergent to clean it.
To clean the grille:Use a dust catcher or brush.
2. Water Bucket
Every few weeks, clean the bucket to prevent growth of mold, mildew and
bacteria. Use soft brush to clean the bucket and then rinse it.
10
Warning:
Otherwise the evaporator will catch dust and
affect unit's performance.
● Do not dry the air filter with fire or electric hair dryer. Otherwise the air filter
may be unshaped or caught on fire.
● Don’t use dust catcher or brush to clean the air filter. Otherwise the air filter
may be destroyed
Check Before Use-season
● Check whether air outlet is blocked.
● Check whether power plug and power socket are in good condition.
● Check whether drain hose is damaged.
Long-time Storage
steps below in order to maintain the unit in good condition.
● Make sure the bucket is clear of water and drain hose is removed.
● Clean the unit and wrap it well to prevent the gathering of dust.

11

Troubleshooting
● Not all the following problems are malfunctions.
Problem
Possible Causes
● Unit is operating in an area where temperature
is higher than 32°C or lower than 5°C.
● Bucket is full.
Controls can not be set.
Noise suddenly rises during ● Power Noise will supplyrise problem.if compressor
has just started.
operation.
●
Humidity does not drop.
● Doors are open.
● There might be some device producing vapor in
the room.
● Room temperature is too low.
● Humidity level may be improperly set.
● If unit is operating in a room where temperature
is from 5 to 15 °C, it will start to defrost automati-
cally. Compressor will stop for a brief period of
time(fan will operate in high fan speed).
Little or no effect in
dehumidifyng
normal operation.
● Due to temperature rising of heat exchanger, the
air may have some strange smell at the beginning.
emitted has musty-odor.
Unit has noises.
● There might be some noise if unit is operating on
Swooshing sound is heard. ●
● Problem of Water Leakage.
Problem Possible Causes
Solution
● Examine the drainage joint. ● Connect the drainage joint
well.
When using drain ● Drain hose is not correctly ● Clear the obstacle from the
hose, there is water
in the bucket.
installed.
drain hose.
● Remove the drain hose and
replace it. Be sure that the
hose is correctly installed.
● Drain hose is not correctly
installed.
12

Problem
Possible Causes
Solution
● Check whether there is ● Make sure there is no curtain,
any obstacle around the
unit.
shutter or furniture that blocks
blocked.
● Make sure all doors and
windows and other opening to
the outside have been
closed.
Bad dehumidifying ● Doors and windows are
performance
left open.
● Warm temperature is good for
● Room temperature is too ature will reduce unit's working
low.
effect. This unit should be wor-
king in a place where temper-
ature is above 5°C.
13
Bucket full indicator
is lit up.
Unit can function
● Bucket is not properly
placed.
● Water is full in the bucket.
● Bucket has been removed.
● Empty the bucket and replace
it.
● If you want the air drier,
press - button to lower the
for unit to dehumidify
continuously.
normally but it can ● Humidity is set too high.
not start up.
Unit's Malfunction Codes Units Condition
Dispay Code “E1” --- Humidity Sensor is damaged
Display Code “E2” --- Temperature Sensor is damaged

IMPORTANT INFORMATION FOR CORRECT DISPOSAL OF THE PRODUCT IN
ACCORDANCE WITH EC DIRECTIVE 2002/96/EC.
At the end of its working life, the product must not be disposed of as urban waste.
It must be taken to a special local authority differentiated waste collection centre or to a
dealer providing this service.
Disposing of a household appliance separately avoids possible negative consequences
for the environment and health, deriving form inappropriate disposal and enables the
constituent materials to be recovered to obtain significant savings in energy and
resources. As a reminder of the need to dispose of household appliances separately,
the product is marked with a crossed-out wheeled dustbin.
Table of contents
Other Rohnson Dehumidifier manuals

Rohnson
Rohnson Genius Wi-Fi R-9820 User manual

Rohnson
Rohnson R-91110 User manual

Rohnson
Rohnson R-9916 User manual

Rohnson
Rohnson R-9610 User manual

Rohnson
Rohnson R-91216 User manual

Rohnson
Rohnson R-91212 User manual

Rohnson
Rohnson R-9280 User manual

Rohnson
Rohnson R-9612 User manual

Rohnson
Rohnson R-9424 User manual

Rohnson
Rohnson R-9290 User manual