RoMedic Vega505EE User manual

Vega505EE
System
IFU no: 630 ML rev. 22 210903
SWL: 230 kg/ 505 lbs
60600003
Instructions for use – English
Bruksanvisning – Svenska
Brukermanual – Norsk
Brugsvejledning – Dansk
Käyttöohje – Suomi
Gebrauchsanweisung – Deutsch
Handleiding – Nederlands
Manuel d’utilisation – Français
Manuale utente – Italiano
Manual de usuario – Español

Table of contents
English............................................................................................... 4
Svenska............................................................................................21
Norsk.................................................................................................38
Dansk................................................................................................55
Suomi................................................................................................72
Deutsch.............................................................................................89
Nederlands....................................................................................106
Français..........................................................................................123
Italiano............................................................................................140
Español...........................................................................................157
Dimensions..................................................................................174
Serial number.............................................................................176
Symbols..........................................................................................175

5
1
2
3
5
6
11
10
9
8
7
4
12
English
Vega505EE
SystemRoMedicTM
1. Lift arm
2. Mast
3. Handlebar
4. Emergency stop
5. Control box / Battery pack
6. Motor for base-width adjustment
7. Rear castors with brakes
8. Sling bar with safety latches
9. Front castors
10. Emergency lowering
11. Motor/actuator for lift arm
12. Hand control
Vega505EE is a mobile patient lift adapted for safe and easy lifting of users weighing up to 230 kg/505 lbs. Vega505EE
features a unique design with a lift arm that can be both raised to an almost upright position and lowered all the way
down to the floor. It is also relatively narrow and compact, with dimensions adapted for use in premises and situations
where space is limited. In spite of the handy size, Vega505EE offers an unusually high lifting height and an extremely
large lifting range. Therefore, the lift can manage all lifting situations and requirements; both low and high lifting,
seated or supine, to and from the floor, bed or chair, and gait training.
3IFU
System

Safety information
Visual inspection
• Inspect the packaging for any damage.
• Check for correct product being delivered.
• Inspect lift functions regularly.
• Check to ensure that material is free from damage.
Before use
• Check if all the parts/components are included in the packaging.
• Check if all approved accessories are included in the package.
• Check if Product Quality Approval document is included in the packaging. Save this document for future contact
with manufacturer.
• Make certain the lift is properly assembled.
• Check lifting function and base-width adjustment.
• Check driving function in all directions.
• Check sling bar connection and safety latch function.
• Always read the user manuals for all assistive devices used during a transfer.
• Keep the user manual where it is accessible to users of the product.
• Always make sure that you have the right version of the user manual.
• The most recent editions of user manuals are available for downloading from our website,
www.directhealthcaregroup.com
• Under no circumstances may a lift with Vega be used by persons who have not received instruction in the operation
of a lift with the accessory mounted.
• It is strongly prohibited to modify the original product.
Always read the user manual
Intended use of the product
Vega is a movable and portable unit which together with approved accessories assists in lifting and/or transferring
patients in a seated or supine position from bed to chair or vice versa, as well as transferring patients short distances
indoors when needed. Vega decreases risk of injuries to caregivers in the lifting situation. To be used by caregivers who
can read and understand the instruction on how to use the lift.
Vega is intended to be used in both Home healthcare environment and Professional healthcare facility environment.
Device description
Vega is to be used for transferring persons with physical disabilities (with little or no muscular function, including loss of
voluntary movement functions) between two point for example bed and wheels chair.
Vega is to be operated by caregivers (lay persons and healthcare professionals) who have access to and the ability to
read and understand the IFU (instructions for use) of the Vega. Vega reduces the need for manual lifting of the patient,
thus making the lifting situation safer and reducing care personnel’s work related injuries.
4IFU System

Assembly
Check to ensure that the following components are included
Mast and lift arm, actuator, slingbar, control box, hand control.
Undercarriage with base-width adjustment motor, screws,
washers, nuts and screw covers.
User manual and charger.
Insert the mast onto the base. Assemble according to illustration A and tighten it
hard (65 ± 5 Nm). Loctite. Place the screw covers over the screws.
Place the battery in the mount in the control box.
Connect the cables: The cable for the hand control in outlet HS; the cable for the
hoist motor in outlet M1, and the cable for the base motor in outlet M2.
Release the emergency stop and perform a final inspection (see final inspection).
HS M1 M2
5IFU
System

Final inspection
Check to ensure that no parts have been left in the packaging.
Inspect the lift for signs of wear and damage.
Check all four castor wheels and castor wheel locks.
Check all connections and fixtures including screws and bolts.
Check the emergency stop function by activating the emergency stop button, and
then pressing either the up or down button. If nothing happens when the up or down
buttons are pressed, the emergency stop is functioning properly.
Grasp the hand control, press the up button and run the lift arm all the way up. Then,
press the down button and run the lift arm all the way down.
Test base-width adjustment function. Press the button for base-width adjustment to
widen the base fully, and then press the other button to narrow the base again.
Test lift function by lifting a person (not a user) using an approved sling. At the same
time, check the emergency lowering function with someone on the lift. See section
on Emergency lowering.
If the lift is functioning correctly, connect the charger and check to ensure that the
charging lamp on the control box lights up.
NOTE!
Before the lift is used for the first time:
• it must be charged for at least 4 hours. See section on charging batteries.
• the control box service counter needs to be reset. To reset the service counters
press both lift buttons on the hand control at the same time for 5 seconds.
An audio signal will indicate that the timer has been reset.
Keep the user manual where it is accessible to users of the product.
6IFU System

Using the product
Contraindications, Precautions, Warnings:
Contraindications
• The floor lifts may not be used by patients above the maximum weight indicated on the label of the lifts.
• The lift must not be lowered into water or used in a shower.
• The lift must not be left or stored in a damp or humid environment.
• The lift must not be cleaned using steam.
• The lift must not be charged in a wet room.
• The lift must not be used in oxygen-enriched environments.
• The floor lift must not be used outdoors, only indoors.
• The lift is not intended for long transporting of users, only for short transfers.
Precautions
• Check that the floor lift is used on a dry and proper levelled surface.
• Check the floor lift is correctly mounted/assembled before its first use.
• Check the floor lift after every folding/disassembly after any transport.
• Check lifting motion and inspect the actuators full range.
• Inspect the lift once per year to detect any signs of damage.
• Check that the hand control does not show signs of wear.
• Check that the hand control markings are in accordance with the lifting functions.
• Check the battery status.
• During yearly service note the number of lift the actuator as performed and take action accordingly.
• It is important to never leave the user alone during the transfer.
• Warranty applies only if repairs or alterations are made by personnel who are authorized by Direct Healthcare Group.
• Ensure that there are no obstacles or people in the way of the lift.
• Handle the battery with care. Do not drop.
• Use only batteries and cables that are intended for the lift.
• Verify that all lifting accessories aligns with gravity and can move freely.
• Activate the brakes whenever the lift is not in use.
• Low speed is recommended when moving a lift when a user is using it.
• Take care not to drive the floor lift over thresholds with high speed or force.
• When passing over a threshold, pass the back wheel of the floor lift first. Approach the threshold with lower speed
and communicate the coming threshold to the user.
7IFU
System

Warnings
• The caregiver must be able to read and understand the Manual/IFU of the product.
• It is important to use only approved accessories to prevent unintended detachment of components and
subsequently a fall that may lead to patient injury.
• Use careful and gentle maneuvers when moving the lift to avoid swinging and impact injuries from surrounding
furniture and other objects.
• For optimal function and safety, the lift should be inspected regularly, see the Maintenance/Service manual.
• Lifting accessories must be properly fitted and tested in relation to the user’s needs and functional ability.
• Special care must be taken when using strong power sources such as diathermy and the like so that diathermy
cables are not placed on or near the device. In case of doubt consult with a Direct Healthcare Group representative.
• Never attempt to lift the mobile lift unit by the handlebar or lift arm.
• Never stand on the lift during when it is operating.
• Do not leave a user or patient unattended during a transfer.
• Never move the lift by pulling on the actuator.
• During a lift, the user must be over the base of support of the lift during the entire lifting procedure, to avoid tipping
of the lift. Never move the user, or start a lift from, outside the base of support of the device.
Safe working load
Different products on the same lift system (lift unit, slingbar, sling and other lifting accessories) may have different
allowable safe working loads. The lowest allowable safe working load always determines the safe working load of the
assembled system. Always check the safe working loads for the lift and accessories before use.
Contact your dealer if you have any questions.
Residual risks and risk control measures:
Risk Hazard Risk Control Measure Information
User Risk Device tilts. If a lift is started with the user far outside the base of
support of the lift, or if a user sitting in a sling is moved
outside the base of support of the lift, it could lead to the
device tipping, and the user falling.
During a lift, the user must be over the base of support of
the lift during the entire lifting procedure. Never move the
user, or start a lift from, outside the base of support of the
device.
Material Risk Components loosening or
breaking due to Corrosion.
Improper treatment of the lift could lead to components
corroding. Use the lift indoors, and do not store or use it in
wet or humid environments.
See sections Contraindications, Precautions and Warnings
and Maintenance for more information and detailed
information about use and storage environments.
8IFU System

Risk Hazard Risk Control Measure Information
User Risk Device tilts. If a lift is started with the user far outside the base of
support of the lift, or if a user sitting in a sling is moved
outside the base of support of the lift, it could lead to the
device tipping, and the user falling.
During a lift, the user must be over the base of support of
the lift during the entire lifting procedure. Never move the
user, or start a lift from, outside the base of support of the
device.
Material Risk Components loosening or
breaking due to Corrosion.
Improper treatment of the lift could lead to components
corroding. Use the lift indoors, and do not store or use it in
wet or humid environments.
See sections Contraindications, Precautions and Warnings
and Maintenance for more information and detailed
information about use and storage environments.
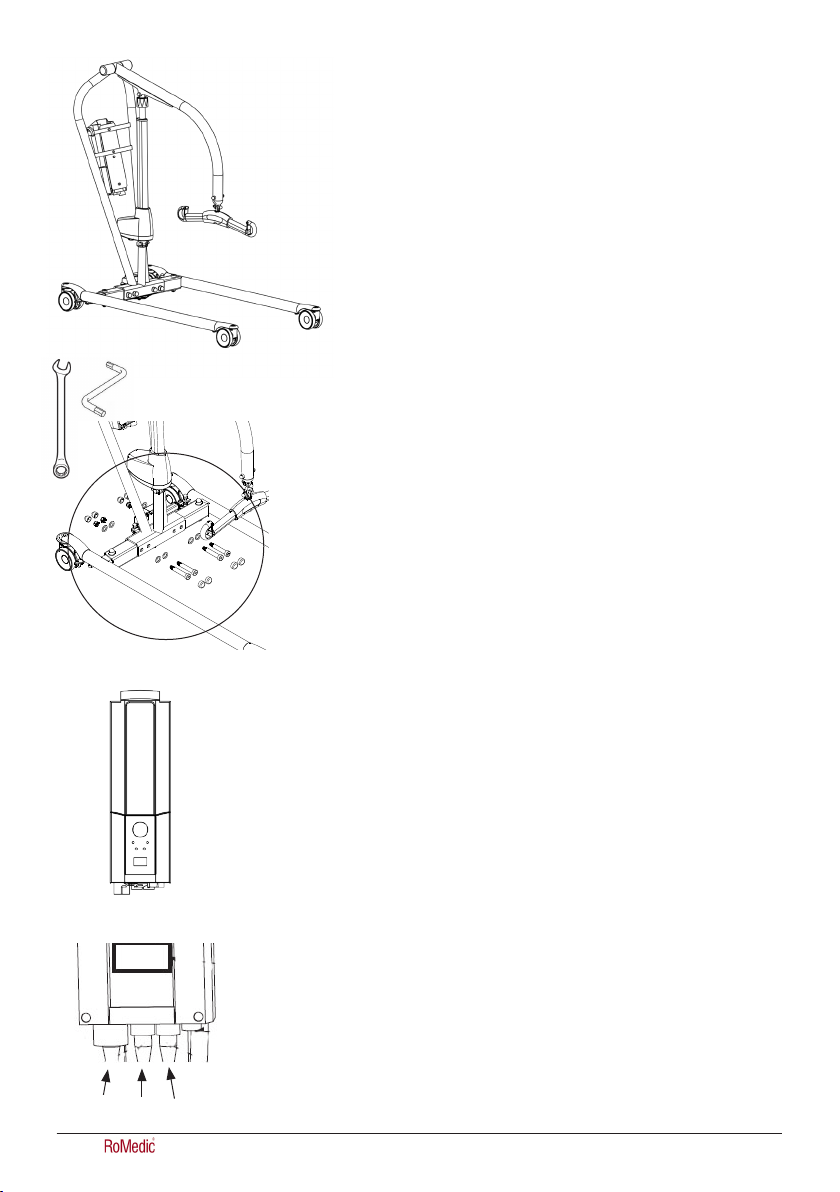
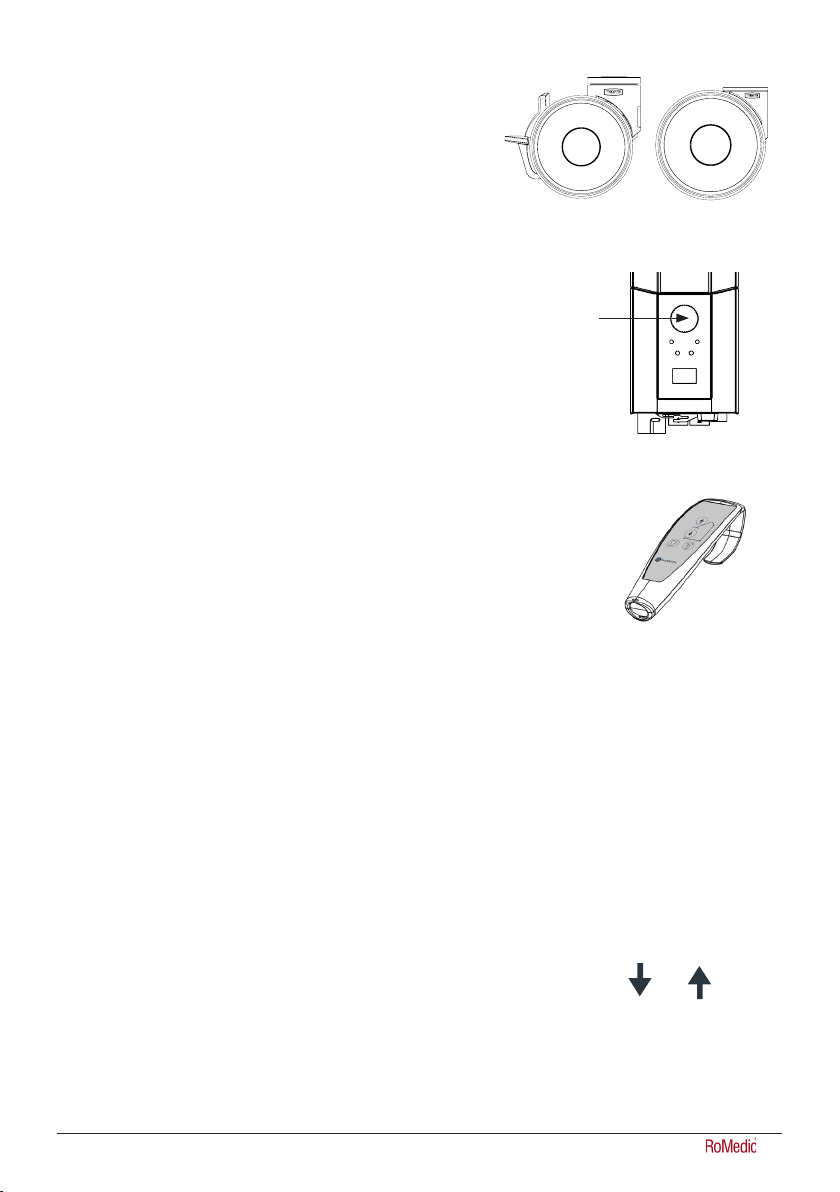
Battery information on the display
The battery discharging will be shown in four stages:
Battery state 1: The battery is ok, no need for charging (100 - 50 %).
Battery state 2: Battery needs charging. (50 - 25 %)
Battery state 3: Battery needs charging. (Less than 25 %) A tone sounds when a button is pressed in
this battery state.
Battery state 4: The battery needs charging. (17V or lower) At this stage some of the functionality
of the lift is lost.At this battery stage it is only possible to drive the lift arm down. Furthermore an
audio signal will sound when a control button is activated. The symbol will switch between the two
pictures for 10 seconds.
The battery symbol is shown when the control box is active until power down (2 minutes after use).
It is not possible to use other batttery types than BAJ1/BAJ2.
The battery level is measured via voltage. This means that it is possible to experience e.g. that the
battery switches from state 1 to state 2 and back to state 1.
Charging batteries
A tone sounding when using the lift indicates that the battery need recharging.
Charge the lift after use to ensure that the battery is always fully charged.
Lock the castor wheels when charging the battery.
1. Connect the charging cable to a power outlet and in the connection for charger cable.
The symbol for charging is shown on the display.
2. Check to ensure that the lamps on the control box light up. The green LED lamp indicates that
the charger is receiving power and the yellow LED lamp indicates that the battery is charging.
3. Charging stops automatically when the battery is fully charged.
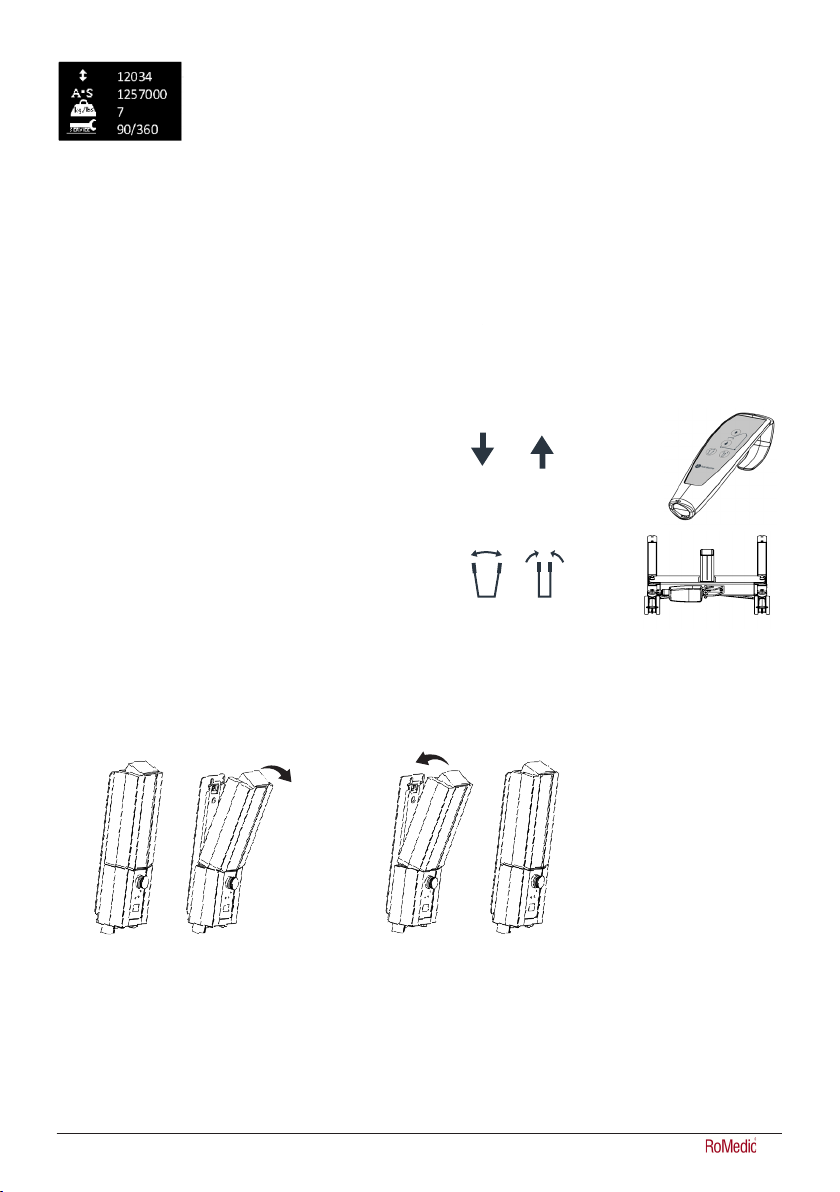
Wall-mounted charger
1. Remove the battery pack from the lift and place it in the wall-mounted charger.
2. Check to ensure that the LED lamp on the front of the charger lights up.
NOTE!
Before the lift is used for the first time, it must be charged for at least 4 hours.
For maximum battery life, charge batteries regularly. We recommend daily charging when the lift is
used daily.
The emergency stop must be deactivated during charging.
9IFU
System

Eva450EEL Eva600EEL
Eva450EML
REVISION HISTORY
REV.
DESCRIPTION
DATE
APPROVED
D
E
F
C
1
2
3
4
B
A
3
2
1
5
C
D
4
6
7
8
A
B
SCALE:1:10
DWG. NO.
REV.
NAME
DATE
DRAWN
APPROVED BY
SHEET 1 OF 1
WEIGHT:
COMMENTS:
STATUS:
TITLE
MATERIAL:
SIZE
Released
EVA EEL 450 base
90001288 02
g
2011-05-20
A3
Unless otherwise stated, general
tolerances according to ISO 2768-m
hc-jope
This drawing and any information or descriptive matter set out hereon are the confidential and copyright property of Handicare
and must not be disclosed, loaned, copied or used for manufacturing, tendering or any other purpose without their written permission.
EE
EE
Service information read-out
Basic service information can be read out on the display. To get the service information on the
display please press the lift arm up button for half a second. The information will be shown for
½ minute or until other buttons are activated.
• Total cycles done by the actuator
• Total work done by the actuator (ampere usage times seconds in use)
• Total number of overloads
• Days since last service/Days between services
Hand control
Raising/lowering the lift arm
Symbol indicate direction of travel.
Motion stops as soon as the button is released.
If the lift arm encounter an obstacle while lowering, the lift will
immediately stop the motion. In order to continue, the lift arm will
need to be raised slightly by using the hand control before further lowering.
Electrical base-width adjustment (EE)Electrical base-width adjustment (EE)
Markings on the buttons of the hand control indicate function.Markings on the buttons of the hand control indicate function.
Motion stops as soon as the buttons are released.Motion stops as soon as the buttons are released.
Changing the battery
”Click!”
12
10 IFU System

Emergency stop
To activate emergency stop
Depress the red emergency stop button on the control box.
Resetting
Turn the button in the direction of the arrows until the button pops out.
To prevent battery discharge, we recommend that the emergency-stop button is pressed in
when the lift is not in use.
Emergency lowering
Manual emergency lowering
For manual emergency lowering, turn the round plastic knob on the actuator clockwise.
Electrical emergency lowering
For electrical emergency lowering, puch the down button on the control box. Use a narrow
object such as a pen.
Trouble shooting
If the lift or base-width adjustment cannot be activated, check the following:
- That the emergency stop button is not pressed in.
- That all cables are properly and securely connected. Pull out the contact and plug it in again firmly.
- That battery charging is not in progress.
- That the battery is charged.
If the lift is not working properly, contact your dealer.
If the lift makes unusual noises:
- Try to determine the source of the sound. Take the lift out of operation and contact your dealer.
11IFU
System

Instructions for use
1. Never use the lift if you have not had proper training on lifts and slings.
Never use the lift before you have read the manual for both the lift and slings.
2. Perform risk assessment, which will dictate whether one or more carers are required.
3. Always do a check of the lift before using it. Pay special attention to checking wheels, bolts, lift arm, sling bar and
labels. See manual for how to check lift before use.
4. Before using the lift always plan and assess the risk before a lift and transfer:
a. Check suitability of the environment where you plan to conduct lifting and then make a plan for the task.
b. Check whether both the lift and the sling you plan to use function properly. Fill out any necessary form before use.
c. Check that the lift battery is charged.
d. Check that the lift has been serviced.
e. Visually inspect the lift and the sling for signs of damage or defects.
f. Ensure sizing and type of sling is correct for the user.
5. Use the lift as a mobile lifting station. Don’t drive if you don’t have to. Plan for a short transfer, move chairs, carpets
and other furniture that might be in your way.
6. Place the sling on the user before you place the lift close to the user. See Accessories such as EasyGlide Ovals,
FootStool, Slide Sheets that can assist you in sling application.
7. Move the lift slowly towards the user. Keep one hand between the sling bar and the user to make sure you never hit
the user with the sling bar.
8. Attach the loops from the sling to the sling bar. Start with the upper ones. Check so that the sling bar does not
rotate and hit the user. After attaching all sling loops, check that they all are inside the safety latch by pulling the
loops down.
9. Lifting procedures:
a. When lifting a user from a chair/toilet/wheelchair etc is most often done by placing the lift in front of the chair or
coming from the side
b. When lifting a user from a bed, it is easiest if you raise the head of the bed and lift the user from a seated
position. If you need to lift a user from lateral position, please pull in the lower straps of the sling to keep them
from sliding up/into groin area. Lower parts of the sling should not touch either knee joints or groin area.
c. When lifting a user from the floor, it is easiest if the user can sit up on the floor. If it is not possible, the most
common method is to place the lift so that a pillow underneath user’s head will be in one corner near the base
of the lift and closer to one side of the mast. Remember to lock the wheels!
12 IFU System

Instructions for use
10. Press UP button on the hand control to lift the user. Keep on lifting, until straps are tight and the user is just about to
be lifted, then STOP and make a safety check.
a. Check so that the sling bar is horizontal. If not, it means that the sling is not properly placed and the user will not
be lifted correctly.
b. Check so that the straps are not caught in the wheelchair, bed rail and other objects.
c. Check so that the sling loops are fully protected from slipping of the sling bar by the closed safety latches.
d. Check so that the user is ready, comfortable and safe in the sling by asking him or her.
e. Check so that the sling bar does not touch the user’s head.
f. Check so that wheels are not locked or blocked. They should only be locked if you lift from the floor.
From this point of taking tension you can release the brakes.
11. Press UP button again and lift the user up.
12. Transfer the user slowly towards the place of destination. Keep the transfer as short as possible.
13. Lowering procedures:
a. When lowering to a bed, it is often best to assist the user into a seated position. Therefore, raise the head of the
bed before lowering the user. If you lower into lateral position, make sure that the user is not placed too high up
in the bed preventing him or her from hitting his or her head into the headboard of the bed.
b. When lowering to a chair, make sure to assist the user to sit as far back in the chair as possible.
14. Press DOWN button to lower the user. When lowering the user, make sure that the sling bar will not hit the head.
Once the user touches down on the chair, try to move the lift and the sling bar away from user’s face. Brakes should
be off to allow this to happen. Lower so that the straps from the sling are not tight and release the loops from the
sling bar. Move the lift away so that you have space enough to remove the sling.
15. Helpful hint:
a. To place the sling try to use a ReadySlide or a EasyGlide oval.
b. To move the lift first check if the wheels are rolling easily. They might need to be cleaned or changed. If it still
challenging to move the lift, the problem could be that the floor is too soft or that the weight of the user is too
high for one caregiver. If that is not possible, plan to perform risk assessment and potentially change to more
caregivers, or possible a different type of lift such as a ceiling lift.
16. If you have questions please talk to your patient handling adviser or us at Direct Healthcare Group. What is the best
handling for one user might be bad for the next one.
13IFU
System

Accessories
Expected lifetime of accessories
Consult the manual or information sheets regarding the respective accessories.
Lifting slings
Direct Healthcare Group’s SystemRoMedic™ line includes a wide range of functional and
comfortable, high-quality lifting slings that are adapted for all types of lifting and for users with
different needs. The lifting slings are available in several materials and in sizes ranging from
XXS to XXL. There are also special lifting sling models in XXXL and XXXXL for extremely large
and heavy users. All models are safe and very easy to use.
Sling bars
SlingBar is a two-point aluminium sling bar available in four variants with different width. All
variants of SlingBar have safety latches which prevent the sling straps from creeping out of
the sling bar and all variants are for users weighing up to 300 kg/660 lbs.
To get more room in a lifting sling when using SlingBar two-point sling bar, SlingBarSpreader
M side bars can be used as an accessory. SlingBarSpreader M open up the lifting sling and
provide for a more reclined position.
SlingBar XS article no.: 70200071
SlingBar S article no.: 70200001
SlingBar M article no.: 70200002
SlingBar L article no.: 70200003
SlingBarSpreader M article no.: 70200042
StretcherBar, article no.: 70200006, and
StretcherSling, article no.: 46502007, for lifting in a supine position.
QuickLink article no.: 70200101
Sling bar RFL X4, Article no.: 70200017, is a four-point sling bar designed to provide more
space in the sling, for example, for obese and/or pain-sensitive users.
Hand control
Hand control HB33-6, article no.: 70200089, with service, battery status and overload
indicator.
Scales
Charder MHS2500 is used together with a stationary or mobile lift for weighing of users.
Article no.: 70100002, SWL: 300kg/660lbs
Article no.: 70200003, SWL: 400kg/880lbs
Assistive devices for positioning
Direct Healthcare Group´s SystemRoMedic™ range includes a wide selection of functional,
comfortable, high-quality assistive devices for positioning that can be adapted for different
types of lifting and for users with different needs.
14 IFU System

Maintenance
The lift must undergo thorough inspection at least once per year. Inspection must be performed by authorized
personnel and in accordance with Direct Healthcare Group’s service manual.
Repairs and maintenance may only be done by authorized personnel using original spare parts.
Used batteries are to be left at the nearest recycling station. Used batteries can also be returned to
Direct Healthcare Group or a Direct Healthcare Group dealer for recycling.
Service agreements
Direct Healthcare Group offers the possibility of service agreements for maintenance and regular testing of your mobile
lift. Contact your local Direct Healthcare Group representative.
Cleaning/disinfection
If necessary, clean the lift with a cloth with warm water or a soap solution and check that the castors are free from dirt
and hair. The electronic components (battery, control box, hand control, actuators, cables) should be cleaned with a
damp cloth only. To avoid degreasing of the piston rods, the actuators should be retracted to minimum stroke and
without load before cleaning. Ensure that the lift is dried thoroughly after cleaning. Do not steam clean due to risk of
corrosion. Do not use cleaning agents containing phenol or chlorine, as this could damage the materials. If disinfection is
needed, 70 % ethanol, 45% isopropanol or similar should be used. Recommended frequency of cleaning is weekly and
possibly more often depending on frequency of use.
Storage and transportation
If the lift is not to be used for some time or e.g., during transport, we recommend that the emergency stop button be
pressed in. The lift should be transported and stored in -10 ° C to + 50 ° C and in normal humidity, 20% to 80% non-
condensing. The air pressure should be between 700 and 1060 hPa. See also Technical Information below, and marked
on the device. Leftmost symbol indicates storage and transportation. Let the lift reach room temperature before the
batteries are charged or the lift is used. The lift should not be stored so that it is exposed to dust, or so that the battery is
exposed to direct sunlight.
Operation
The operating environment should be 5 °C to 40°C, relative humidity 20% to 80% non-condensing, and atmospheric
pressure 700 to 1060 hPa. See also Technical Information below, and marked on the device. Leftmost symbol indicates
operating condition.
40°C
5°C
50°C
-10°C
1060
hPa
700
hPa
1060
hPa
700
hPa
%
80%
20%
%
80%
20%
40°C
5°C
50°C
-10°C
1060
hPa
700
hPa
1060
hPa
700
hPa
%
80%
20%
%
80%
20%
15IFU
System

Symbols
White/blue
Read user manual
May not be discarded in domestic waste
The product complies with the requirements of the Medical Device Regulation (EU) 2017/745
Type B, according to the degree of protection against electric shock
The device is intended for indoor use
Class lI equipment
Important
Be observant
Red/ black
Do not push or pull the lift by the actuator
Yellow/Black
Pinch warning
Duty cycle:
2 min in active (ON) mode,
18 min in rest (OFF) mode.
Mass
Weight (mass) of the device, the safe working
load of the device, and the sum total. All in kg.
Vega
27747 230
SWL Total
16 IFU System

Lifting speed 37 mm/s without load.
Batteries Two 12 V, 2.9 Ah valve-regulated, sealed, lead accumulator (gel-type batteries)
Charger Max. 400 mA
Motor (mast) DC 24 V, 9,7 Amp. IP X4. Operationtime: 10% at maximum continous operation of
2 minutes, maximum 5 cycles per minute. Push: 10 000N.
Motor (base) DC 24 V, 2.2 Amp. IP X4. Operationtime: 10% at maximum continous operation of
2 minutes, maximum 5 cycles per minute. Push: 1500N.
Sound level With load: upwards: 43 dB(A) downwards: 44 dB(A).
Material Steel
Emergency lowering Manual and electrical
Castors Front 4”, 100 mm, back 4”, 100mm
Weight 42,8 kg
IP class IP X4
Expected lifetime 10 years
Expected lifetime
of accessories Consult the manual or information sheets regarding the respective accessories
Operating forces buttons
on handset
4 N
Max. load 230 kg / 505Ibs
Operating environment 5 °C to 40°C, relative humidity 20% to 80% non-condensing, and atmospheric
pressure 700 to 1060 hPa.
Storage and transportation
environment
-10 °C to + 50 °C, relative humidity 20% to 80% non-condensing, and atmospheric
Environment pressure 700 to 1060 hPa.
Technical Information
17IFU
System

The lift has been tested for compliance with current regulatory standards regarding its capacity to block EMI
(electromagnetic interference) from external sources. The lift has been tested according to IEC60601-1-2 Edition 4.
Some procedures can help reduce electromagnetic interferences, such as following the intended environment: Home
Healthcare Environment and Professional Healthcare facility environment.
The following are exceptions to the above intended environment: Near HF Surgical Equipment and in a RF Shielded
room of an ME SYSTEM for magnetic resonance imaging.
WARNING: In case the unit stops operating, behaves in an unexpected way, or moves unintentionally due to possible
electromagnetic disturbance or interference, the unit should be switched off. It should be switch on again and its
function should be verified before use. If the problem remains the unit should be used in another room or environment.
In case of other equipment being disturbed, its function should be verified before using again.
WARNING: In case the unit stops operating or behaving in an unexpected way due to possible EM disturbance, the
unit should be switched off. Its function should be verified, and the equipment should be used in another room or
environment. In case of other equipment being disturbed, its function should be verified before using again.
WARNING: Use of this equipment adjacent to or stacked with other equipment should be avoided because it could result
in improper operation. If such use is necessary, this equipment and the other equipment should be observed to verify
that they are operating normally.
WARNING: Portable RF communications equipment (including peripherals such as antenna cables and external
antennas) should be used no closer than 30 cm (12 inches) to any part of the lift including cables specified by the
manufacturer. Otherwise, degradation of the performance of this equipment could result.
Electromagnetic Compatibility (EMC)
18 IFU System

19IFU
System

5
1
2
3
5
6
11
10
9
8
7
4
12
Svenska
1. Lyftarm
2. Mast
3. Körhandtag
4. Nödstoppsknapp
5. Kontrollbox och batteri
6. Benbreddningsmotor
7. Bakhjul med broms
8. Lyftbygel med urkrokningsskydd
9. Främre hjul
10. Nödsänkning
11. Motor/ställdon för lyftarm
12. Handkontroll
Vega505EE är en mobil personlyft anpassad för säkra och enkla lyft av brukare som väger upp till 230 kg. Vega505EE
har en unik design med en lyftarm som kan både höjas till en nästan helt upprätt position och sänkas ända ner till golvet.
Den har också ett relativt smalt och kompakt utförande, med yttermått som anpassats för användning i lokaler och
situationer med begränsat utrymme. Trots sitt behändiga format erbjuder Vega505EE en ovanligt hög lyfthöjd och ett
extremt stort lyftintervall. Lyften klarar därför de allra flesta lyftsituationer och -behov; både låga och höga lyft, sittande
eller liggande, till och från golv, säng och stol samt gåträning.
Vega505EE
SystemRoMedicTM
20 IFU System
Table of contents
Languages:
Other RoMedic Medical Equipment manuals

RoMedic
RoMedic WendyLett User manual

RoMedic
RoMedic Eva400 User manual

RoMedic
RoMedic QuickMove User manual

RoMedic
RoMedic Return User manual

RoMedic
RoMedic FlexiMove User manual

RoMedic
RoMedic hygienesling User manual

RoMedic
RoMedic DisposableSling User manual

RoMedic
RoMedic Carina350EML User manual

RoMedic
RoMedic MiniLift125 User manual
Popular Medical Equipment manuals by other brands

Otto Bock
Otto Bock Kenevo 3C60 Instructions for use

DCI Edge
DCI Edge SERIES 4 installation instructions

ChoiceMMed
ChoiceMMed Fingertip Pulse Oximeter user manual

Pressalit Care
Pressalit Care R8661 Mounting instruction

Synthes
Synthes Hybrid Fixator Proximal Tibia Frame Technique guide

Solano
Solano Lumino Pro manual