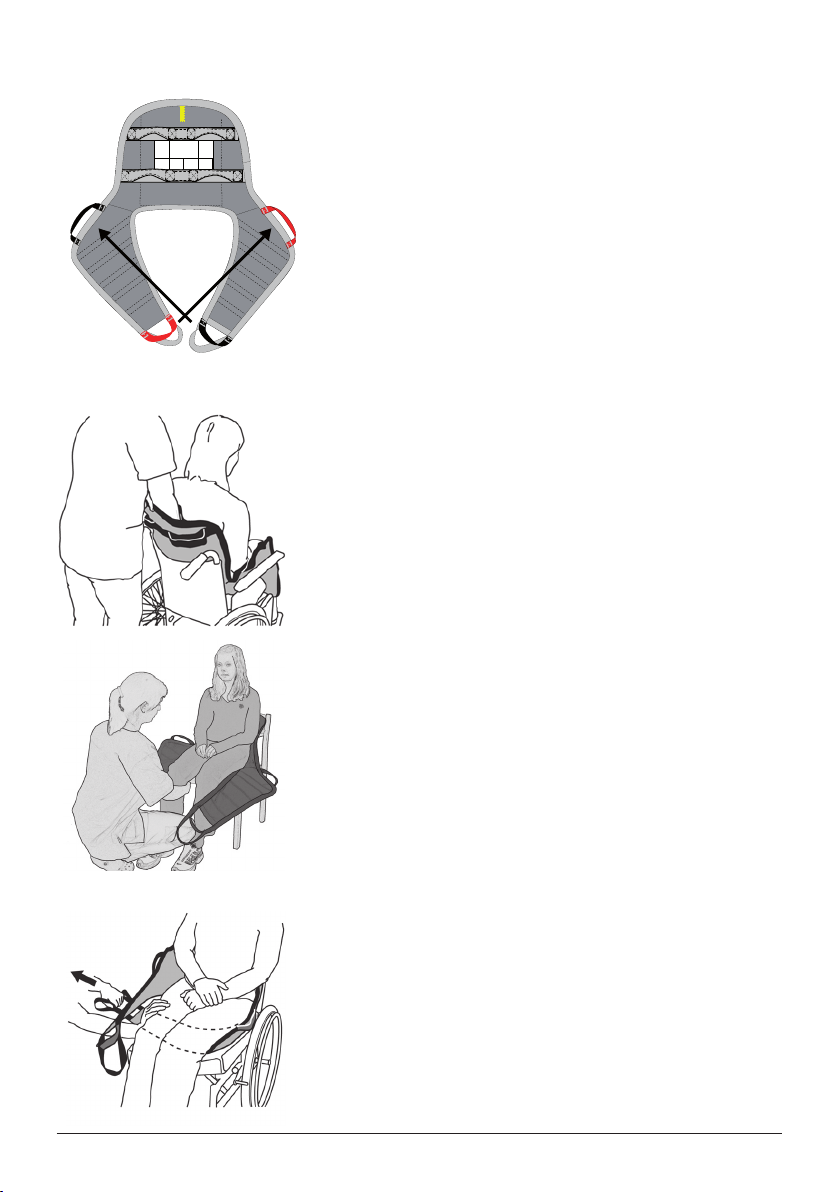
1. LiftSeat has handles in two sections on the back support; choose
the handle that enables the best working stance.
2. One of the handles on the upper part of the leg supports is red;
after application, it should meet the red handle on the lower part of
the opposite leg support. On the opposite side, these handles are
black, and should meet each other after application.
3. On the lower part of the leg supports are two handles. For a
smaller size, choose the innermost (red or black); for a larger size,
choose the outermost (grey).
Description of LiftSeat
Application of LiftSeat when the patient is sitting in a wheelchair/chair or in bed
1. Hold LiftSeat in one hand and grasp the lower edge of the sling
with your other hand. This is easier if the patient leans forward or can
be helped to lean forward slightly. Guide the sling down behind the
patient’s back, by sliding it along the back of the chair/wheelchair or
along the bed, ideally, to the tailbone.
Take care to guide the sling down to the patient’s hips. Do this by
pushing the sling into the space in the back corners of the wheel-
chair seat.
2. Pull the leg supports out along the outside of the thighs. Sit facing
the patient and pull the lower edge of the leg support, so that the
sling slides into place around the hips. Light pressure against the
patient’s knees prevents him/her from sliding forward in the chair.
3. After checking to ensure that the leg supports are of equal length
on both sides, place them under the patient’s thighs. Both leg sup-
ports should be under both of the patient’s legs.
1
2
1
2
3
3


